

Manual File Upload
1. Description
The button "UPLOAD FILES" is for uploading files to an opened Project. Files uploaded are to be used as inputs for analytics, for 2D or 3D visualization, or just to store data to be shared with your collaborators.
Examples of files can be construction as-built, future mine plans, and previously processed data from other sources such as manned aircraft, ground-based sensors, satellite tile, or human surveys.
It is possible to create a new survey for an existing Project when uploading a file.
Info
The workflow to upload a raw image dataset is described here.
2. Procedure
Step 1 - Select the project.
Step 2 - Click on "UPLOAD FILES".

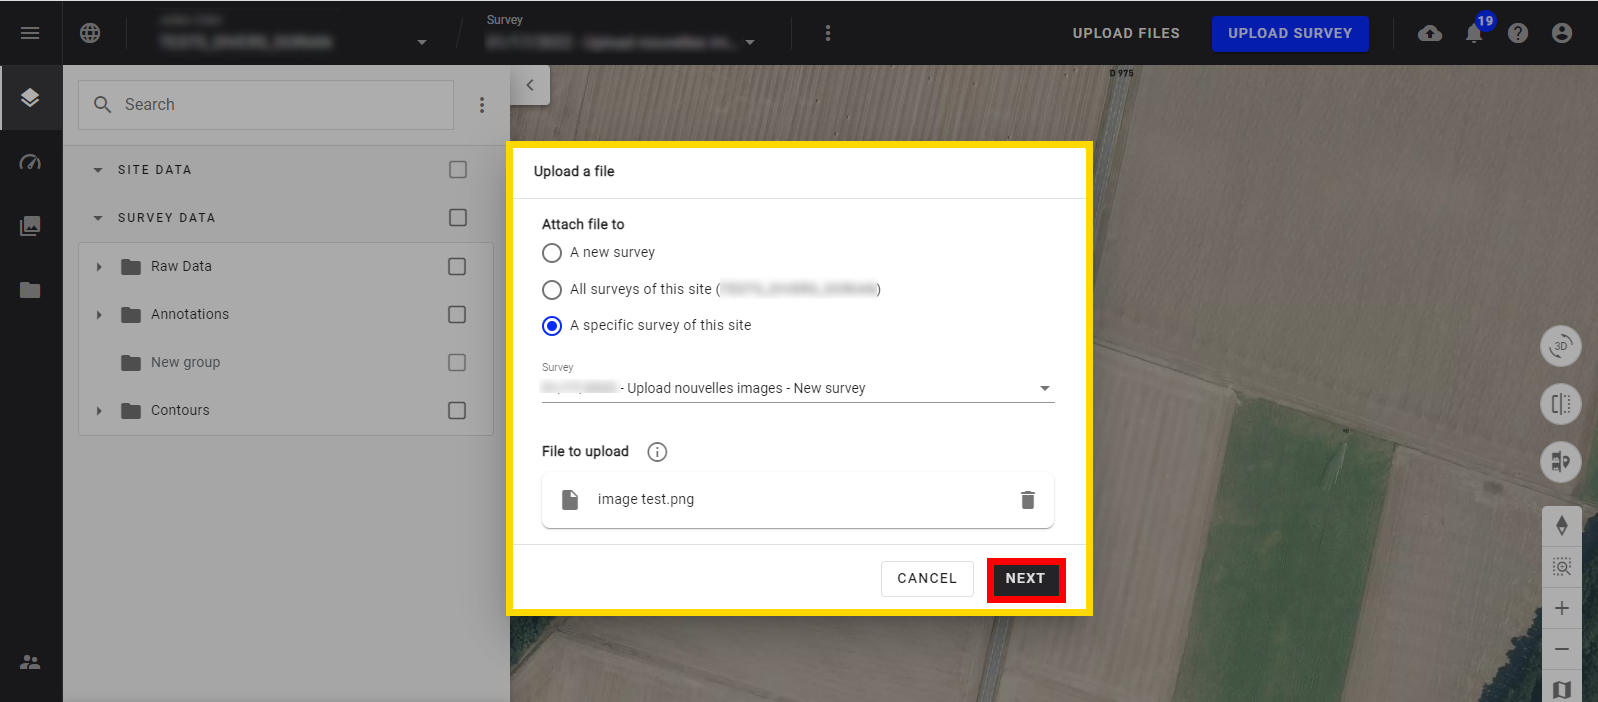
Step 3 - Choose the survey option:
- A new survey (create a survey)
- All surveys (accessible to all surveys = project level)
- A specific survey of the project
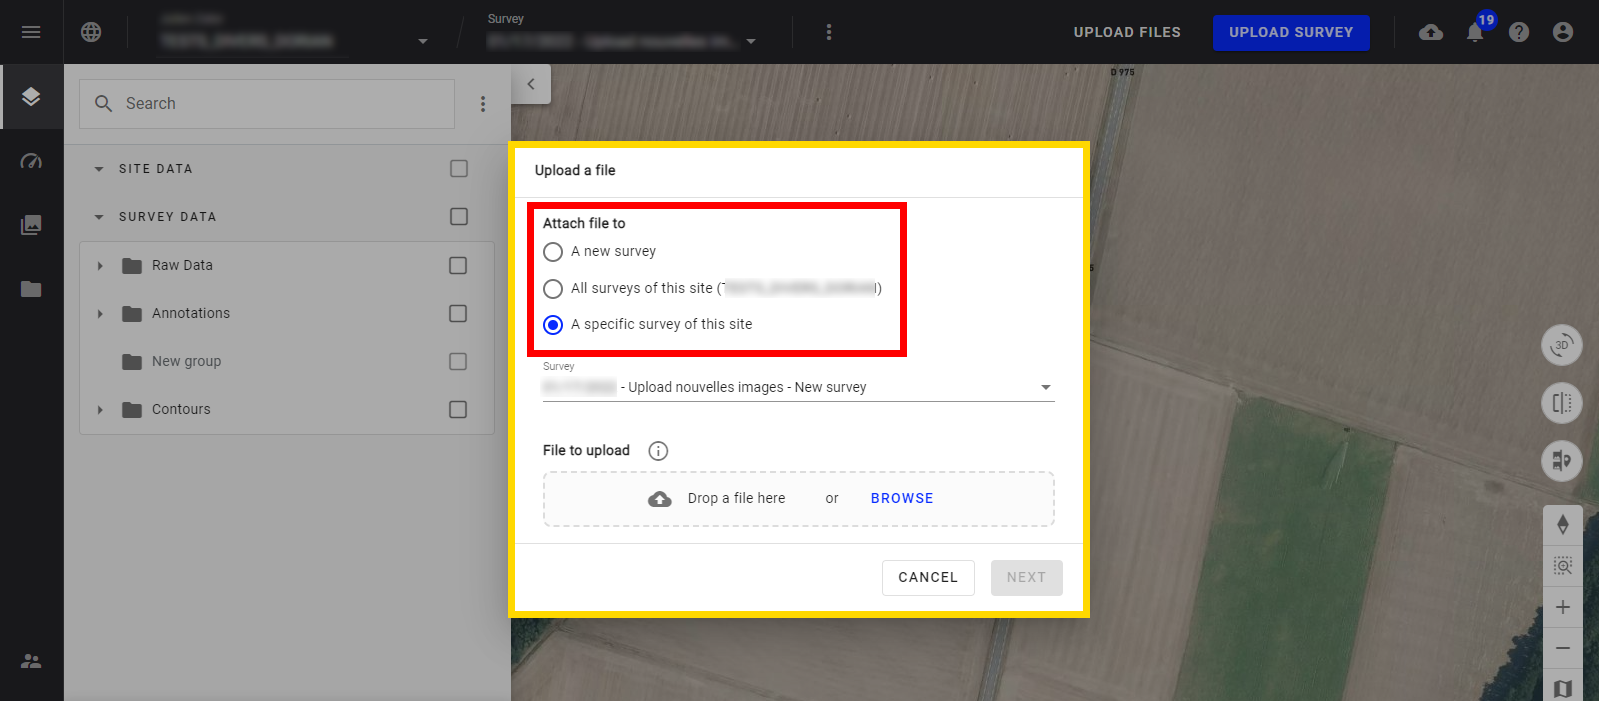
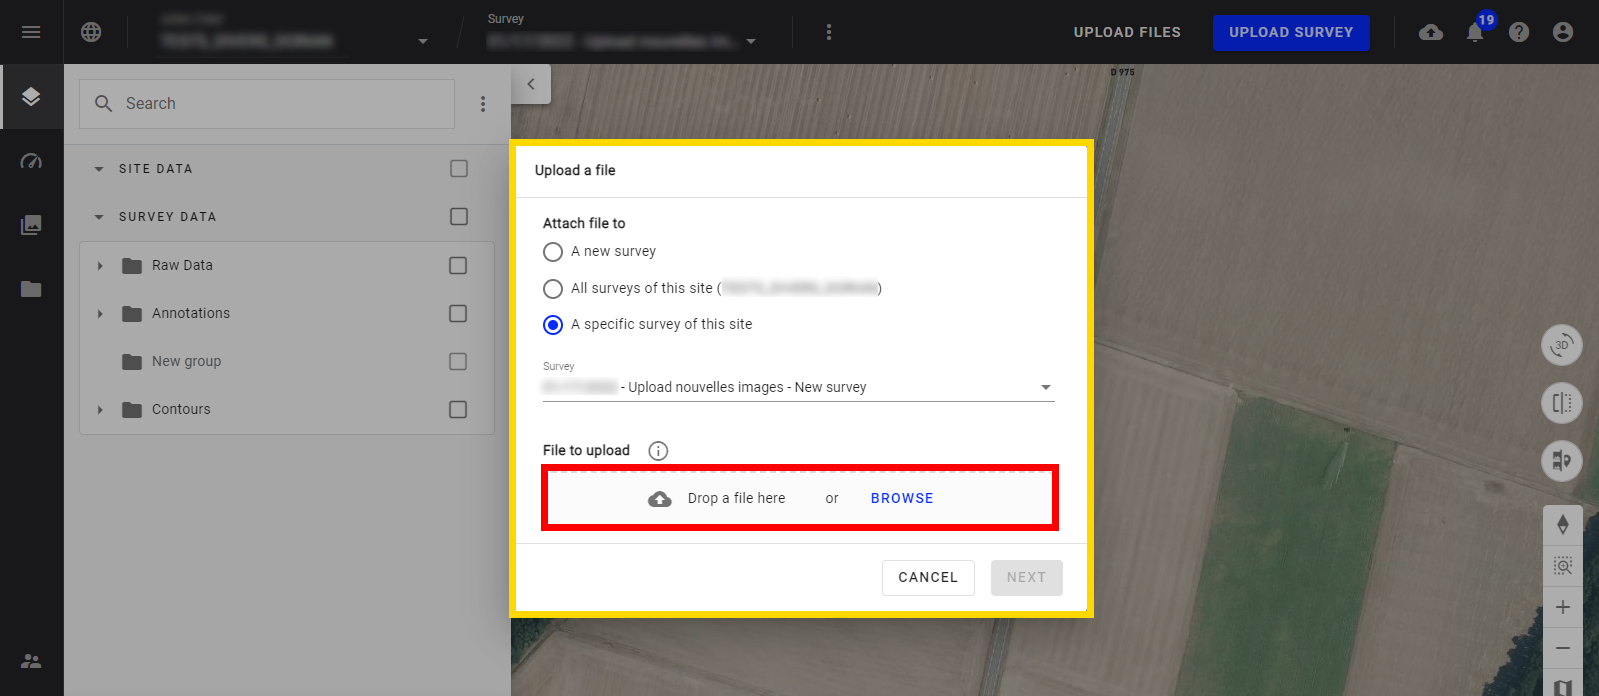
Step 4 - Drag and Drop or browse the file.
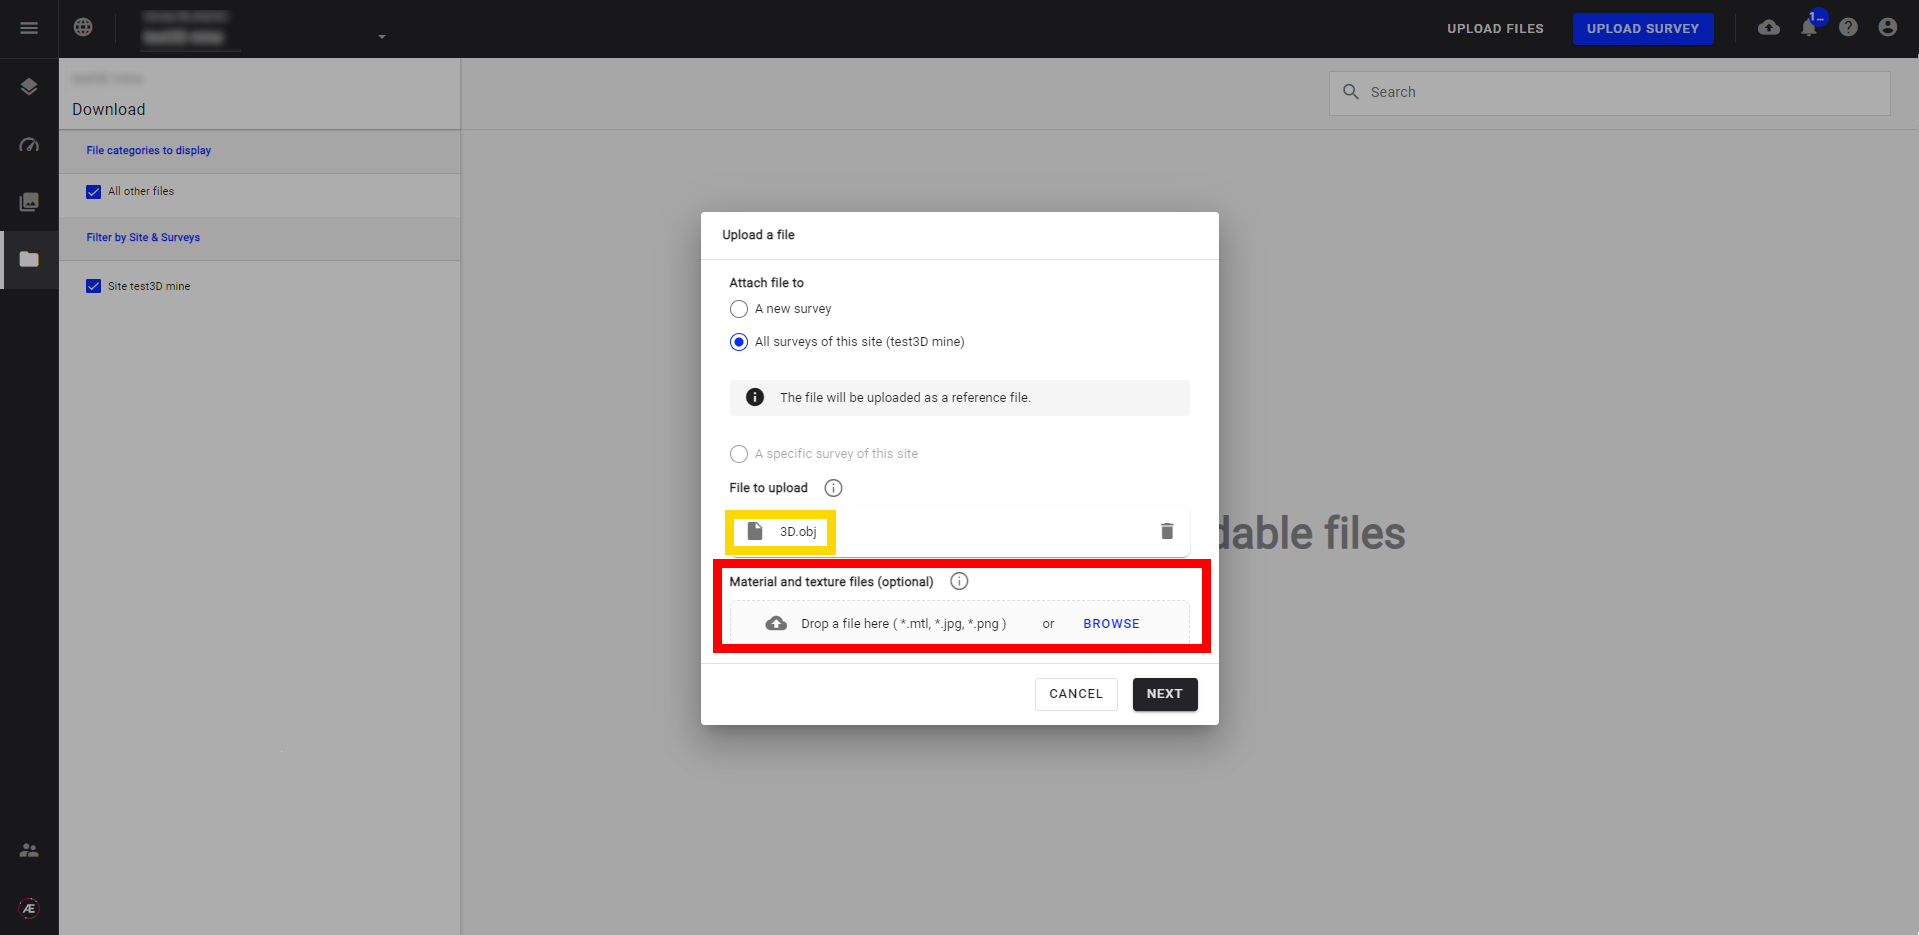
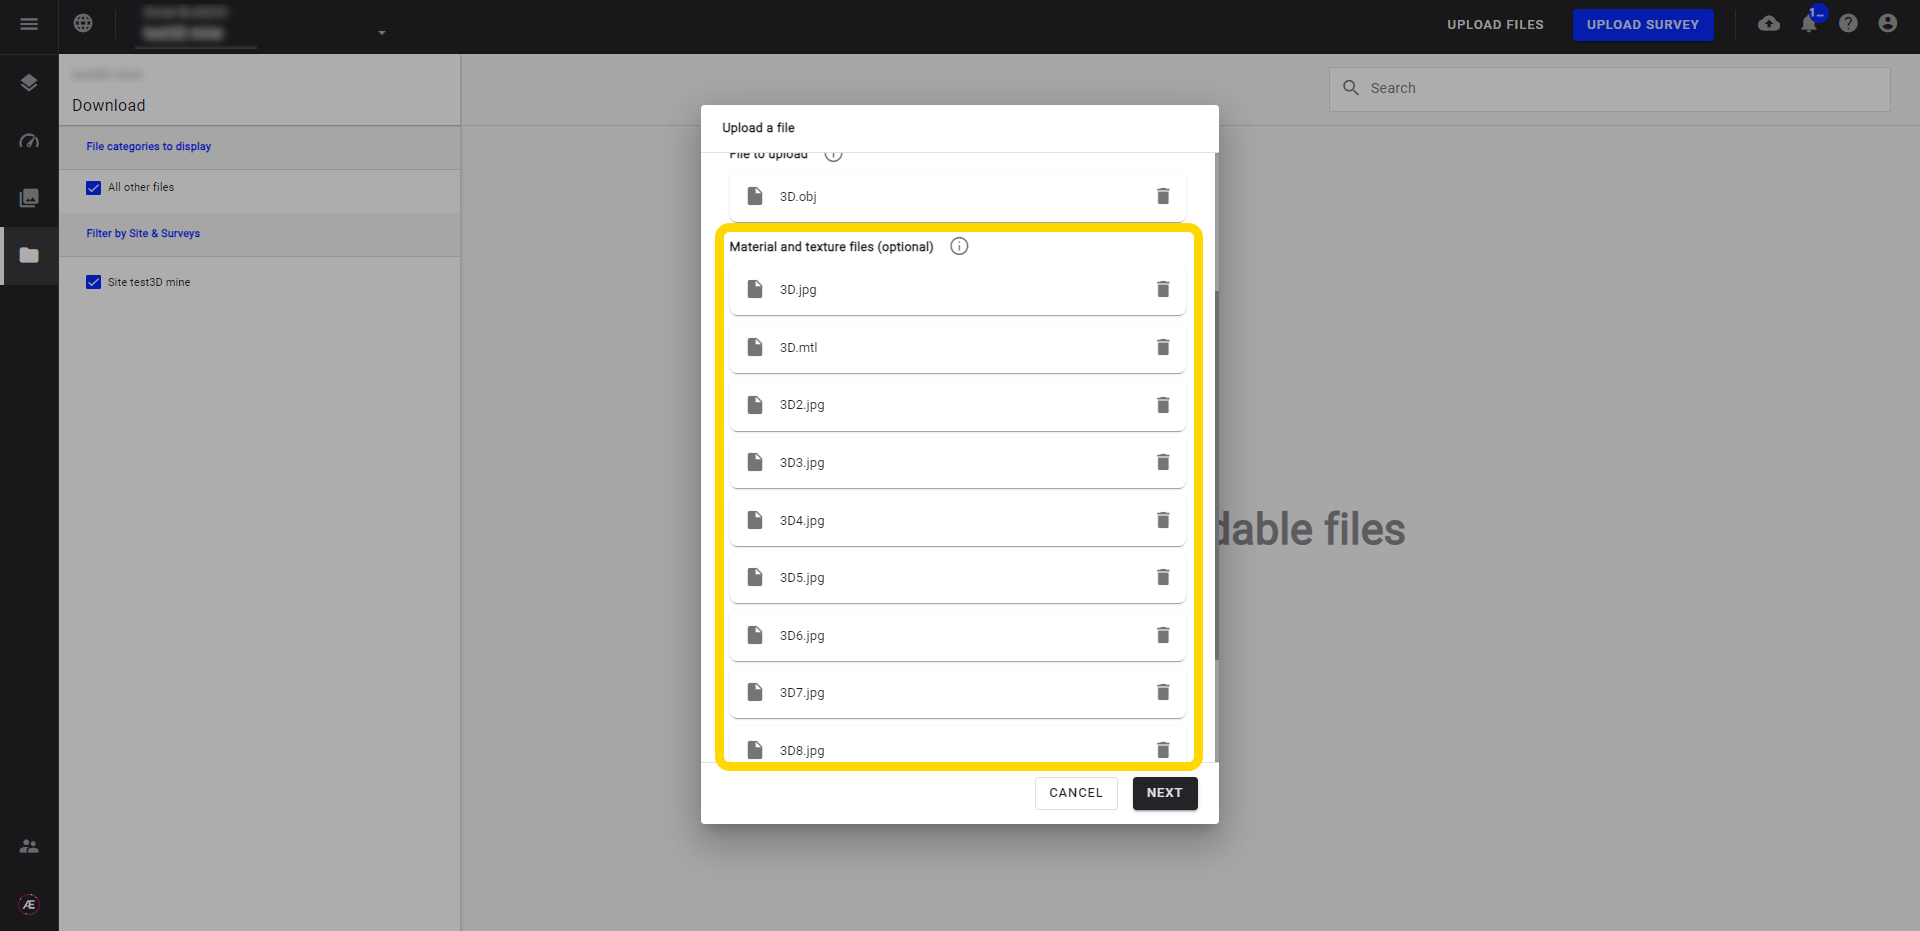
Optional step for 3D
Once the 3D model file (obj) is selected, a new box appears to attach mtl and multiple jpg or png texture files.
Step 4a - Add material and texture files.
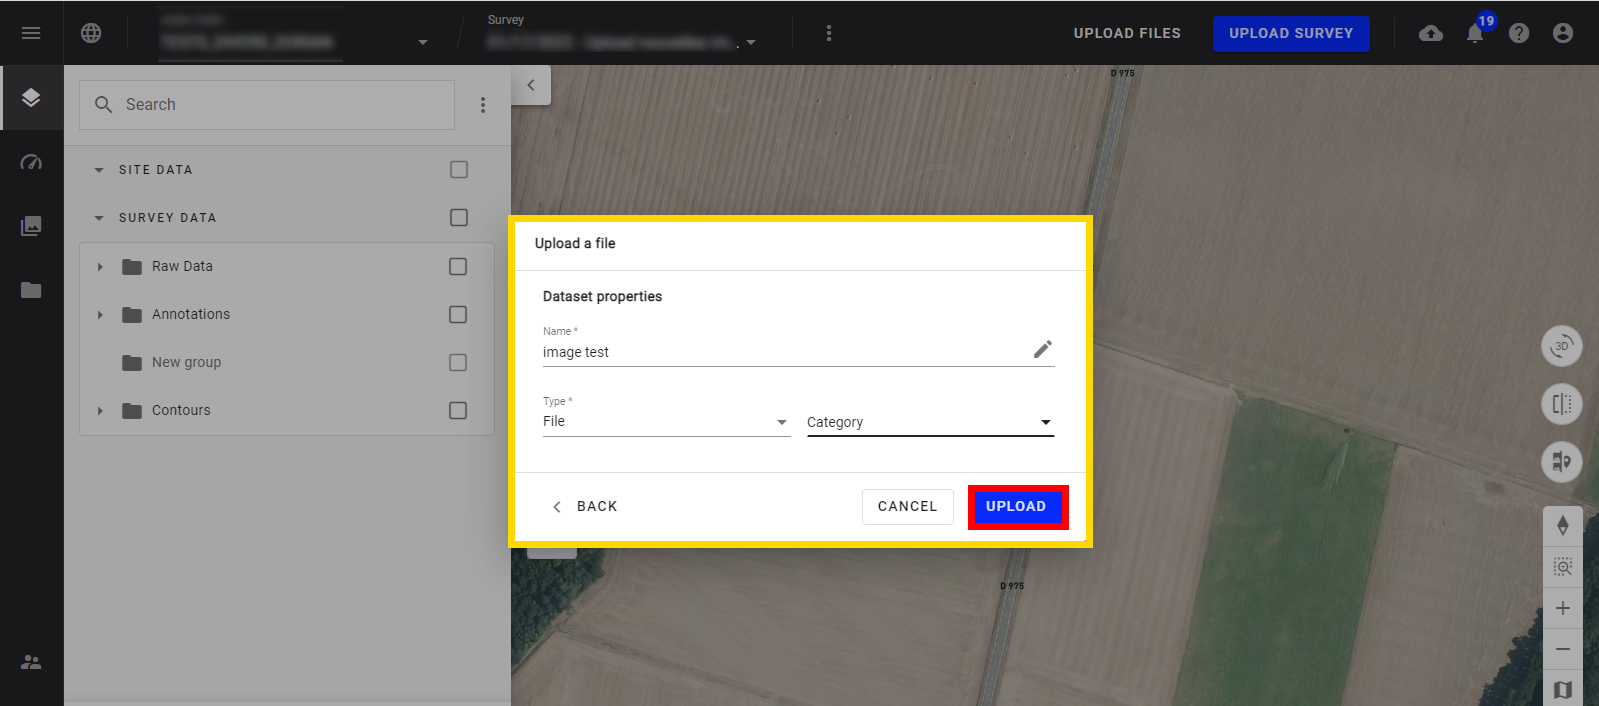
Step 5 - Click on "NEXT".
Step 6 - Rename the file, if necessary.
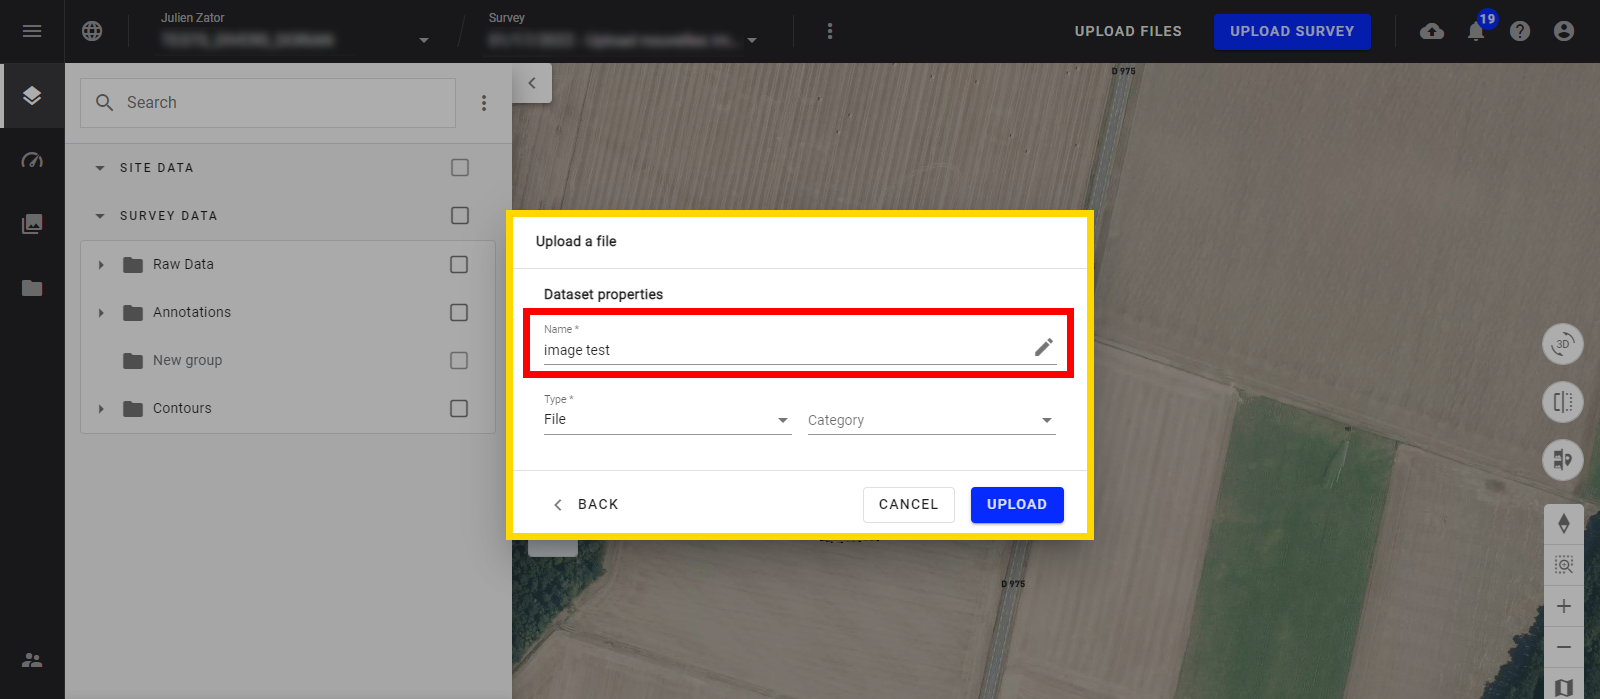
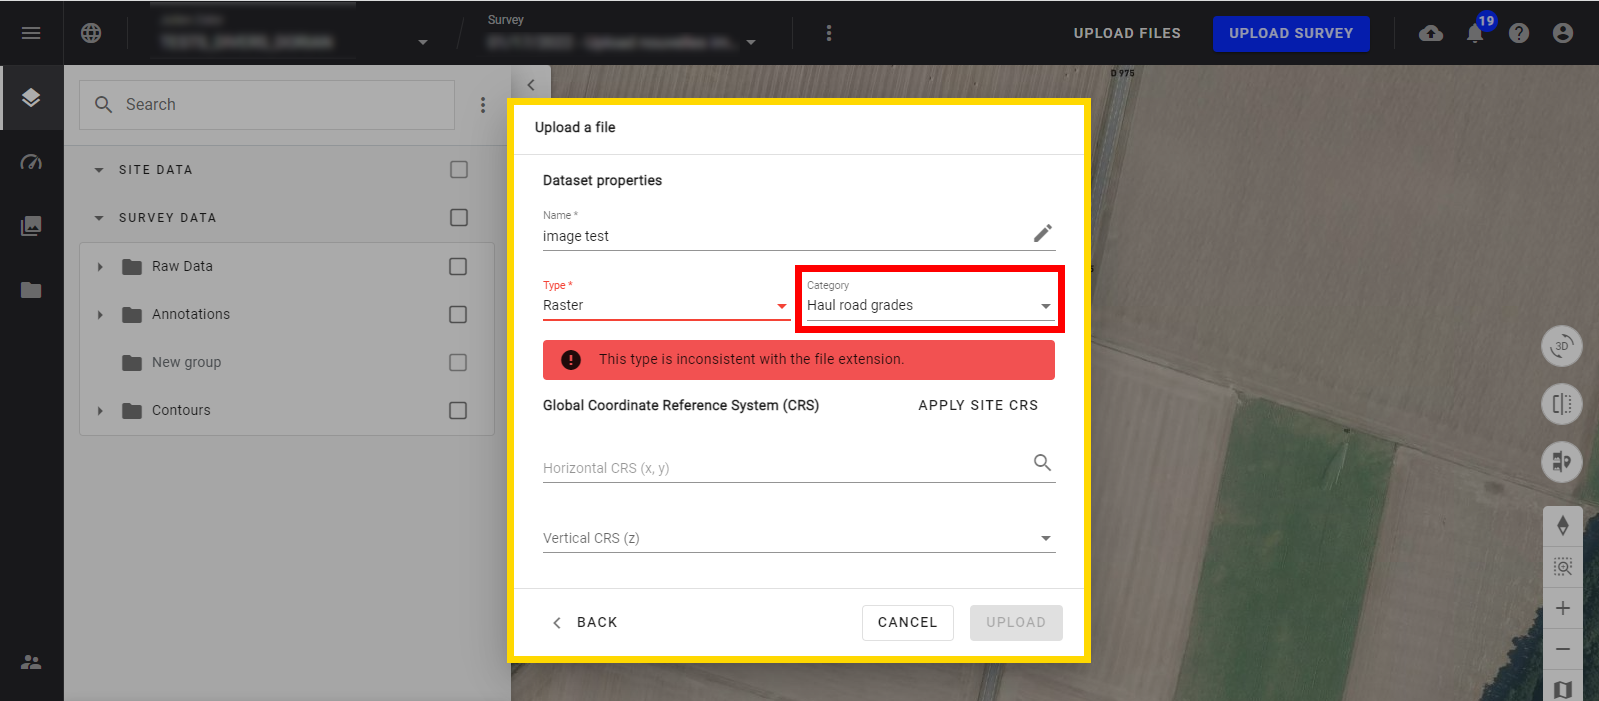
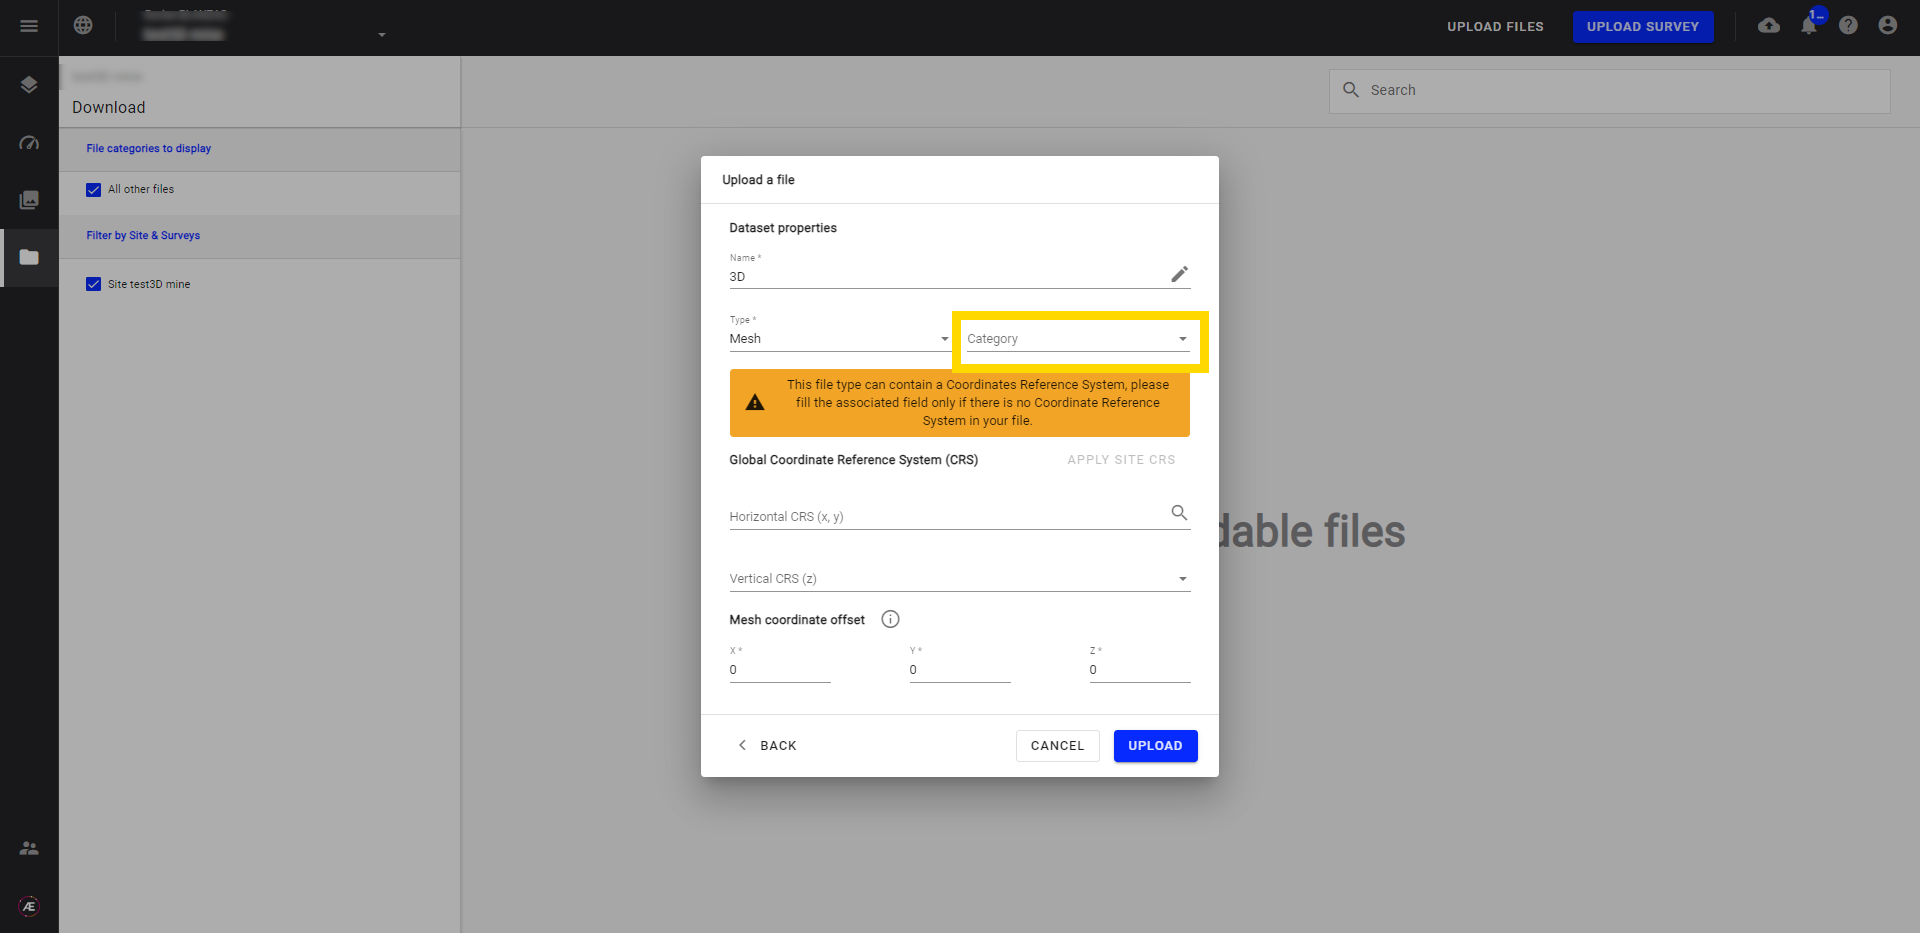
Step 7 - Define the type (See Table 1, Paragraph 4.).
Step 8 - Define the category (see Table 2, Paragraph 5.).
Info
- For 3D files, select the "Mesh" type and keep the "Category" box empty.
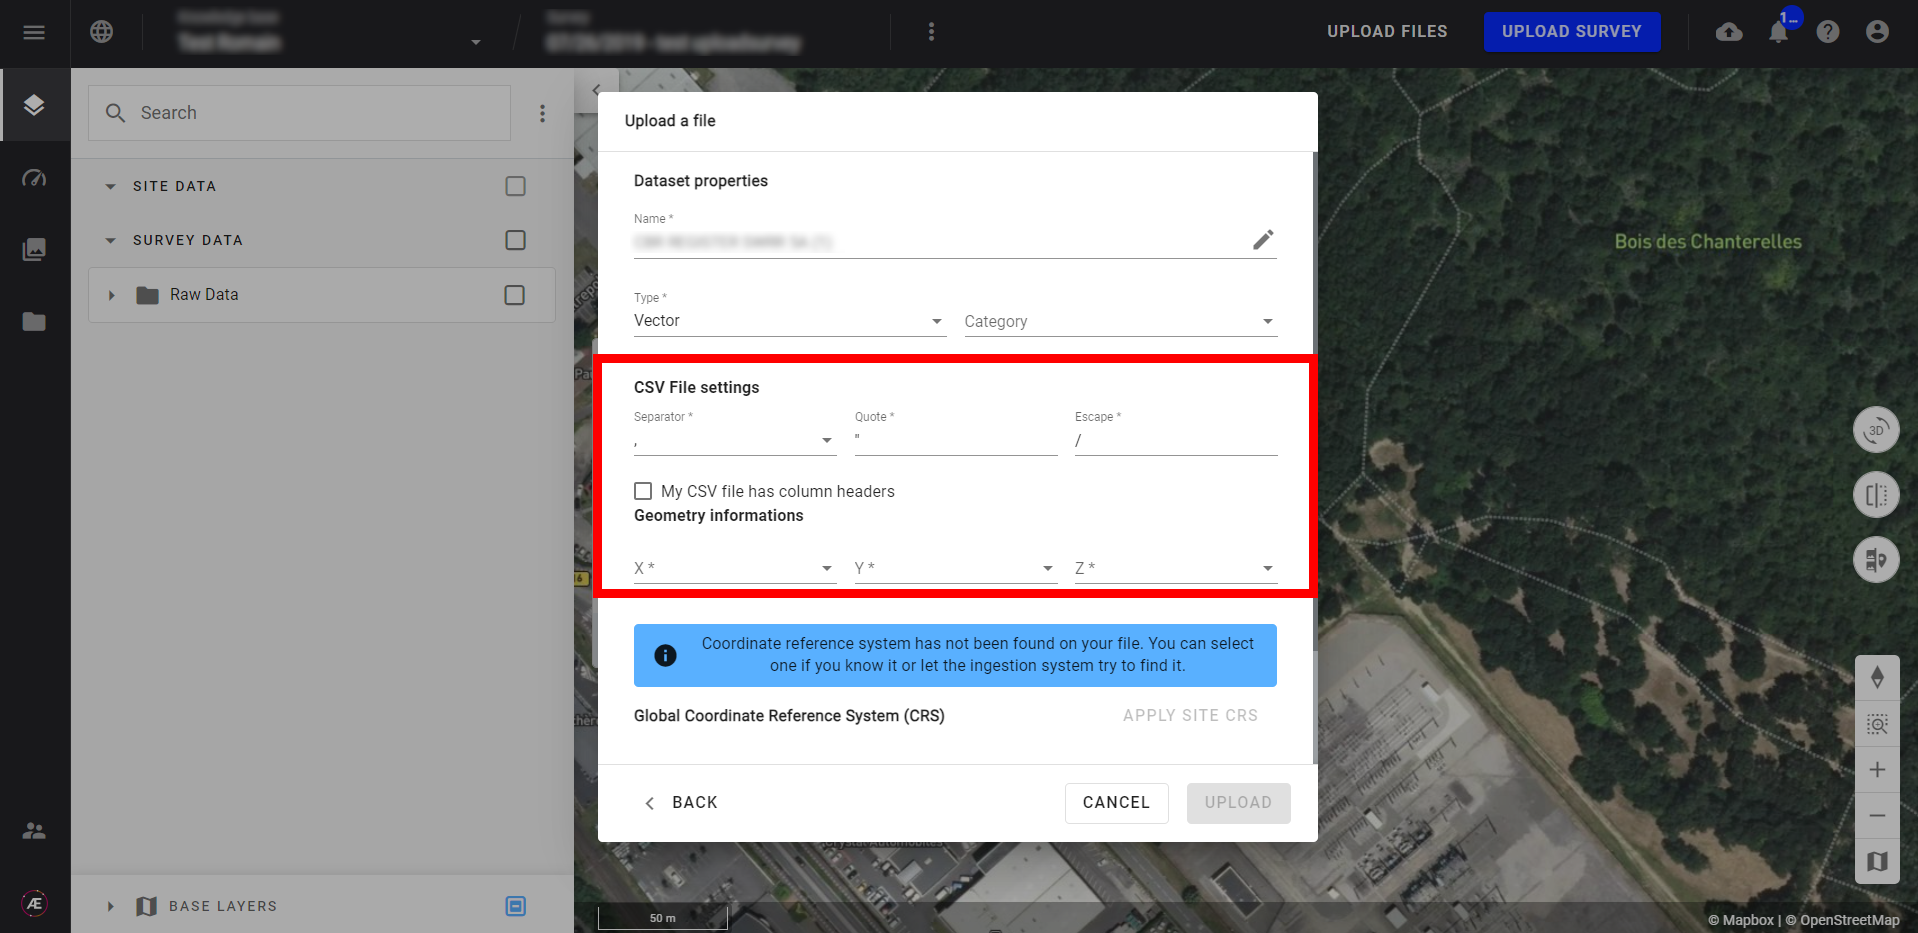
- For CSV files, select the "Vector" type, select a "Category" (see paragraph 5), adjust the CSV file settings if the input file deviates from Aether's default values, tick if the CSV file has column headers, and localize columns X, Y, and Z. See Upload CSV as a Vector File for more information
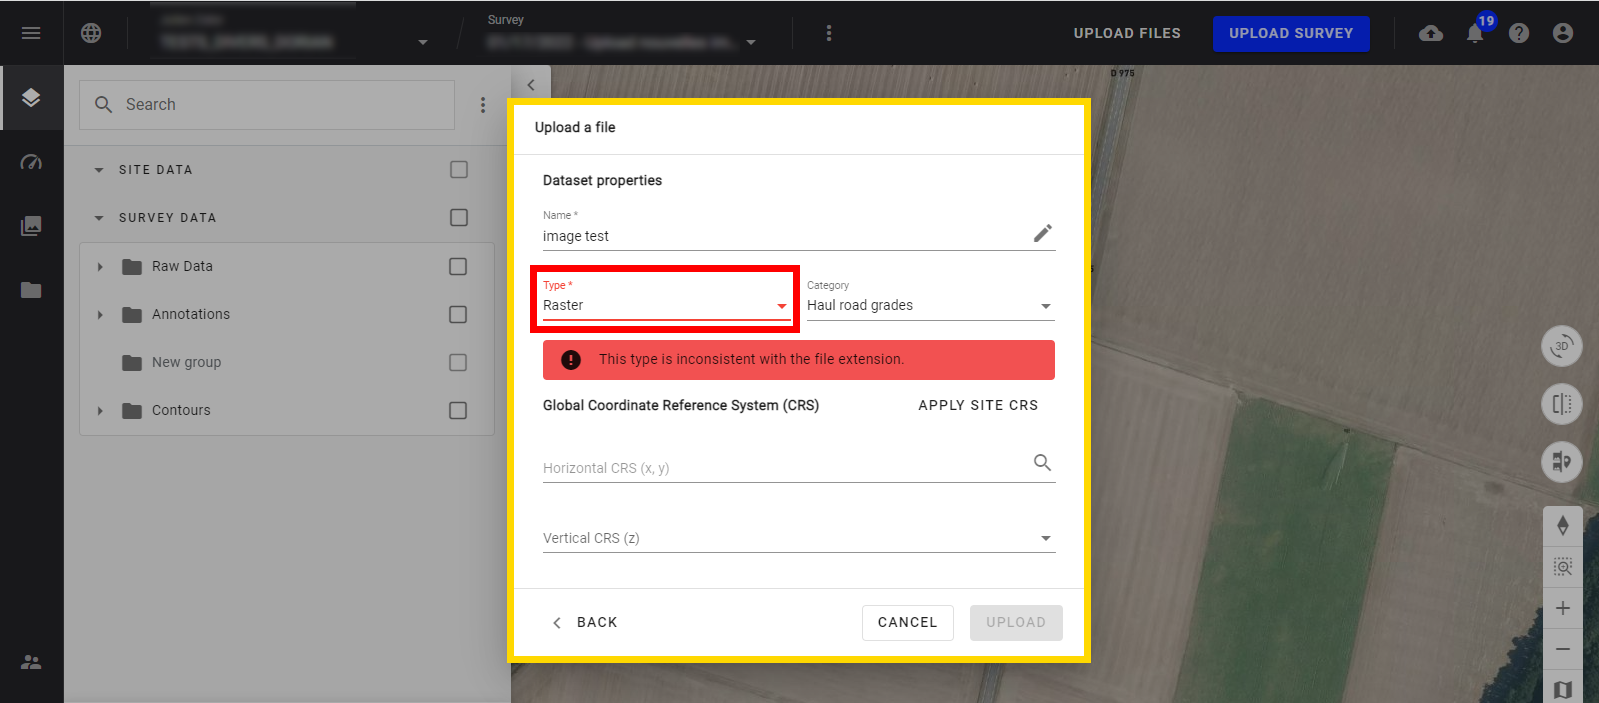
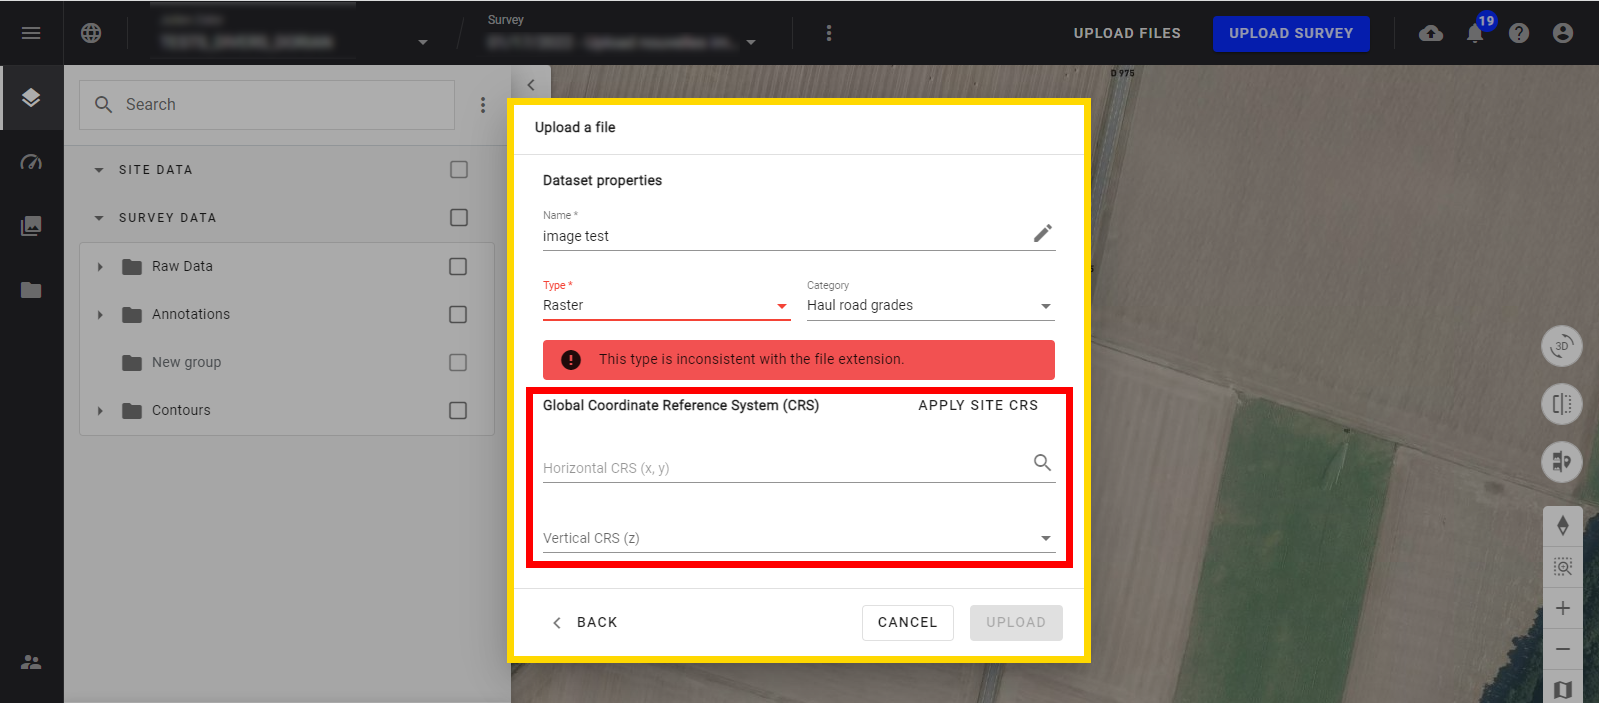
Step 9 - Define Coordinate Reference Systems (CRS).
Step 10 - Click on "UPLOAD".
Warning
Do not log out or close the browser tab of Aether before the upload completion will stop the process.
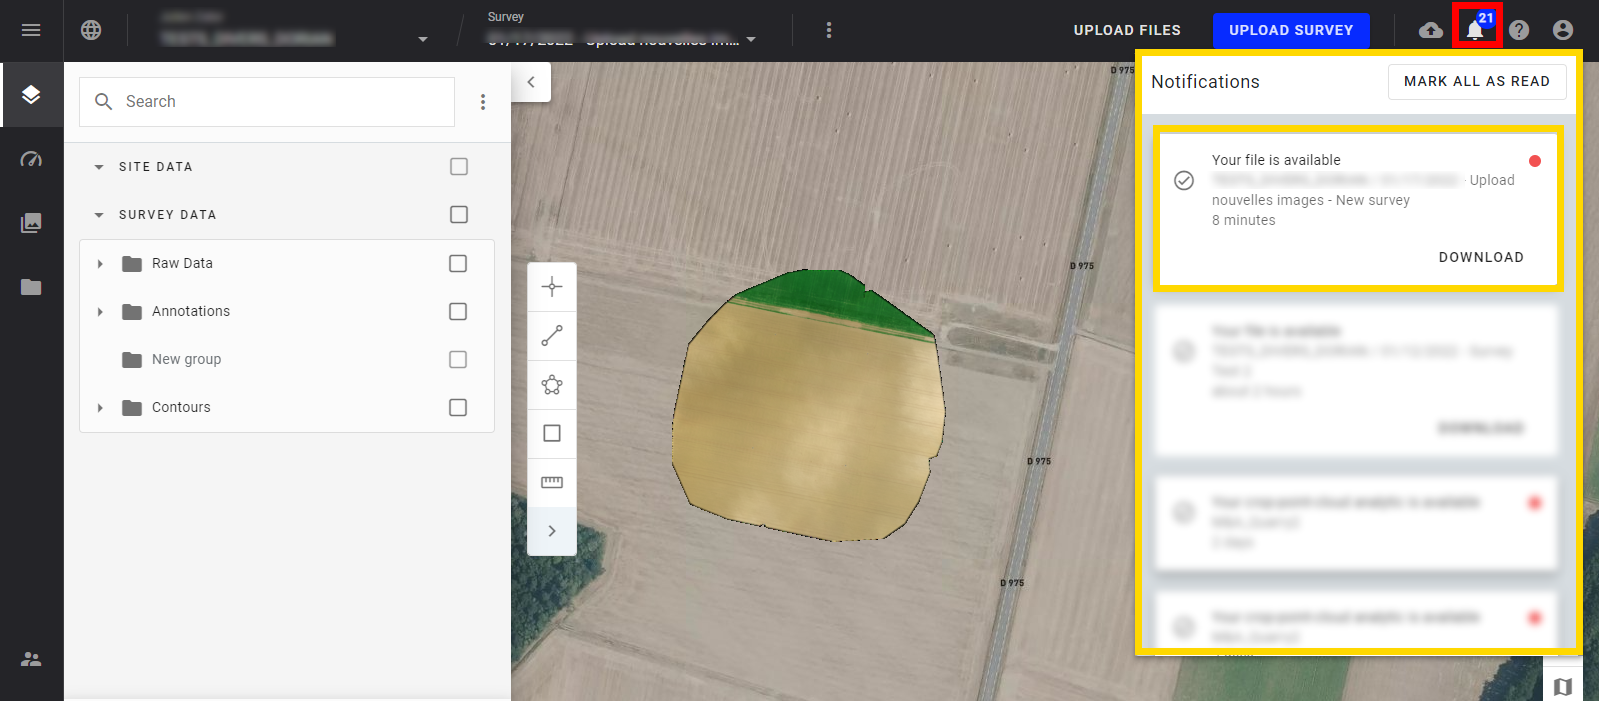
Step 11 -.Click on "CONFIRM" to launch the upload.
Step 12 - Follow the progression of the uploading.
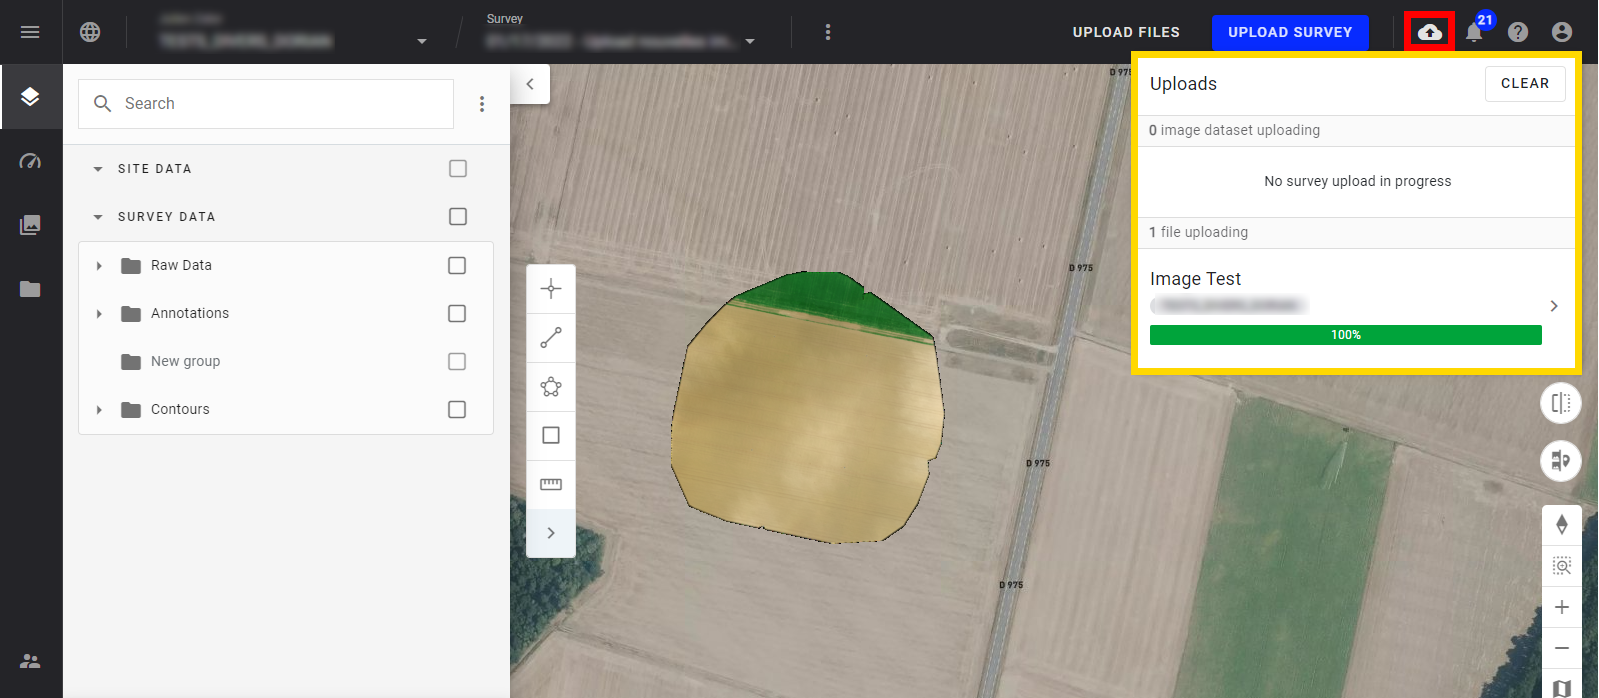
Step 13 - Aether notifies the user that the uploading is done.
3. Results
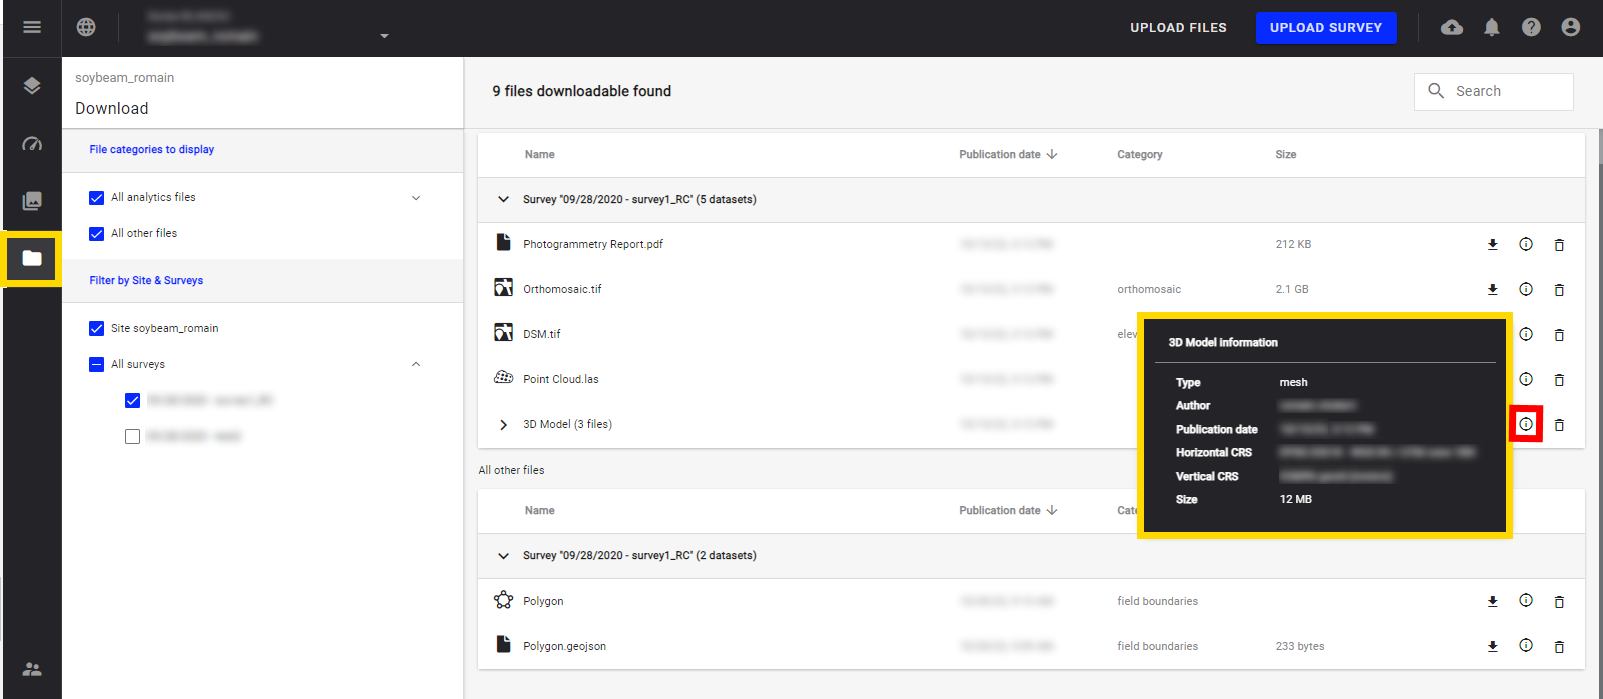
- Uploaded files are in the Download section of Aether. It is possible to download or delete them and check the information (Type, Author, publication date, CRS, etc...)
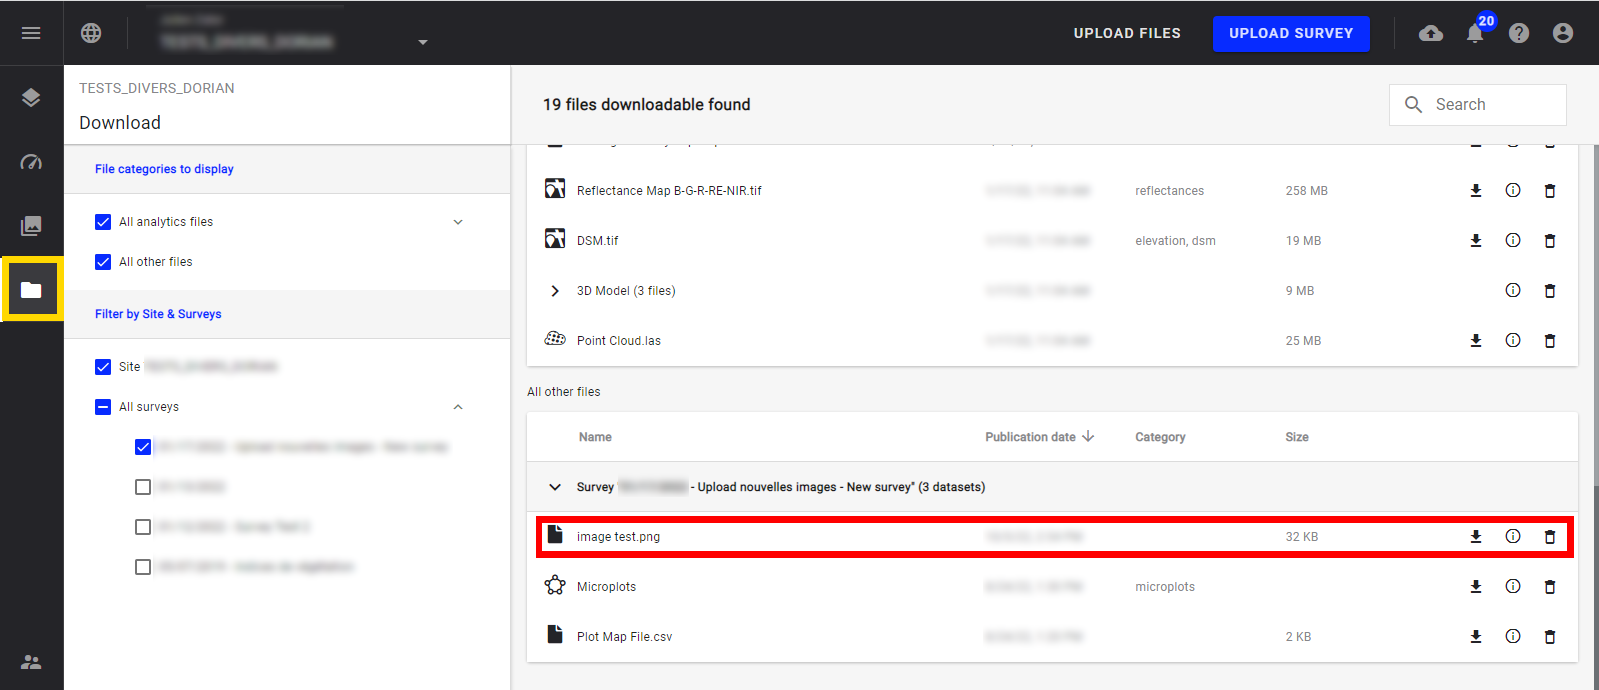
- Depending on the type and categories, files uploaded are added in the corresponding categories. The categories could be created by the upload.
Example: vector file for microplots in the category "Contours".
4. File Types
- The following file types are supported and can be imported to either add data to an existing survey or create a new survey.
Table 1: accepted files format
| TYPE | FORMATS |
| Vector | kml, json, geojson, topojson, zip shapefile, dxf (single-layer), csv |
| Raster | tiff, jp2 |
| Point Cloud | las (1.2 & 1.4), laz |
| Mesh | obj (+ mtl + jpg + png), glb |
| Image | tif, jpeg ( + dlc for UX11 users) |
| File | zip, csv, txt, xlsx |
- A warning message is displayed in case the file to upload has an extension not recognized for the selected file type.
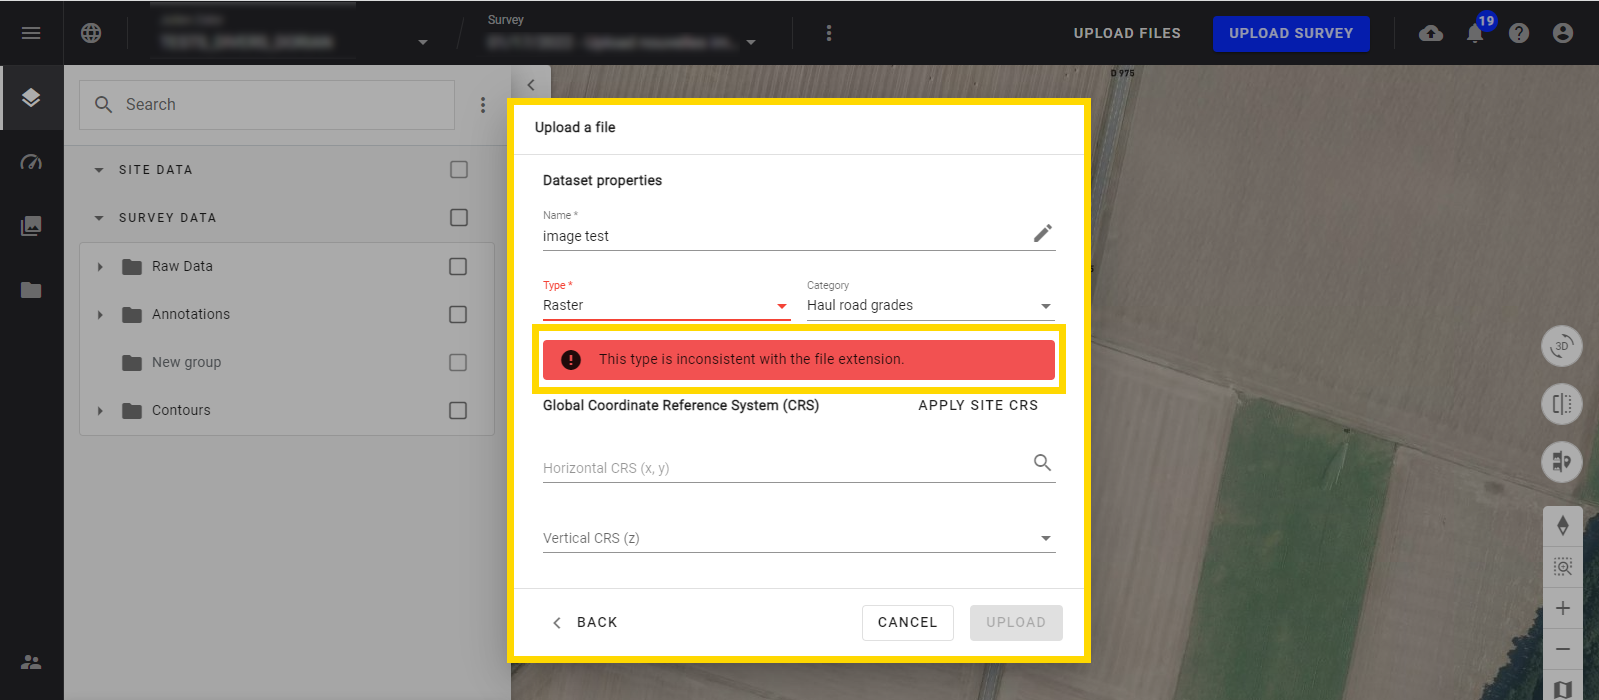
Warning message
5. File Category
- A file category can be added to a file that originated outside of Aether so Aether's analytics can reference the specific file format. The following selections are available to the user, sorted per industry.
Table 2: Files Categories
| CATEGORIES | |||||
| Generic | Agriculture & Forestry | Mines & Aggregates | Power & Utilities | None | |
|
|
|
|
|
|
