

Vector Layers Styling
1. Description
Vector Styling in Aether enables vector layer data to be assigned symbology based on the associated attribute values.
There are two different vector styles:
- System styles: It is the pre-defined style that will be applied to a vector layer attribute by default after analytic processing or an upload with a specific category.
- Custom styles: Aether enables users to create custom vector styles for numerical attributes.
To illustrate these styles, let's look at an agricultural dataset as an example.
2. System Styles
The “Plant Count” analytics provides a vector layer with different attributes, such as the number of plants and the emergence per plot. By default, each attribute has a dedicated style with 5 categories.
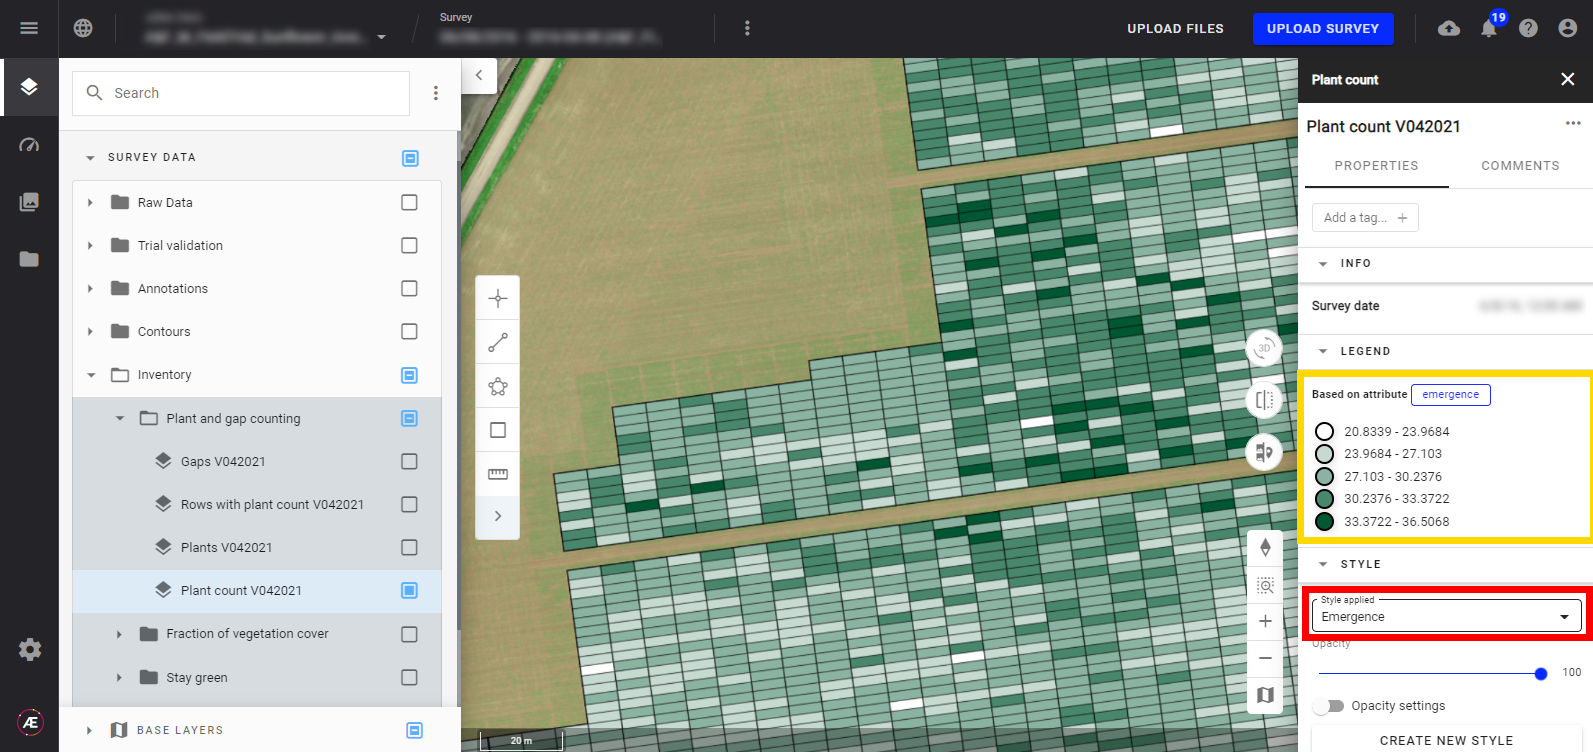
The system style that is applied will depend on the analytics launched.
- When clicking on the name of the layer you will open the info panel on the right side of the screen, which enables the reading of the scale and the attribute selection.
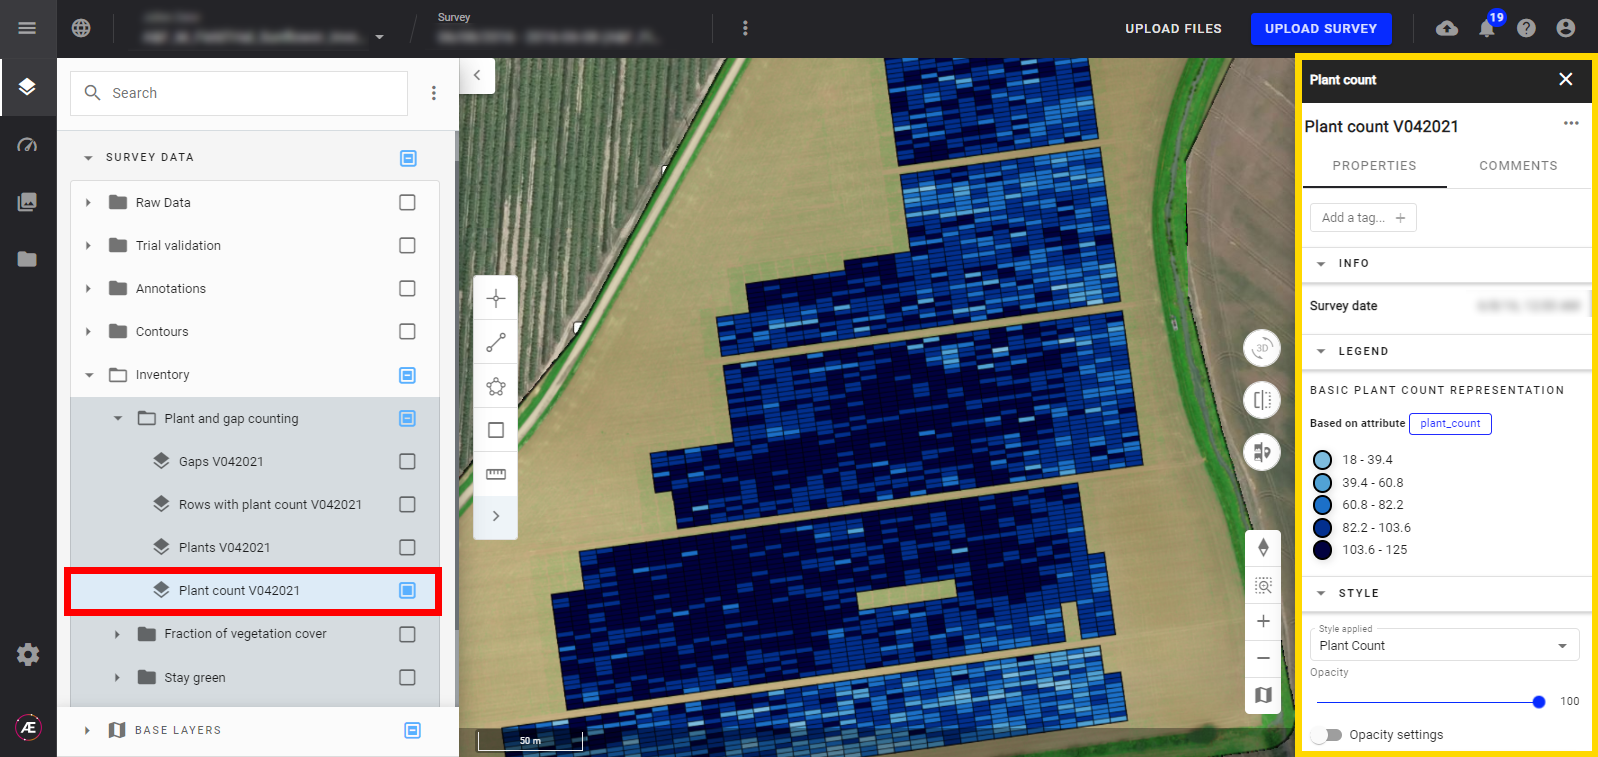
- Change between available attributes from the drop-down menu to update the layer visualization.
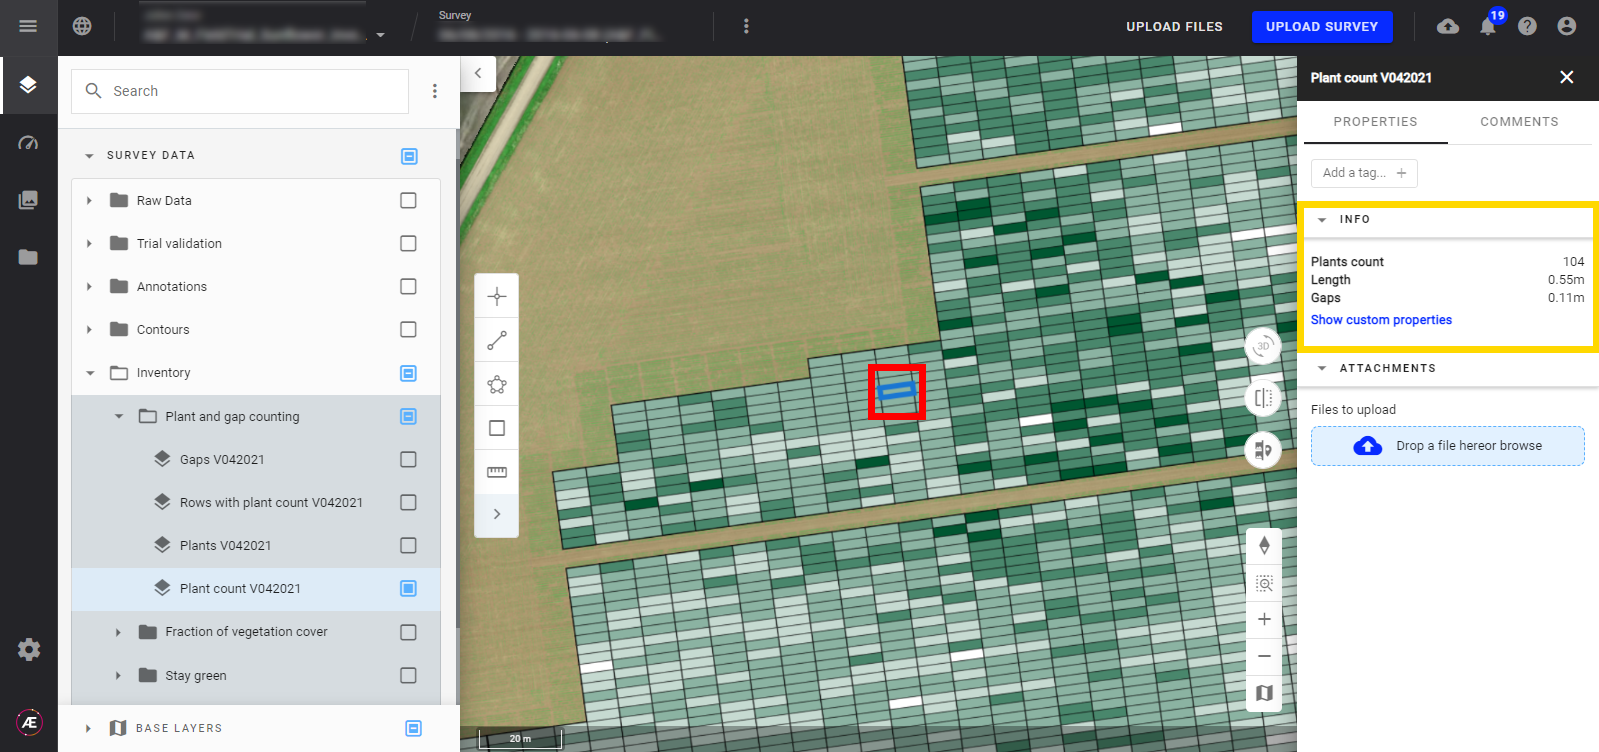
- Clicking on a single polygon on the map enables you to display the corresponding attribute values in the right-hand panel INFO section.
3. Custom Styles
Creating a custom style on a vector is possible as long as it possess a string, integer or float value. In particular, for integer and float attributes, it is possible to customize the color ramp, the number of intervals, and the value of each interval. As for labels, it is possible to display a string, integer or float attribute.
3.1 Create a custom style
You can create and save a custom style if:
- You have a Domain Manager role
- You have a Manager Company role
- You have a User Company role
As a Contributor to a Company, you can create and display a custom style but you won't be able to save it.
3.2 Step-by-step creation
If we go back to our previous example, you can create a custom style by following these steps:
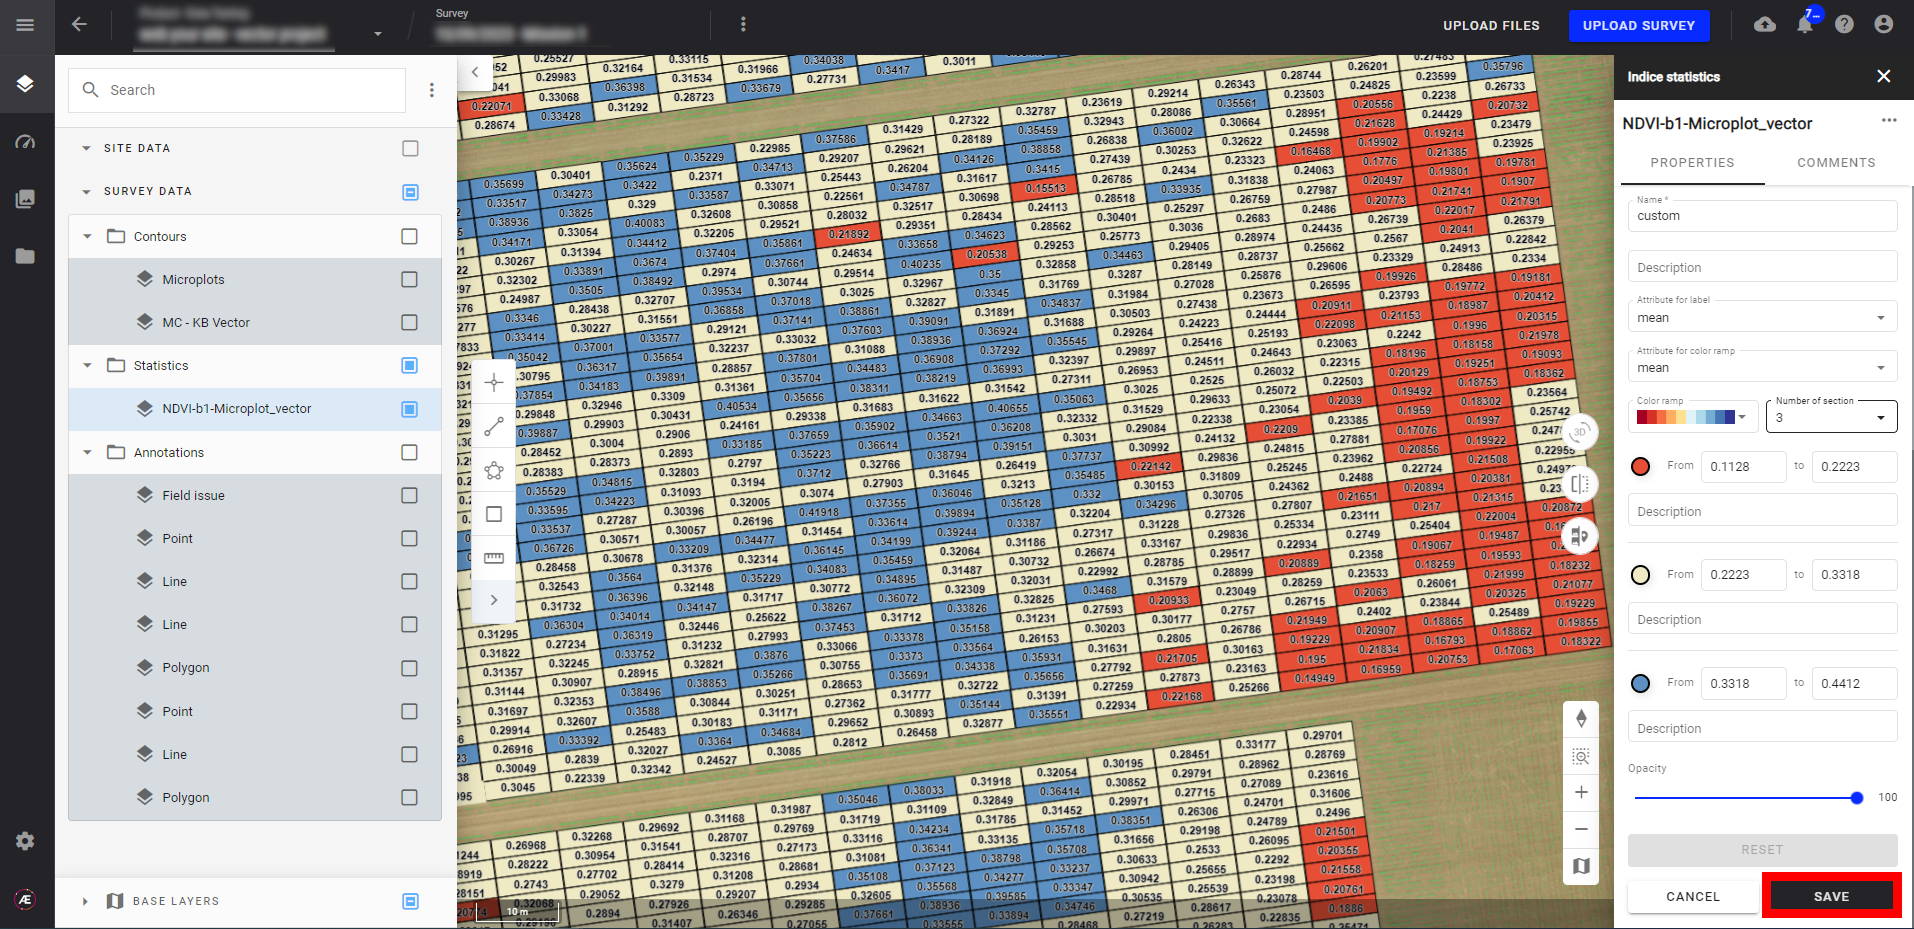
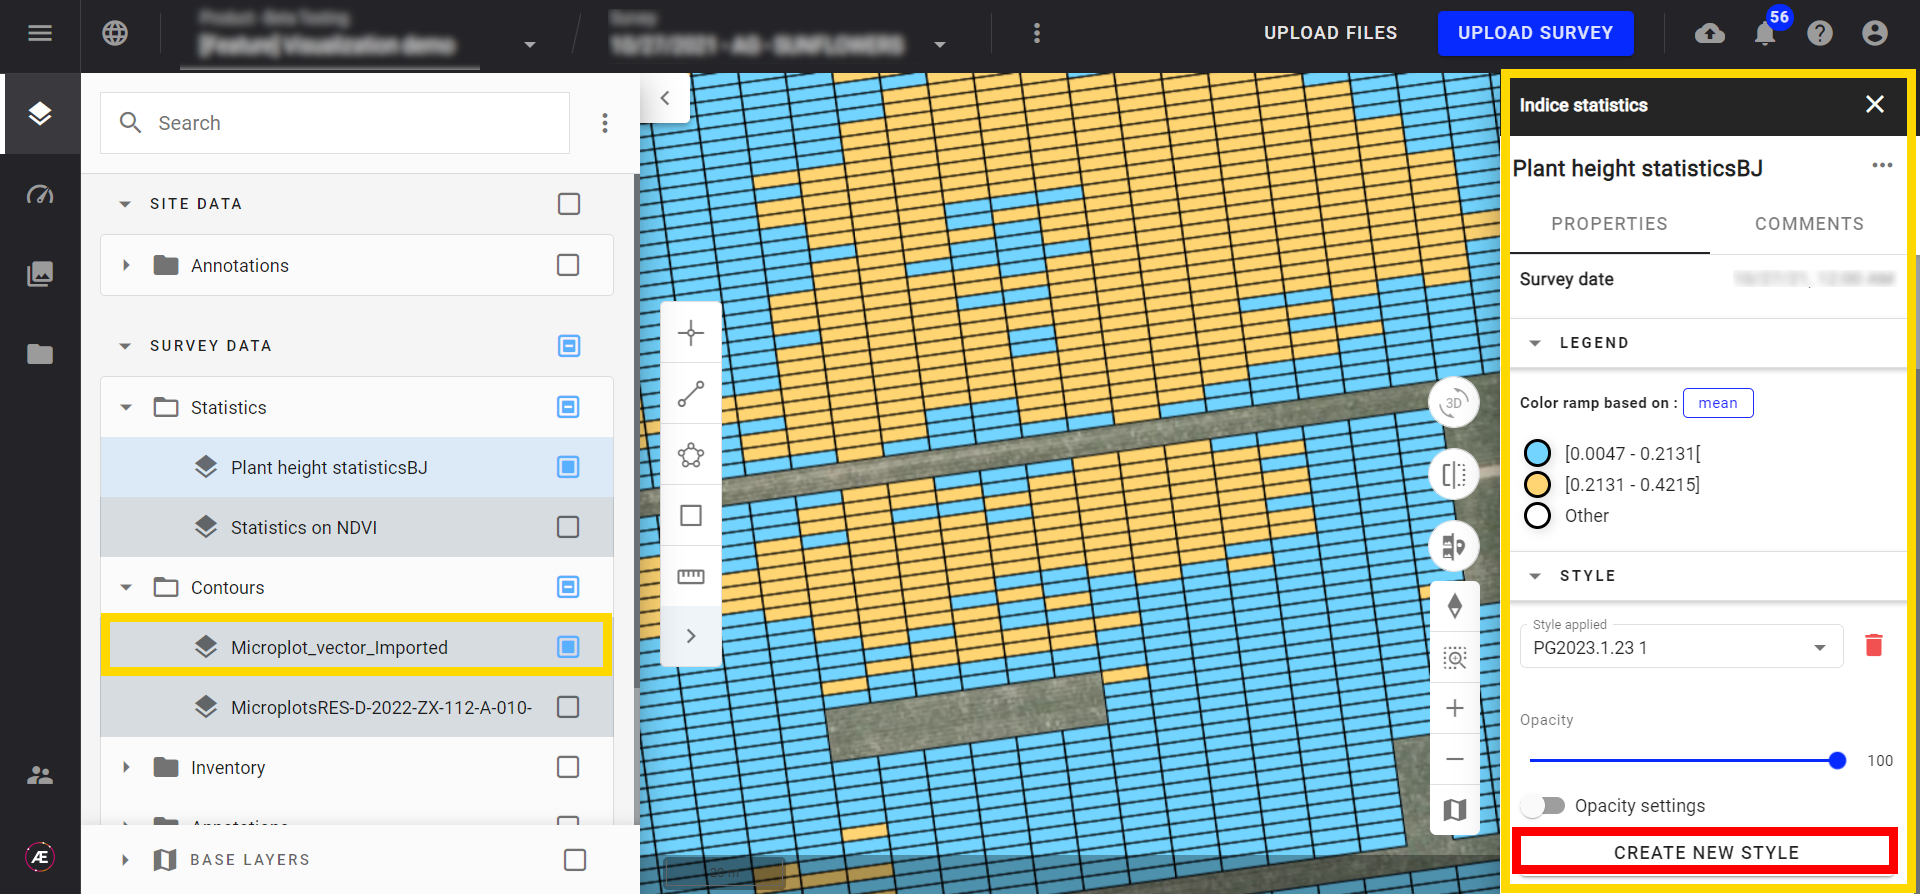
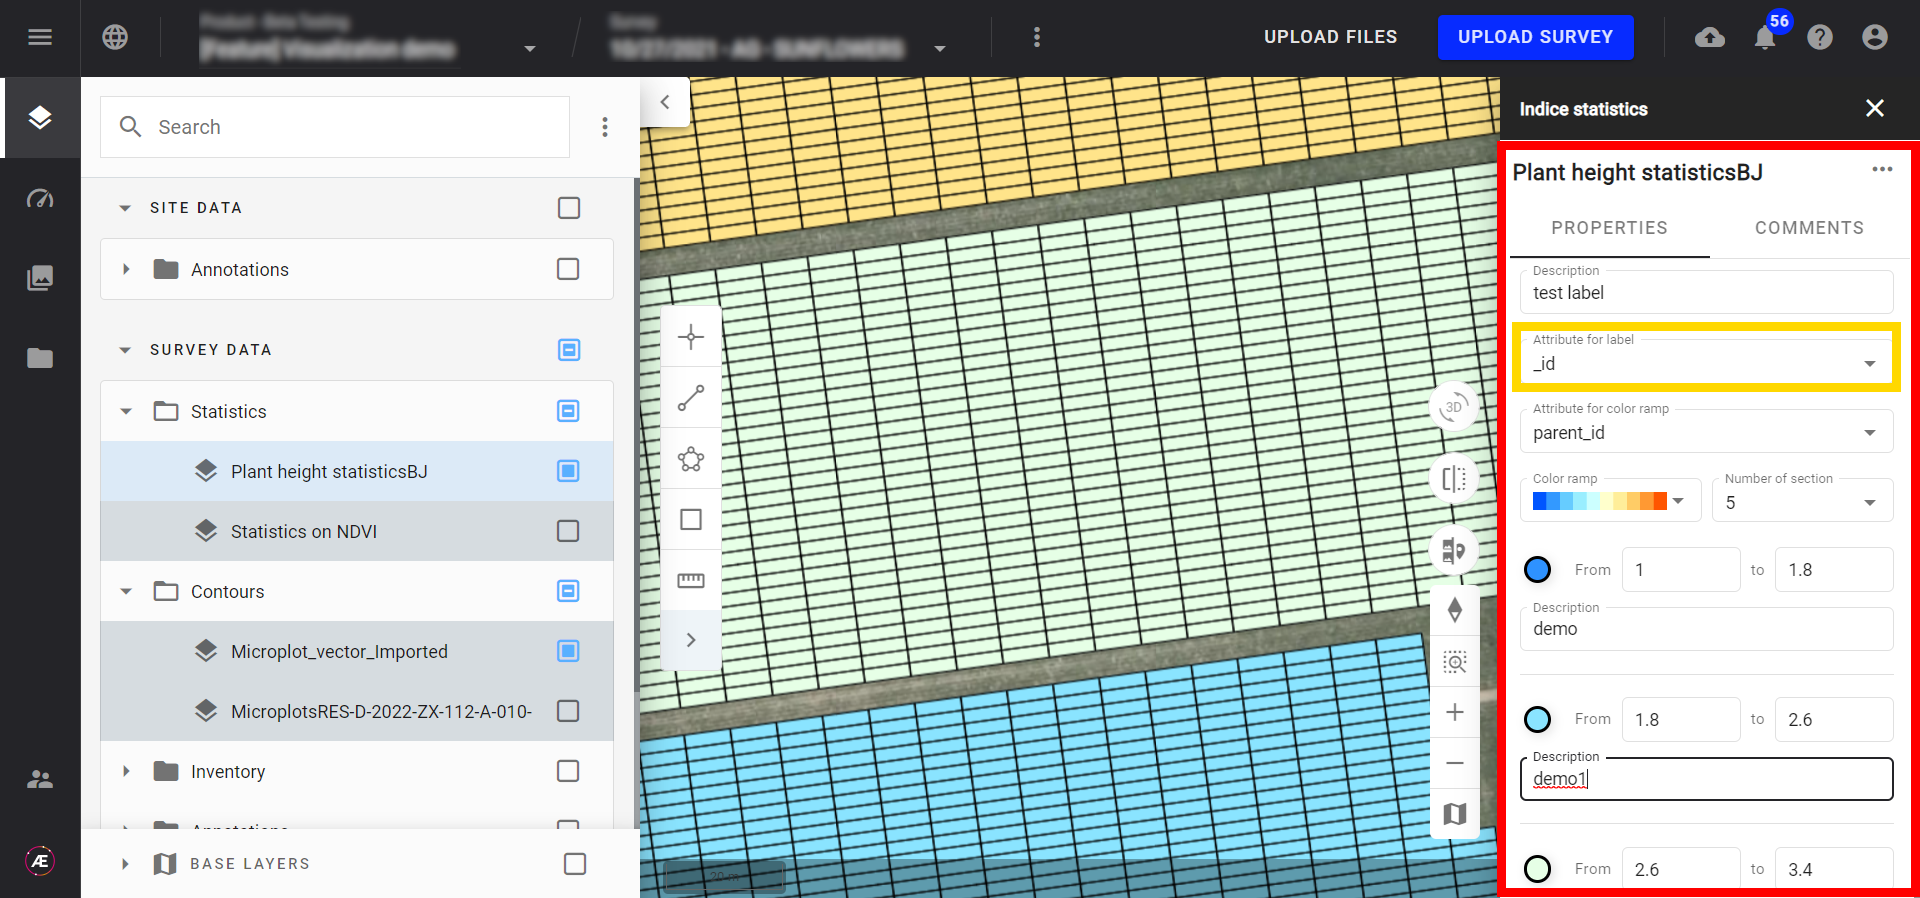
Step 1 - Open the Info Panel of the layer of interest, in this case, “Plant Count”, which contains the vectorized microplots with several attributes. Click on "CREATE A NEW STYLE".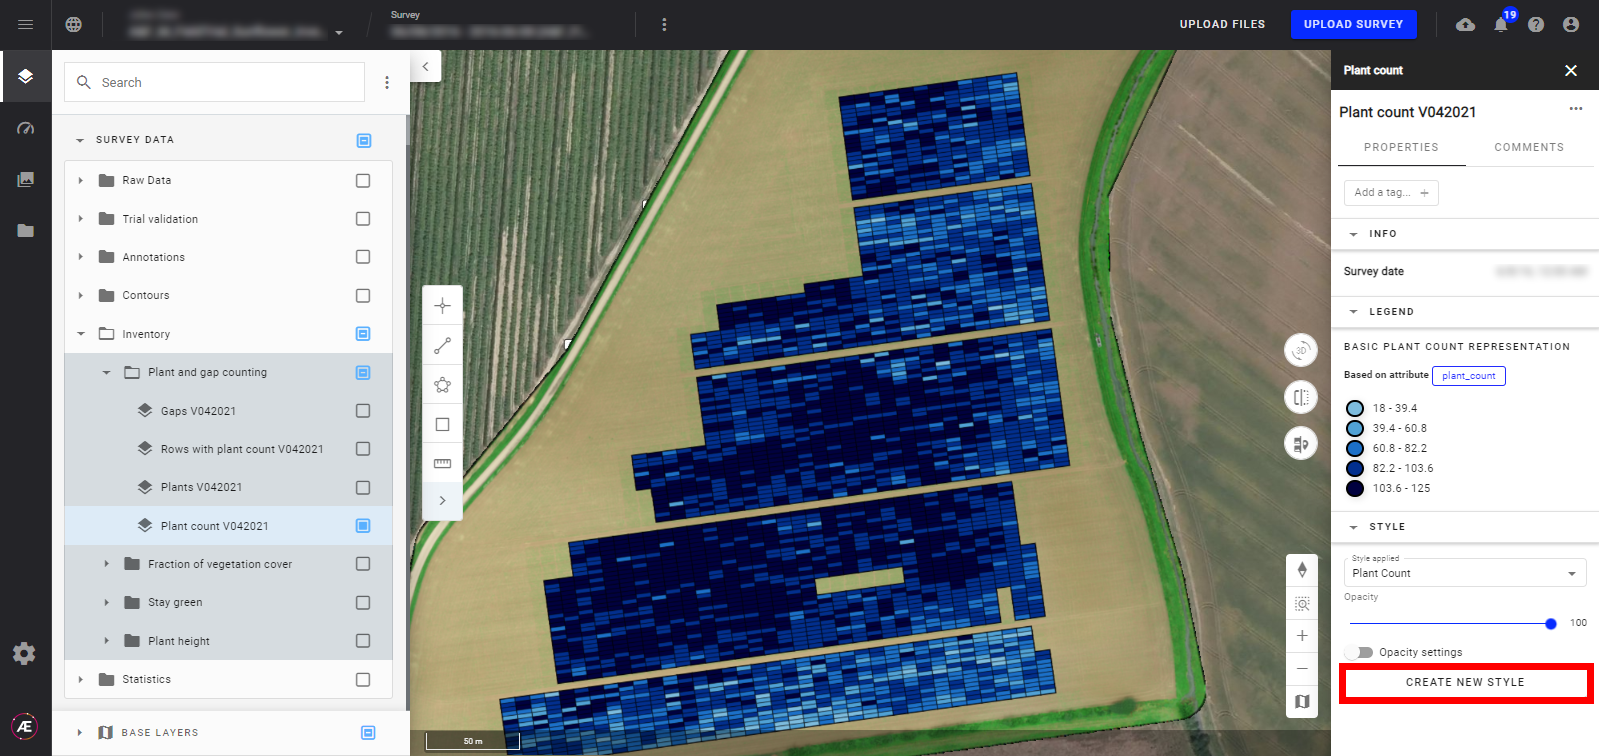
Step 2 - Type a name for your new style.
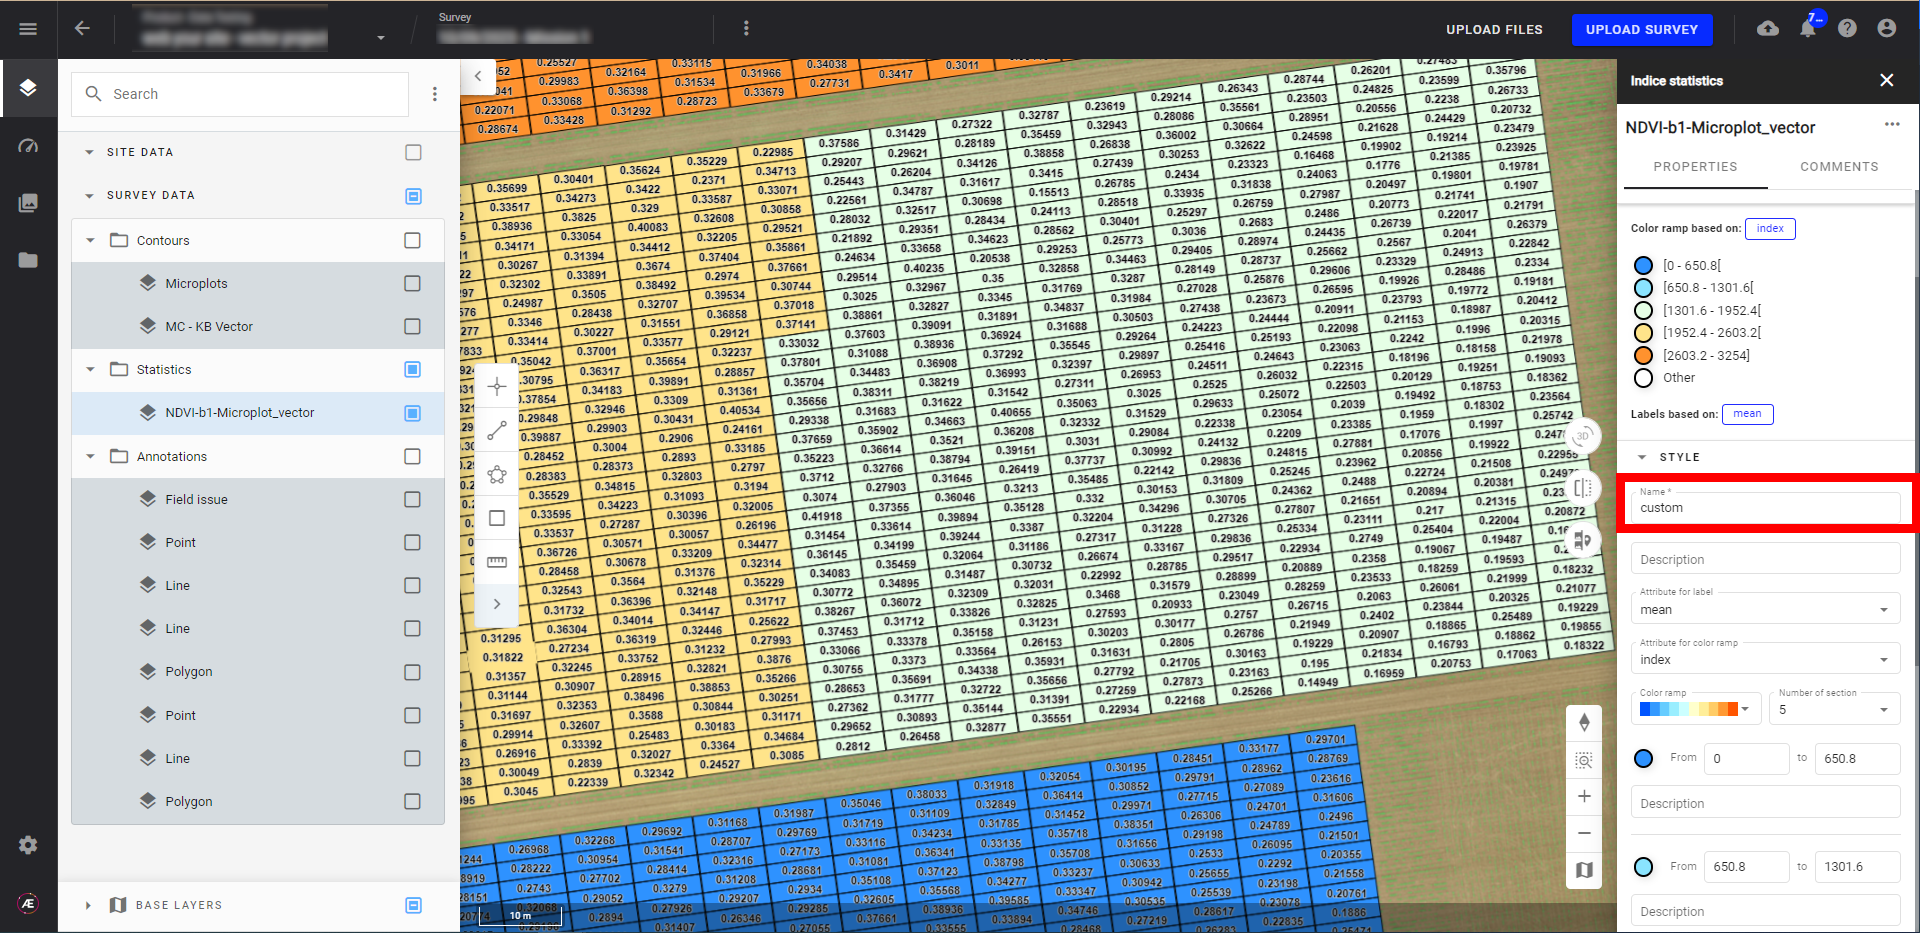
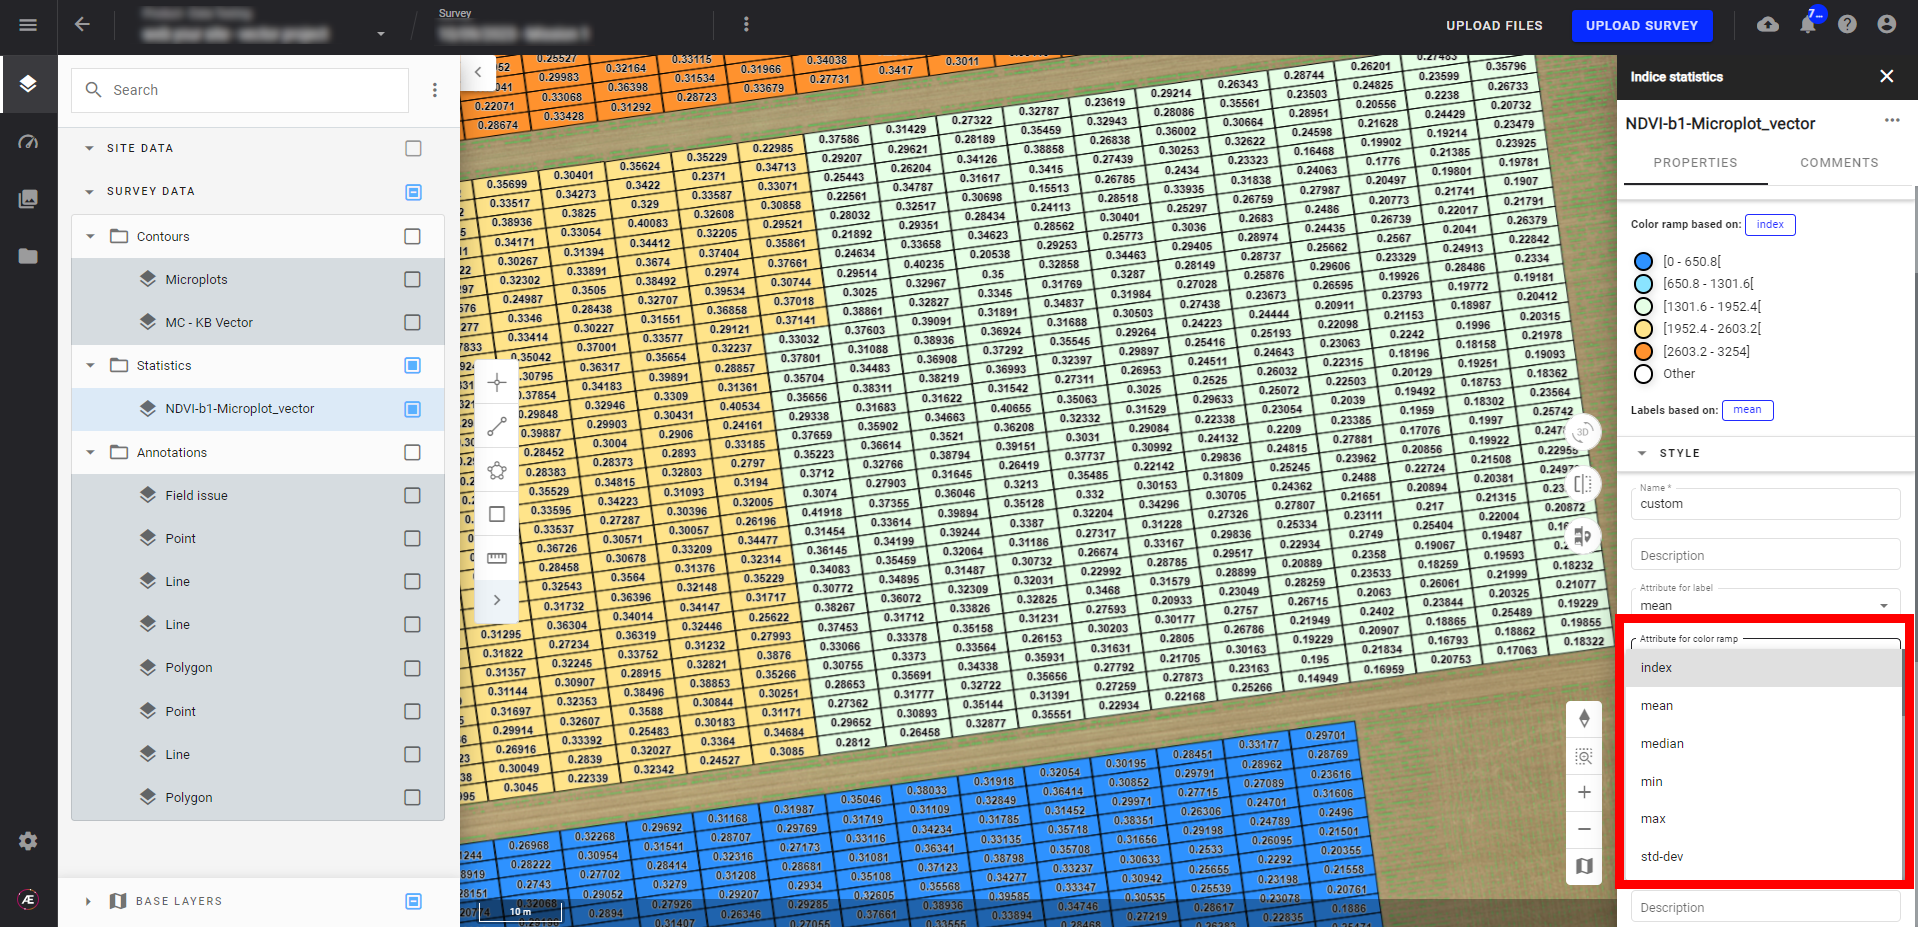
Step 3 - Choose the attribute from the drop-down list. It shows the available attributes attached to your vector.
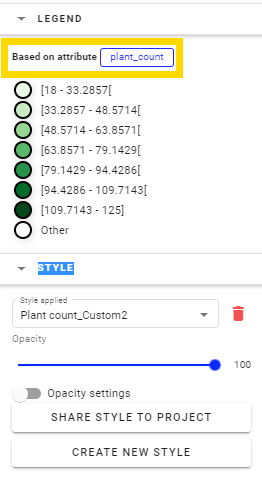
Step 4 - Choose your color ramp and the number of classes (intervals) you want to create.
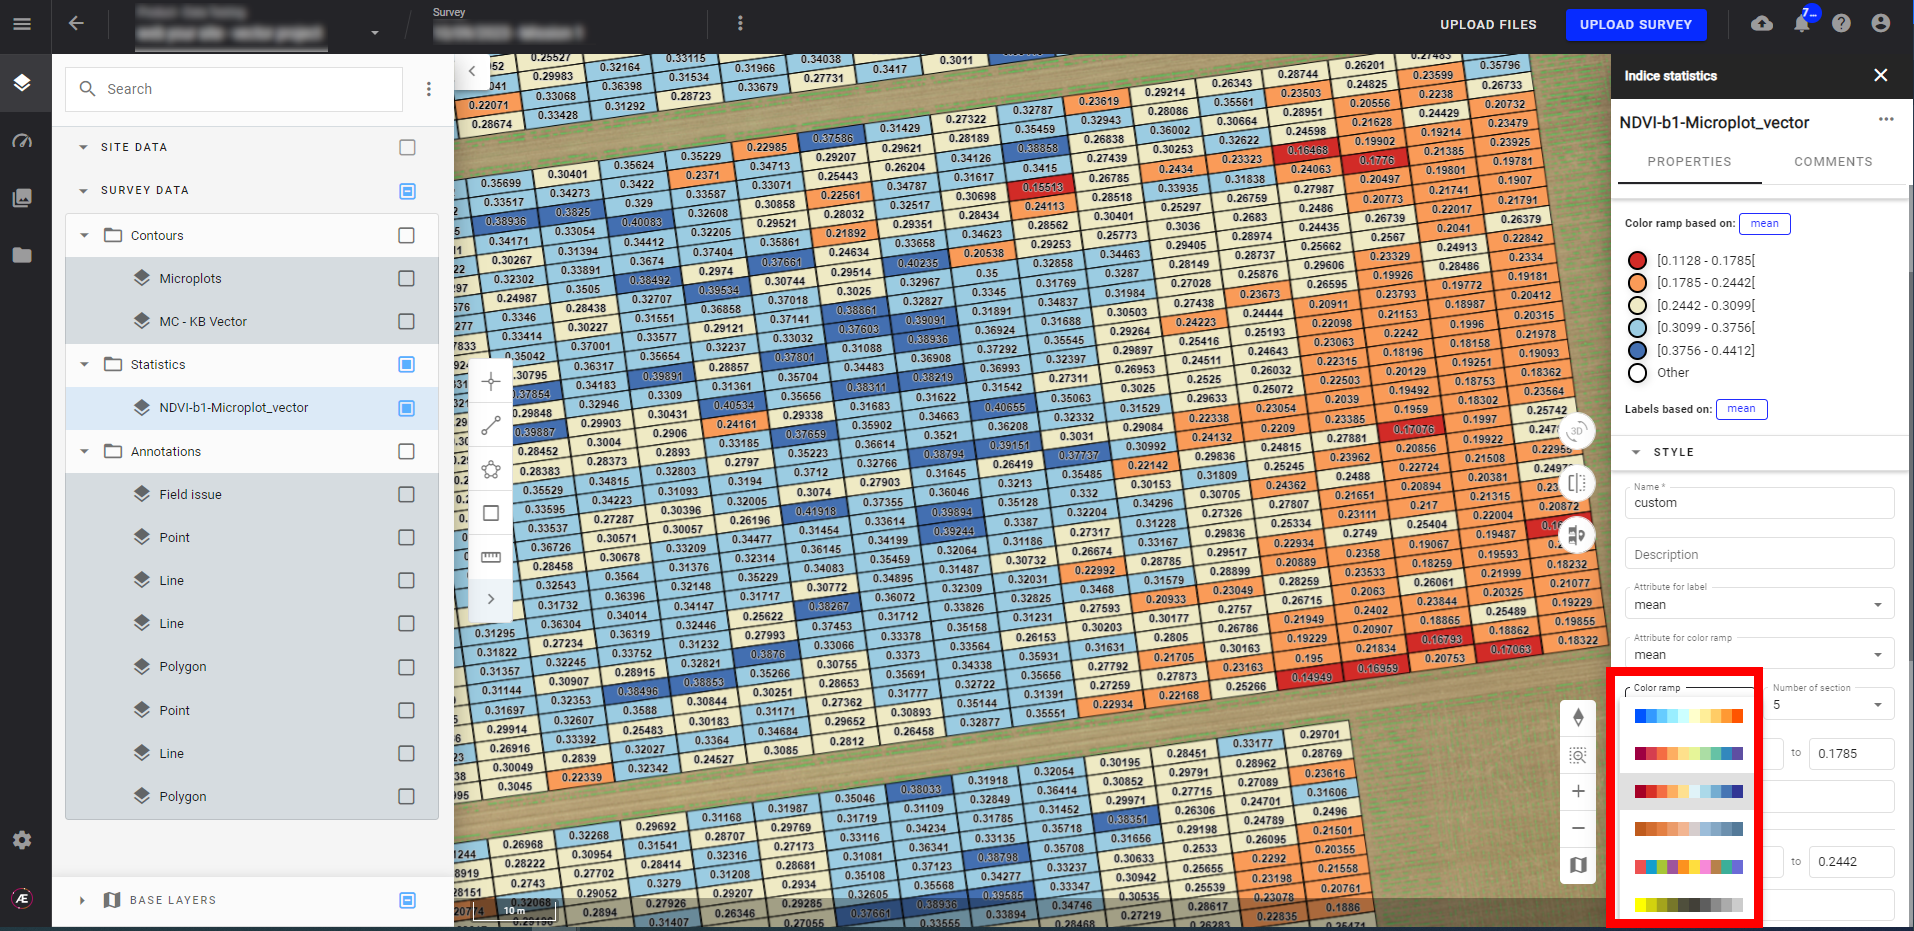
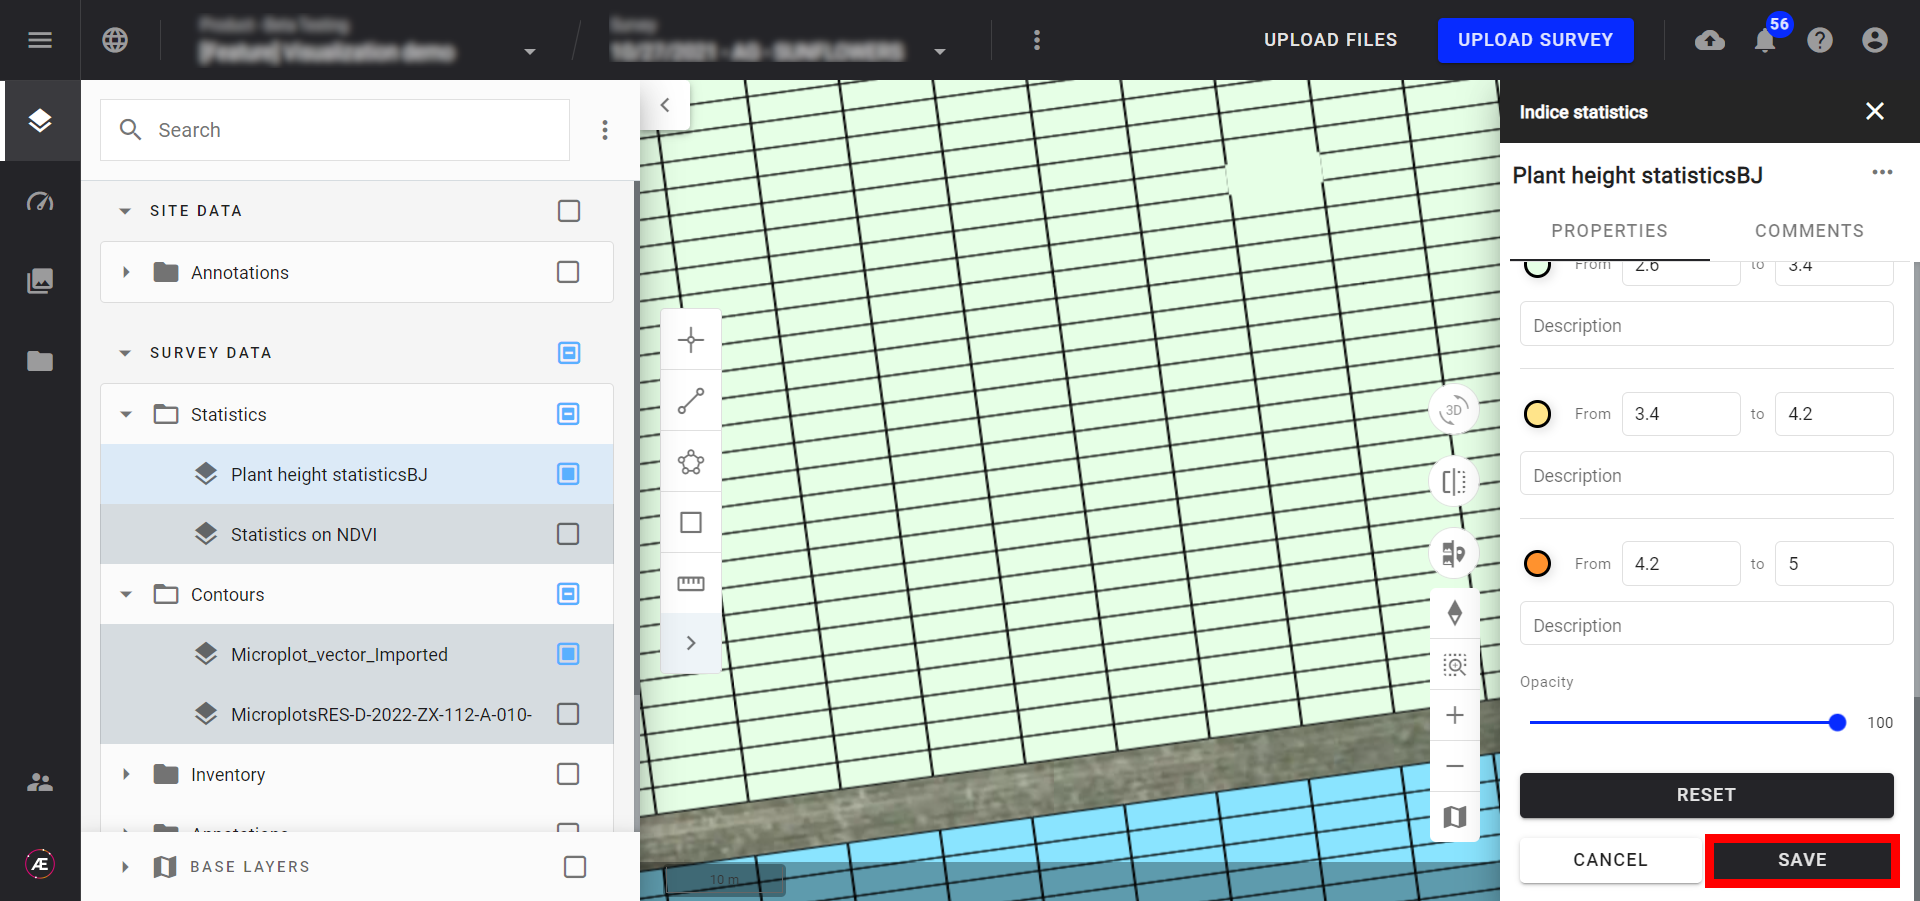
By default, 5 classes with equally distributed values will be proposed, but you can define between 1 and 10 classes. You can modify the values of each interval but they have to be consecutive values.

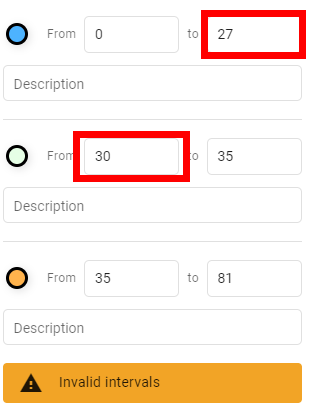
Intervals
When changing the values of your intervals, be sure that you enter consecutive values. If this is not the case, a warning message will be displayed and you won't be able to create your custom style.
You can also add a description to each class.
Step 5 - Save your new style by clicking on "SAVE".
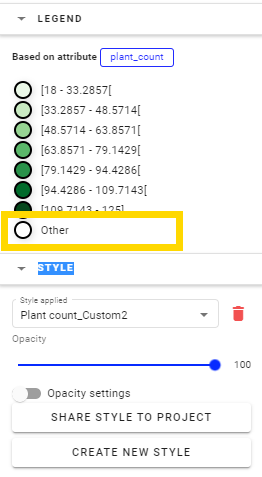
- Once your new style is created, you will be able to visualize it. An "Other" label will be added to the Legend to categorize values outside of the classes.
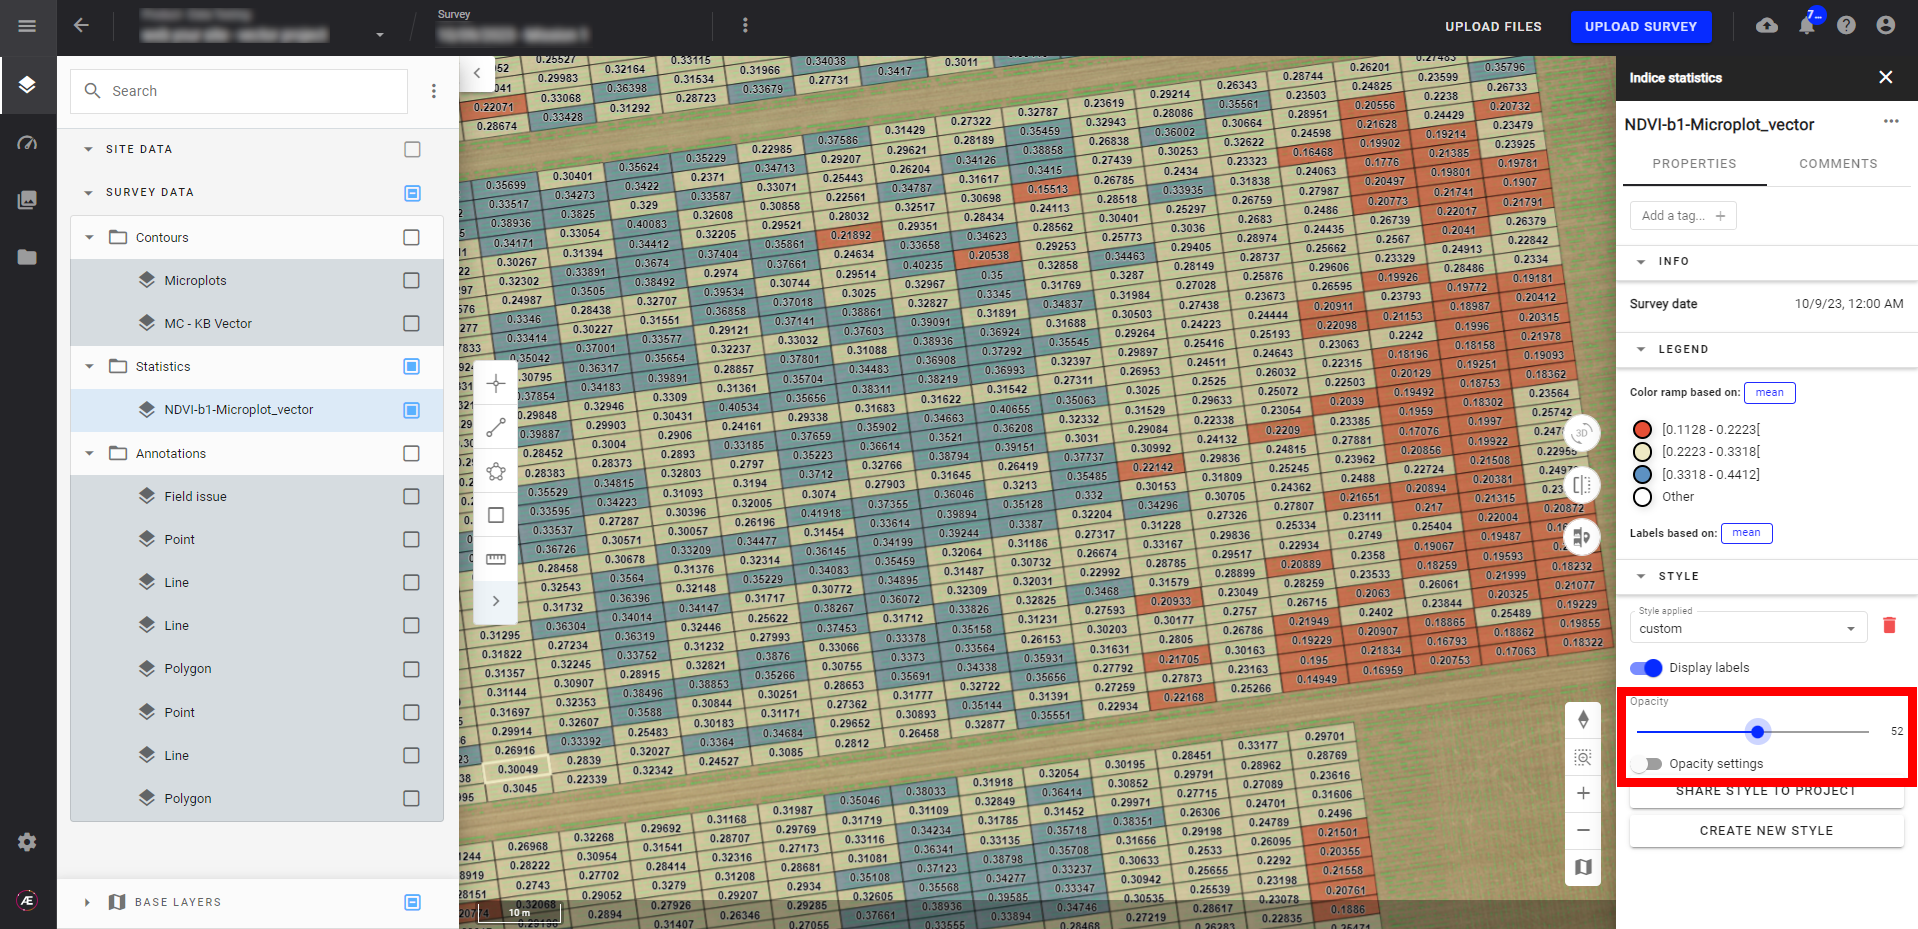
- You also can change the opacity of a custom style which will save automatically.
3.3 Display Labels on vector layers
Info
Labels are optimized for small polygons (like the microplots in the example below). In other contexts, the quality of the display is not guaranteed.
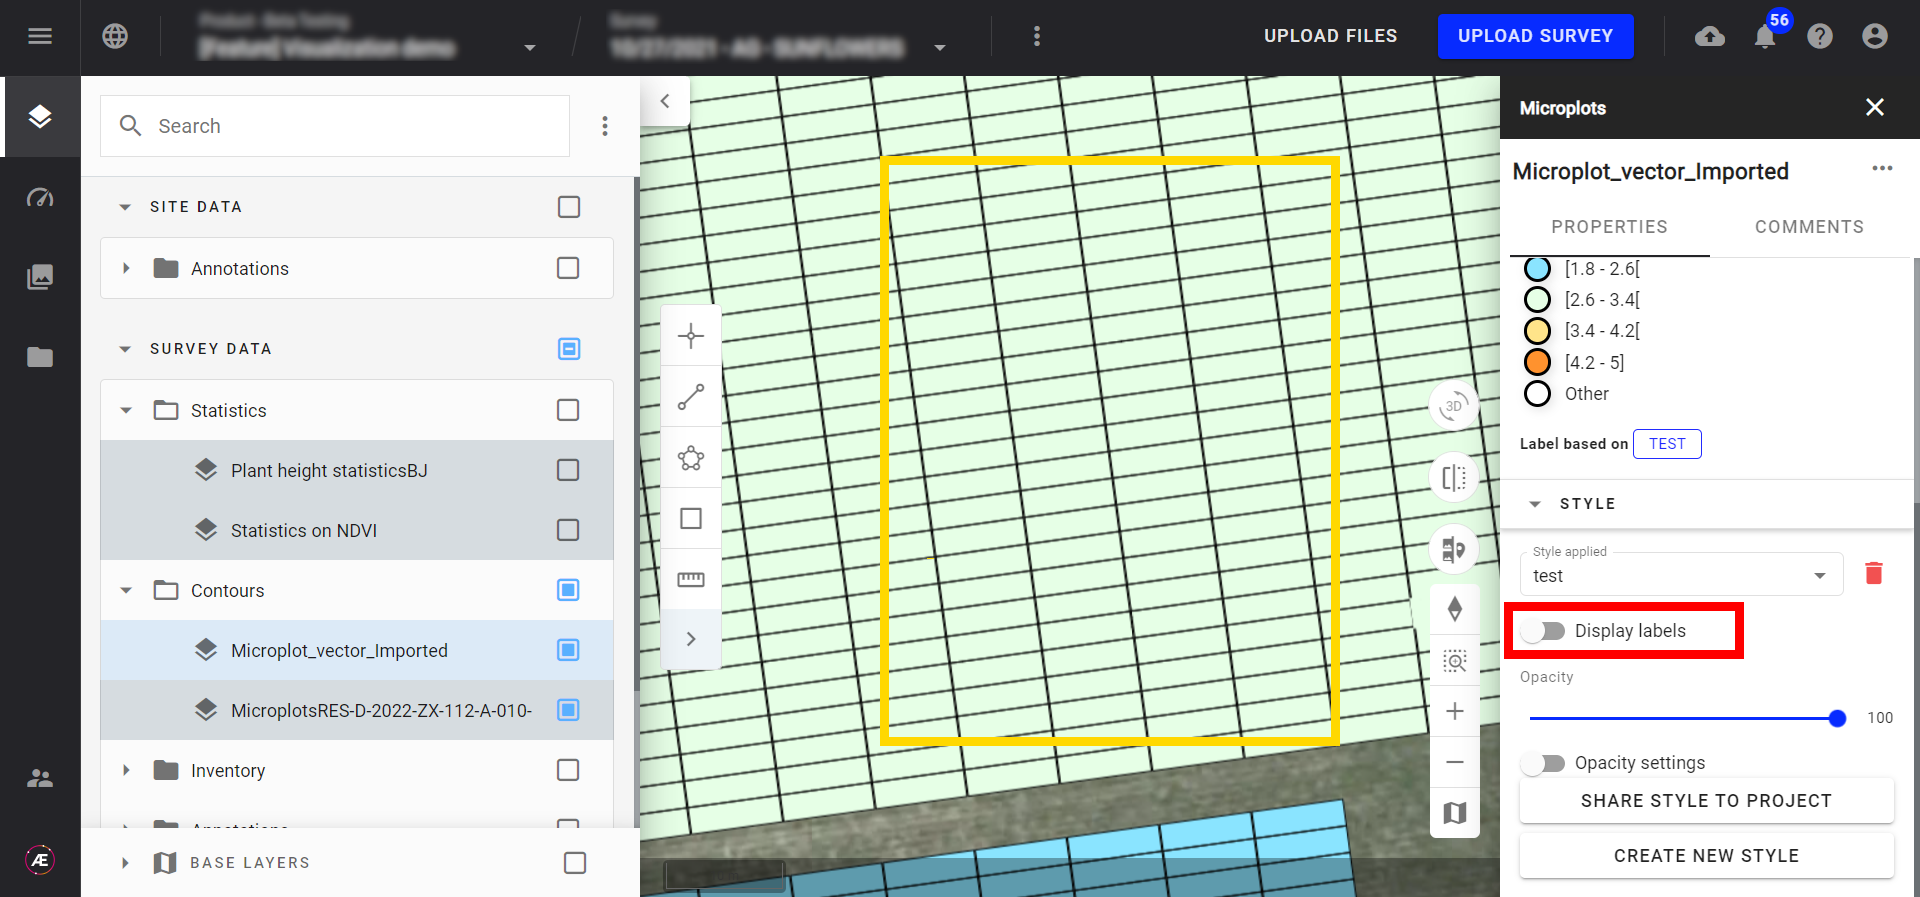
Step 1 - Open the layer info panel and click on "CREATE A NEW STYLE'".
Step 2 - Select the attribute used for the labels ("Attribute for label" field) to customize the labels to display on the map view and fill in the fields, see paragraph 3.2.
Step 3 - Click on "SAVE".
Step 4 - The style is created and labels are visible.

Step 5 - Use the "Display labels" button switch to display ON or OFF labels.
3.4 Share a custom style
You can share a custom style at different levels depending on your role in your Aether account organization:
- Domain Manager role can share a custom style at the Project, Company, and Domain level
- Manager role can share a custom style at the Project and Company level
Info
The created style is linked to a specific attribute name. It means, that it can be only used on other vector layers containing the same attribute name.
Once your custom style is created and saved, it will appear in the "Layer Style" drop-down list as a "User" style.
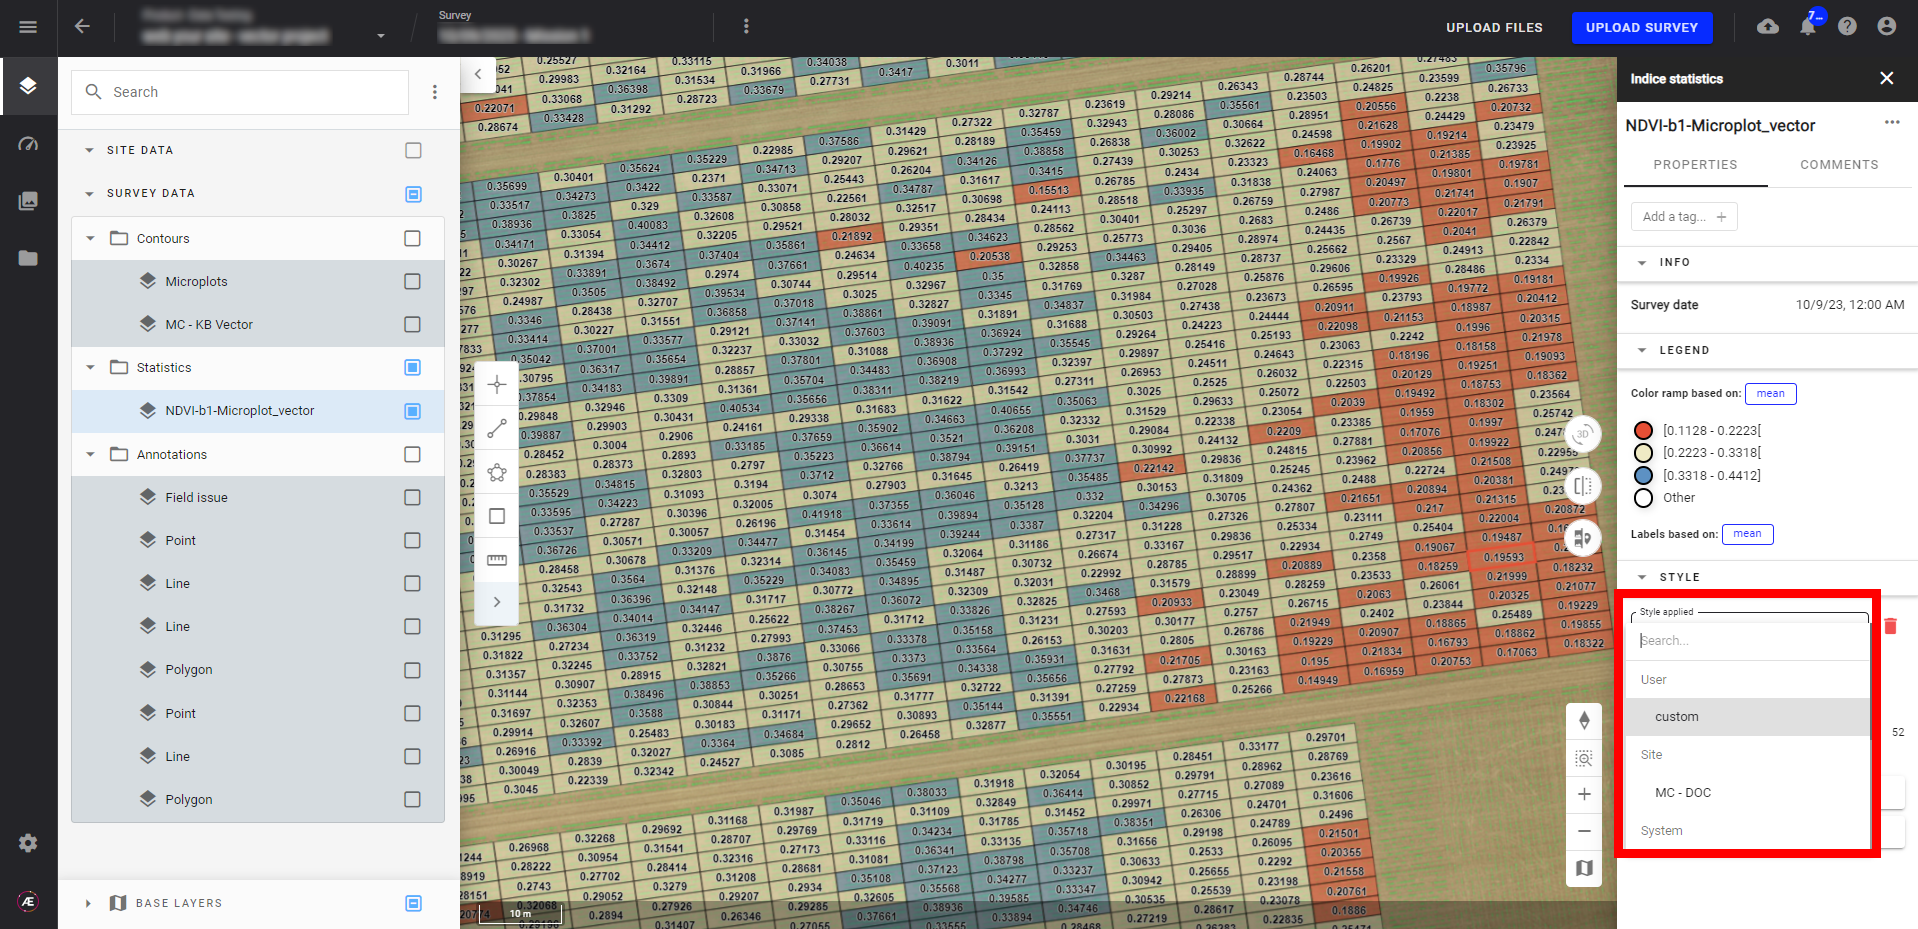
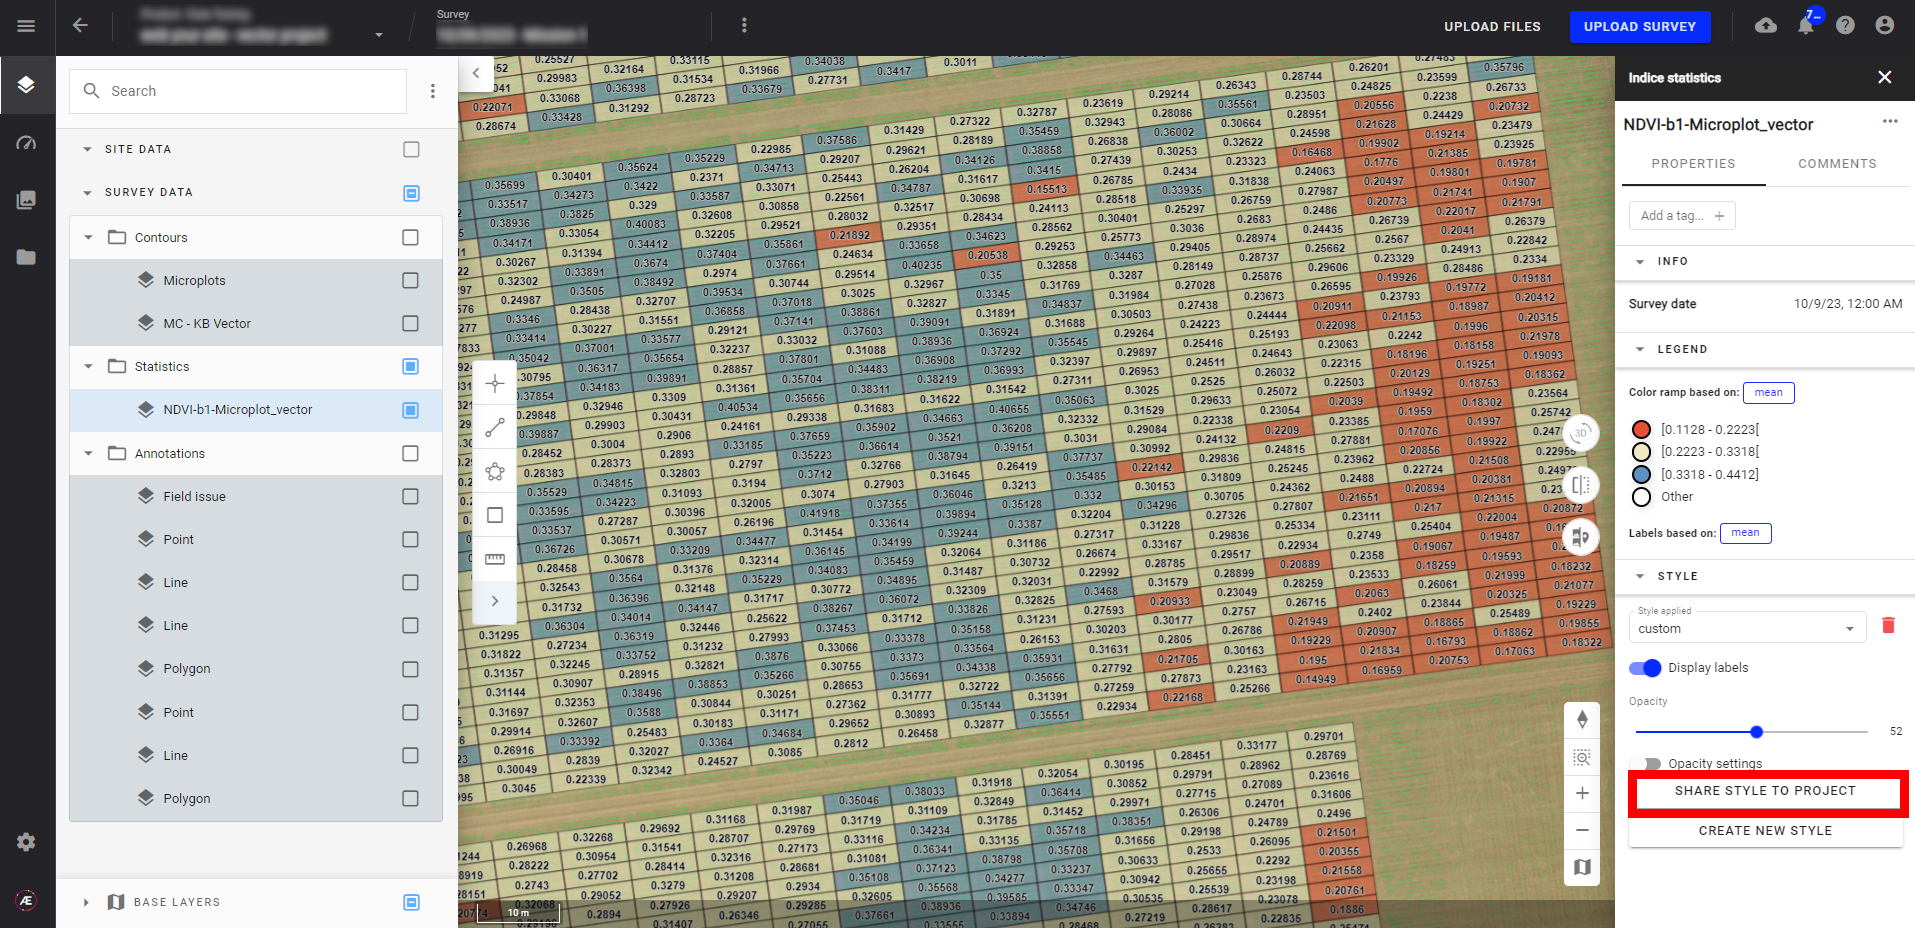
- To share it to another level, select your style from the "Layer Style" drop-down list and click on "SHARE STYLE TO PROJECT". Your style is now shared with a Project Style, which means it will be available for the project you are in.
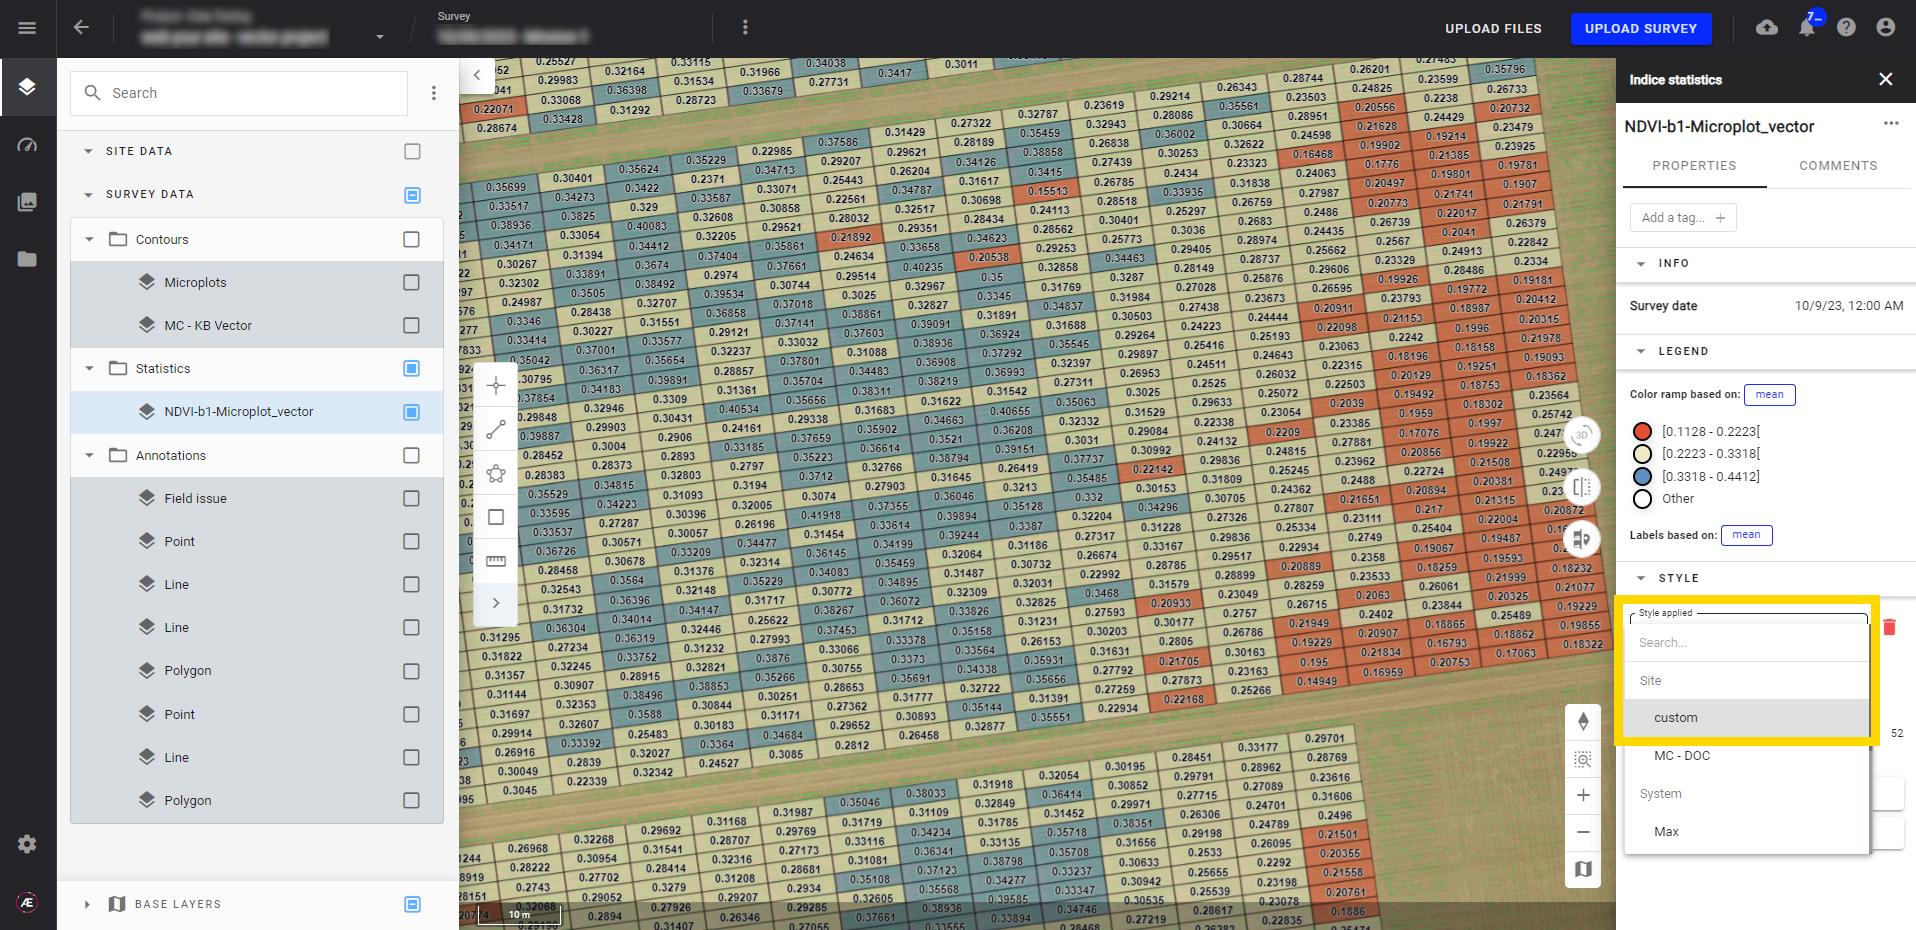
- If you open the drop-down list "Layer Style" you will now see your newly created custom style at a Project level.
- To share your style at a Company level, click on "SHARE STYLE TO COMPANY". This will enable the style to be used for data with the respective attribute for all the Projects of your Company.
- If you want to share your style at a Domain level (only for Domain Manager), click on "SHARE STYLE TO DOMAIN" and your custom style will be available for all the Companies and Projects in your Domain, when the attribute for which the style has been created is available, in this case, plant_count.
3.5 Hierarchy of the custom styles display:
Hierarchy depending on the sharing of the custom style (layer/project/company/domain):
- A custom style created for a given layer/attribute will be displayed on that layer/attribute only.
- A custom style shared at the project level will be applied to all layers containing the same attribute within the project.
- A custom style shared at the company level will be applied to all layers containing the same attribute within the company.
- A custom style shared at the domain level will be applied to all layers containing the same attribute within the domain.
If you create and apply a new custom style on a layer/attribute that already contains a custom style (either attached to the project, company, or domain level), this new custom style will be displayed on that layer every time. If you share this custom style with the project, company, or domain, it will replace the other custom styles in place for the display.
Hierarchy within the layer itself:
- The styles for a given layer appear in alphabetical order.
- The custom styles have priority over the system styles
-
Example :
- For a given layer, there are 3 attributes (A, B, C)
- Attribute A has a system style
- Attribute B has a custom-style
- Attribute C has a custom-style
- When opening the layer, the first attribute that will be displayed on the map is the attribute B
3.6 Delete a custom layer
Step 1 - Click on the trash icon near the custom layer
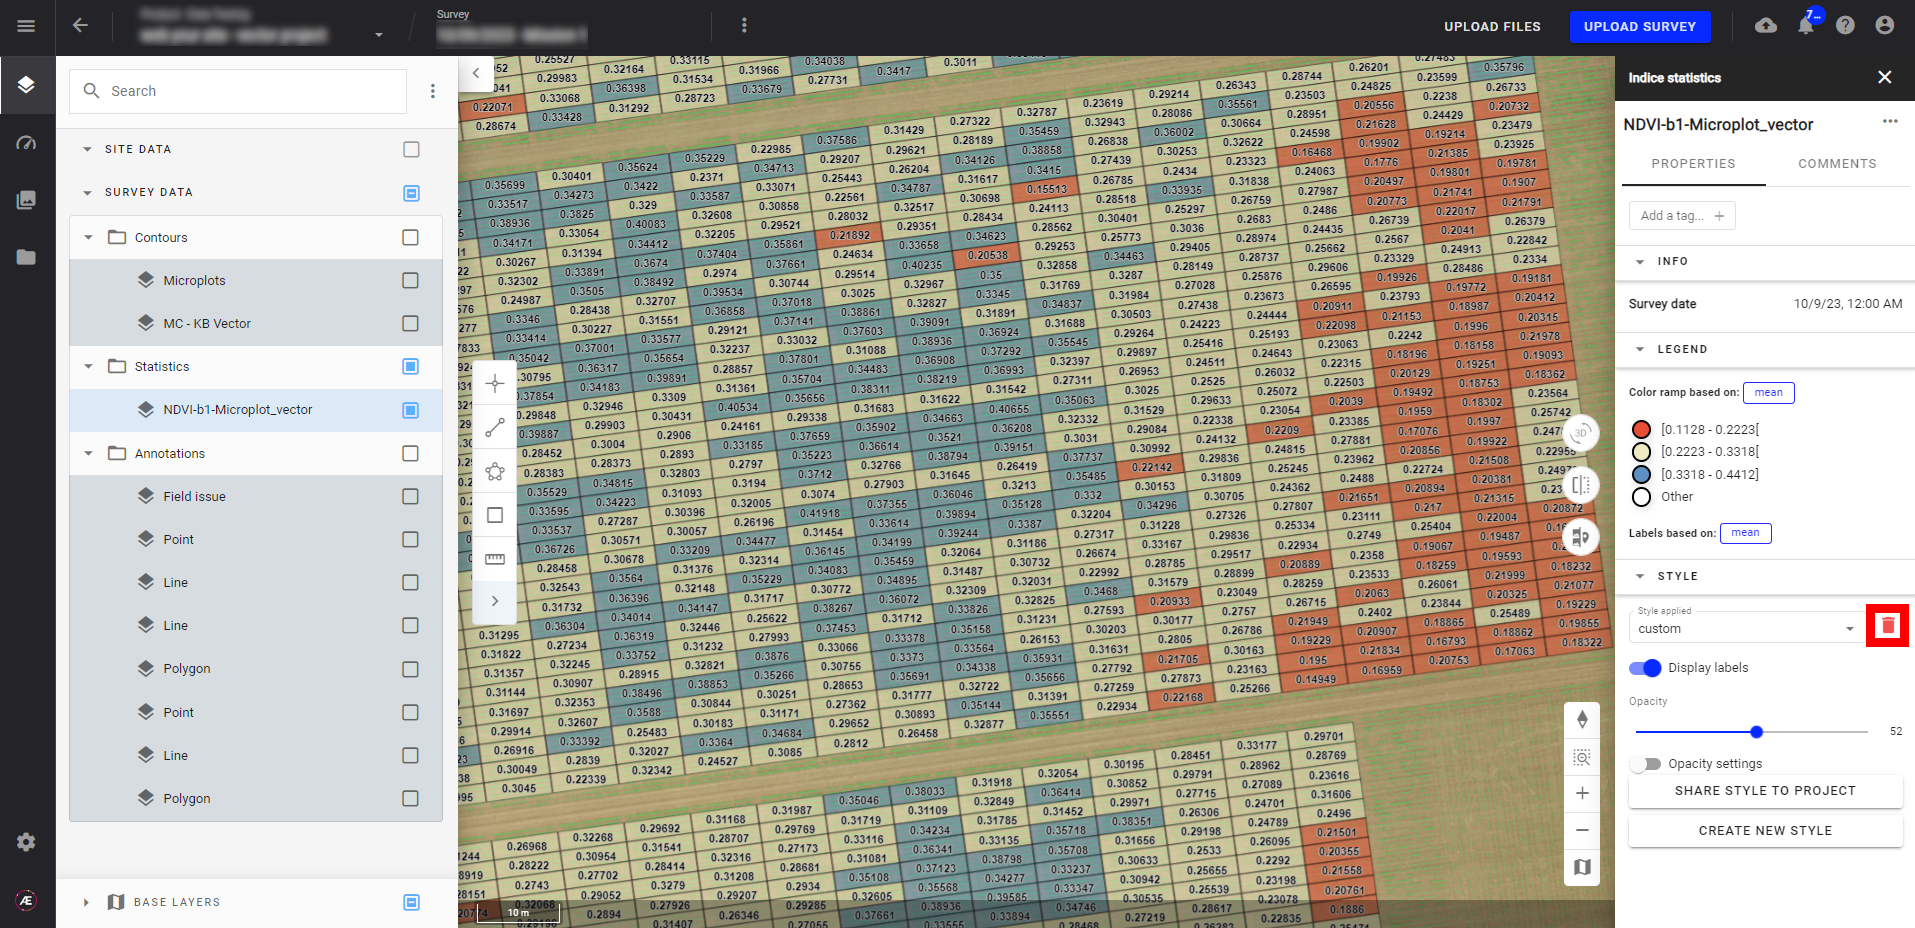
Step 2 - Click on "CONFIRM" to delete the custom style or "CANCEL" to abort the operation.
