

Volume Calculation
1. Description
Aether enables quick volume calculations by referencing raster base layers such as the digital surface model (DSM). Let's review the process for calculating the volume for a stockpile as an example.
2. Inputs
A raster DSM, generated from the photogrammetry process, is required for volume calculations.
3. Workflow
There are several ways to calculate a volume on the platform.
3.1 From the Measure Tool
This method is the fastest and does not create an annotation on the platform.
Step 1 - Click on the "Measure" button (1) then on "Area & Volume" (2).

Step 2 - Draw a polygon around the area you wish to measure.
Info
Use double-click to complete the perimeter of your polygon.
Step 3 - On the pop-up window that appears, click on "Compute 3D Measures".
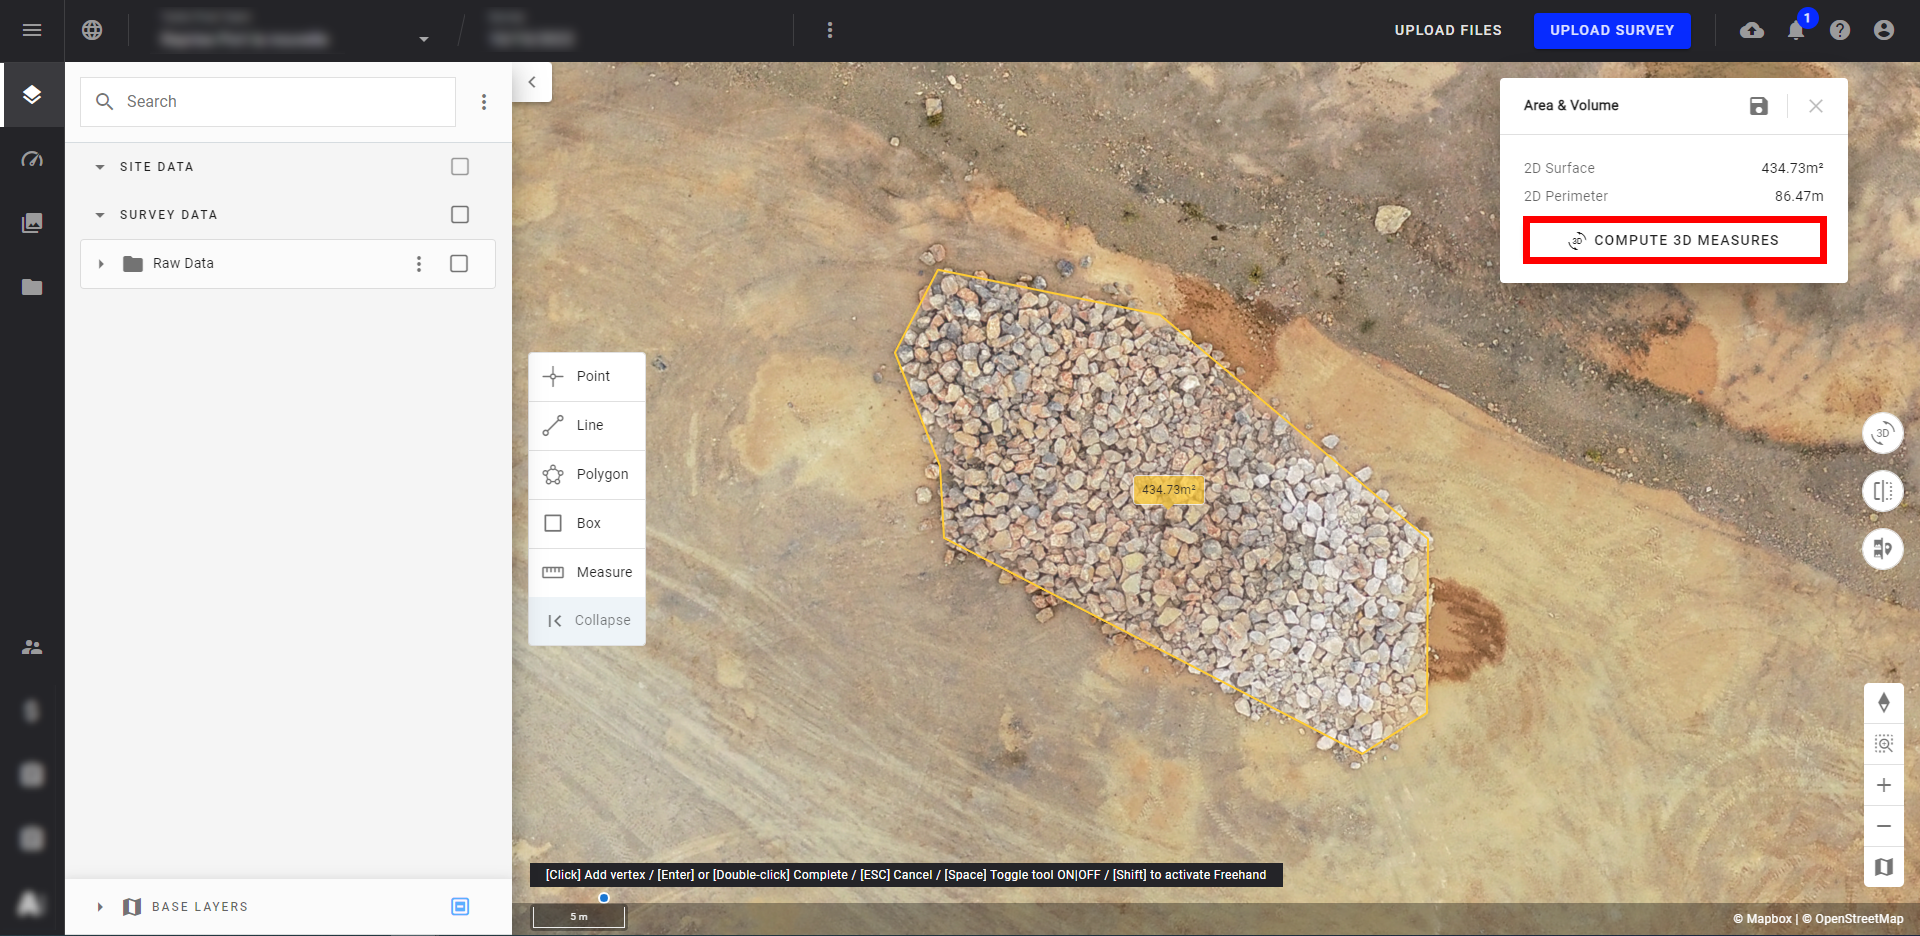
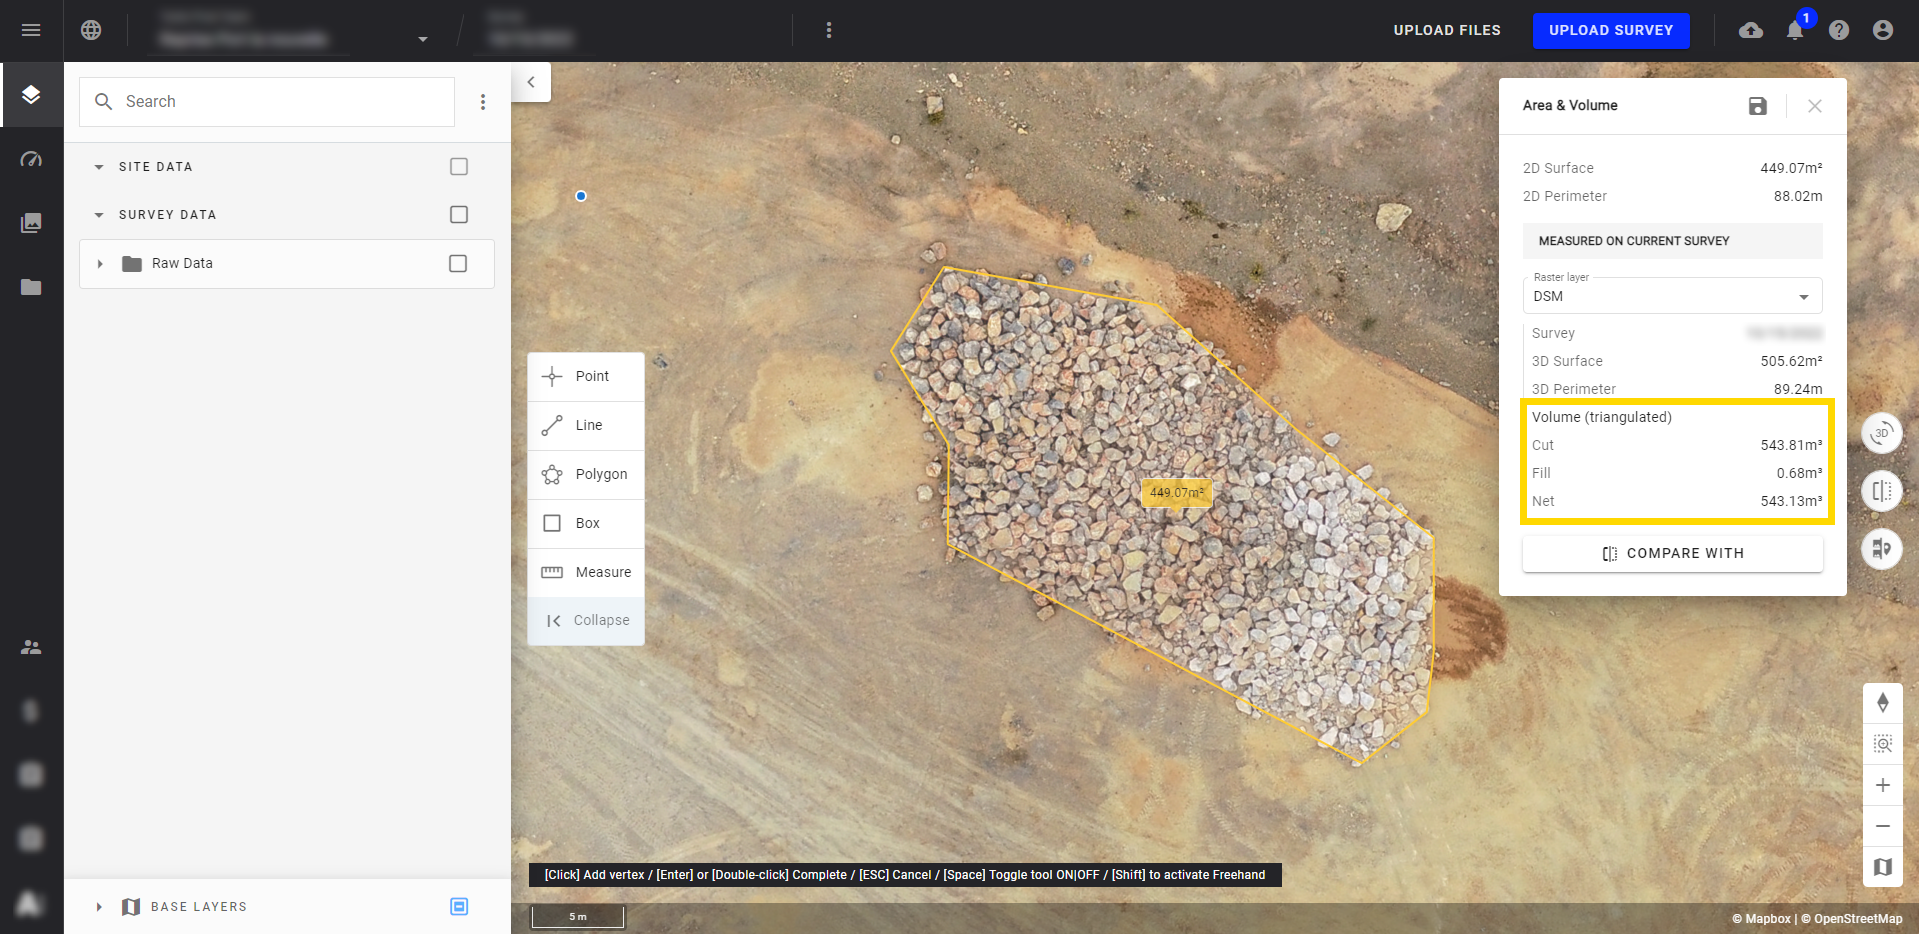
Step 4 - The Volume Calculation results are displayed in the yellow framed part of the pop-up window. For more information, go to paragraph 4.
Warning
The volume calculation method used by the Measure Tool is the triangulated method and can't be changed. To access more calculation methods, see paragraph 3.1.
Info
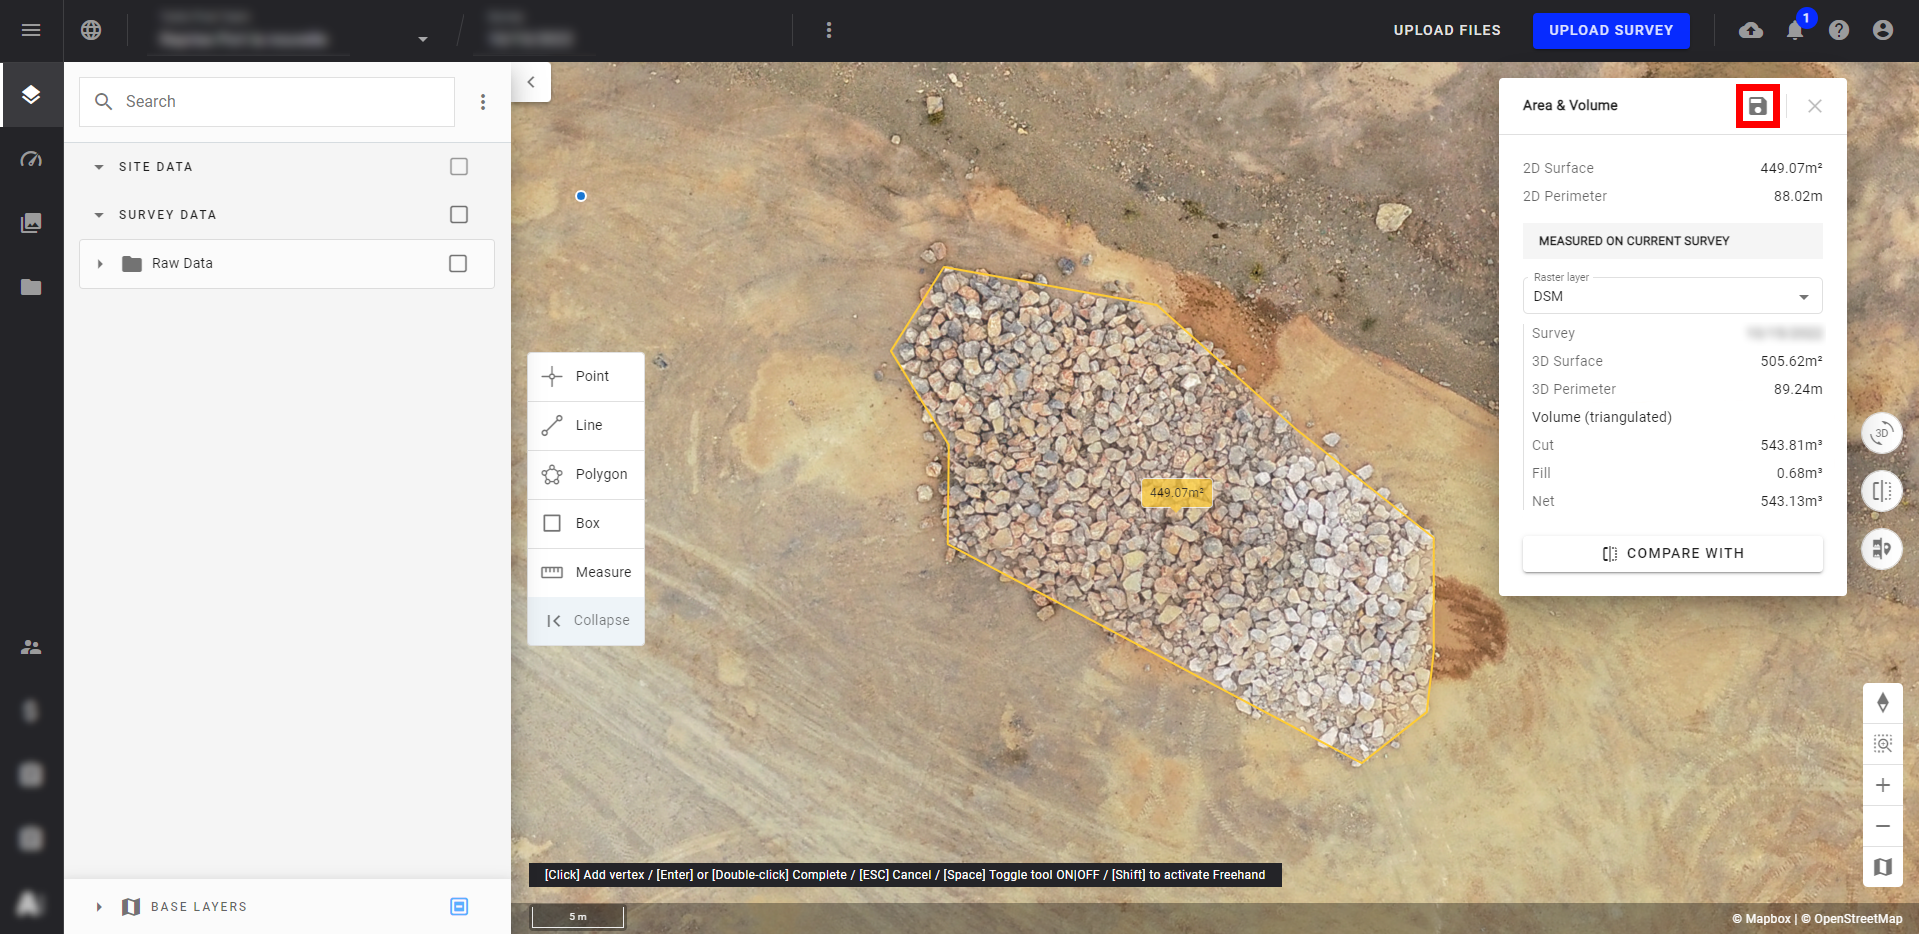
It is possible to save your measurement and transform it into an annotation by clicking on the save button (in red below). Once the annotation is created, it will be visible in the "Annotations" folder and several calculation methods will be available.
For more information, see Annotation Creation and Edition.
3.2 From a Polygon Annotation
This solution offers a wide choice of volume calculation methods detailed below.
Step 1 - From the layers tab in the in-site menu, select the desired base layer and zoom in on the area of interest.
Info
You can use the Digital Surface Model (DSM) or the Contour Line in order to delineate the calculation zone better.

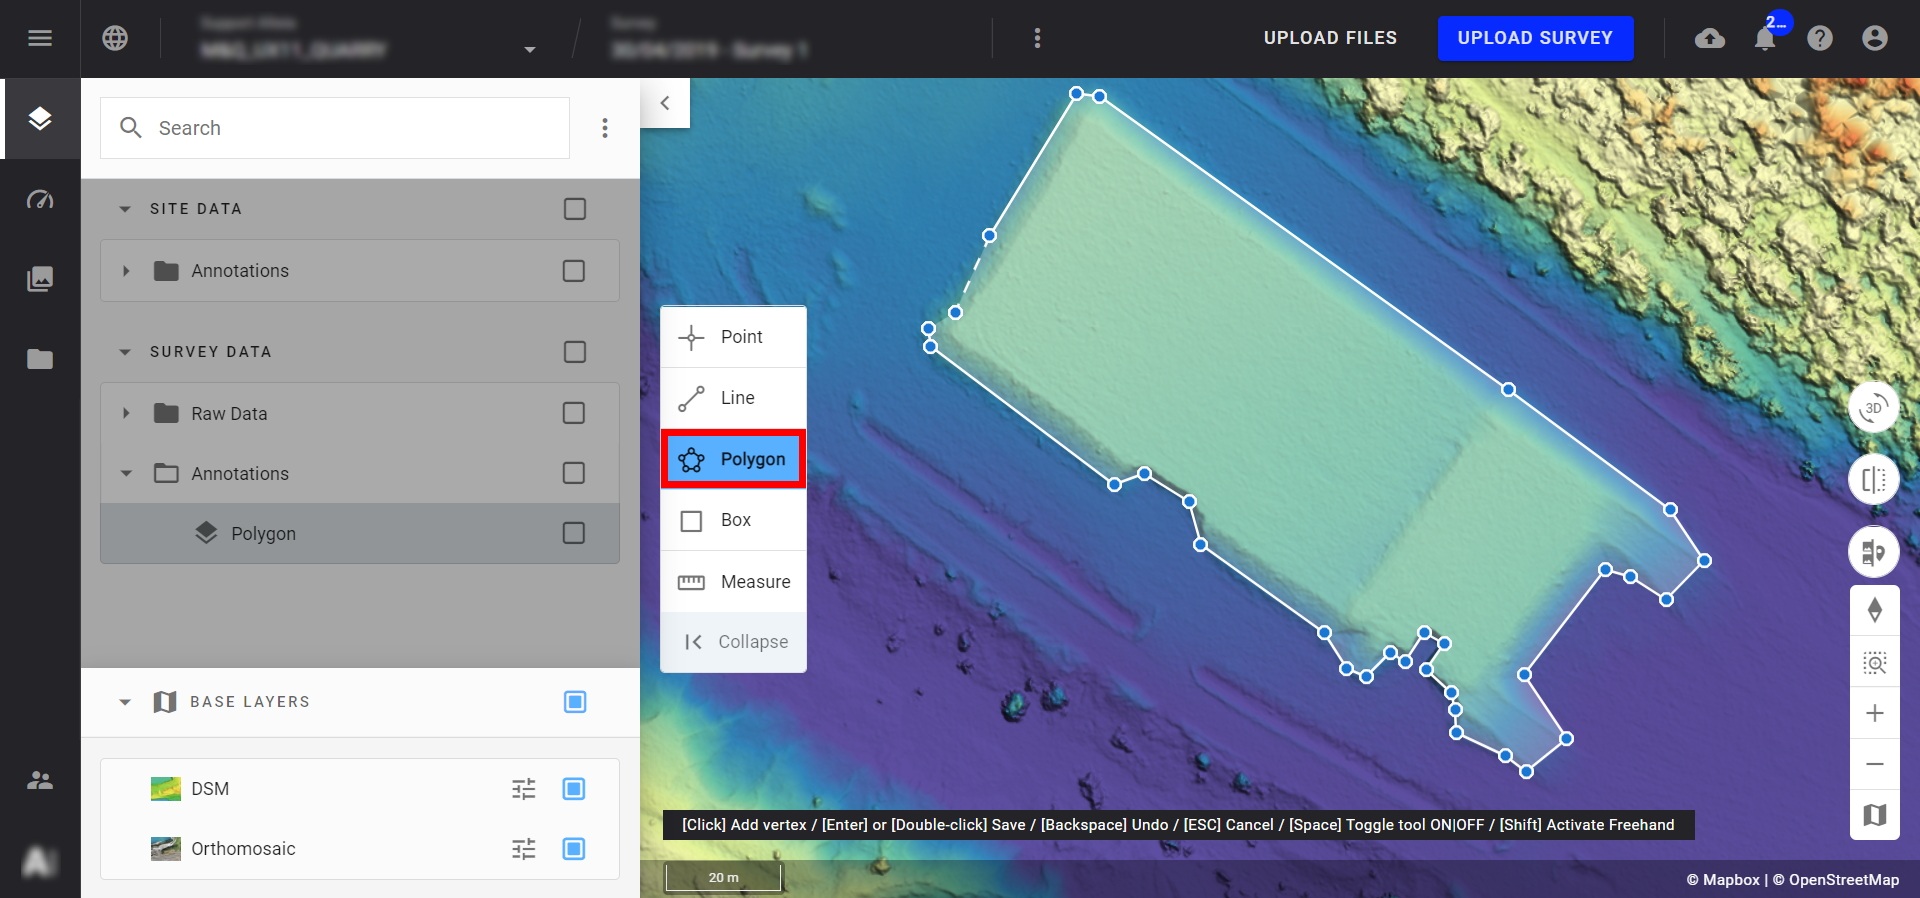
Step 2 - From the Annotation toolbar select the polygon icon (framed in red) and draw a polygon annotation onto your 2D layer.
Info
Cancel the creation of your polygon at any time by clicking on the ESC key on your keyboard.
Step 3 - Once the polygon is complete, double-click on the last point to save it.
Info
- Creating the polygon creates the contour (base) from which the volume will be calculated. This calculation is based on the elevation data contained in the DSM within the polygon's area.
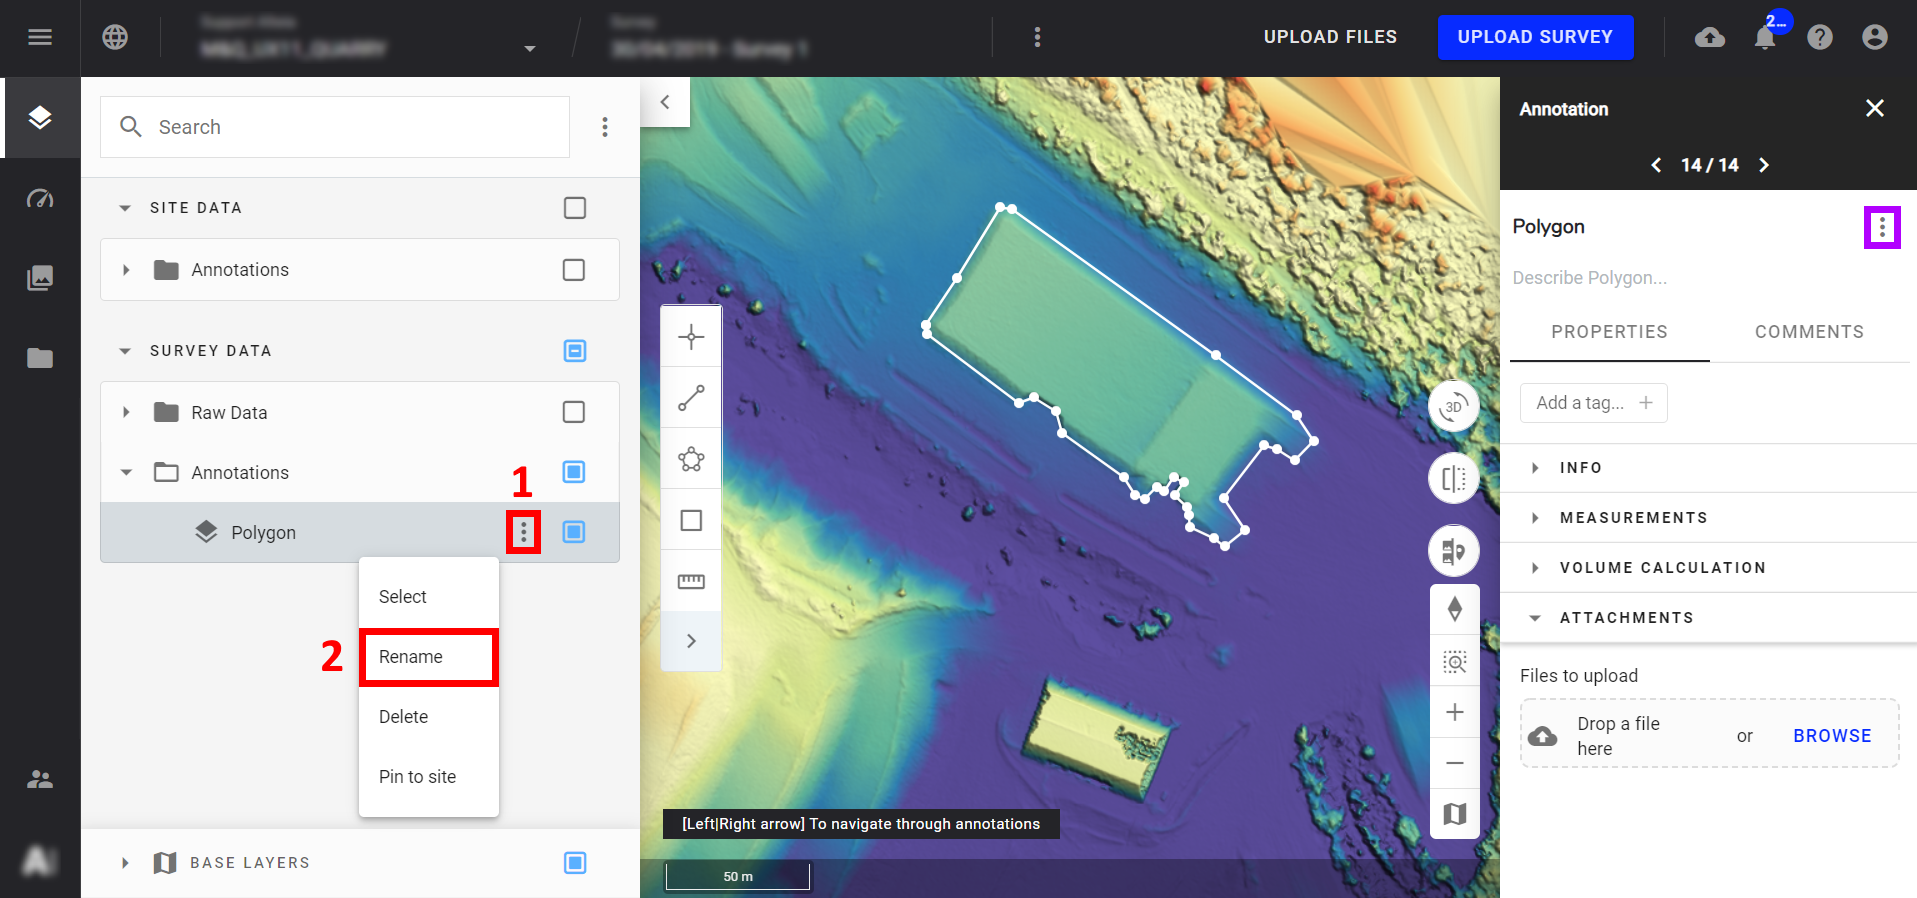
- Saving the polygon will automatically open an information panel on the right-hand side. Edit the name of the polygon by selecting the kebab menus framed in red or in purple (1), renaming It (2), and hitting the "ENTER" key.
- To reopen the information panel at any time, select the polygon from the map.
- You can also move your annotation to any file in the section of your choice (PROJECT DATA or SURVEY DATA), see Browsing and Arranging Layers.
Step 4 - Once these operations are complete, select "Volume calculations" from the information panel (framed in red below).

- The drop-down menu reveals the options "Source file" and "Method" (framed in purple above). On "Source file", select the Geotiff raster you want to use to calculate the volume (here the DSM from photogrammetry is used).
- Select "Method" to review the list of six options and the associated calculation method and requirements. Select the method for your calculation and the method description calculations, "Cut", "Fill", "Net", and "Lowest", will populate accordingly.
| Method Name | Example Image | Calculation Methodology | Used to |
|---|---|---|---|
| Lowest Point | 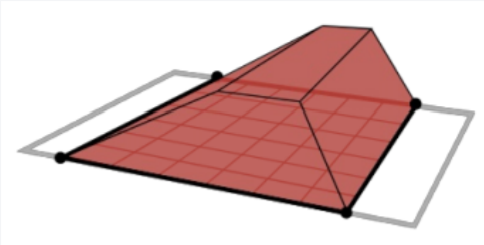 |
Calculates the volume between the surface model and a flat plane defined by the lowest point in the polygon. |
|
| Triangulated Surface | 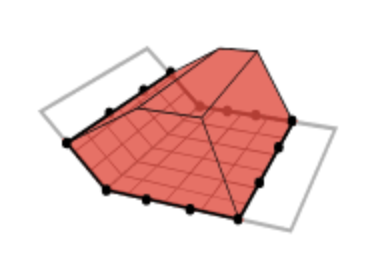 |
Calculates the volume between the surface model and an interpolated base surface based on the elevation of points on the polygon boundary. It only considers the elevation of the points that were created by the user to make the polygon and interpolates a surface according to those elevations. Within the polygon, every full volume above the surface is added to the cut value, while every empty volume beneath the surface is added to the fill value. |
|
| Best Fit Plane | 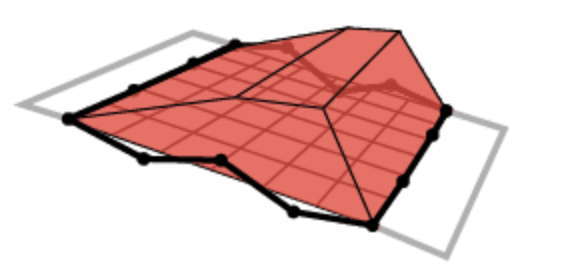 |
Fits a flat plane minimizing the distance from the selected points to the plane. |
|
| Configurable Z value | 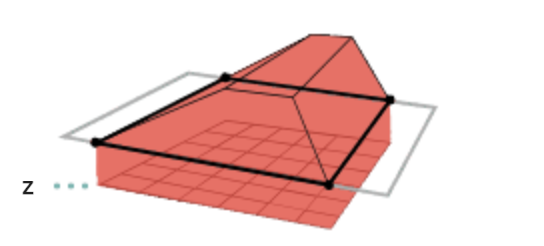 |
Calculates the volume between the surface model and the selected polygon based on a flat-plane offset. |
|
| Constant thickness | 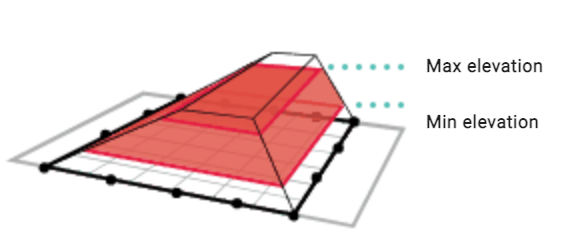 |
Calculates the volume between two flat planes based on entered elevations. |
|
| Differential | .png) |
Calculates the volume between the surface model and another survey surface or site surface. |
|
4. Results
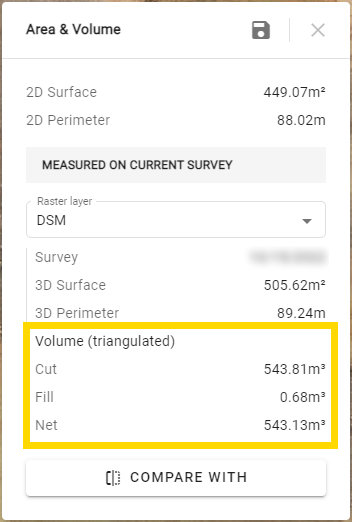
Regardless of the calculation method used, 3 types of results are displayed:
- Cut: Corresponds to the amount of material present within the defined perimeter (what there is potentially to remove).
- Fill: Corresponds to the amount of void present within the defined perimeter (what there is potentially to fill).
- Net: Corresponds to the difference between the "Cut" and "Fill" measurements.
