Project Info Panel
1. Introduction
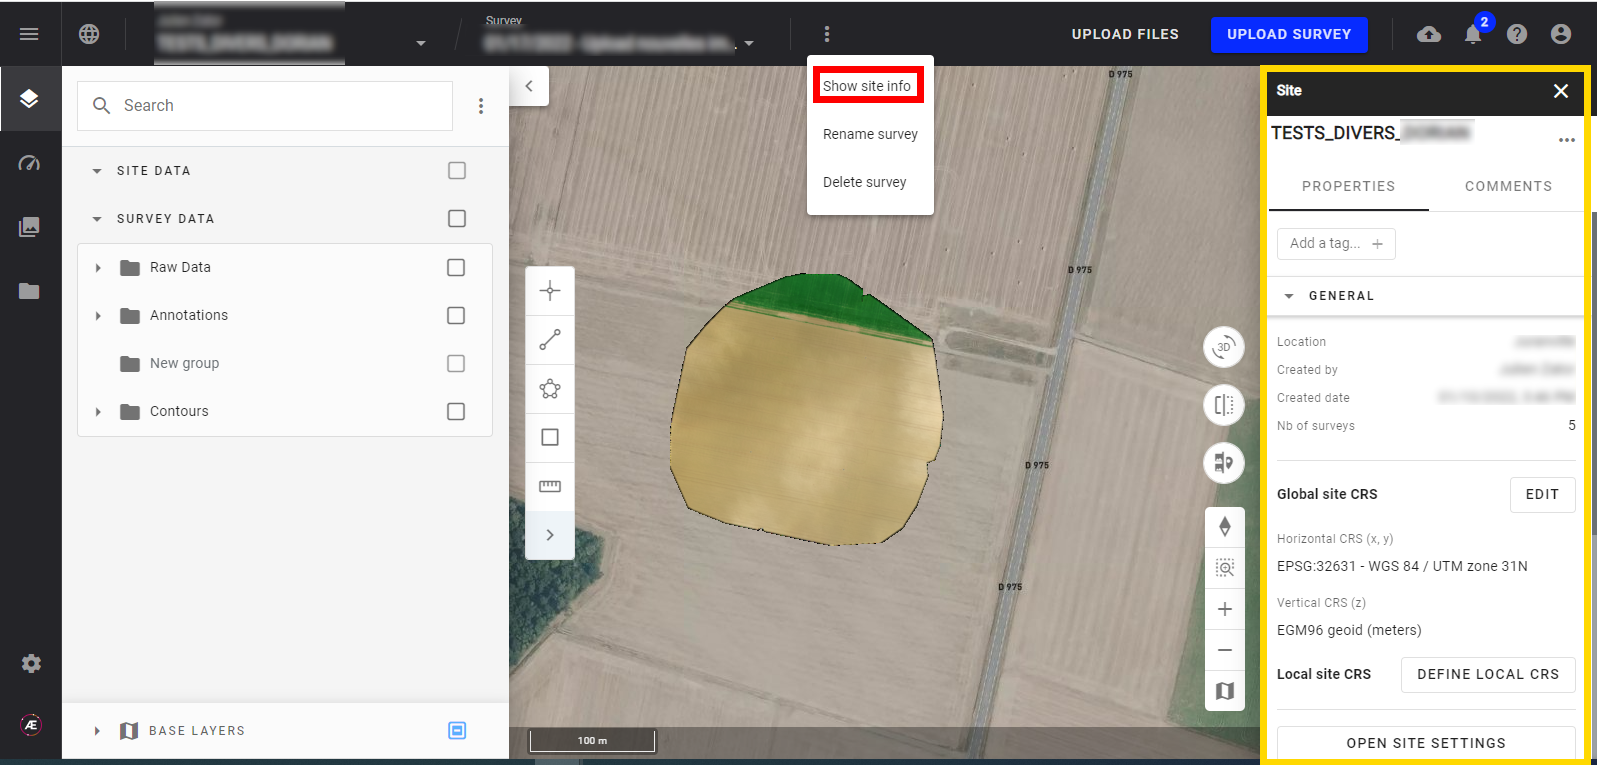
The Project Info Panel displays the basic information about the Project such as the location, the creator's name, and the creation date. The Project Info Panel is also where you can access advanced settings such as units and photogrammetry settings.
2 . Access to Project Info Panel
There are two ways to access the info panel:
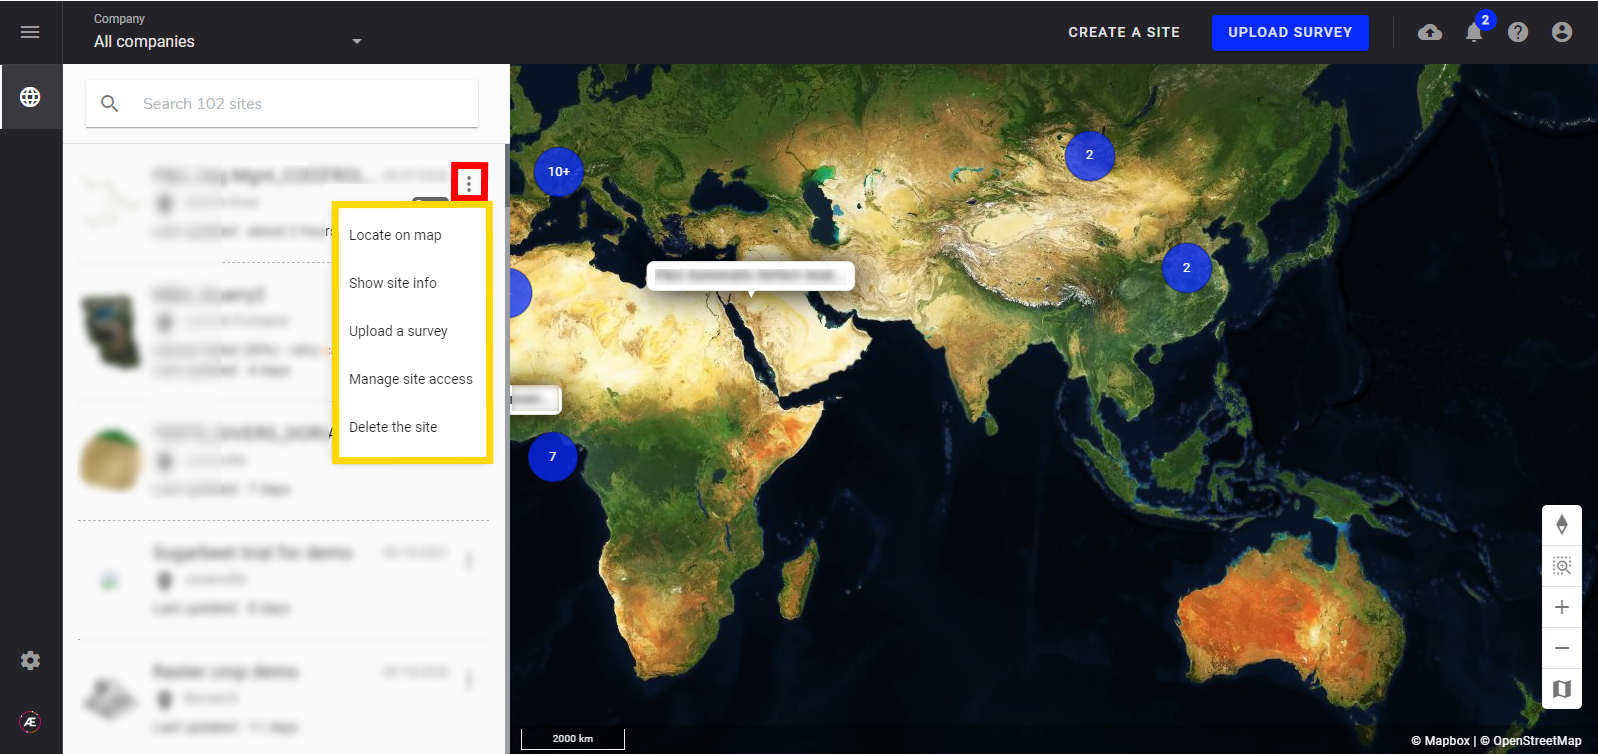
- Click on the three dots on the desired Project while you are on the project dashboard.
- Or while viewing a project, click on the 3 dots menu in the top menu.
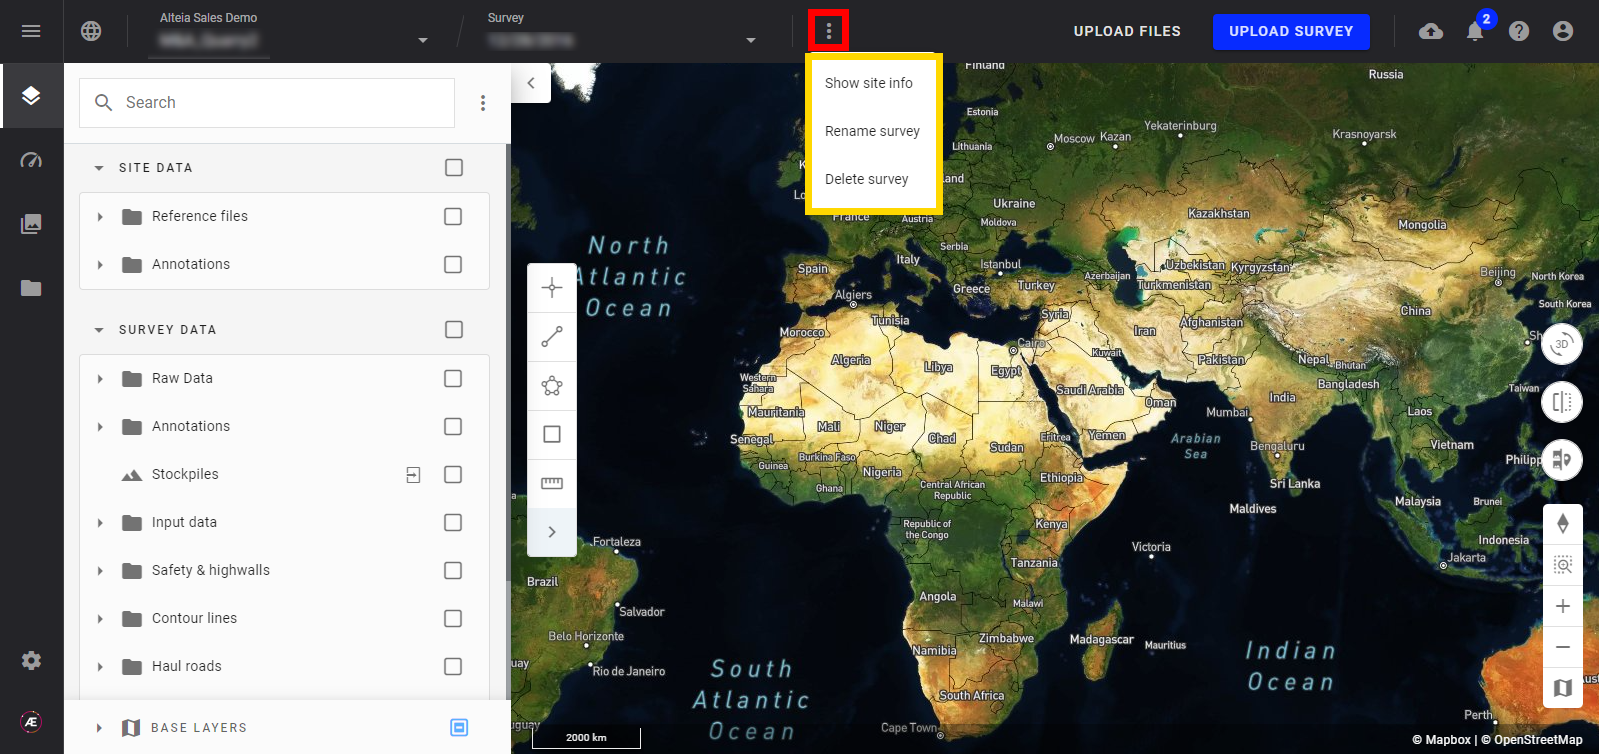
- For both cases, click on "Show Project Info".
3. Edition
Several settings can be modified on this project info panel. The project's name can be changed, as well as comments and tags.
3.1 Rename the project
Step 1 - Click on the 3 dots near the name of the project, and a menu is displayed.
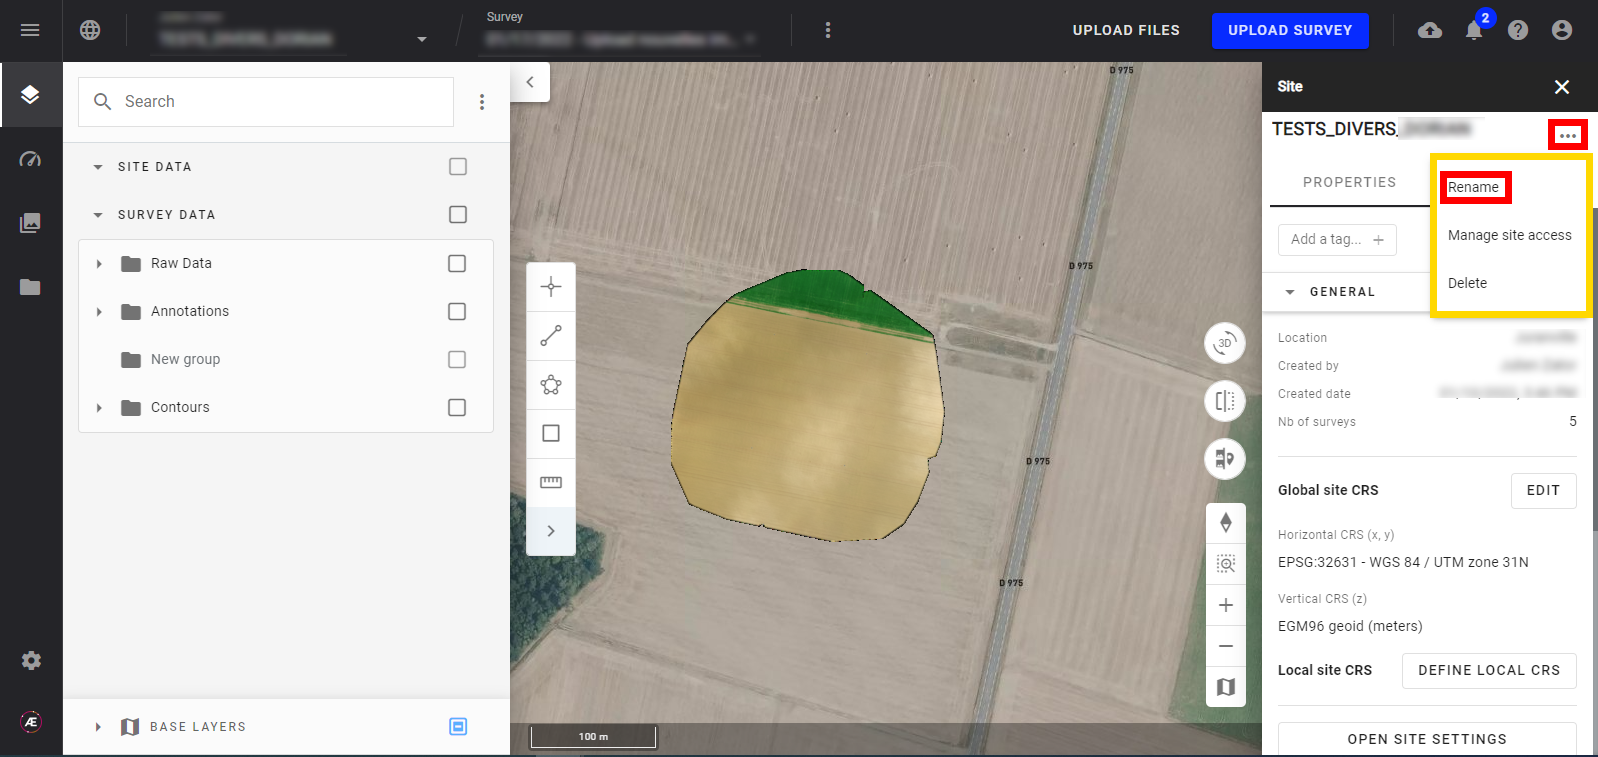
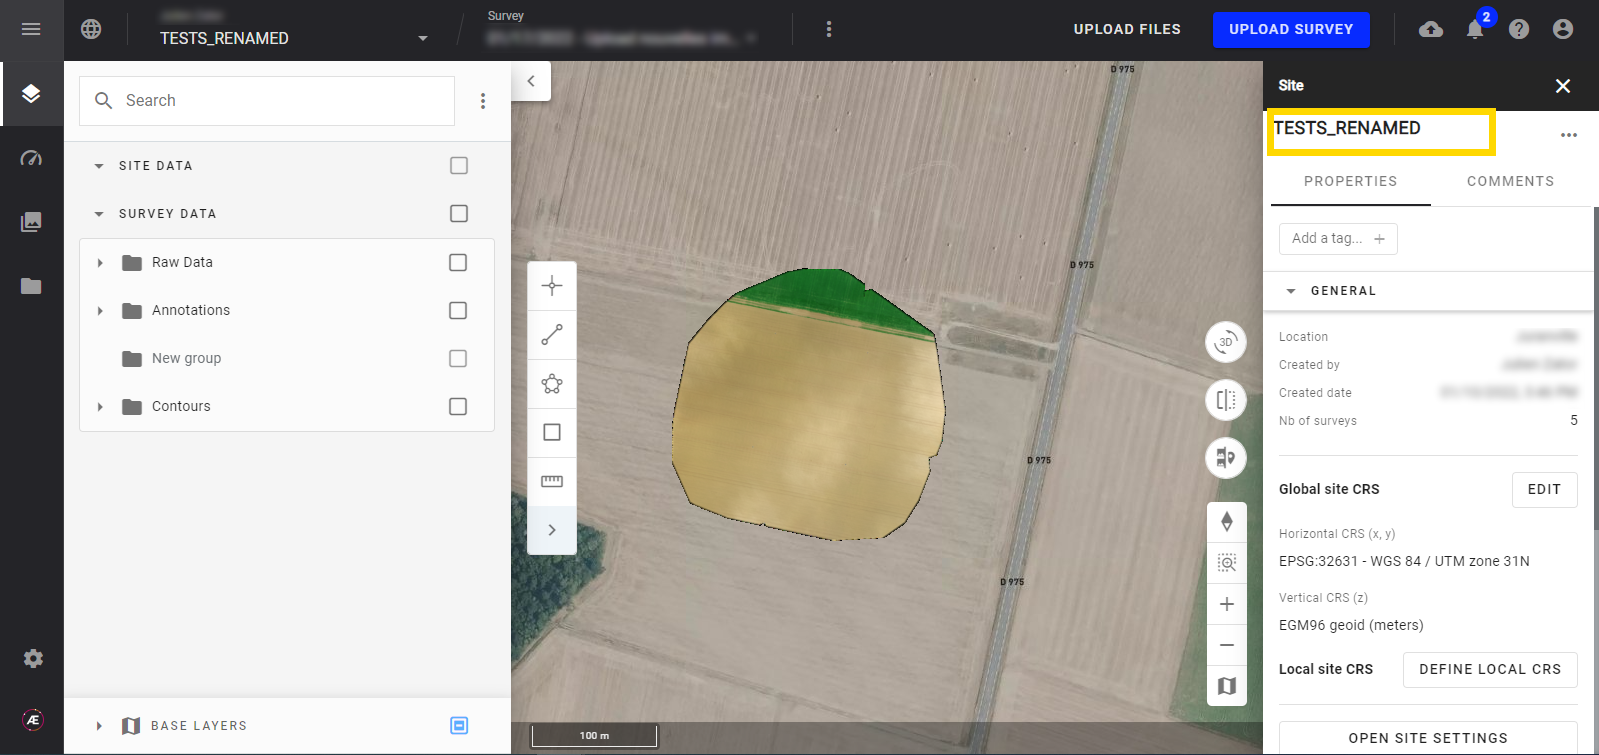
Step 2 - Enter a new name for the project. Validate by clicking outside the name field or using Enter key on the keyboard.
3.2 Add Comments
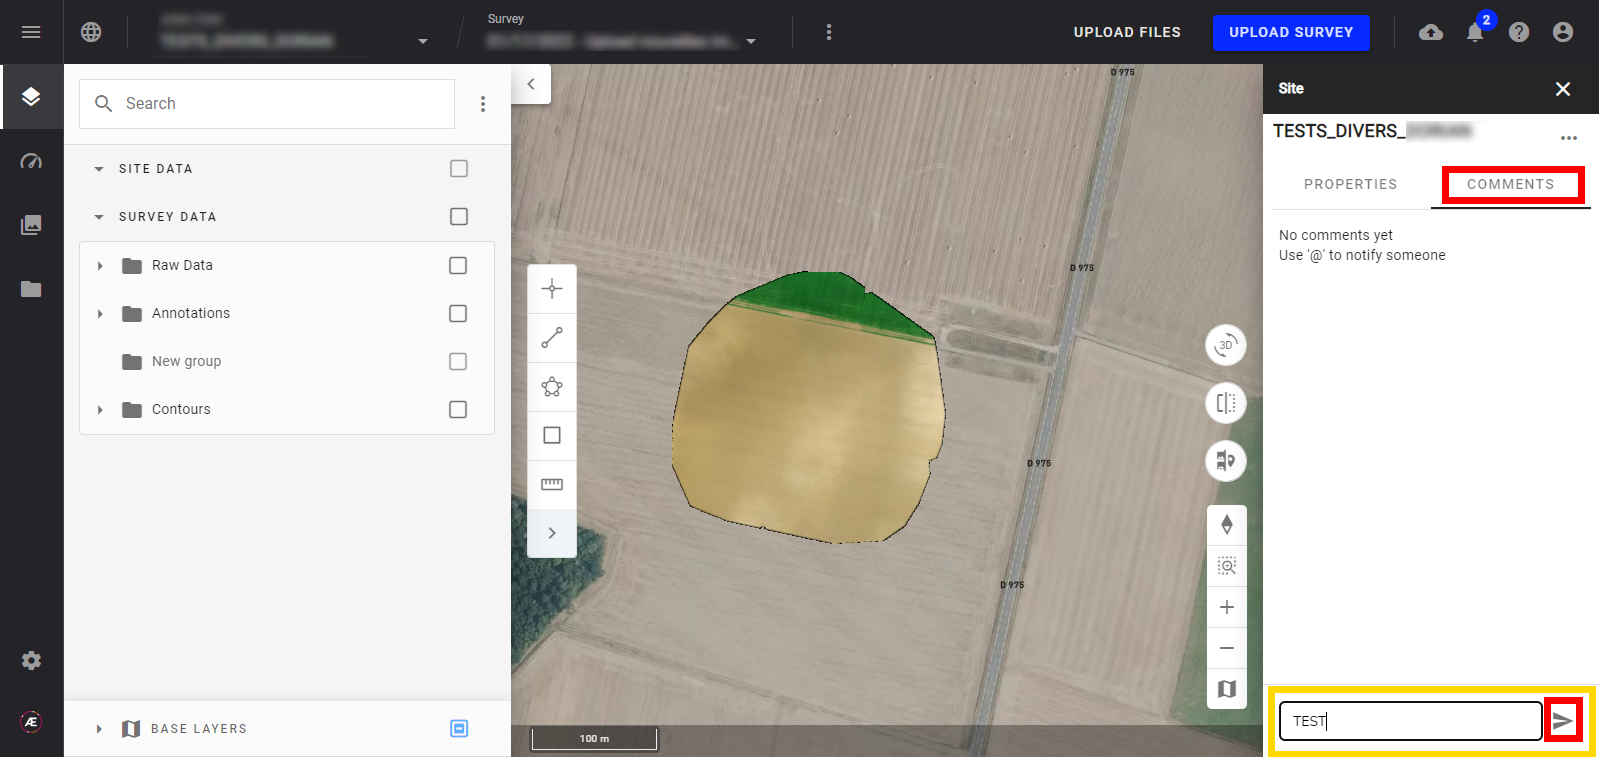
Step 1 - Click on the "COMMENTS" section of the Project Info Panel.
Step 2 - Write a comment and click on the send button.
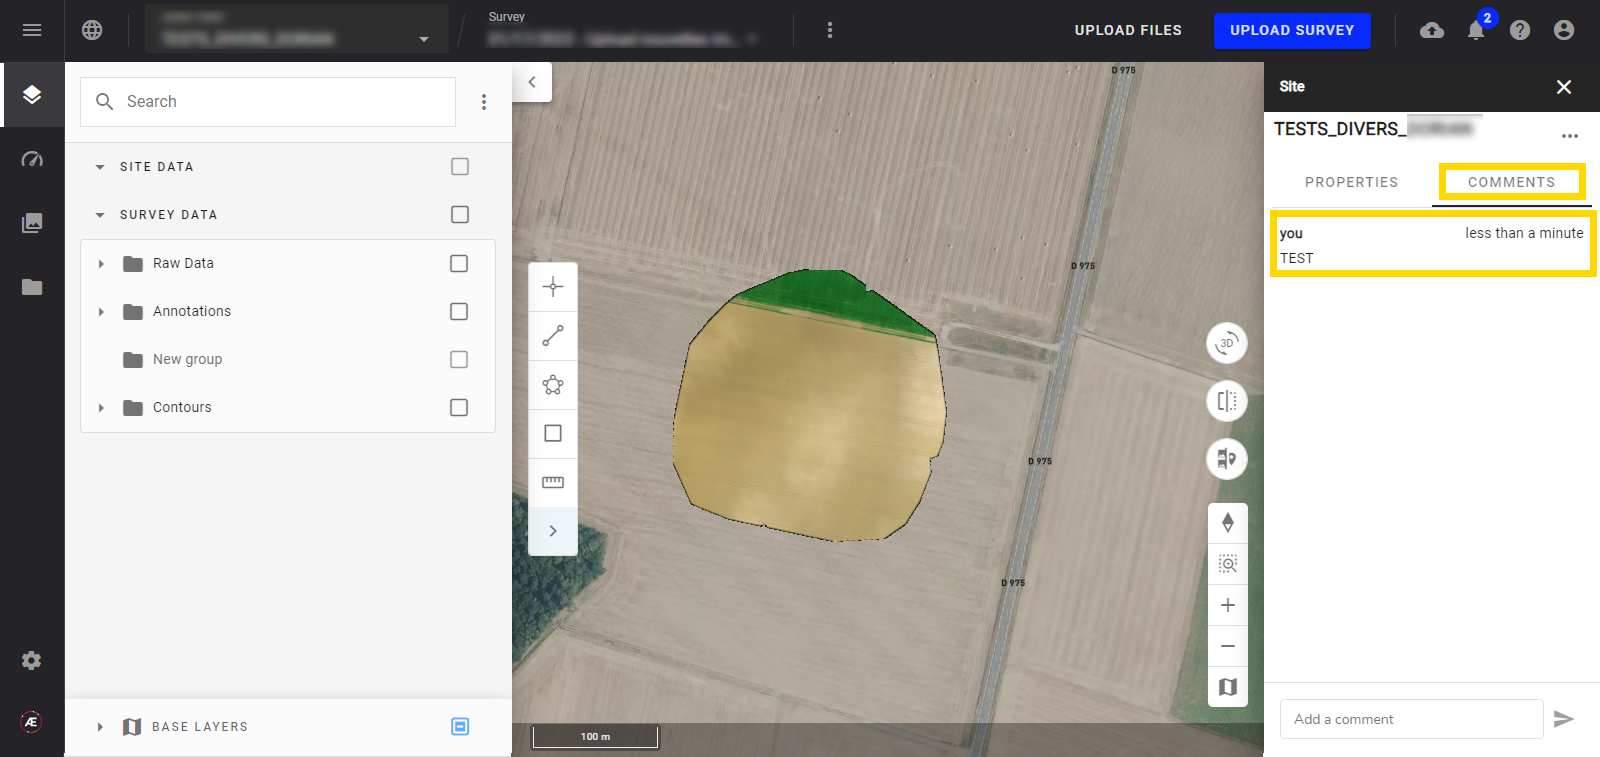
Step 3 - The comment is displayed.
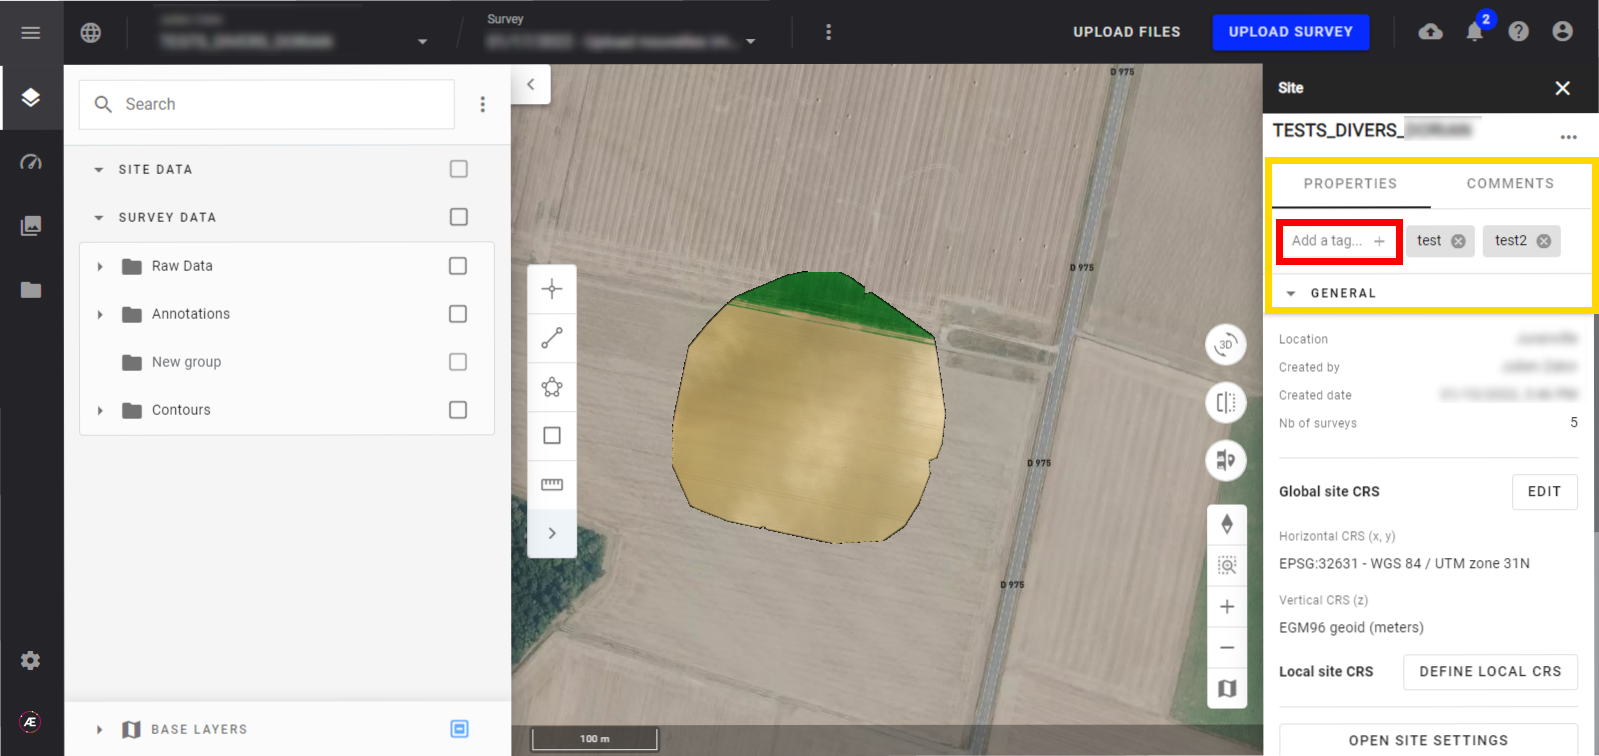
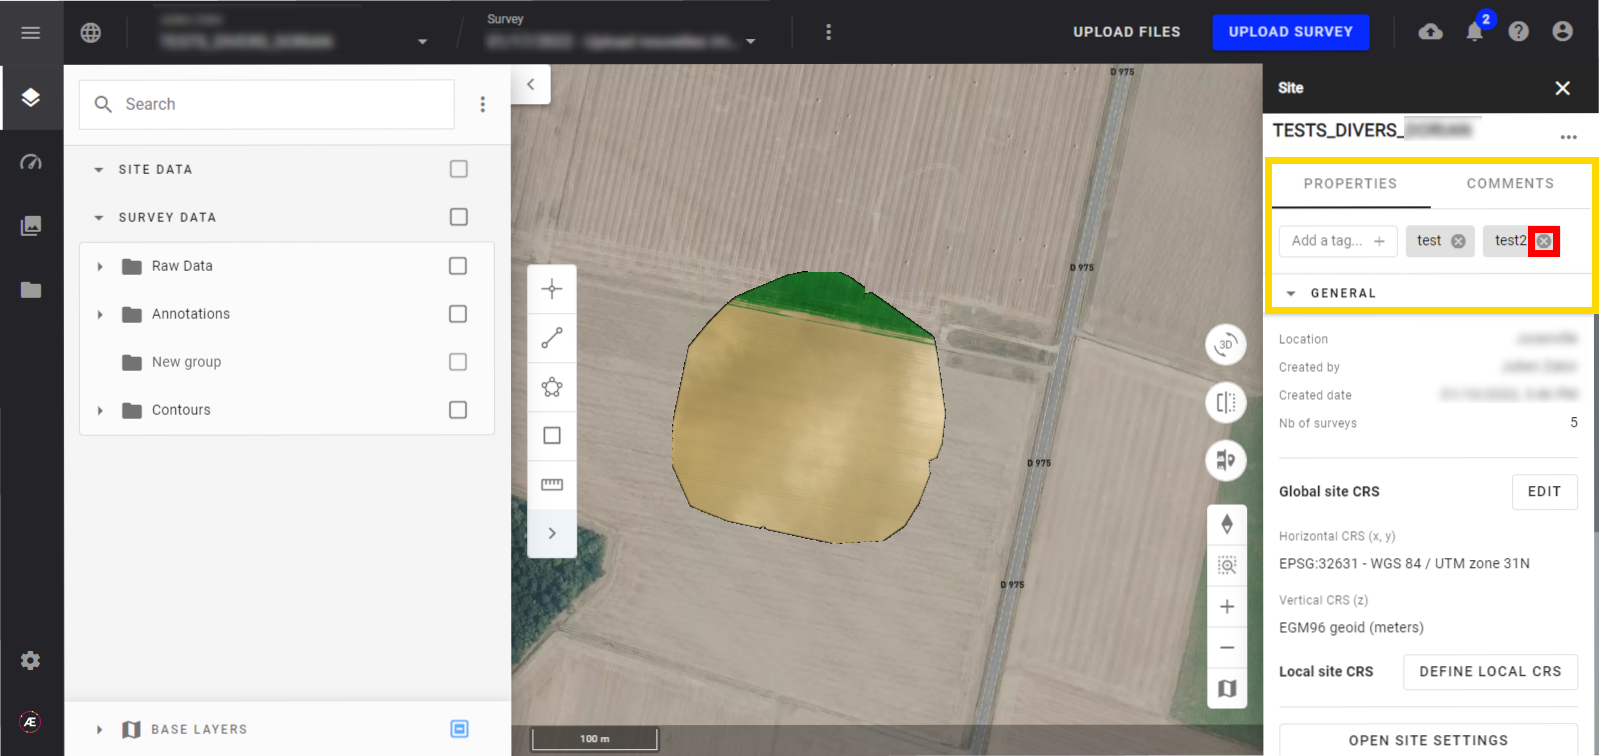
3.3 Add/delete a tag
Step 1 - On the Project Info Panel enter a tag in the field Add a tag.
Step 2 - Use Enter key on the keyboard to validate the tag.
Step 3 - Click on the cross in the tag to delete it.
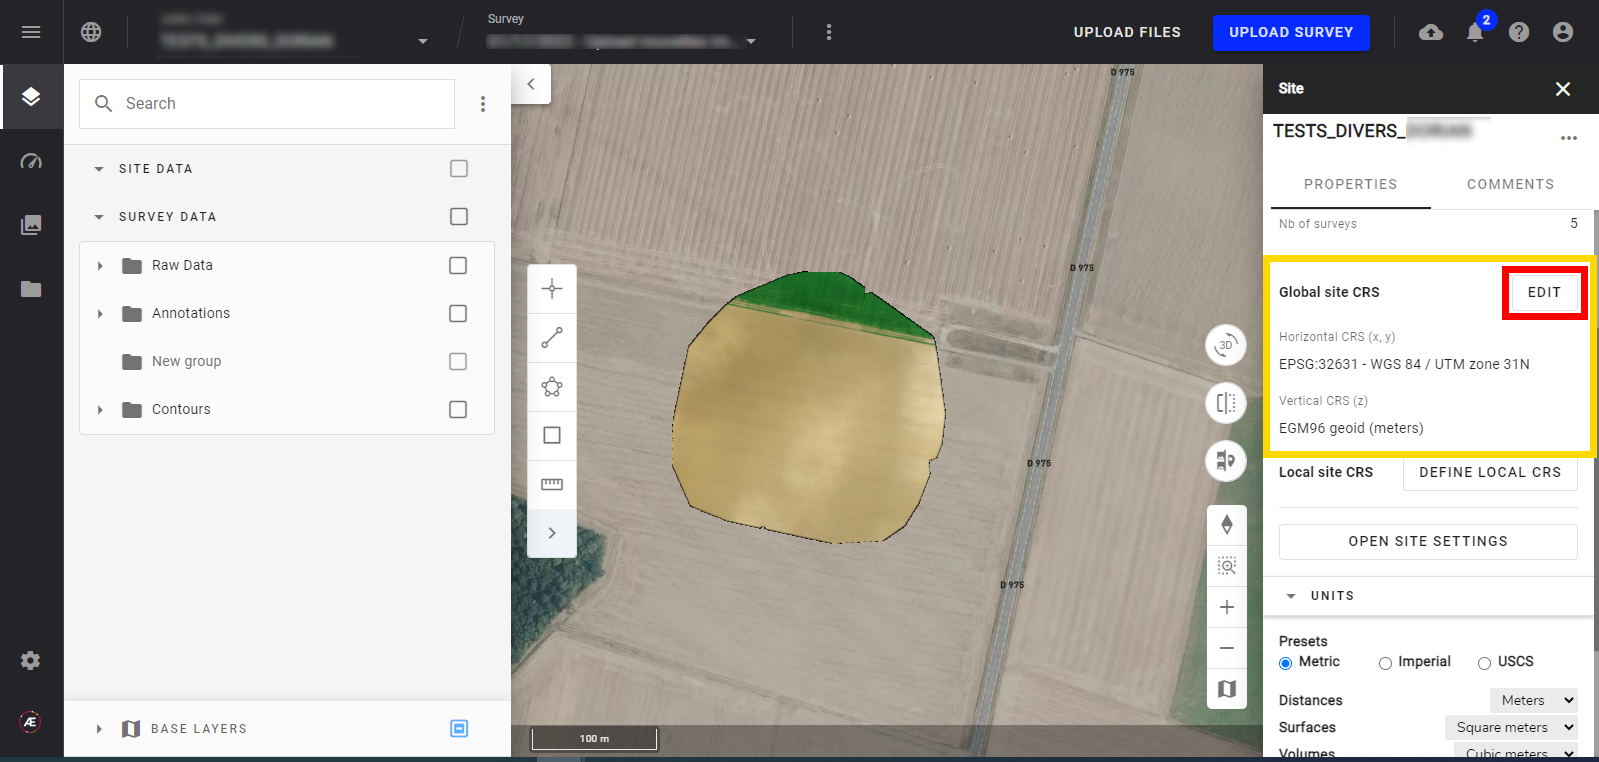
3.4 Edit Global Project CRS
Scroll down in the Project Info Panel to view the Global project CRS section.
Click "EDIT" to edit the global Coordinate Reference Systems (CRS).
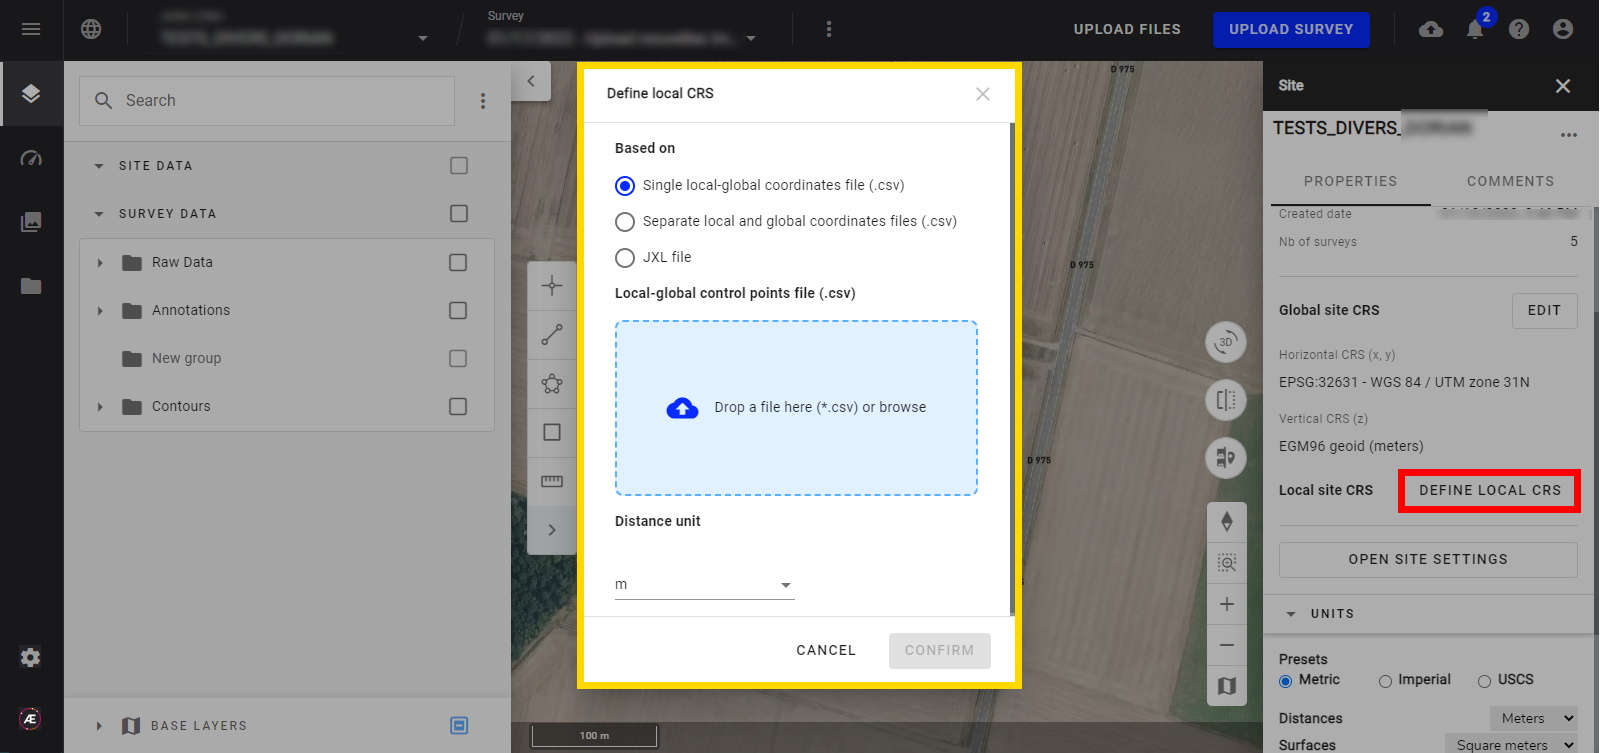
3.5 Define Local Project CRS
Step 1 - Click on "DEFINE LOCAL CRS" to open the local CRS settings windows.
Step 2 - Consult Local Coordinates about local project CRS.
3.6 Open Project Setting
Step 1 - Click on the "OPEN PROJECT SETTINGS" to open the project settings windows.
Step 2 - Consult the Project Settings for Mines & Aggregates about the settings (for mines, and aggregates projects only).
/worksite-management/site-settings
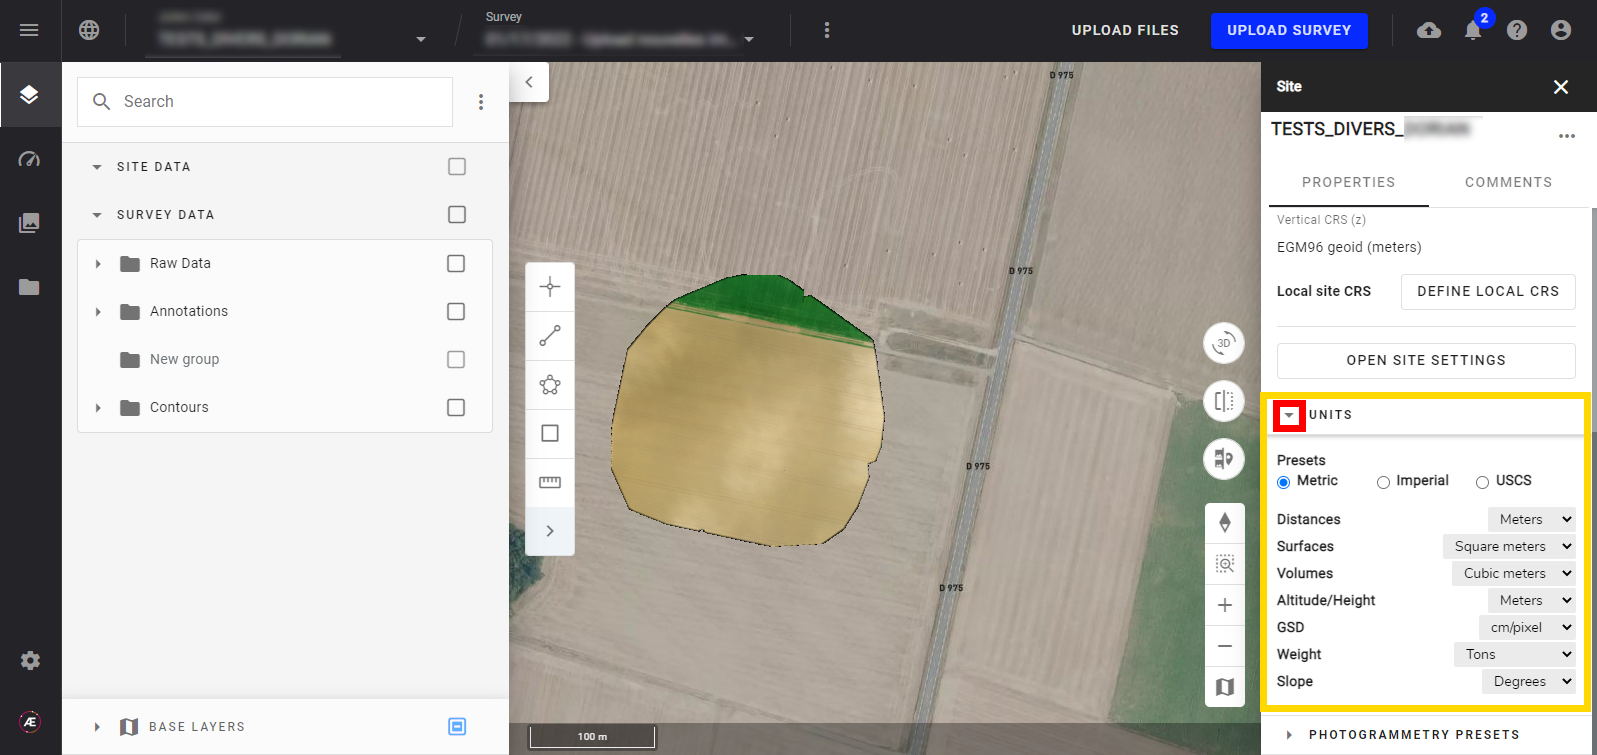
3.7 Units
Step 1 - Click on the arrow to display the units menu.
Step 2 - Select the unit system.
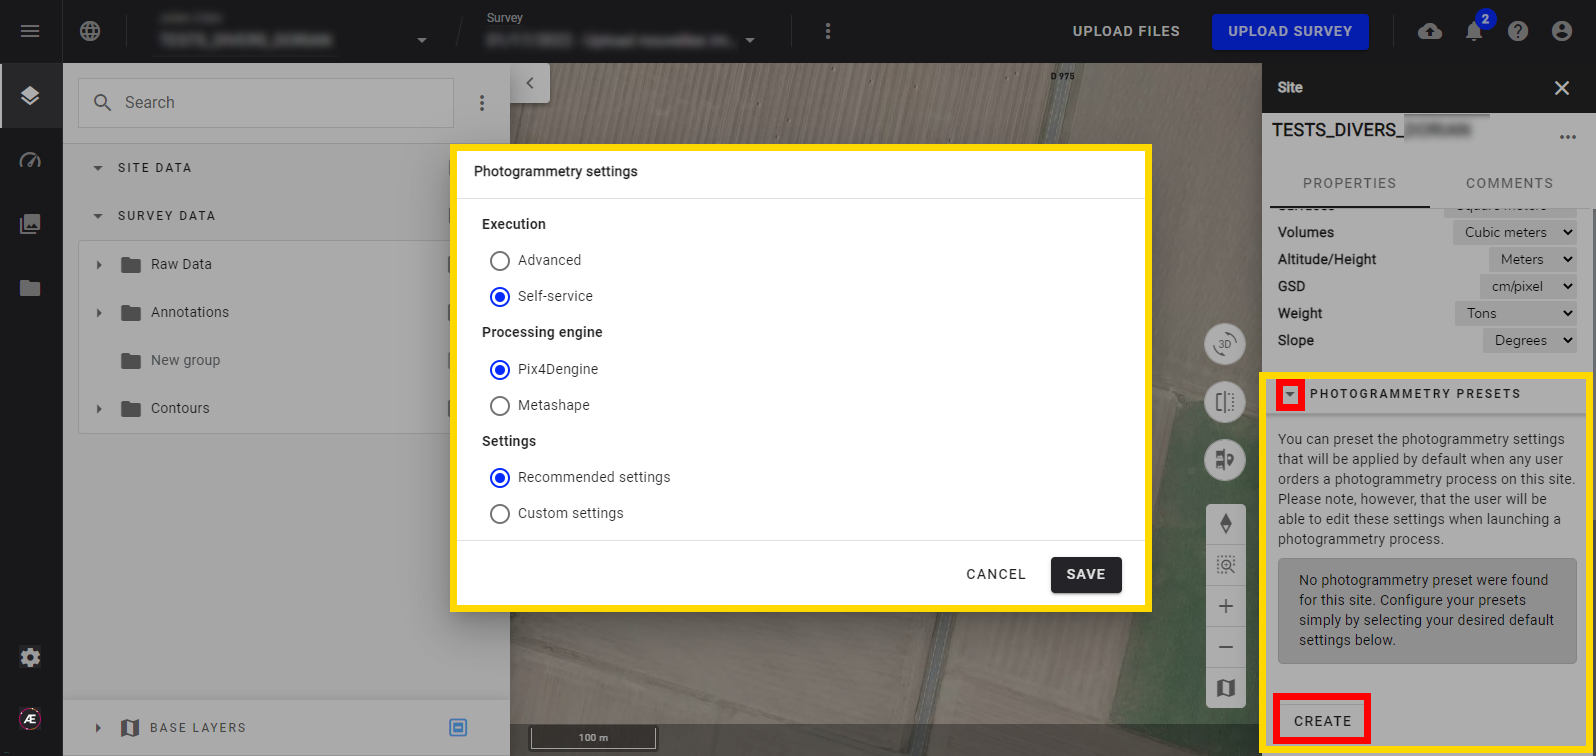
3.8 Photogrammetry presets
Step 1 - At the bottom of the project info panel, click on the arrow to display the photogrammetry presets menu.
Step 2 - Click on the "Create" button to open the photogrammetry presets window.
Step 3 - See Photogrammetry Engines and Options for more information on photogrammetry options.