

Upload Survey
1. Description
This article describes how to “UPLOAD SURVEY” in Aether.
The "UPLOAD SURVEY" button creates a survey based on a pack of raw images also named image dataset.
Only User, Operator, and Manager roles can create a survey. To learn more: Account and User Roles Management.
As for Project Creation, a survey can be created from the home page or an opened project. The new survey needs to be attached to one of the companies available.
Please note that it is also possible to create a new survey from a simple orthophoto image. For this, please refer to the article: Manual File Upload.
2. Inputs
| Inputs | Description |
| Image dataset | A set of minimum 5 images |
| CSV (optional) | file containing metadata |
3. Workflow
3.1 Project choice and survey name
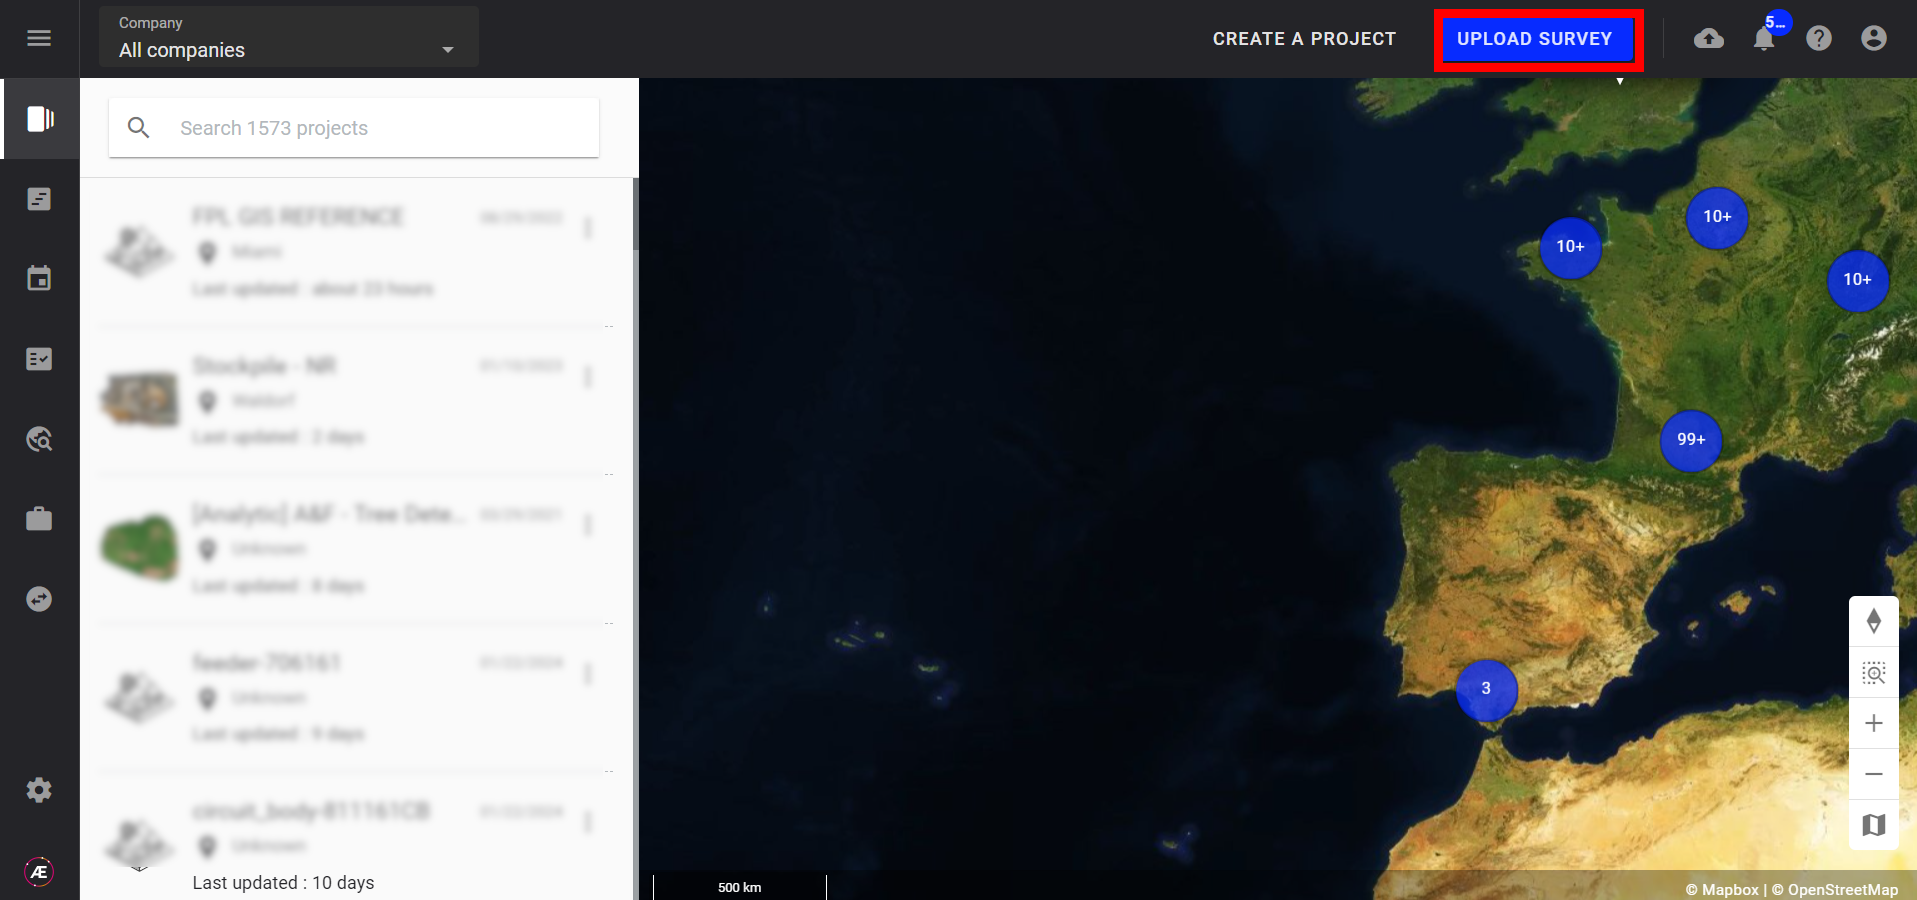
Step 1 - Click on "UPLOAD SURVEY".
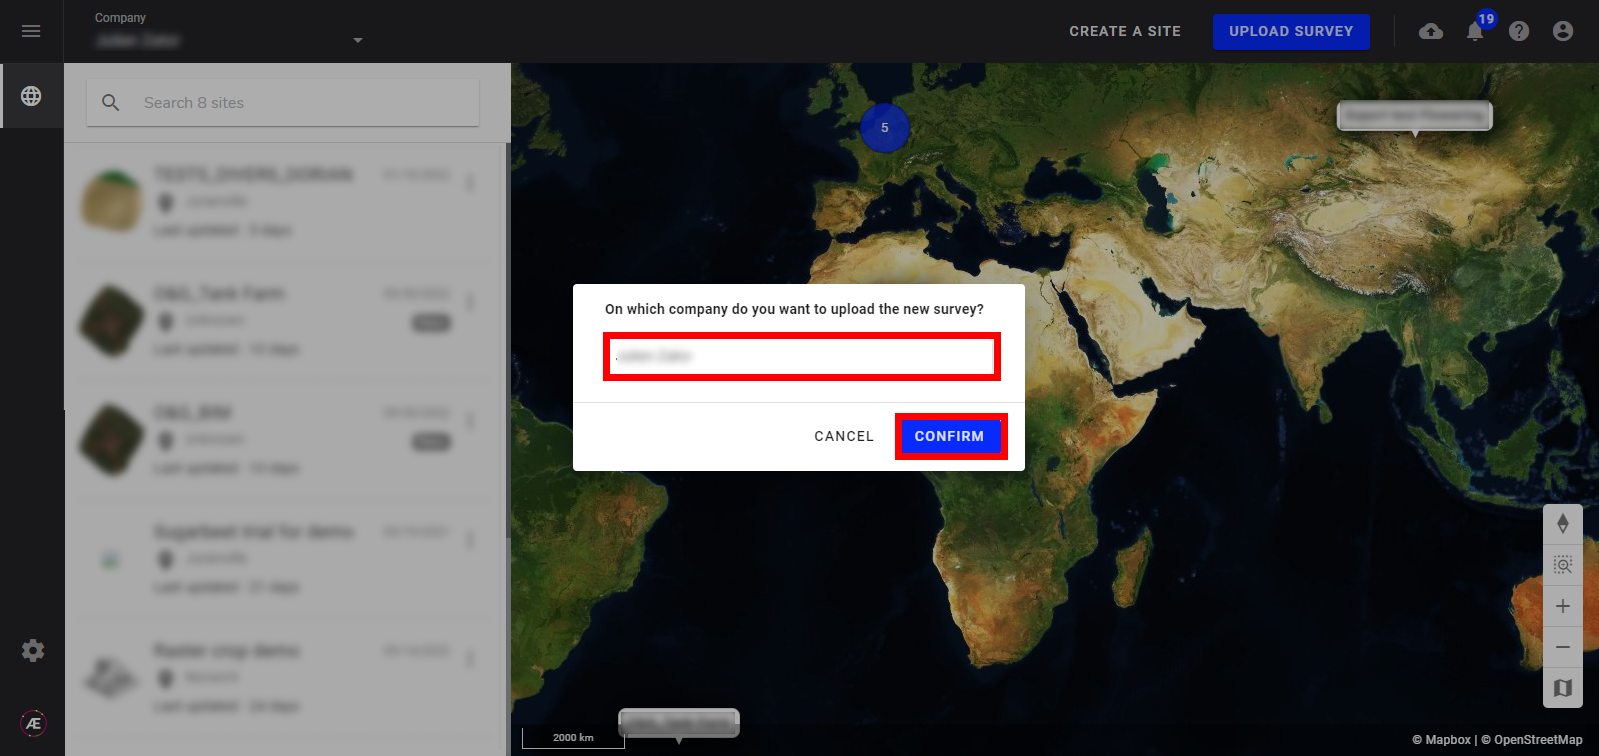
Step 2 - Select and confirm the company to attach the survey to.
Info
This step is available if there is no company selected before step 1. In case of the company was already selected before step 1 the pop-up is already filled with the company name.
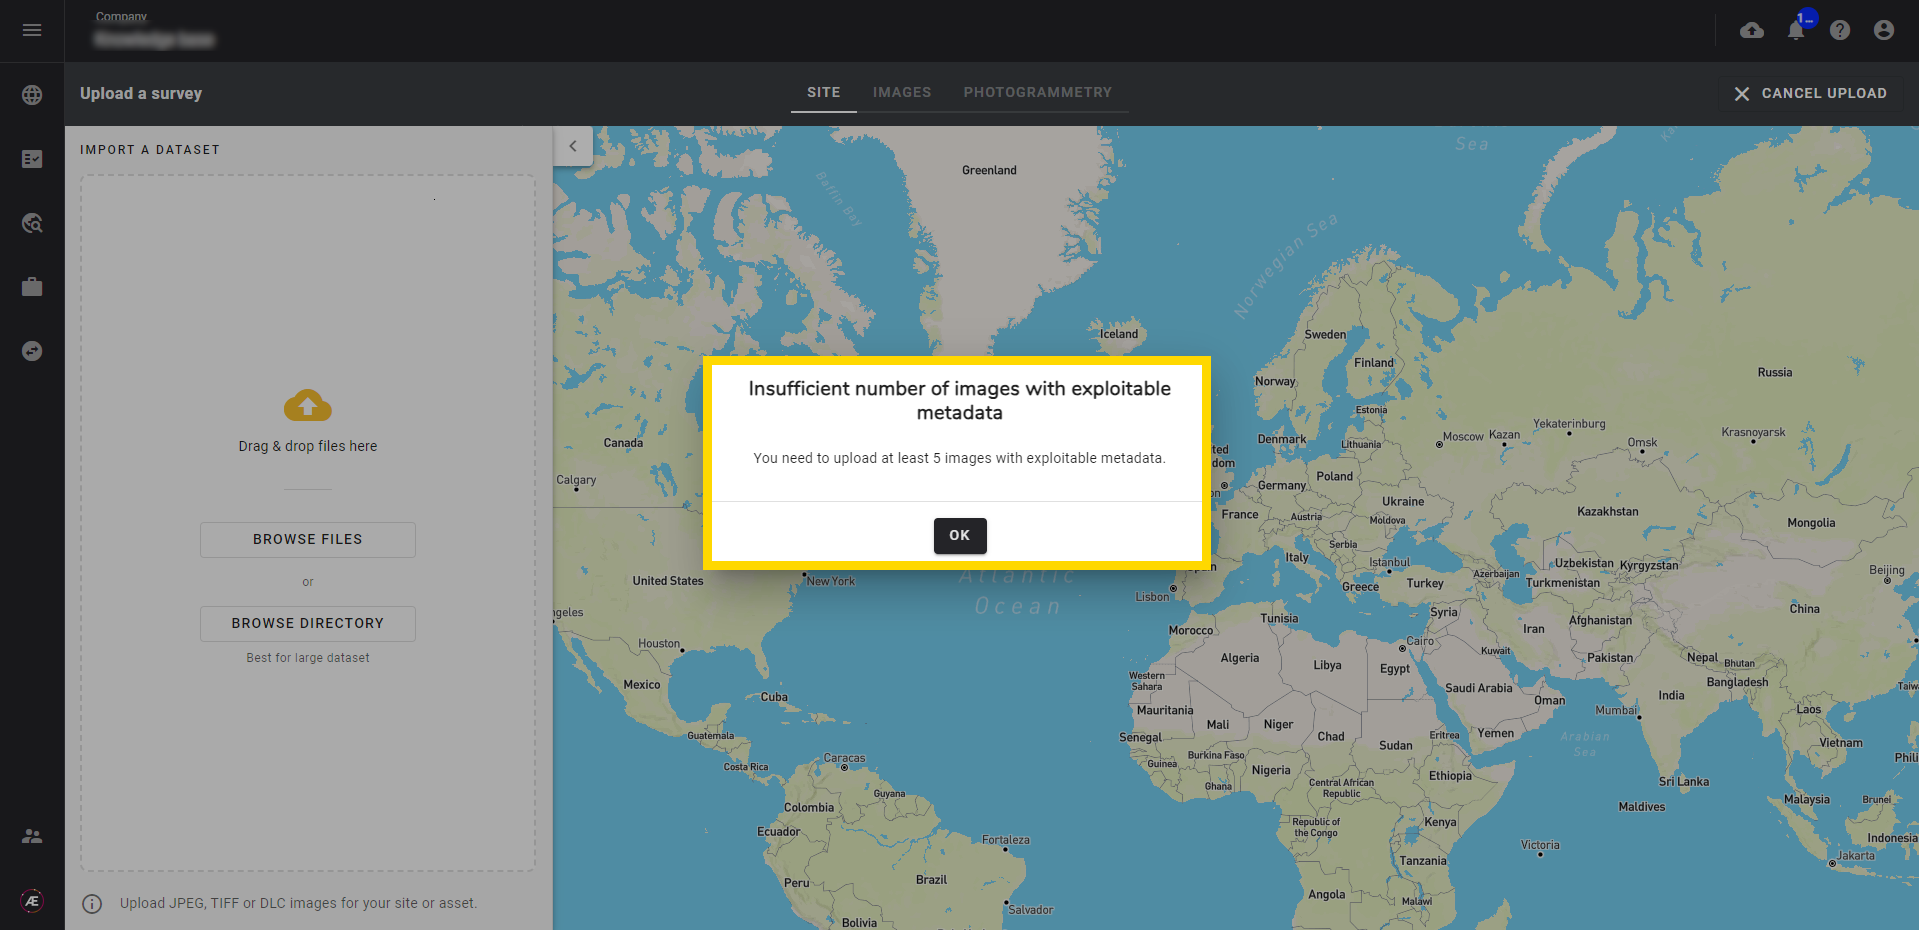
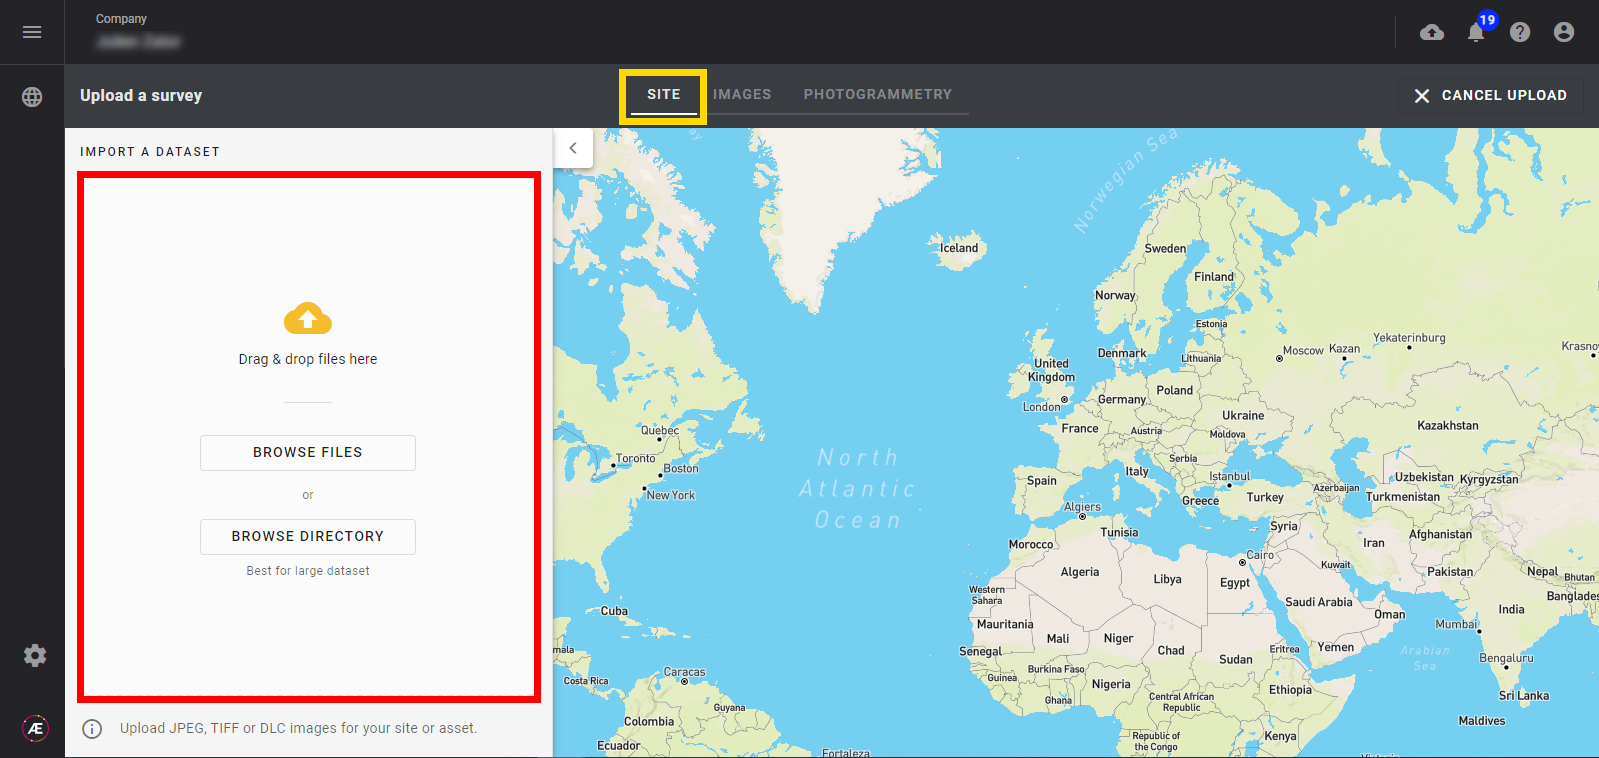
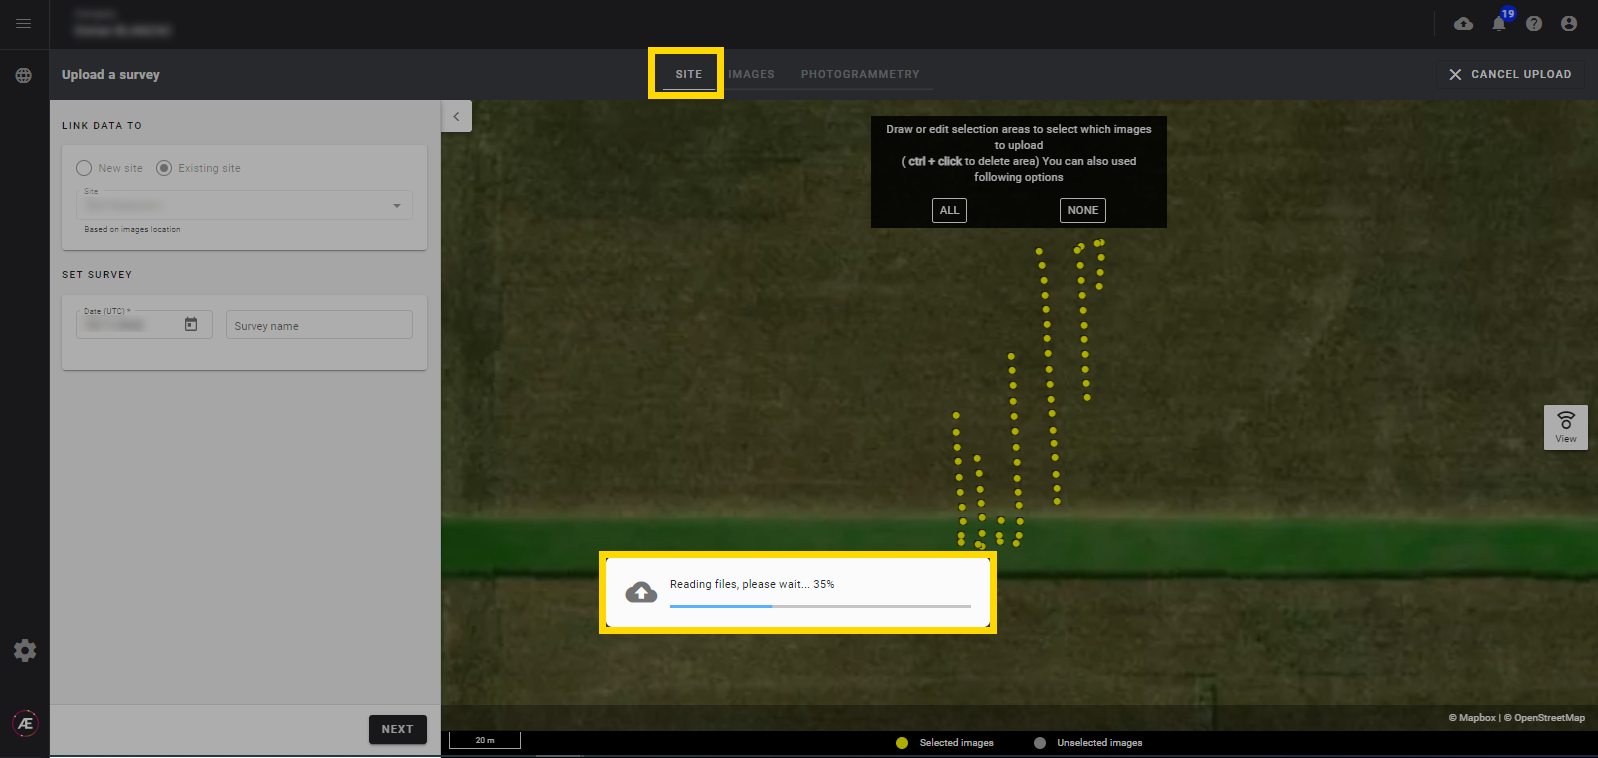
Step 3 - Drag and drop or browse the dataset (5 images minimum for a dataset). And patient until the end of the upload.
Info
- If the dataset is compressed (.zip file), decompress it before and drag and drop the files.
- A pop-up is displayed when the dataset doesn't contain 5 images minimum with exploitable metadata
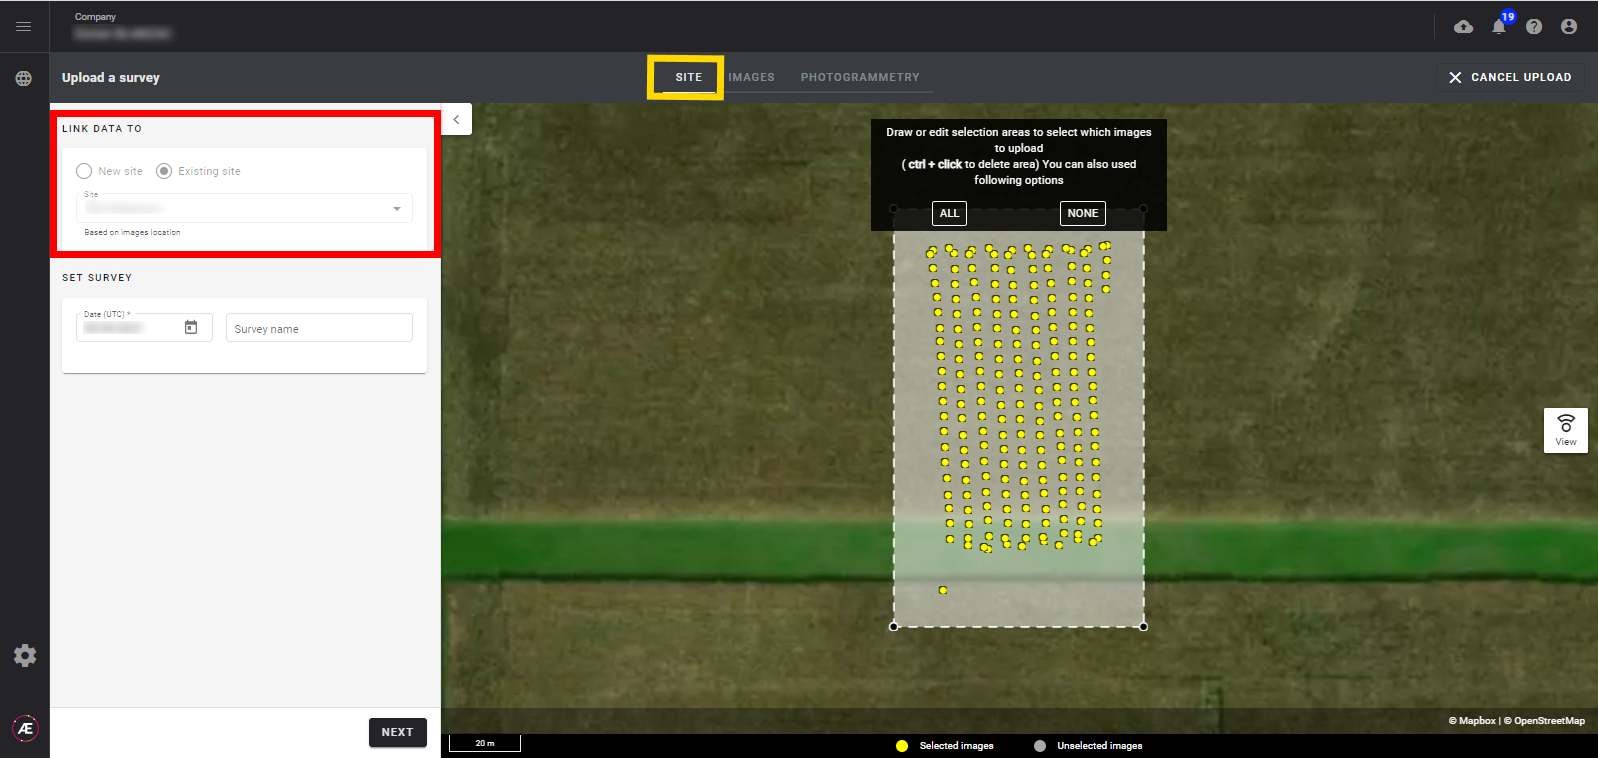
Step 4 - Link the survey to a "New project" or to an "Existing project".
Info
At this stage, a project may already be selected if the downloaded dataset is added to an existing project. Using the geolocation metadata, Aether selects the corresponding existing project.
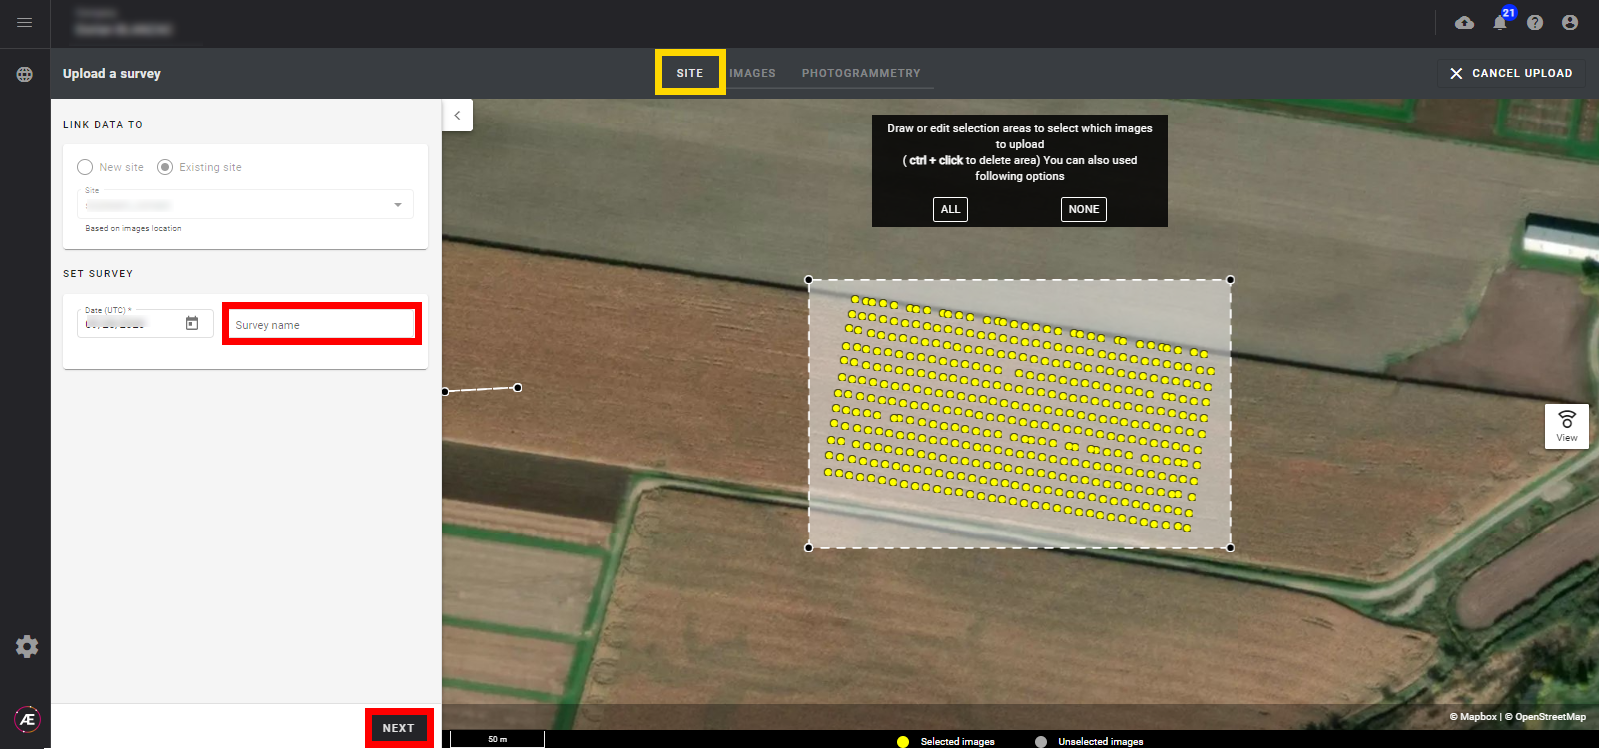
Step 5 - Name the survey and click on "NEXT".
Info
The survey's date is configurable (the date of the data collection by default).
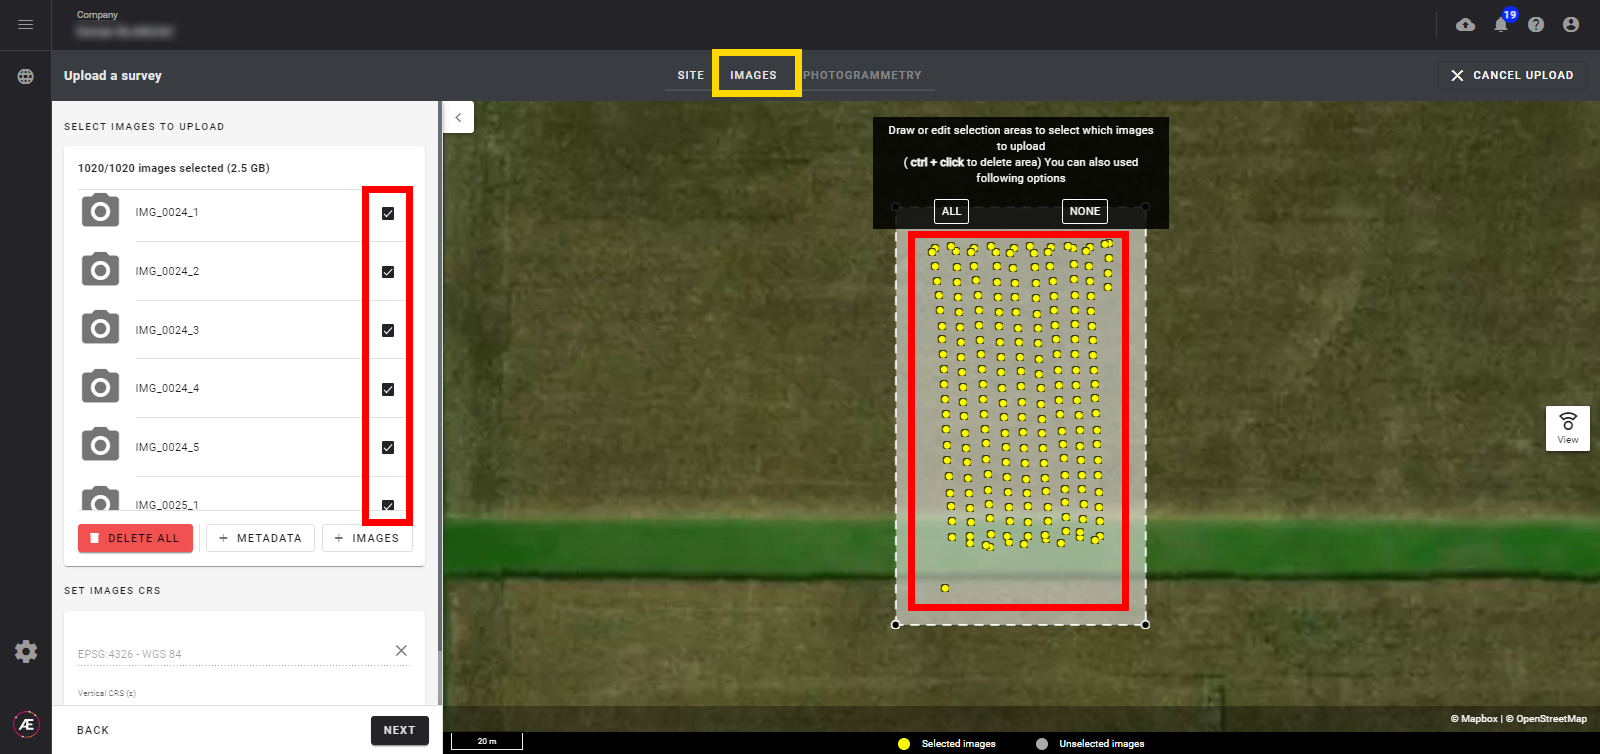
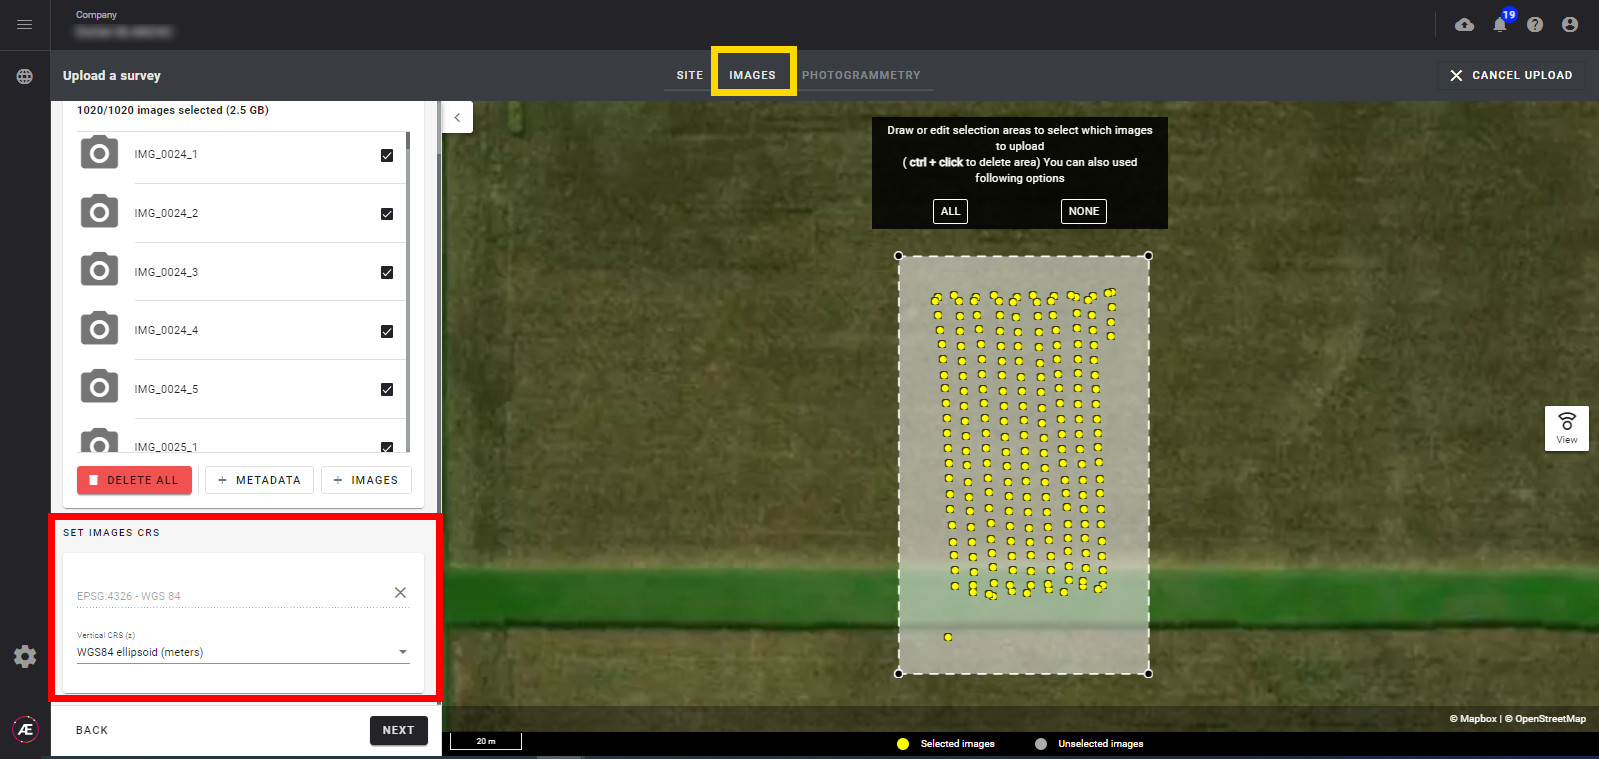
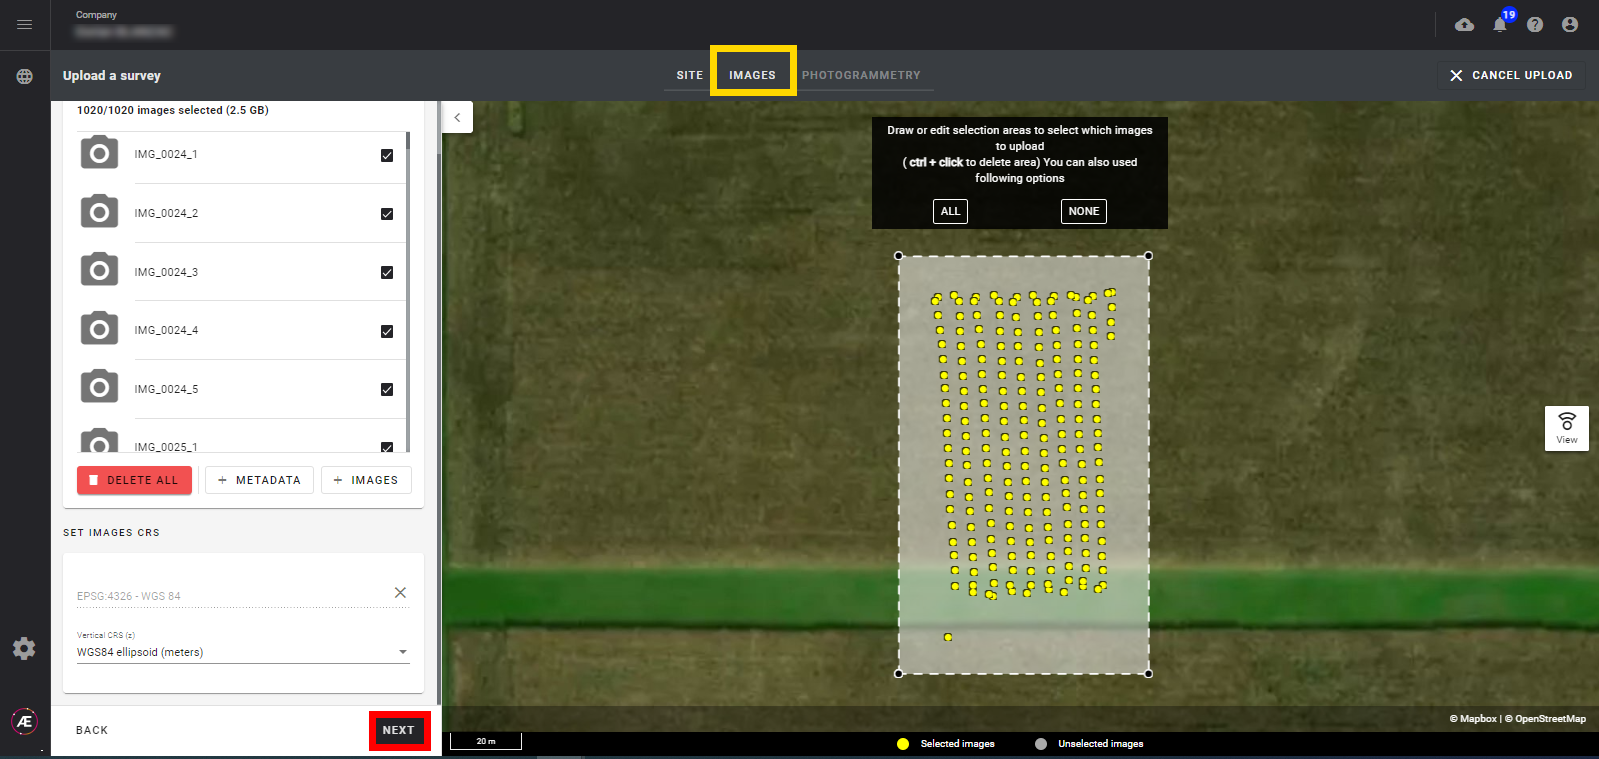
3.2 Image selection
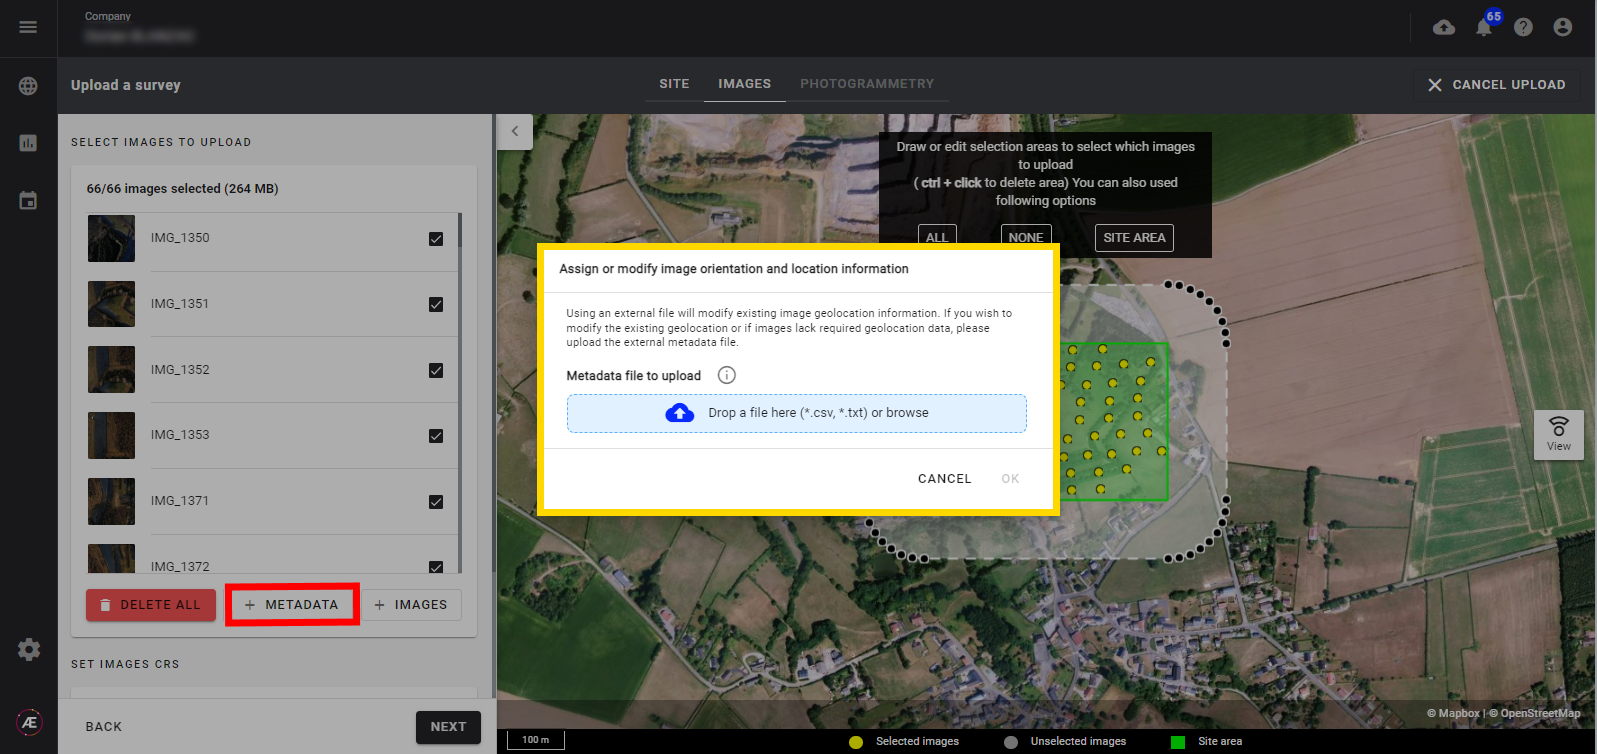
Step 1 - Select or deselect images to upload on the left panel. The selection area on the map can also be used for the same purpose.
Step 2 - Select the Coordinate Reference Systems (CRS) (mandatory step):
- If the pictures have metadata, the input CRS will be filled automatically. The vertical CRS is not set automatically
- If not, after adding the geolocation coordinates file (generally in a CSV file), choose the appropriate formatting source and the file CRS
Step 3 - In case there is no geolocation metadata, Click on "+ METADATA" to upload the geolocation CSV file.
Info “+METADATA”
- drag and drop the CSV file that contains the metadata
- Select the “Source (formatting”) in the list
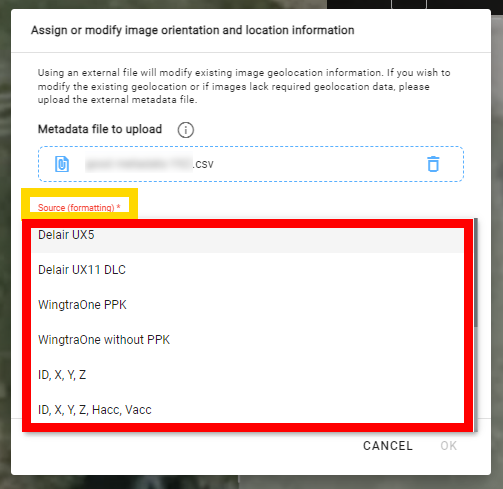
| Name of the “Source” on Aether | CSV Formating |
| WingtraOne PPK | ID, Y, X, Z, Omega, Phi, Kappa, Hacc, Vacc |
| WingtraOne without PPK | ID, Y, X, Z, Omega, Phi, Kappa, Hacc, Vacc |
| Delair UX5 | ID, Y, X, Z, Yaw, Pitch, Roll |
| ID, X, Y, Z | ID, X, Y, Z |
| ID, X, Y, Z, Hacc, Vacc | ID, X, Y, Z, Hacc, Vacc |
| ID, X, Y, Z, Roll, Pitch, Yaw | ID, X, Y, Z, Roll, Pitch, Yaw |
| ID, X, Y, Z, Roll, Pitch, Yaw, Hacc, Vacc | ID, X, Y, Z, Roll, Pitch, Yaw, Hacc, Vacc |
| Delair UX11 DLC | ID, Y, X, Z, Roll, Pitch, Yaw, Acquisition date, Exposure time, ISO Speed rating, Hacc, Vacc, Sensor model, Focal length, Pixel size, Width, Height |
- Set the Coordinate Reference Systems (CRS).
- Click on “OK”.
Step 4 - Click on "NEXT".
3.3 Photogrammetry.
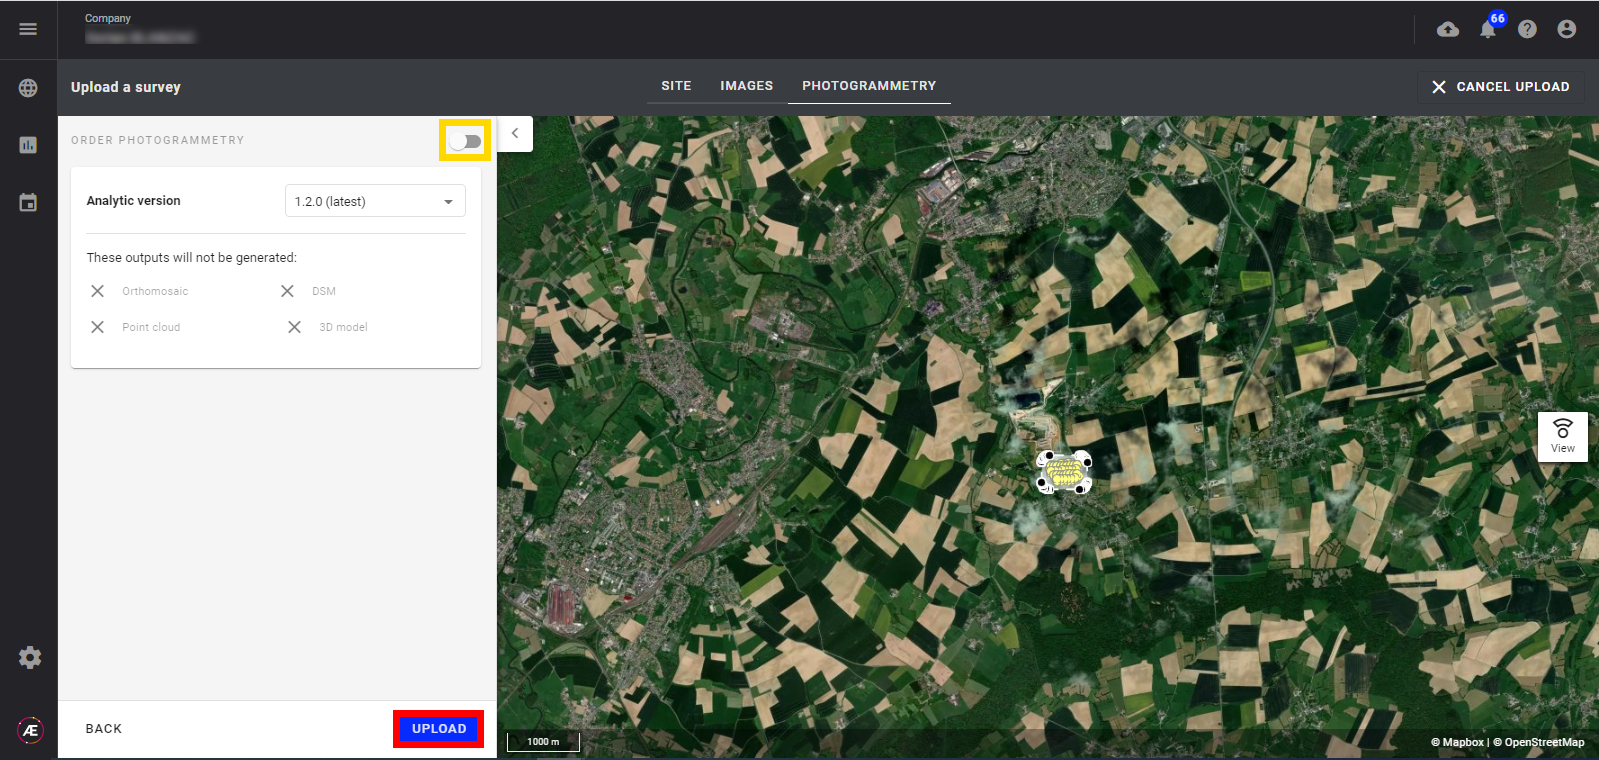
Step 1 - The switch button "ORDER PHOTOGRAMMETRY" enables you to choose whether the uploaded data has to be processed or not:
- If the photogrammetry is ordered, see Photogrammetry Process Launching.
Info
In the photogrammetry tab activated you can find the “estimation processing time”.
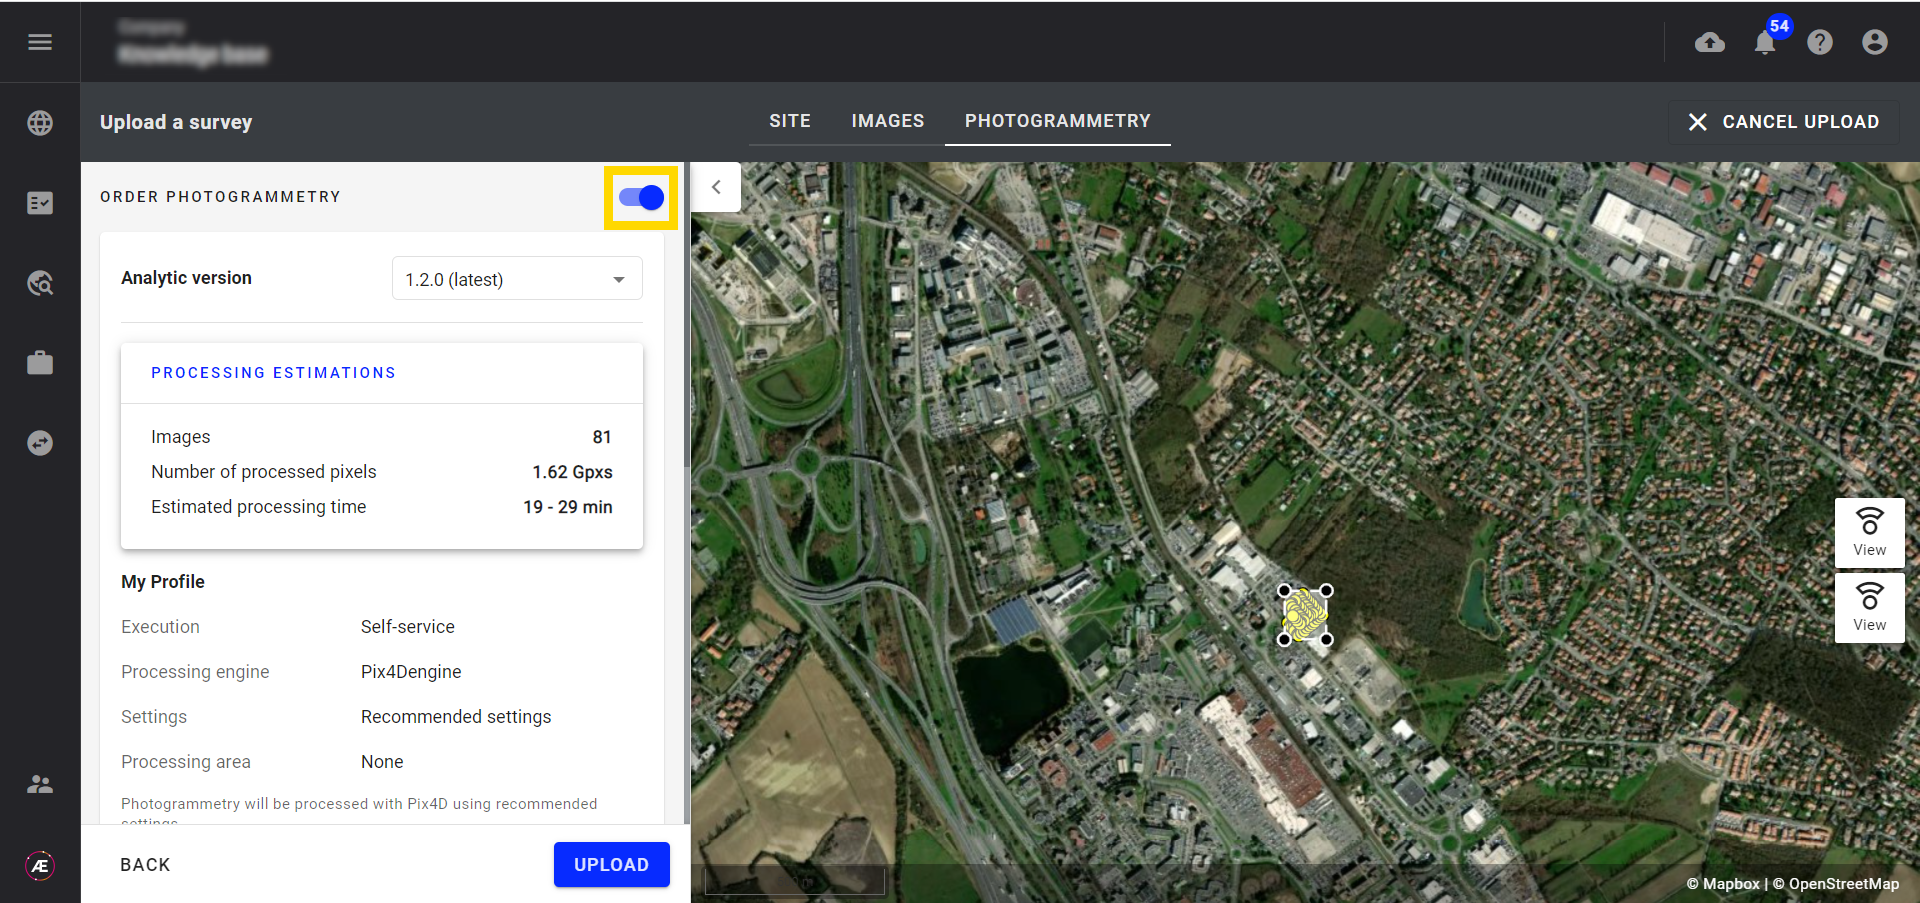
- If not deactivate the switch button and click on "UPLOAD".
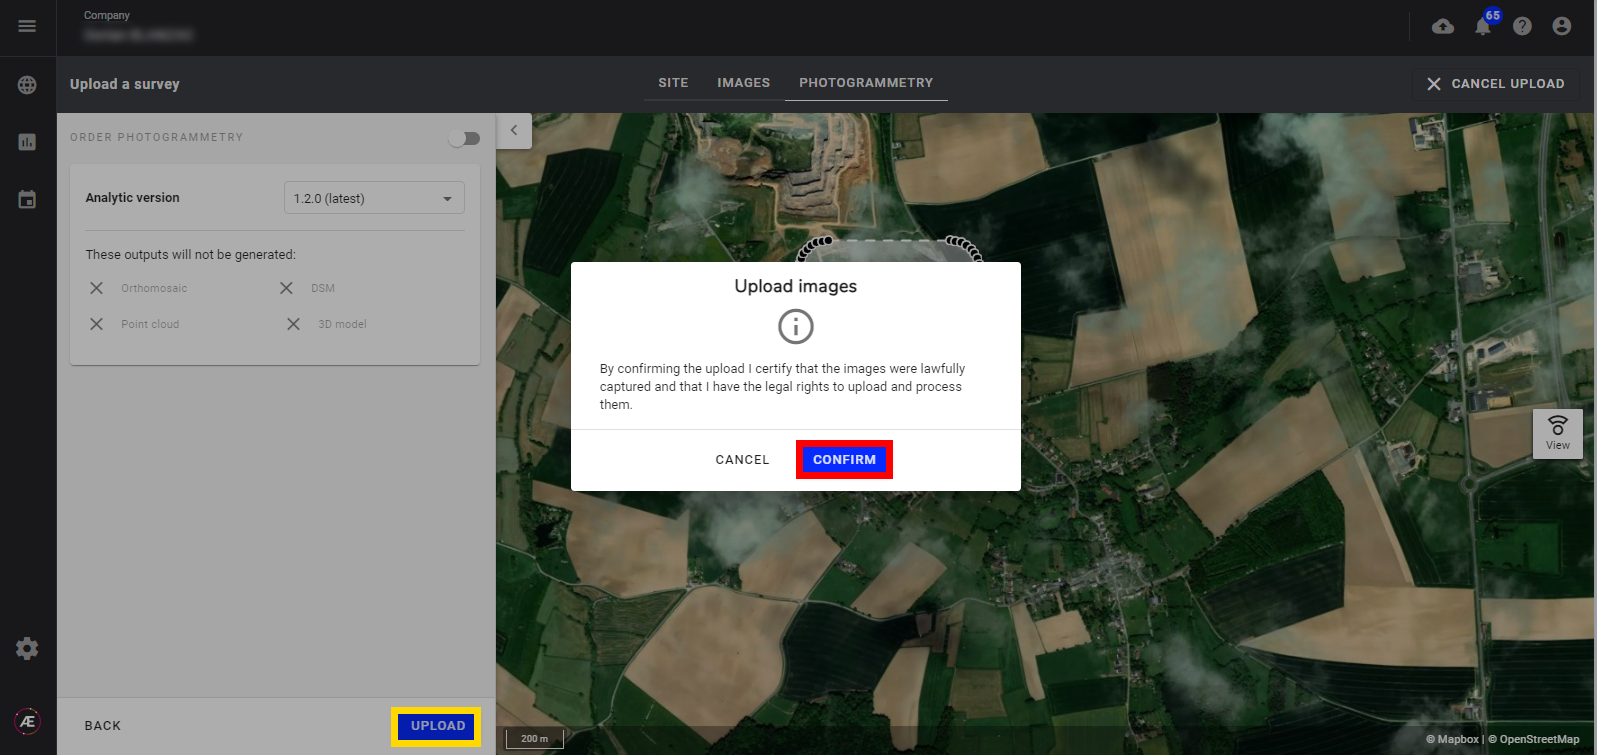
Step 2 - Click on "CONFIRM" to launch the upload.
IMPORTANT
Don't log off or shut down the computer until the end of the upload to ensure completion.
4. Results
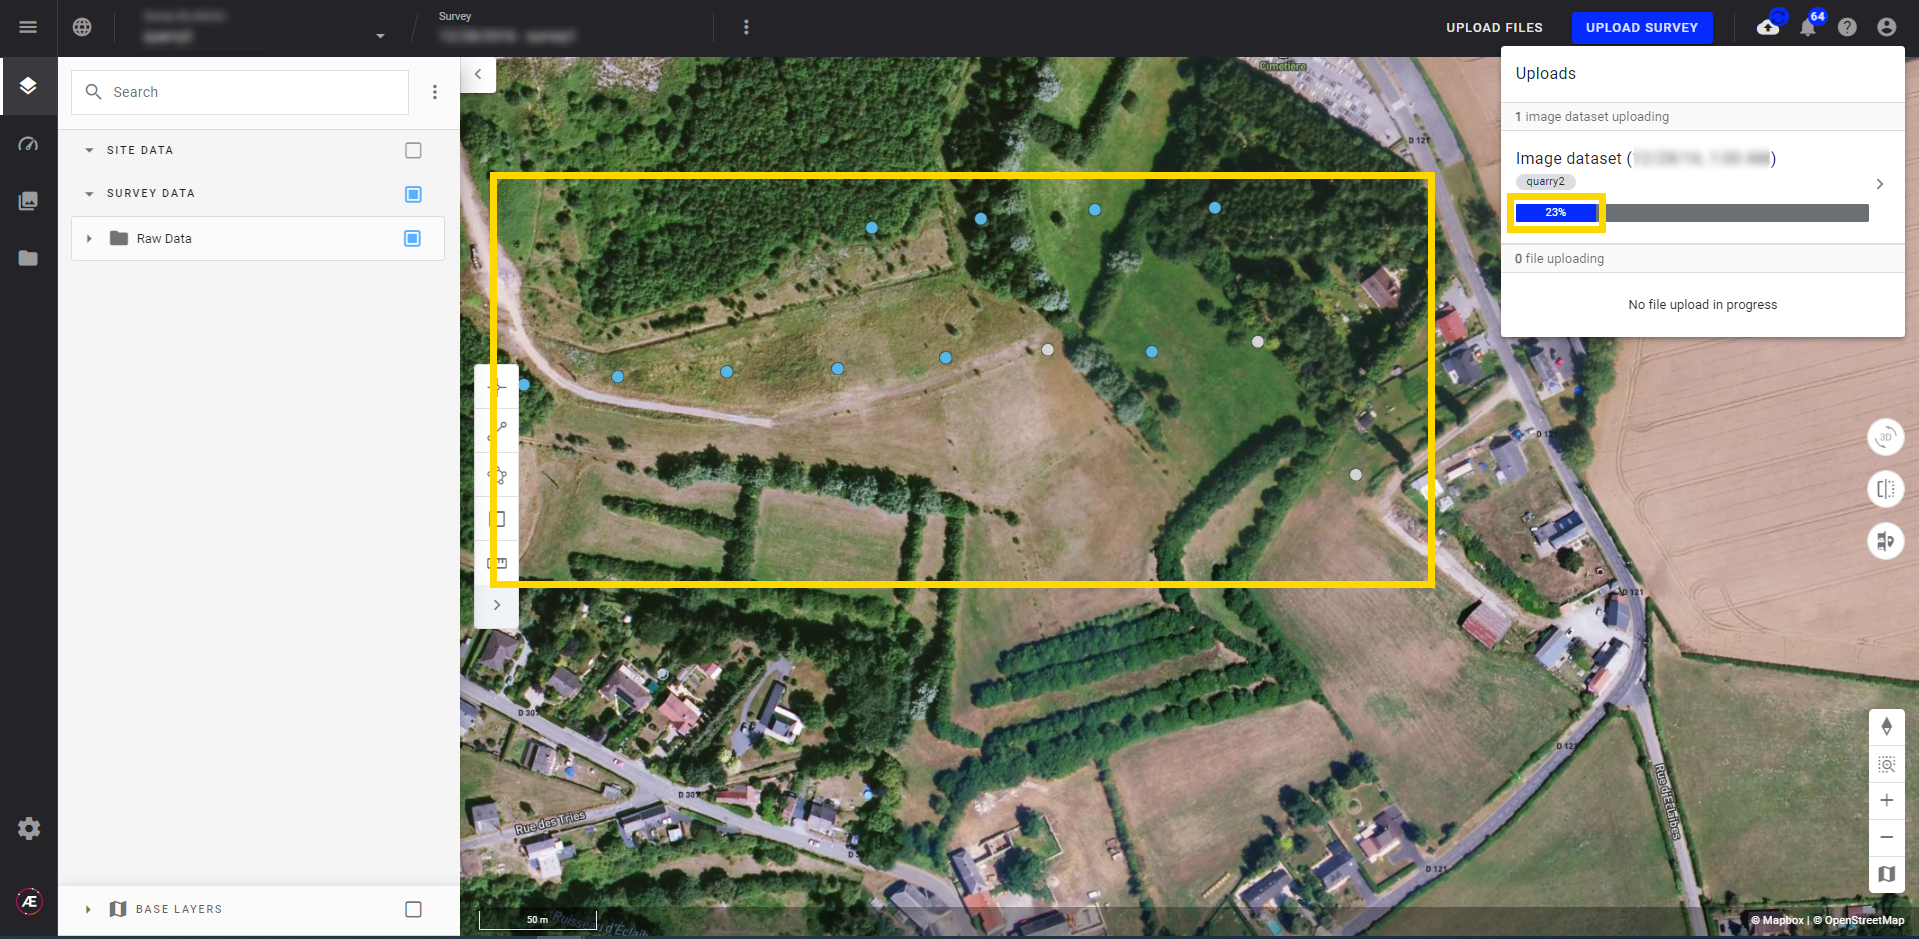
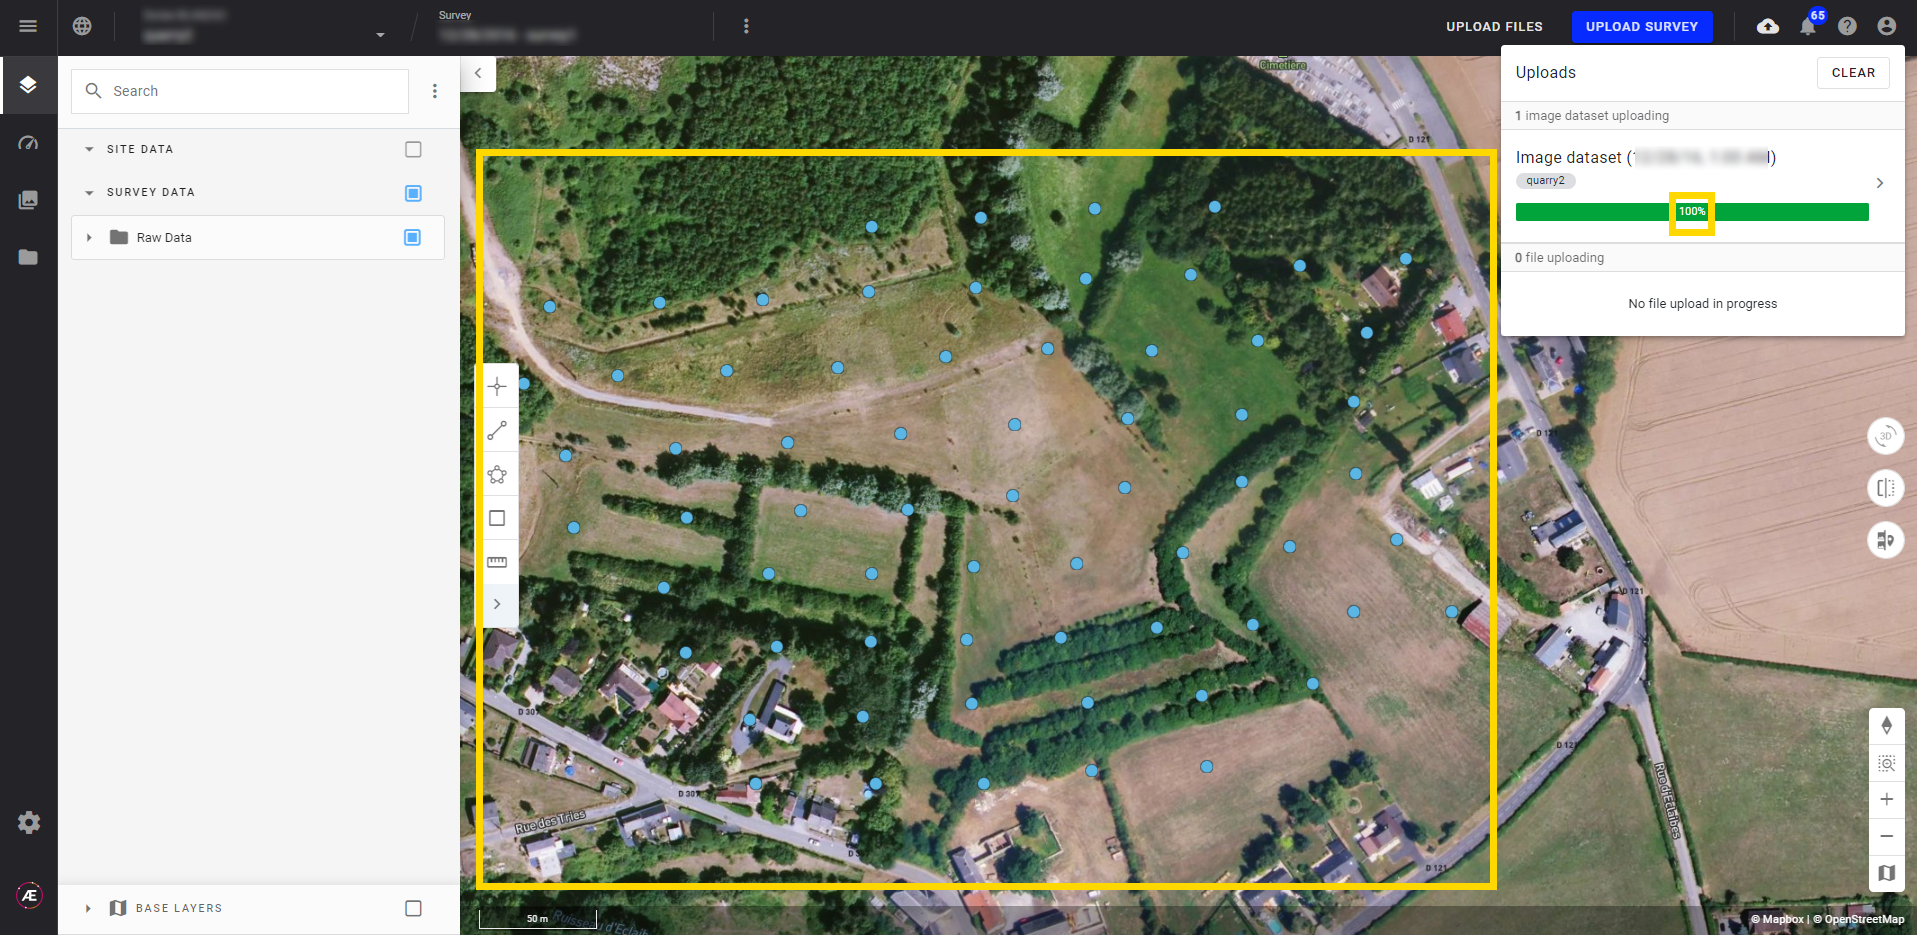
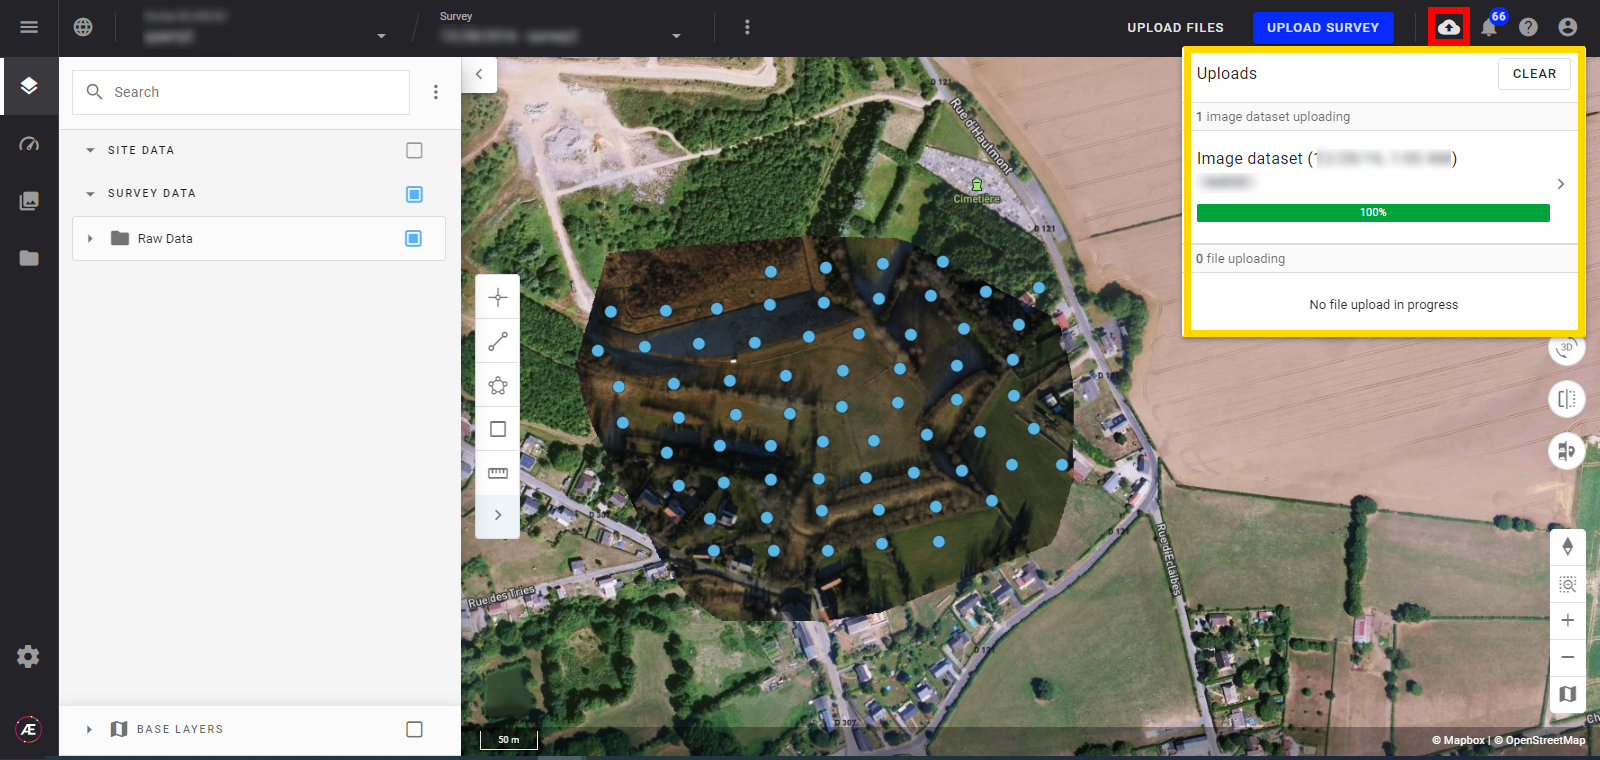
Step 1 - The progression of the upload is visible by clicking on the cloud icon.
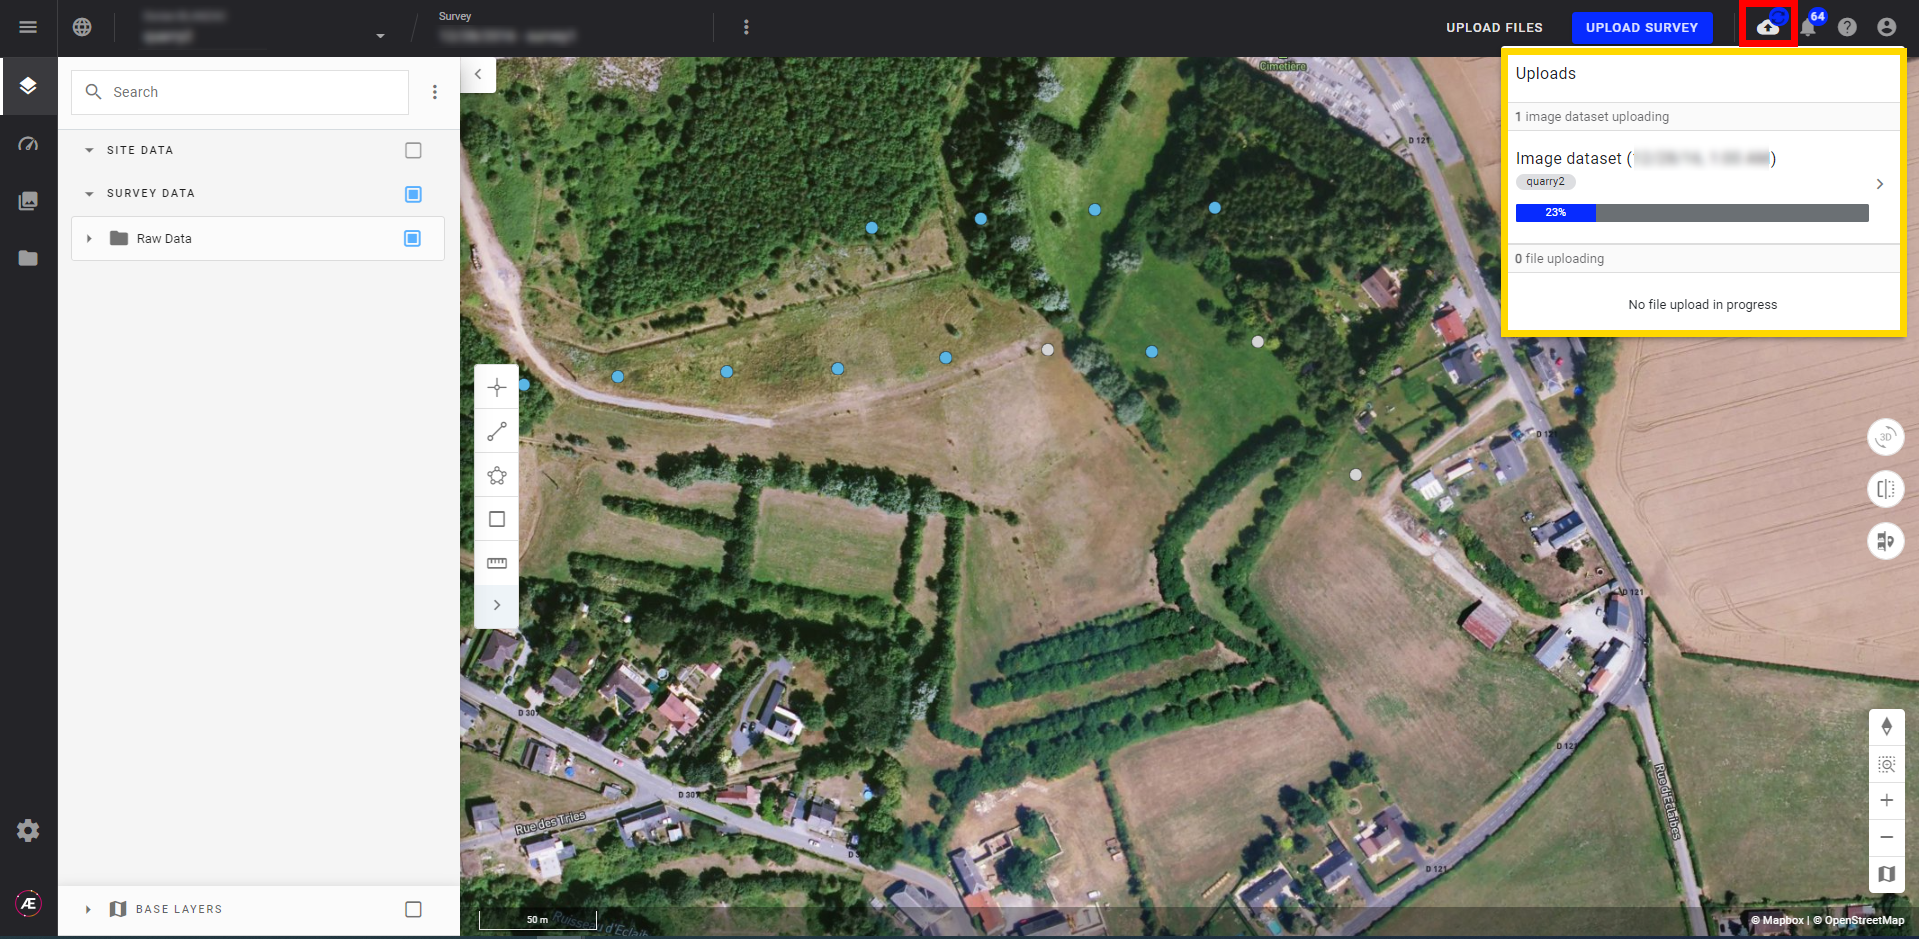
The progression of the upload is also visible on the map view.
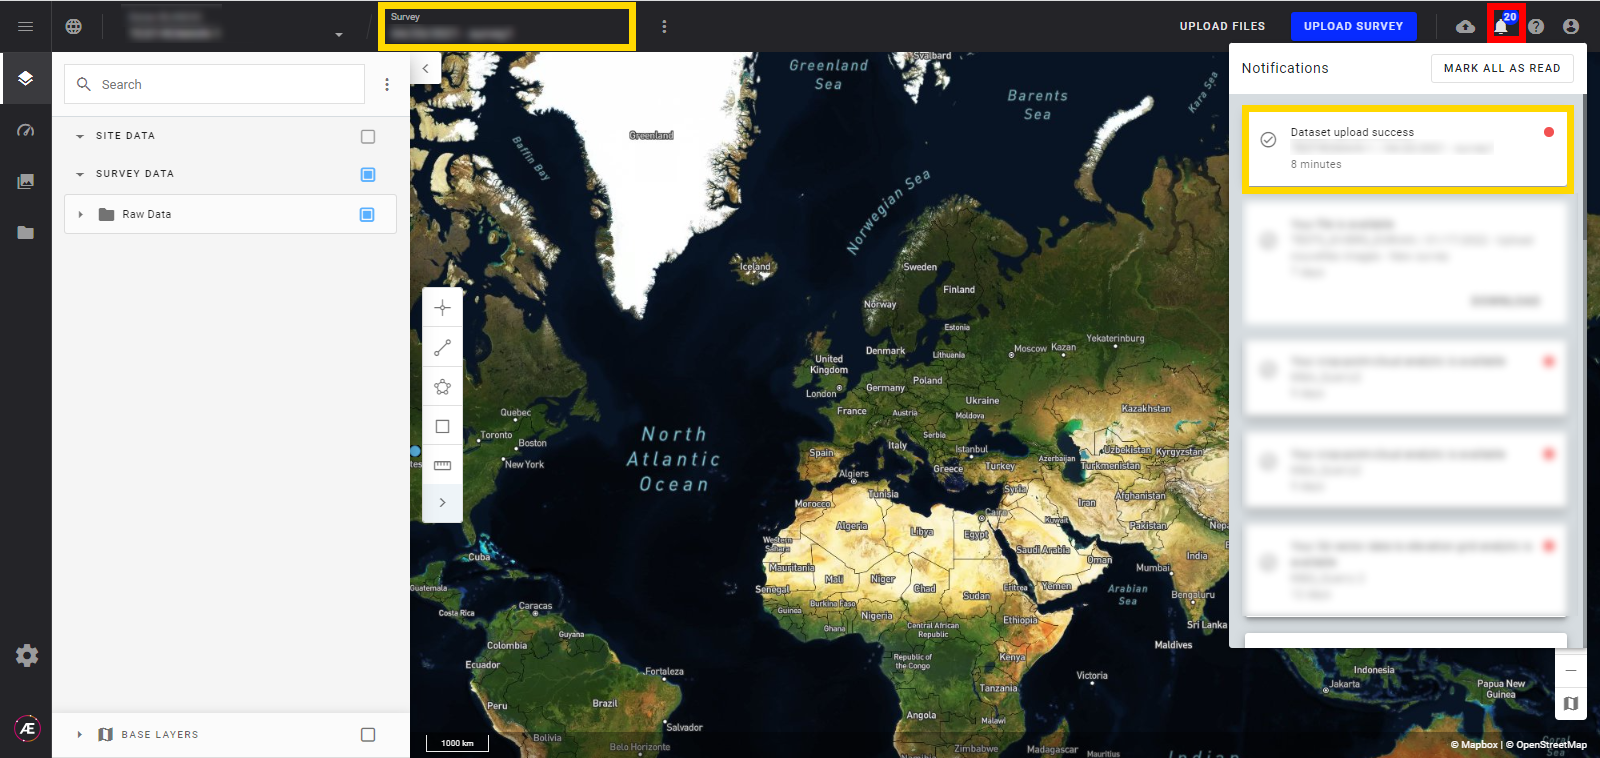
Step 2 - A notification is sent to inform that the upload is done. The survey is created.
Step 3 - The dataset is fully uploaded when there is no more visible processing logo on the Upload logo (cloud icon).
Info
The survey date is displayed in UTC
5. Failure during the upload
Info
Users can stop the uploading.
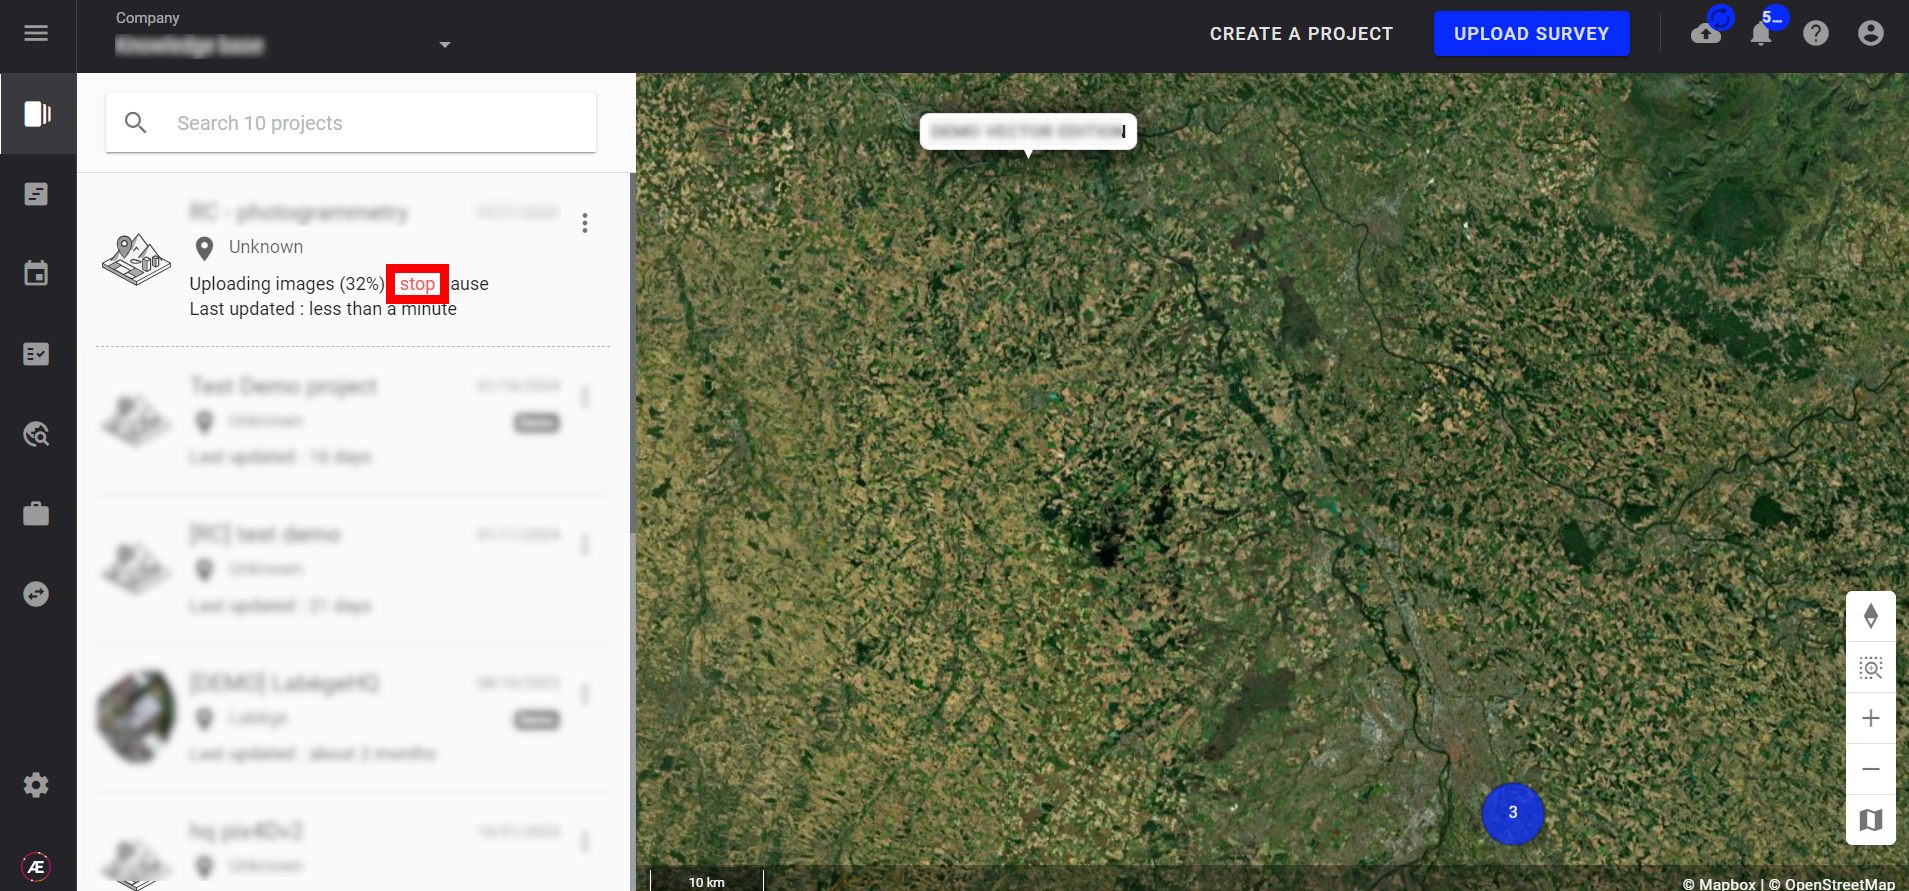
Then choose:
- “cancel” the upload, the survey is not created and the images uploaded are deleted.
- “retry”, see the following procedure.
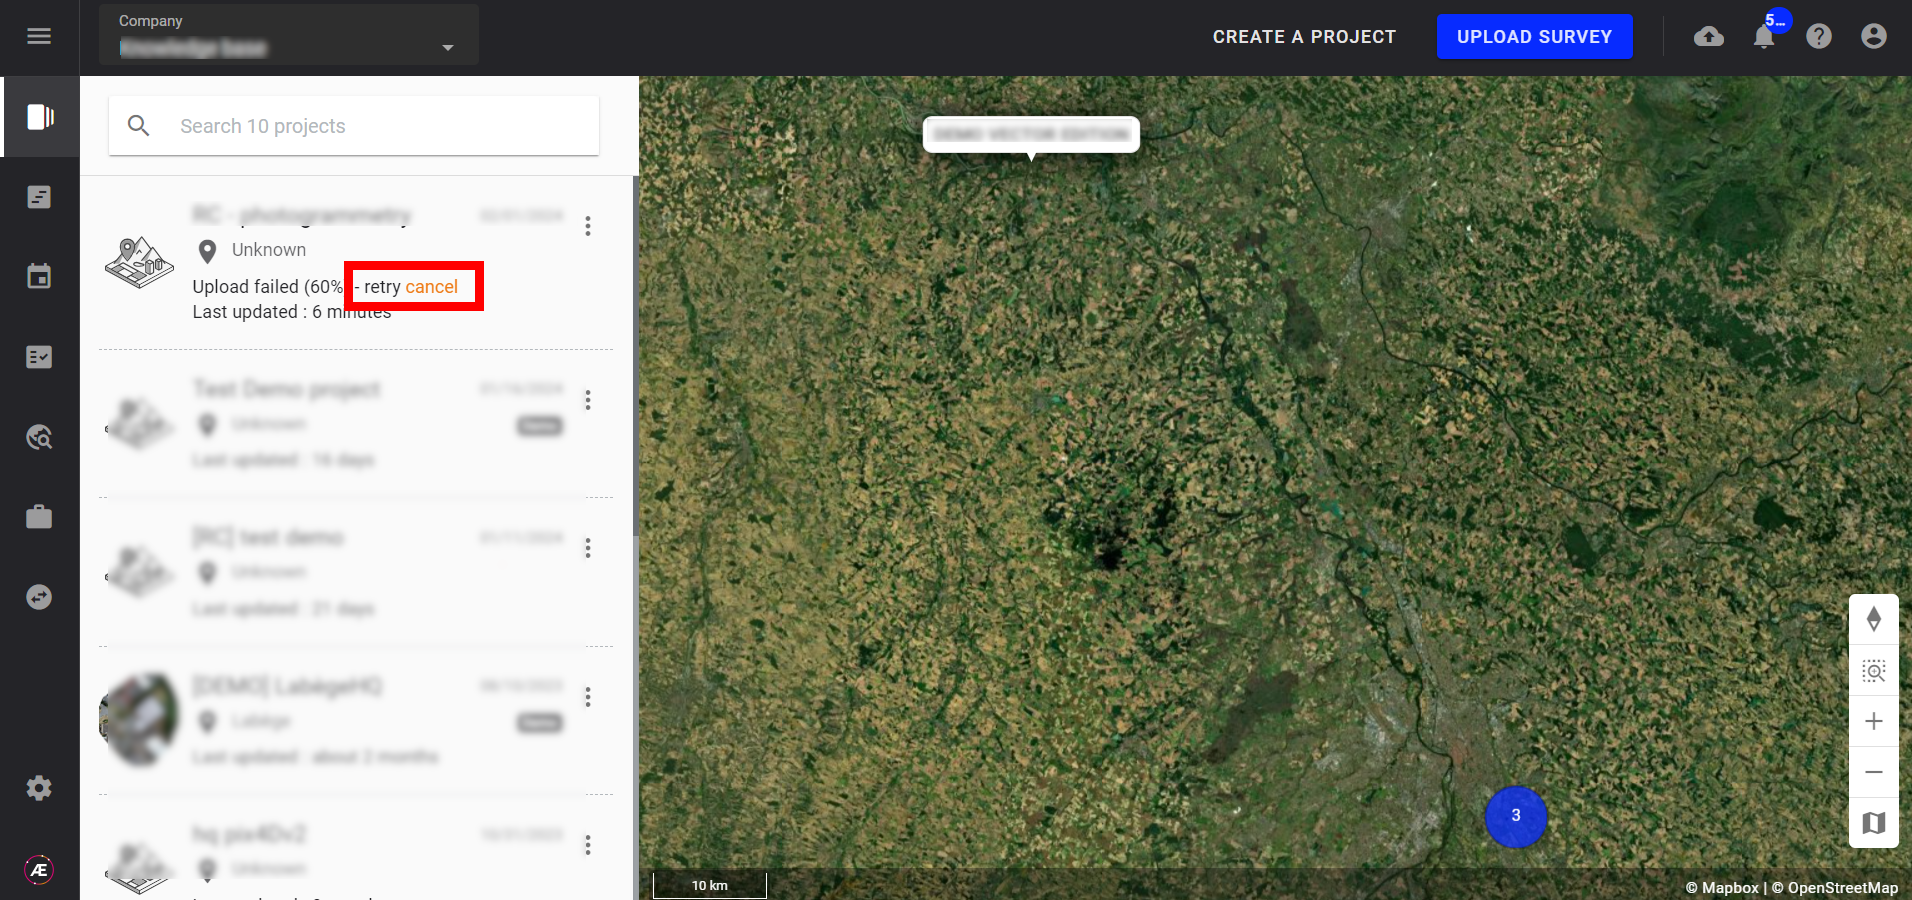
Step 1 - Click on the retry button on the project dashboard.
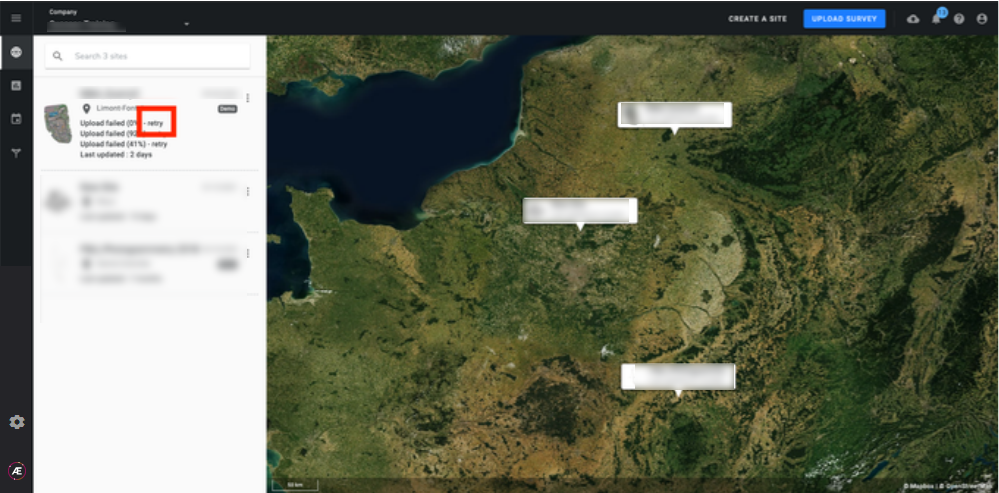
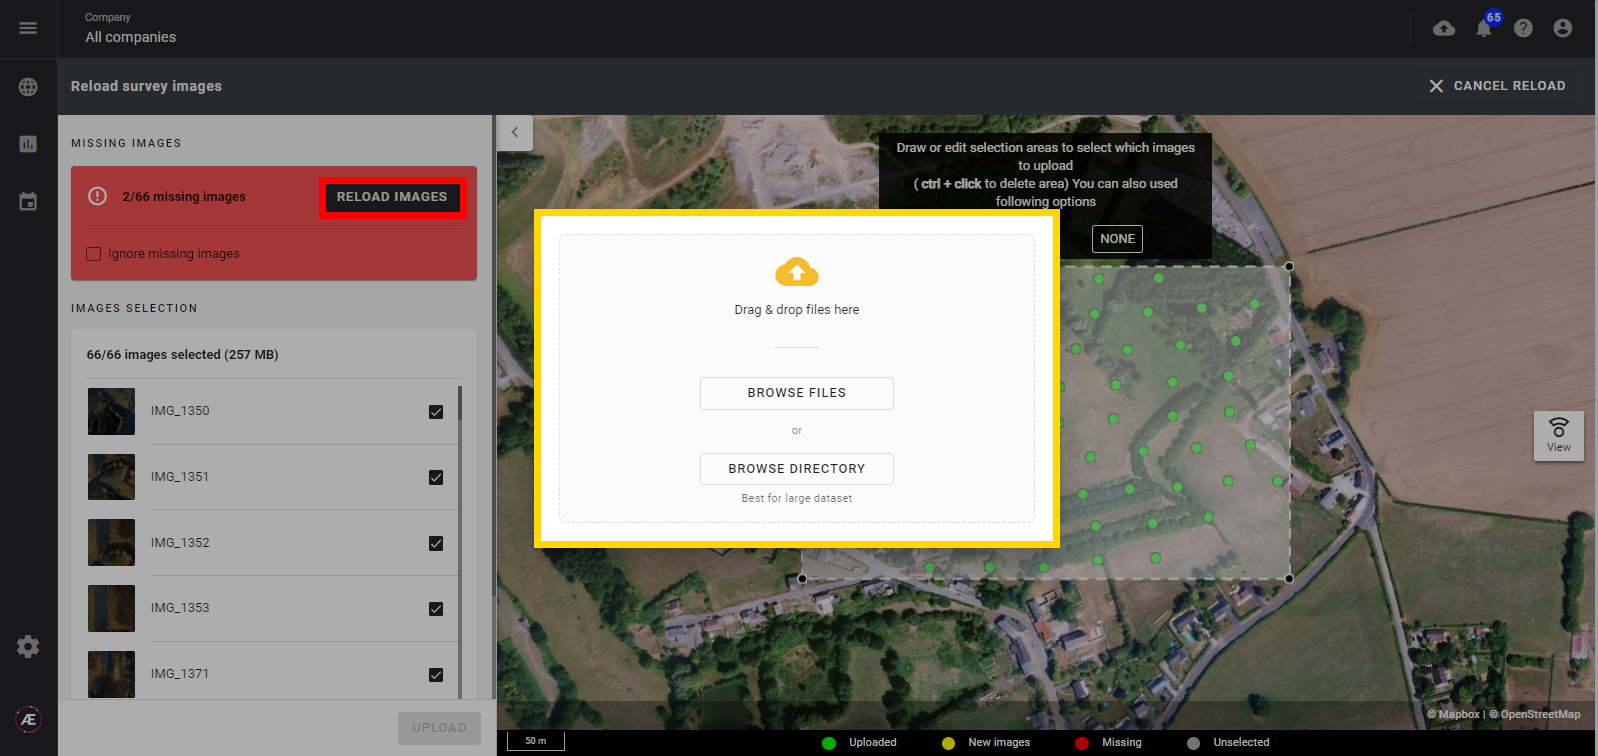
The platform will display in red the photos that have not been uploaded.
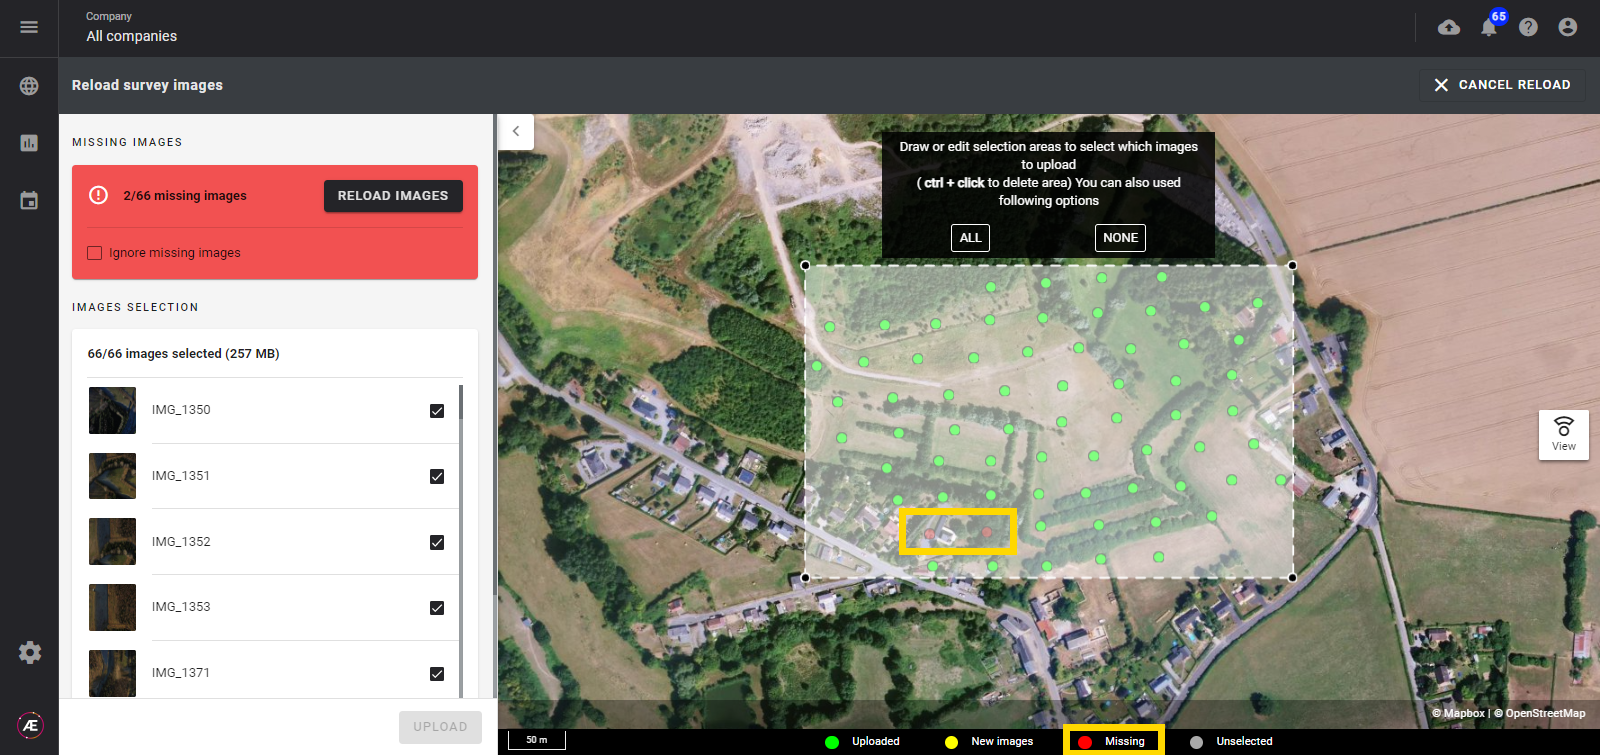
Step 2 - Click on "RELOAD IMAGES" and drag and drop or select the dataset directory.
Step 3 - The green dots correspond to images already uploaded. The yellow dots correspond to images that need to be re-uploaded (the sorting is done automatically). Click on "UPLOAD" to complete the new attempt.
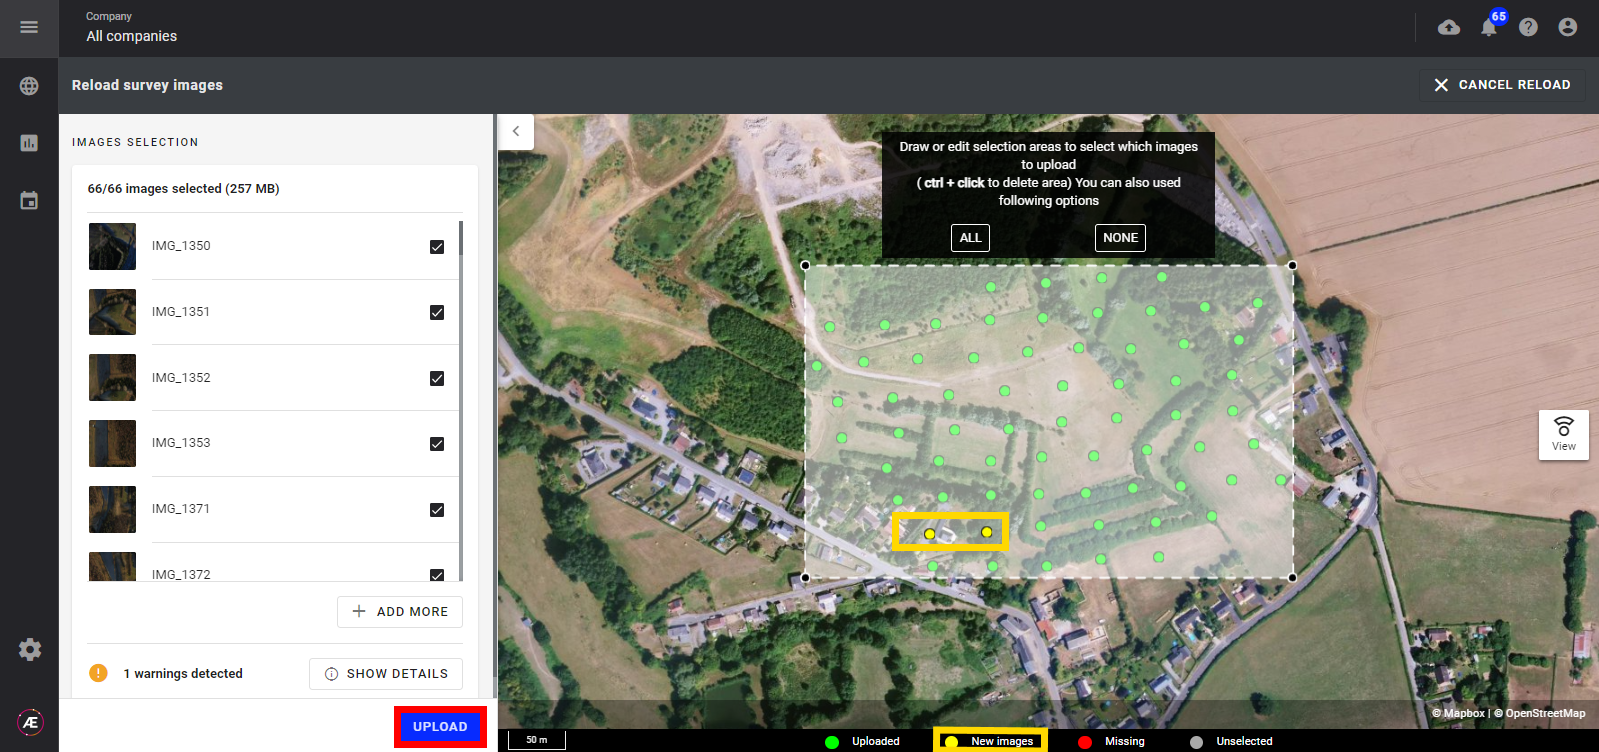
Step 4 - Click on "CONFIRM" on the pop-up.

