Vector Geometry Edition
1. Description
This tool is for editing the geometry of a vector file generated or uploaded in Aether.
2. Workflow
Step 1 - On the layer panel, tick the box of a vector file and click on the "Activate / Disable: Geometry edition module" icon next to the name of your vector file.
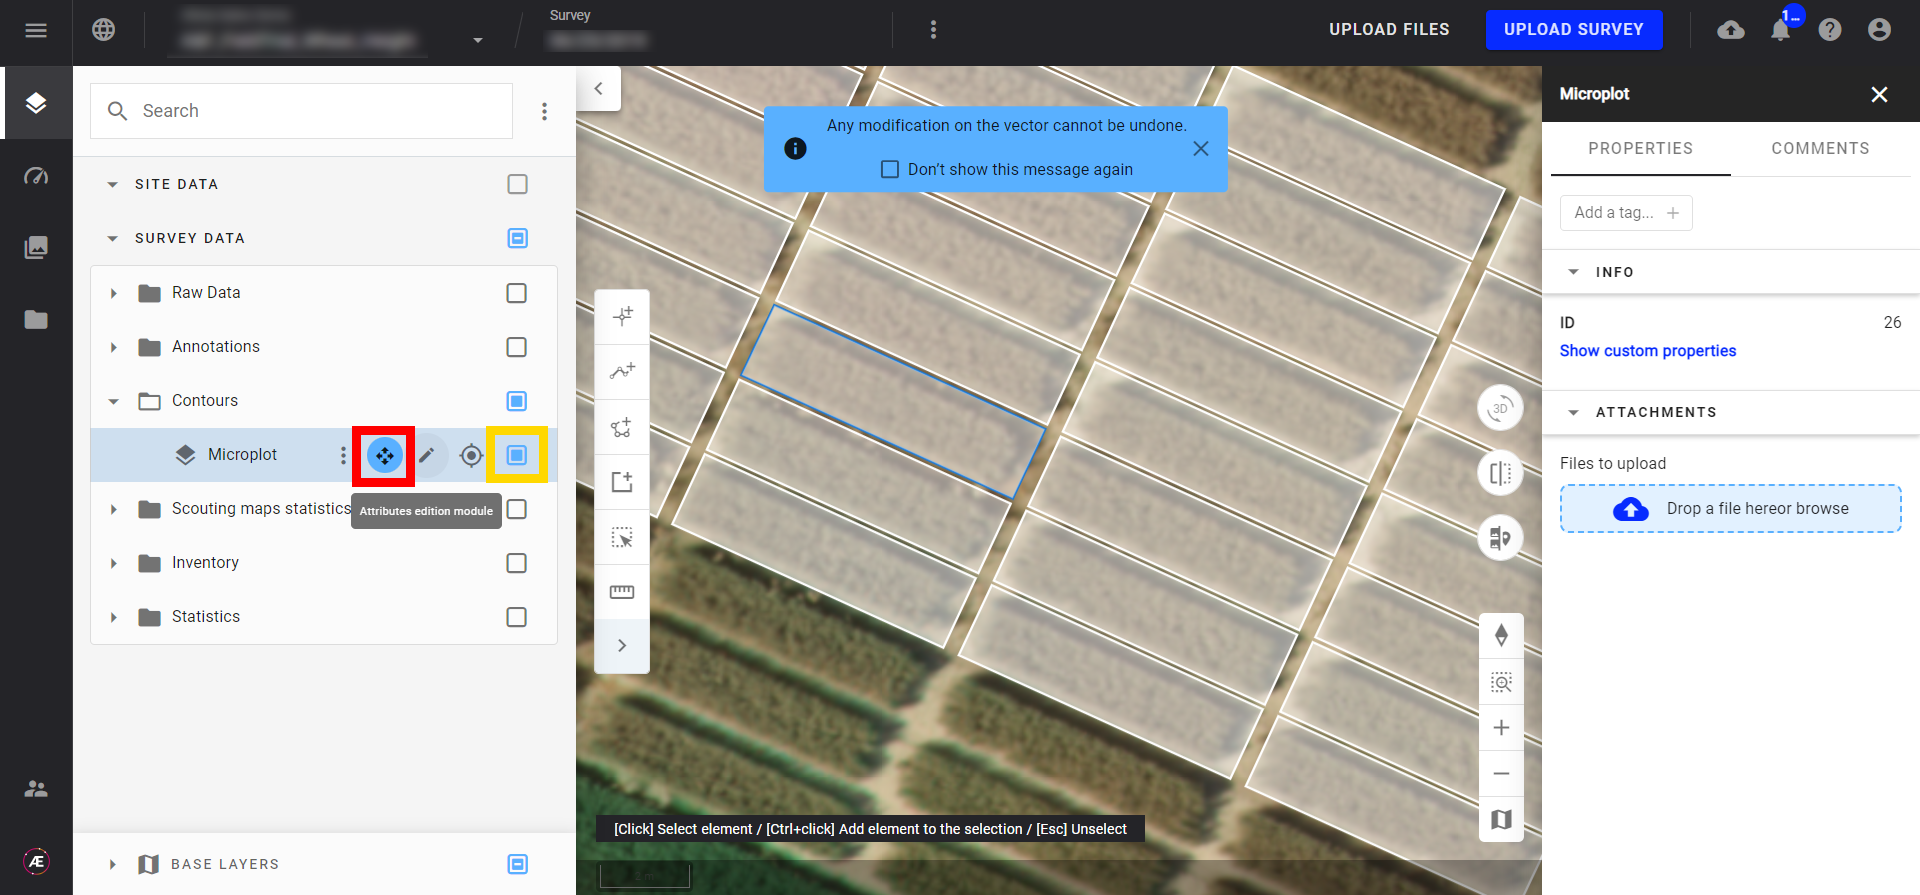
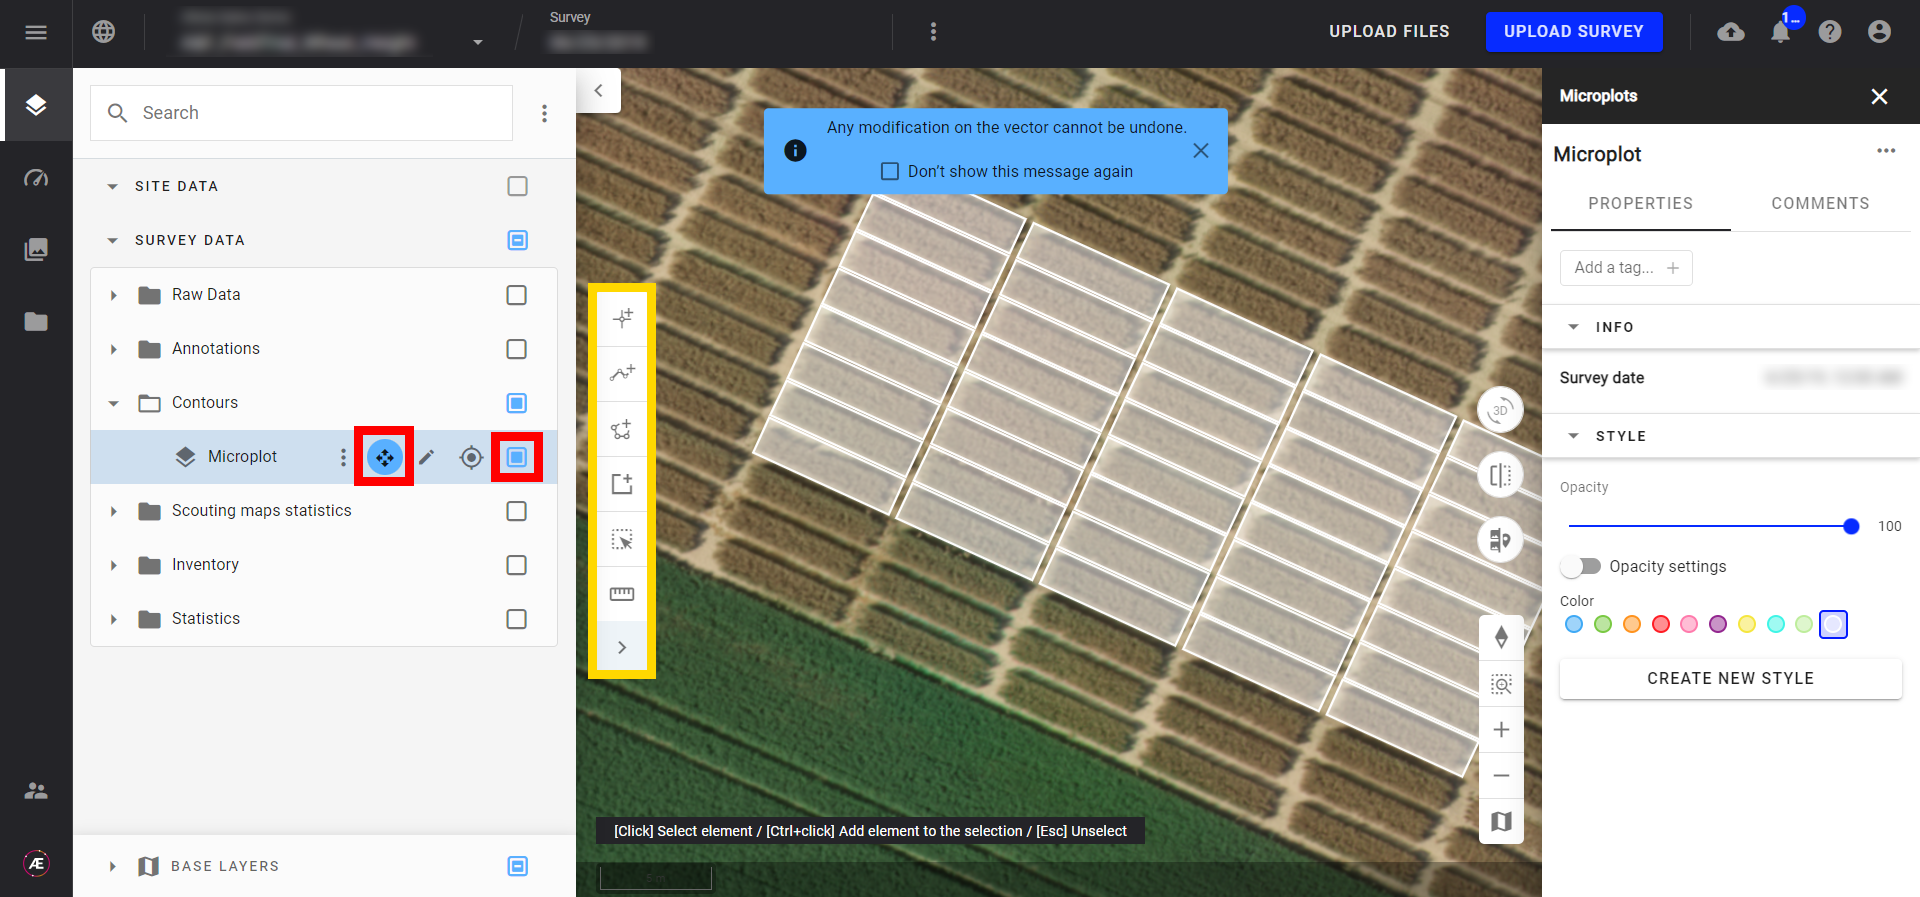
Step 2 - Once in the geometry edition mode you have access to several tools:
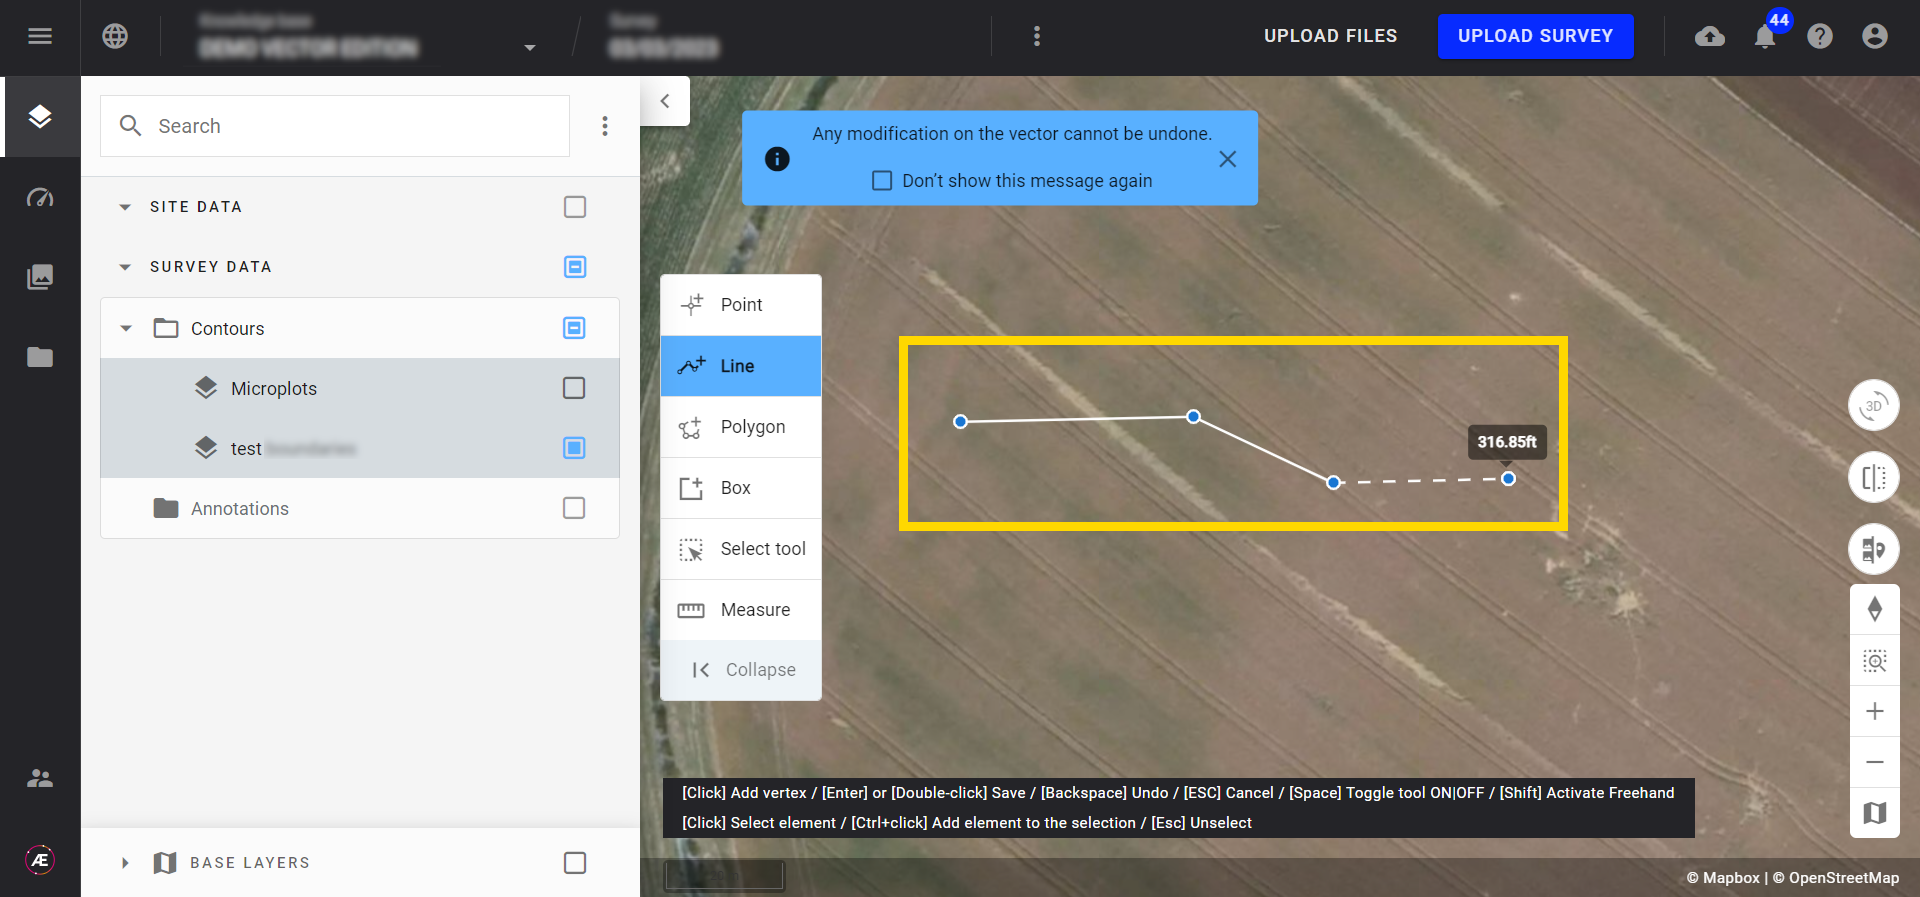
- The left bar allows the addition of new features (point, line, polygon, rectangle), the selection of several features with a lasso, and the access to measurement tools.
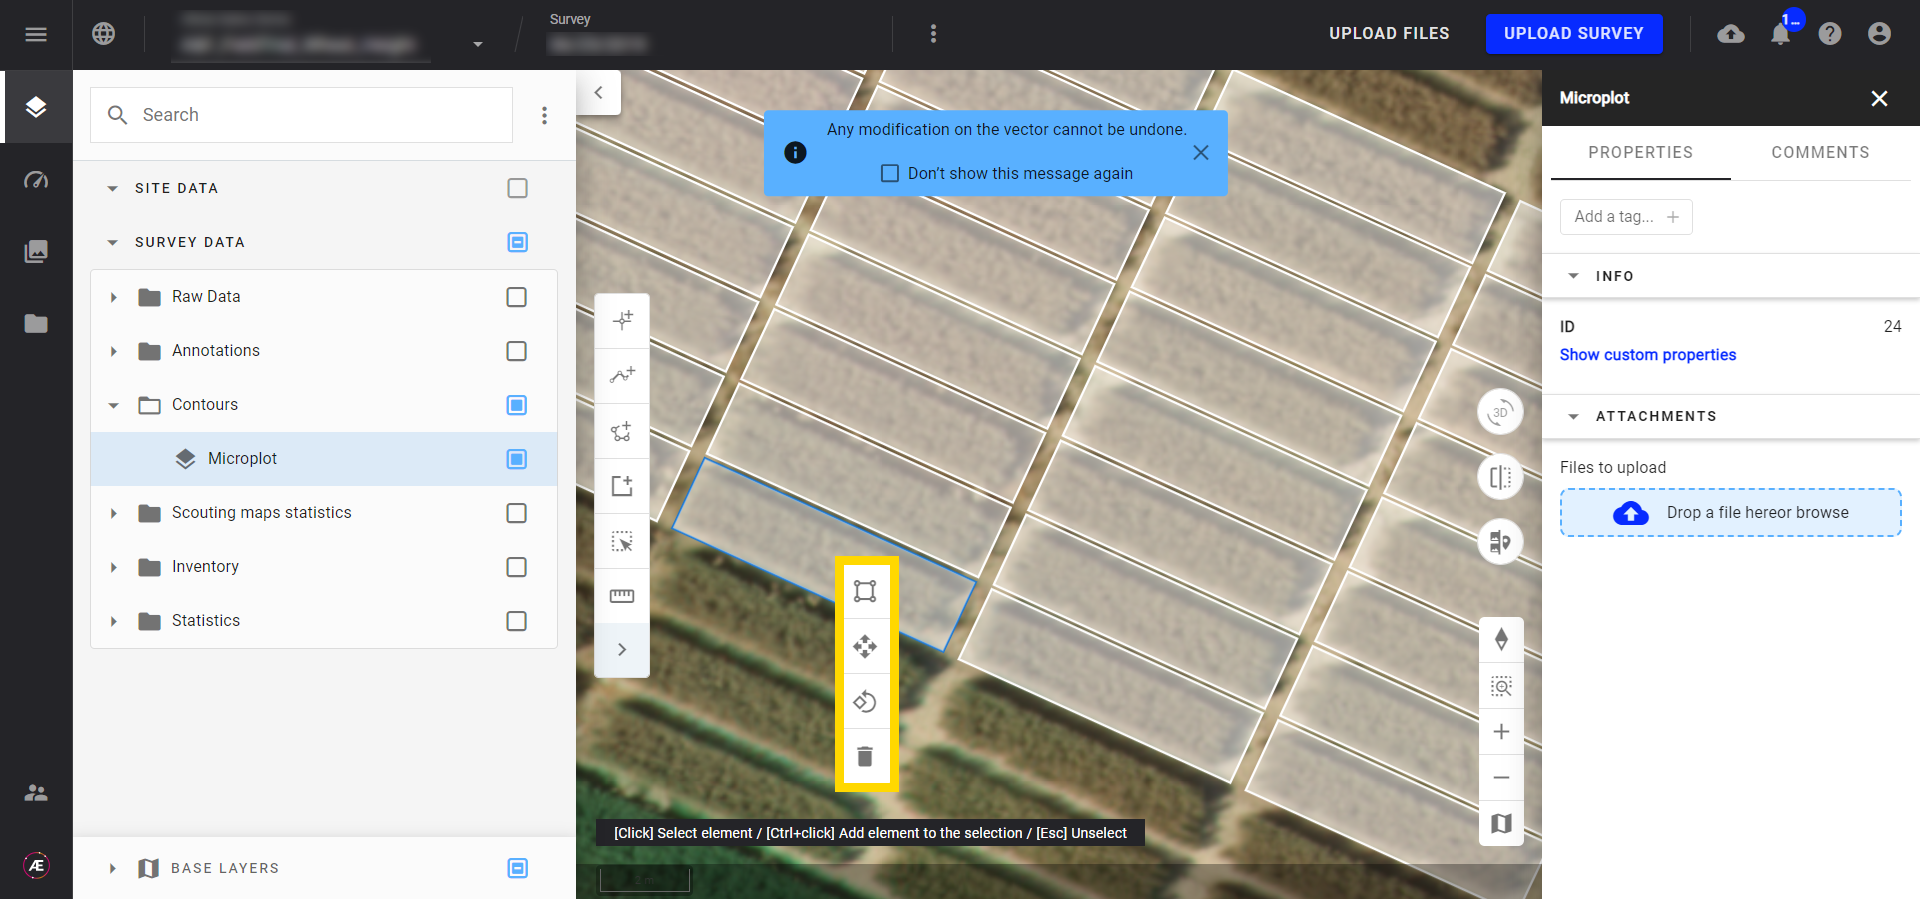
- Right-click on one or several features to have access to additional tools to edit the selection.
3. Description of the functions
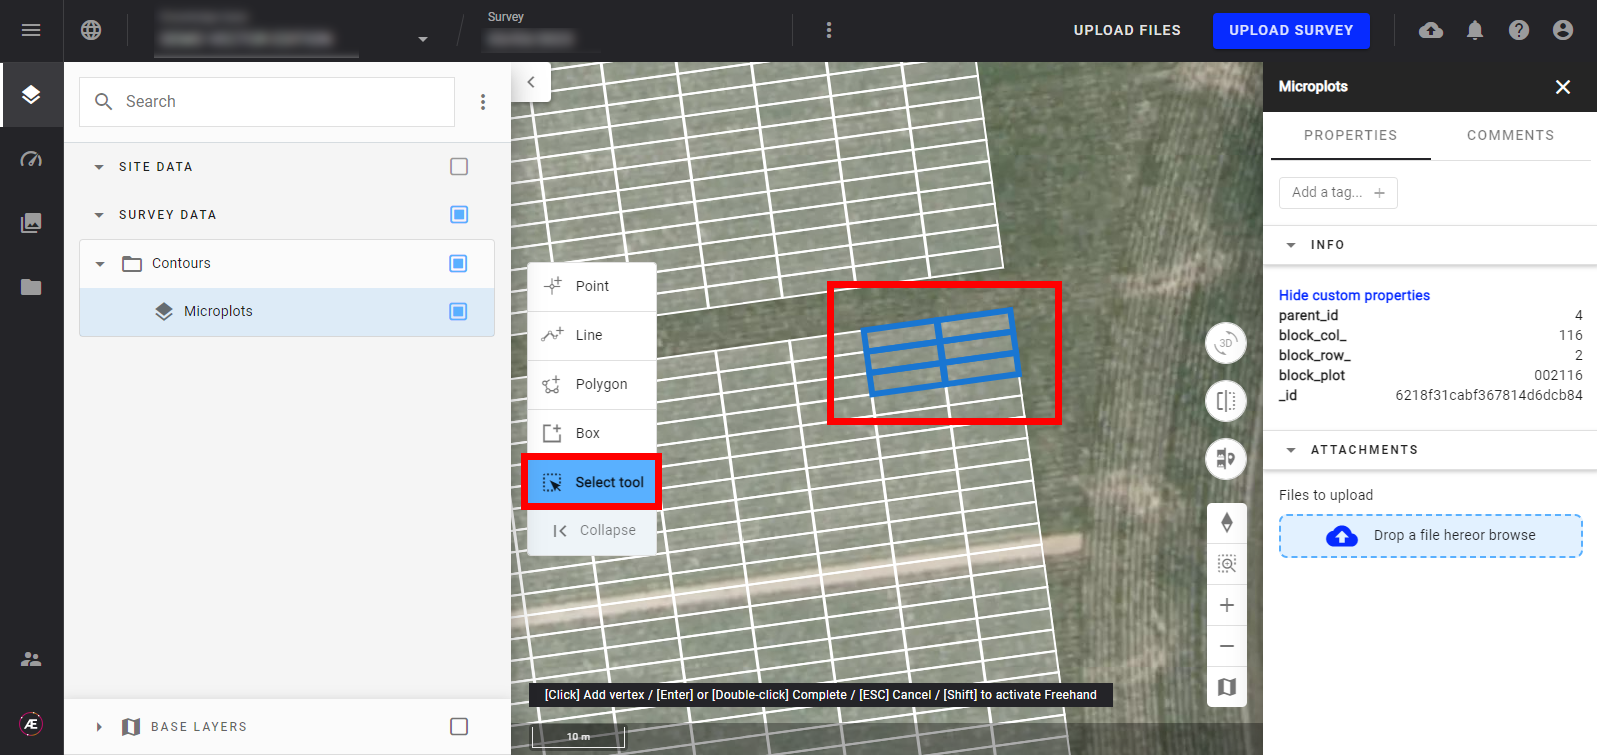
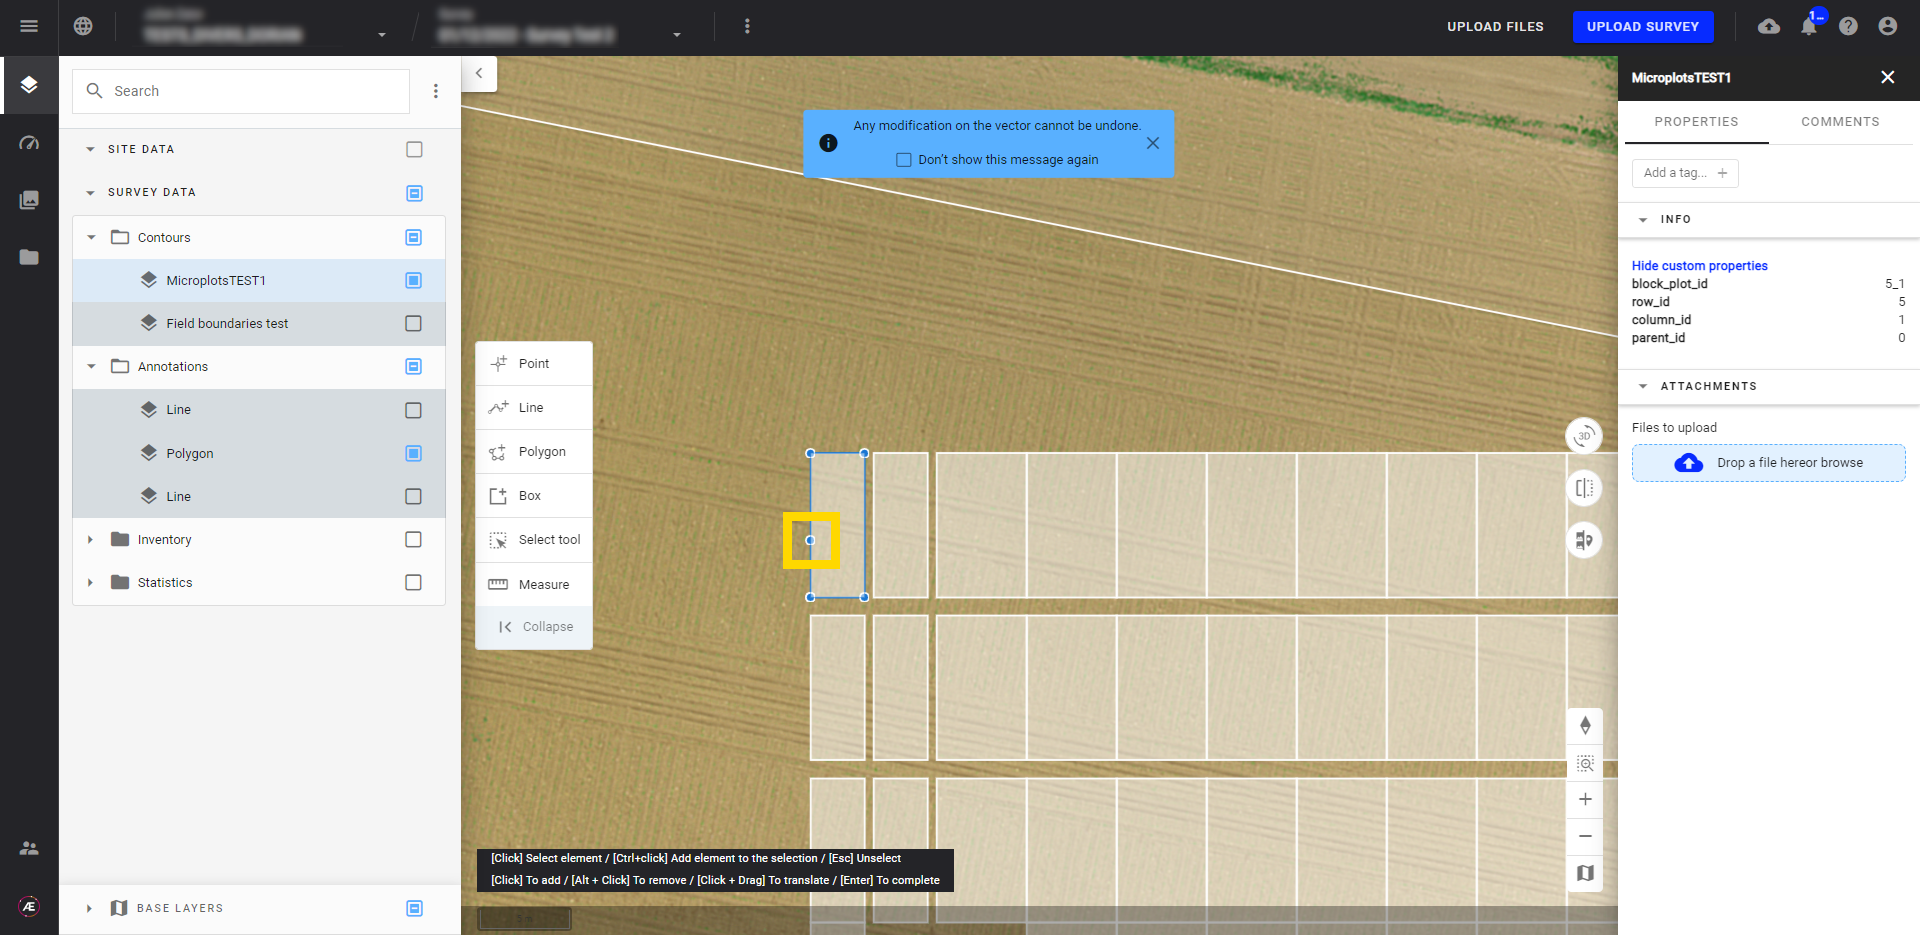
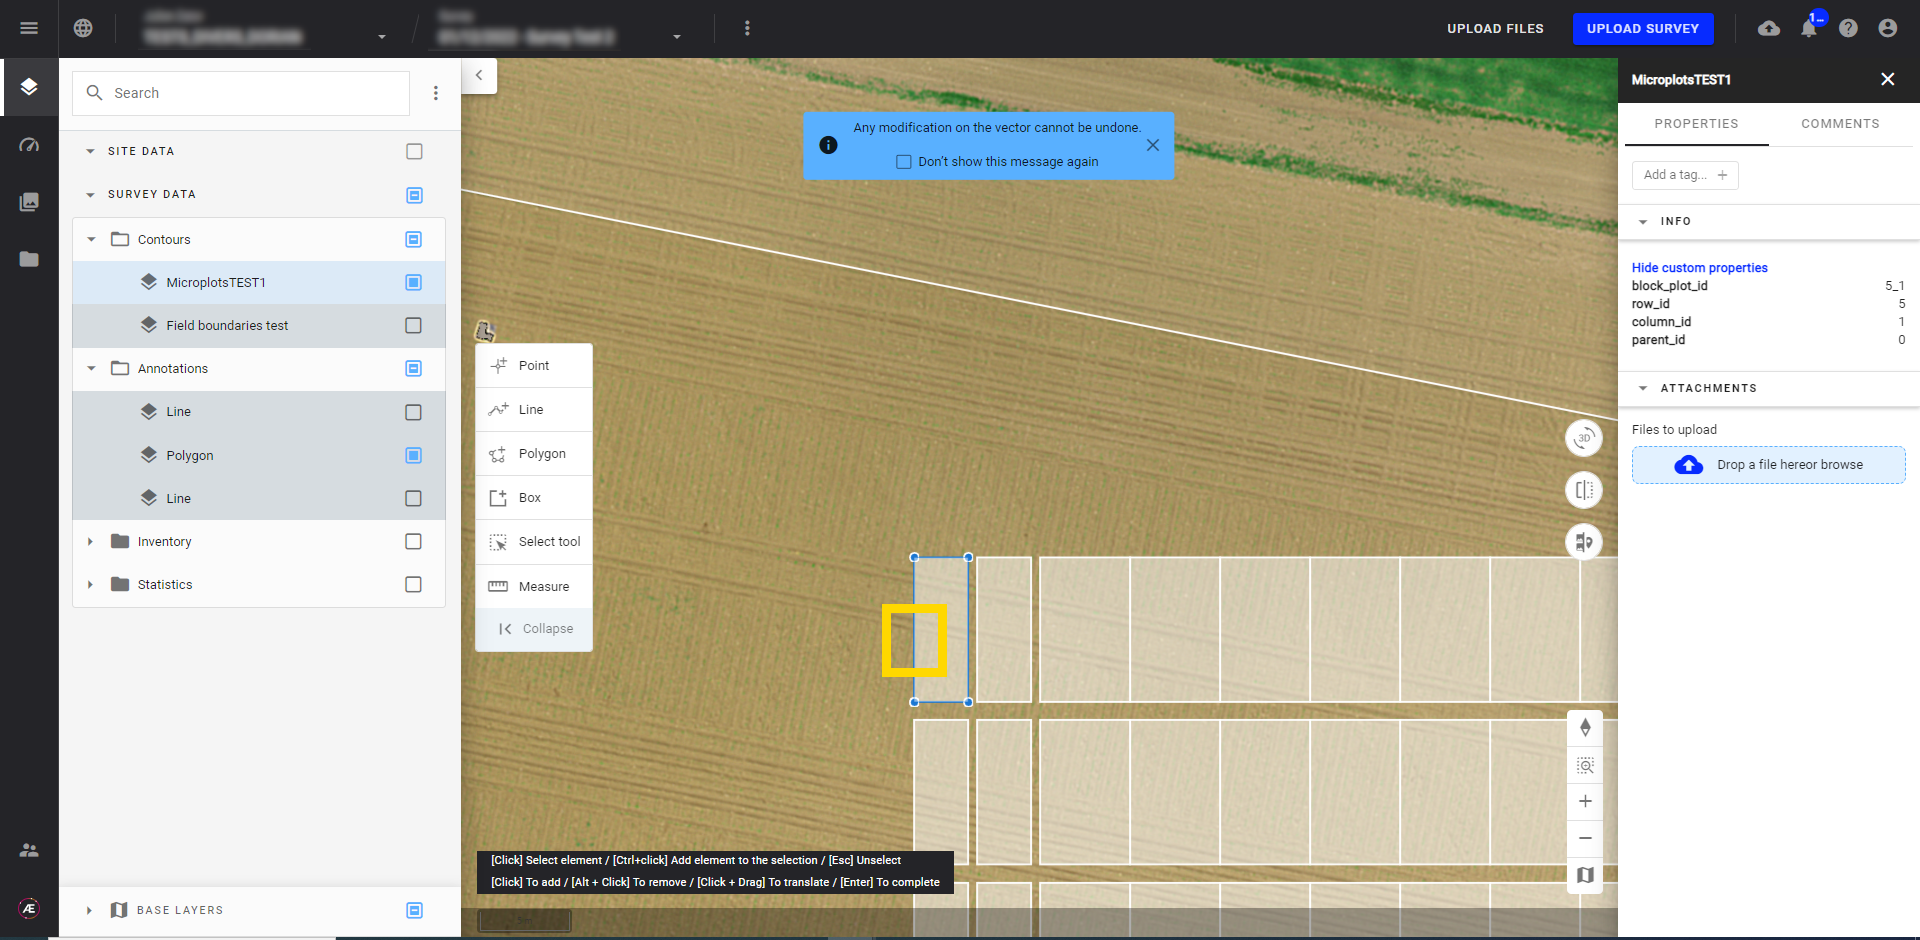
3.1 Feature selection
Select each feature (part of the vector) to modify by clicking on ctrl + left + click or by using the selection tool. Double-click to finish using the selection tool.
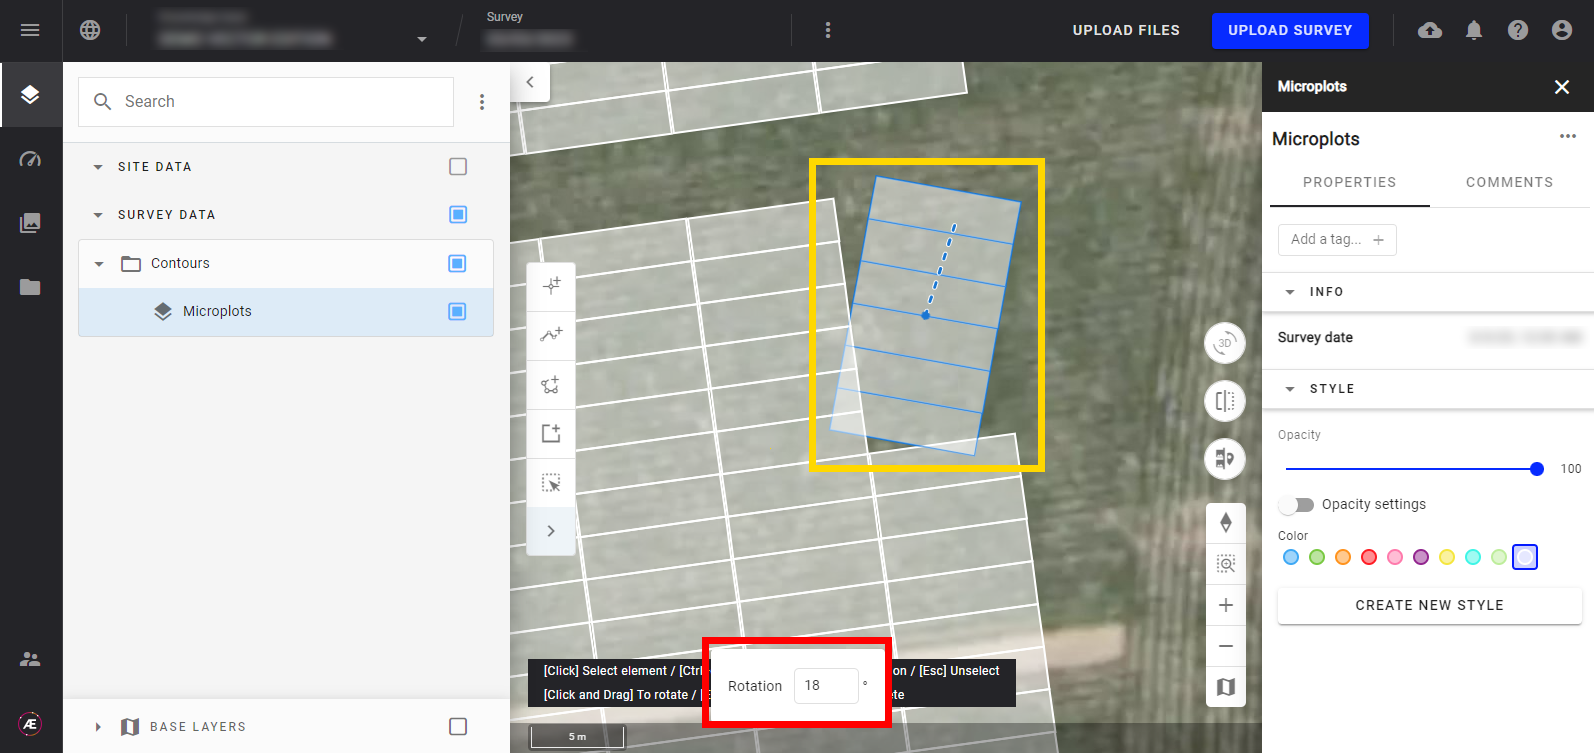
3.2 Rotation
- Right-click on the selection and left-click on the following icon.

- Use the dashed line as a handle and rotate the selection with the mouse.
The value in the input field will give you information about the angle of rotation. - To be more precise, you can enter a value in the field to add a rotation offset and press "Enter"
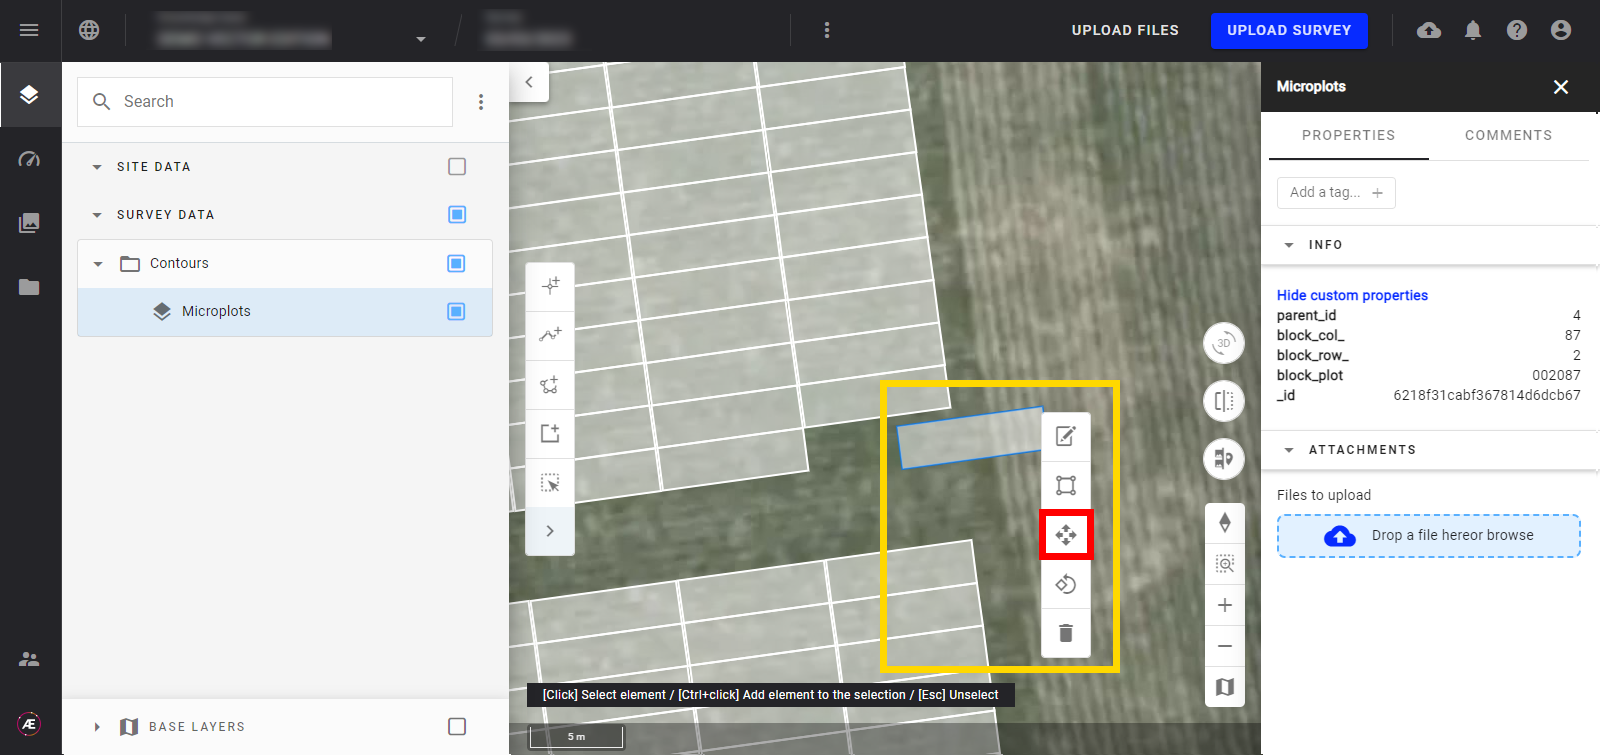
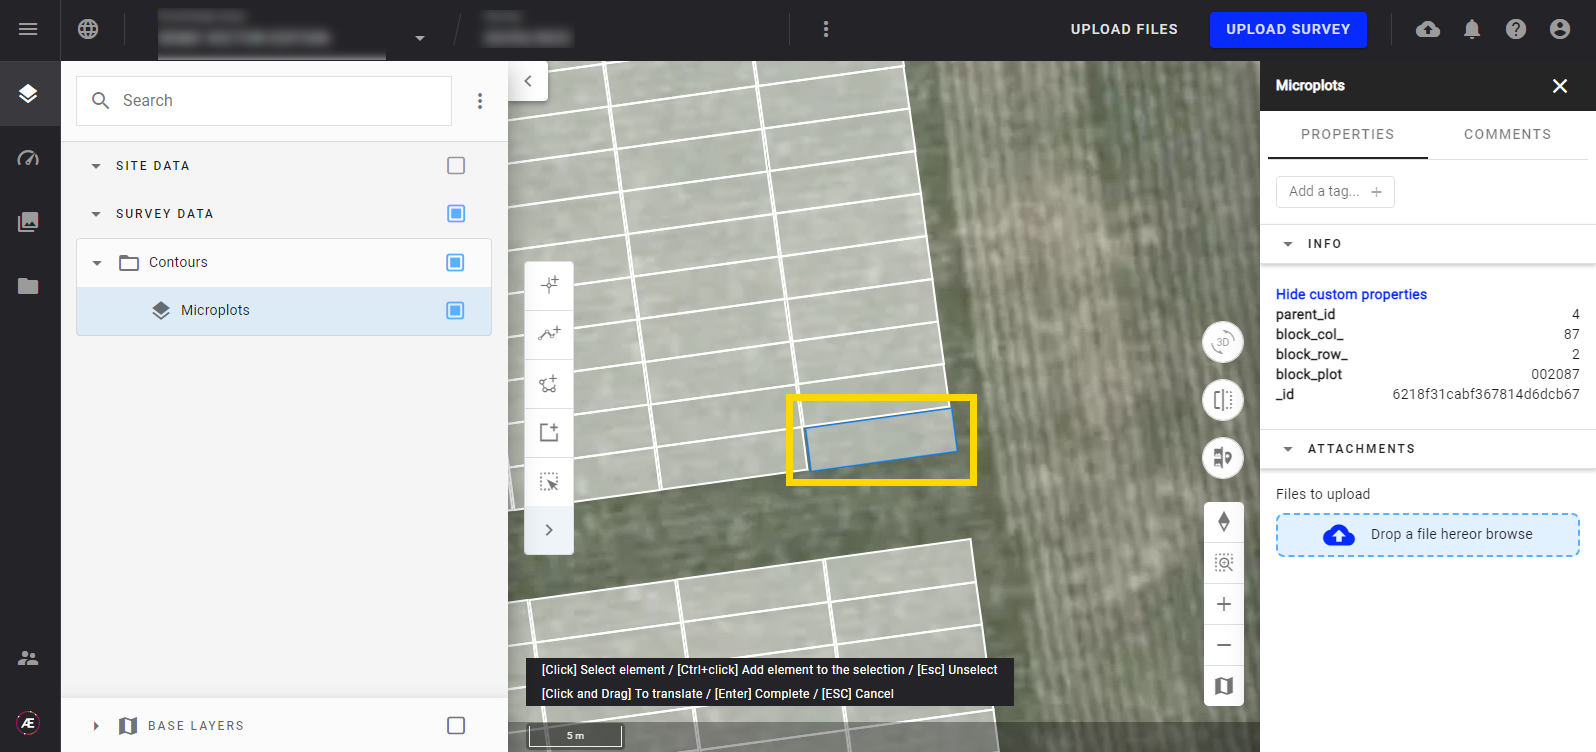
3.3 Relocate, move features
- Right-click on the selection and Left-click on the following icon.

- Hold the selection and move the shape on the map.
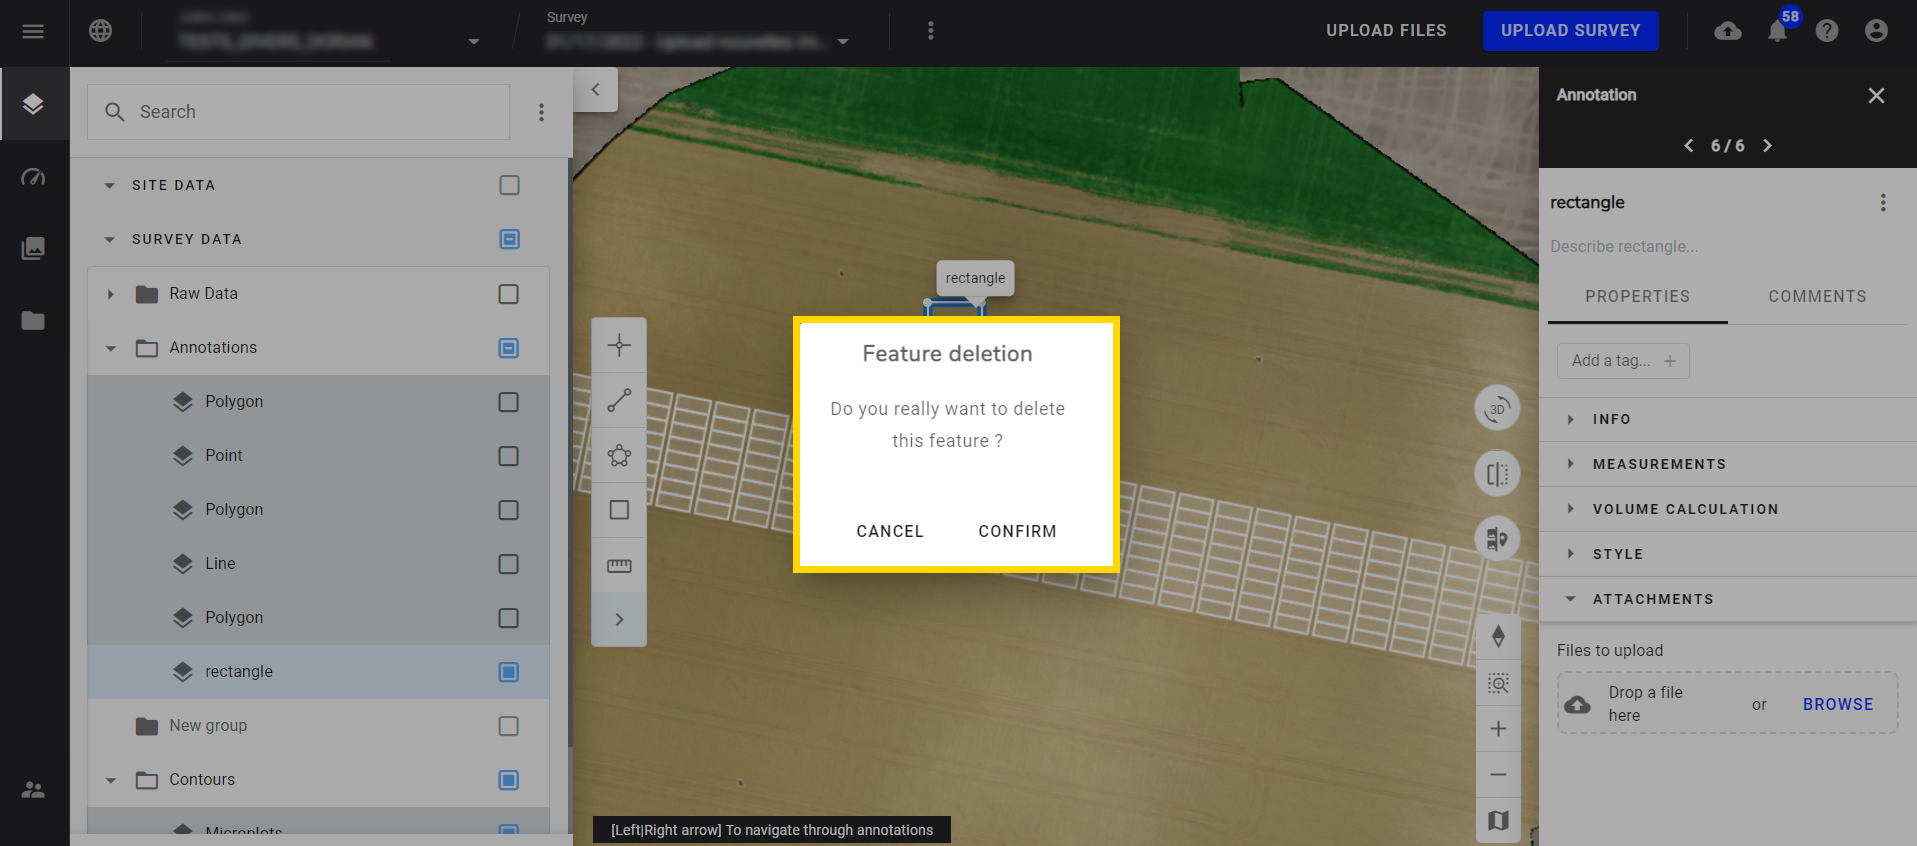
3.4 Deletion
- Right-click on the selection and Left-click on the following icon.

- Confirm the action on the popup.
3.5 Polygon edition
- Right-click on the selection and Left-click on the following icon.

- Left-click on the shape to add a vertex and then hold the click and drag the point to the right position.
- To delete a vertex, hover the mouse on the vertex and press Alt + left-click on the vertex.
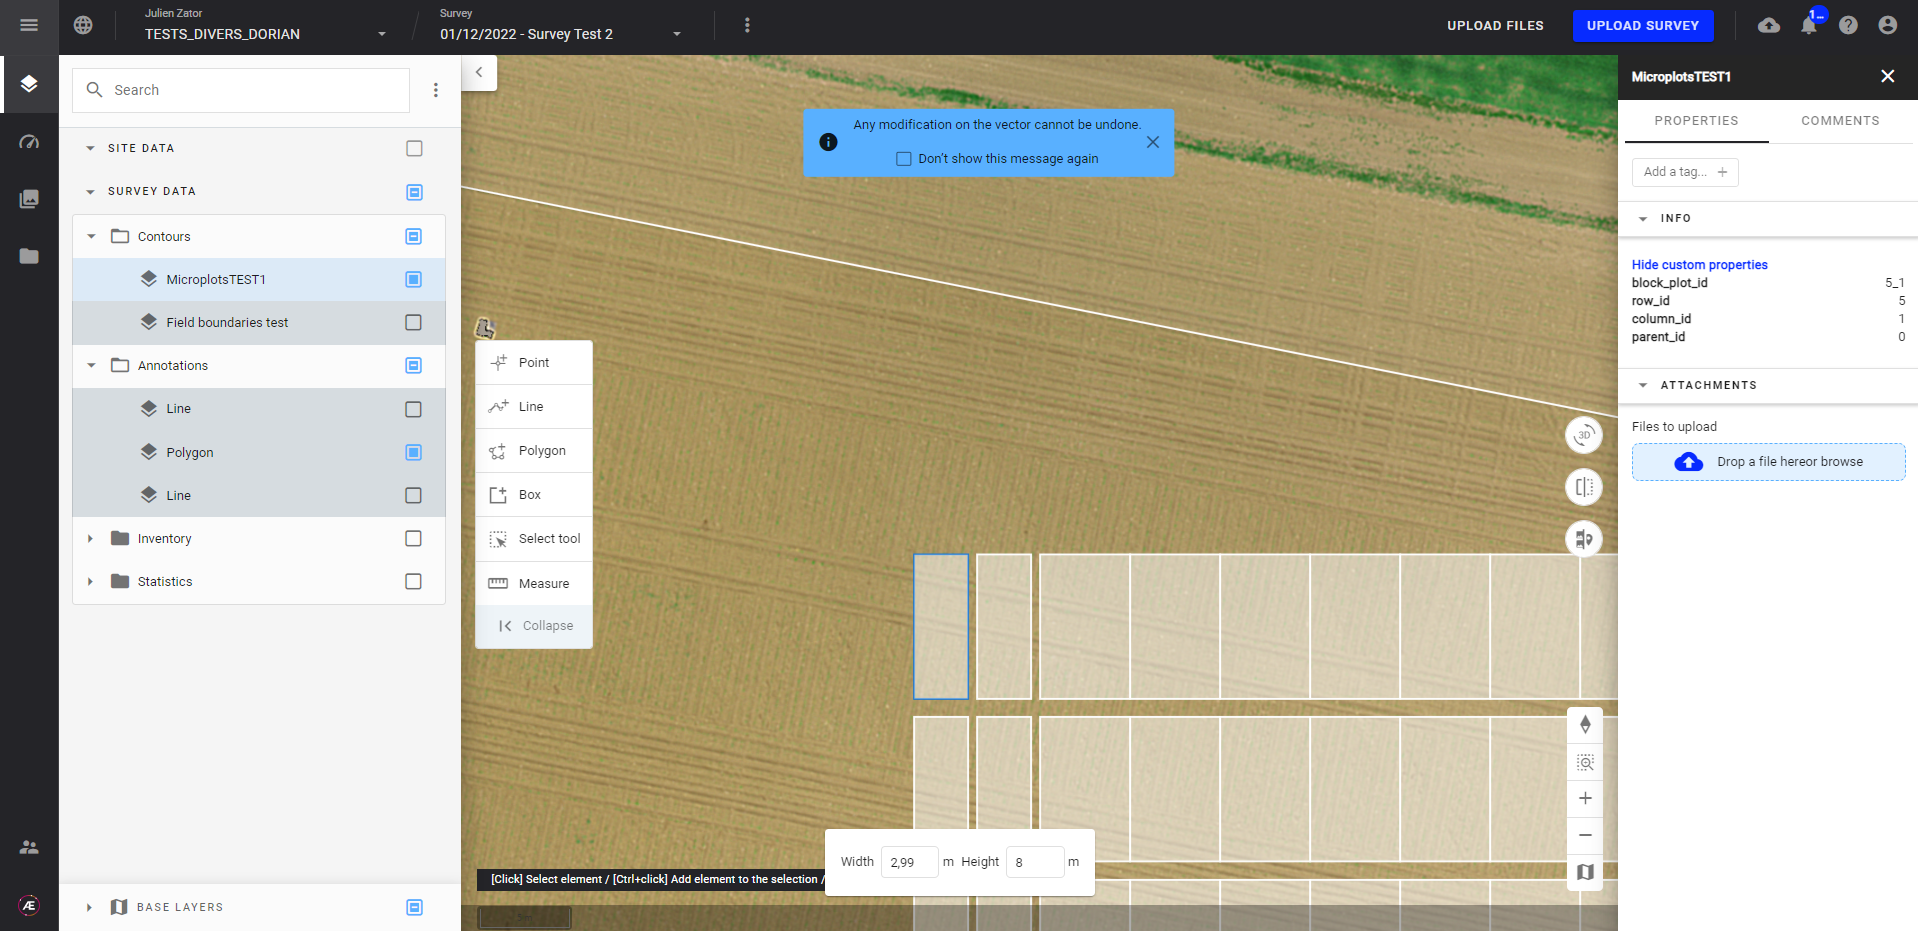
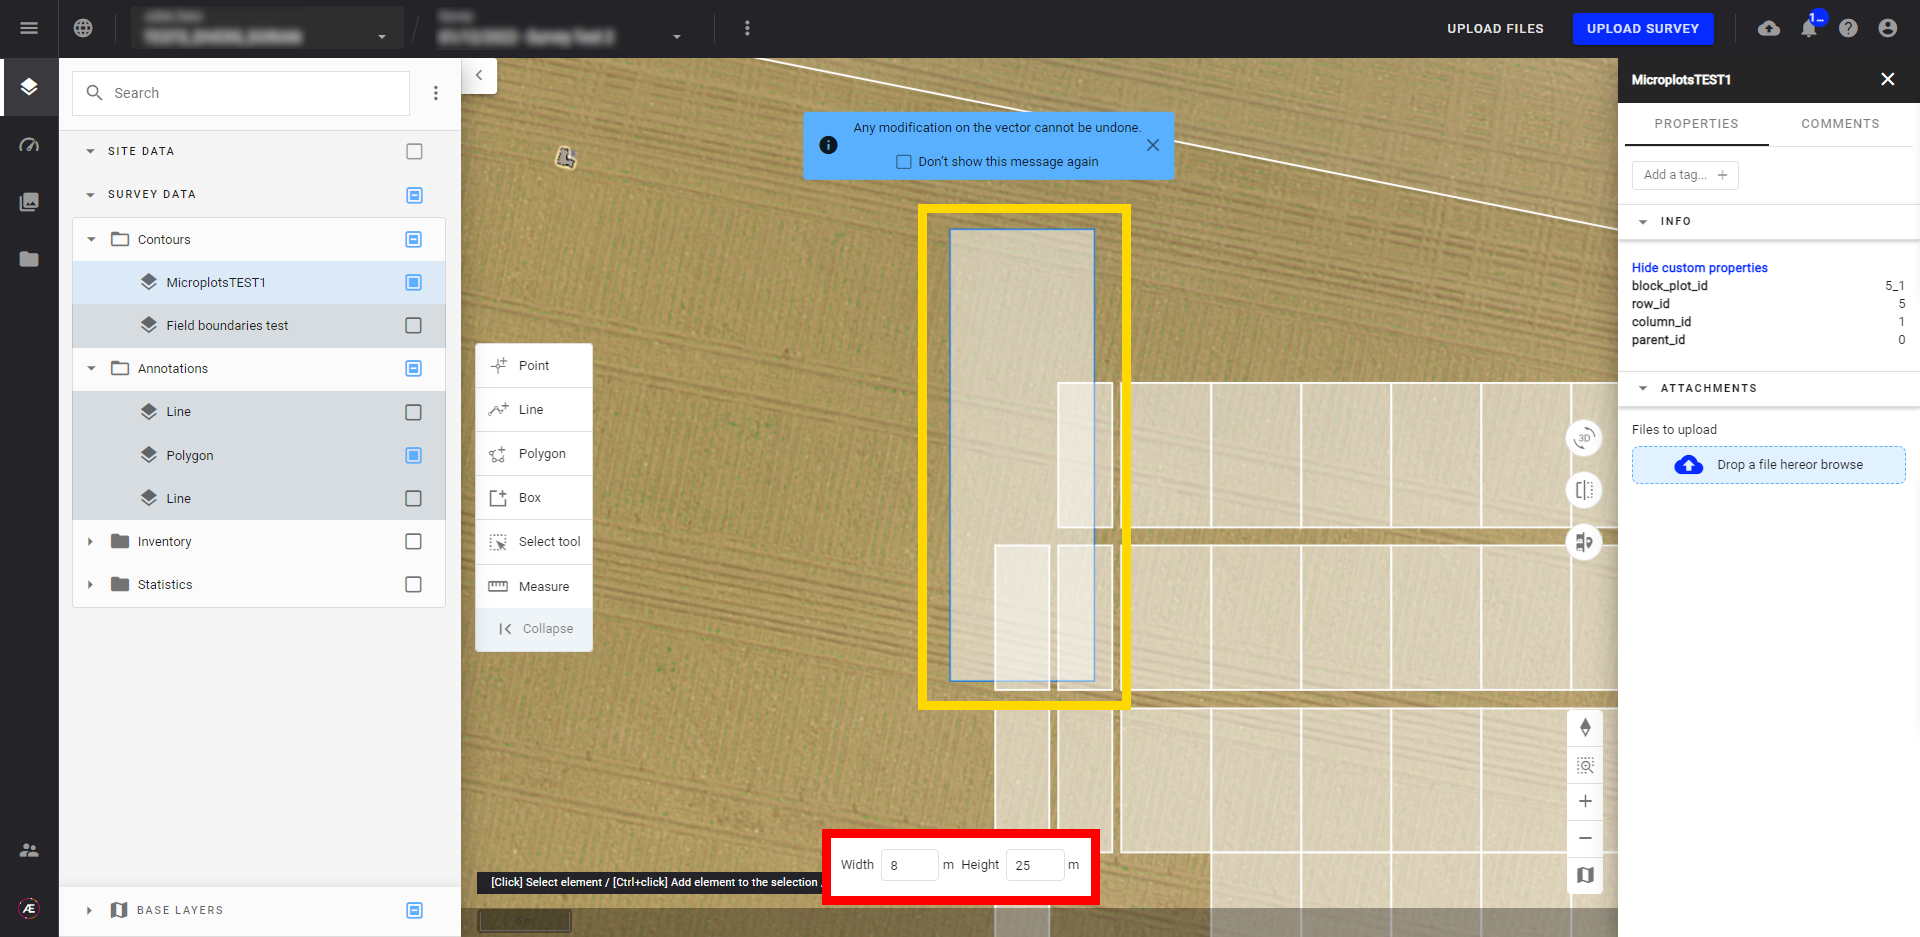
3.6 Transformation
This tool allows you to change the dimensions of the shapes.
- Right-click on the selection and Left-click on the following icon.

- To change the dimensions: enter a decimal value for the Width and height and press "Enter".
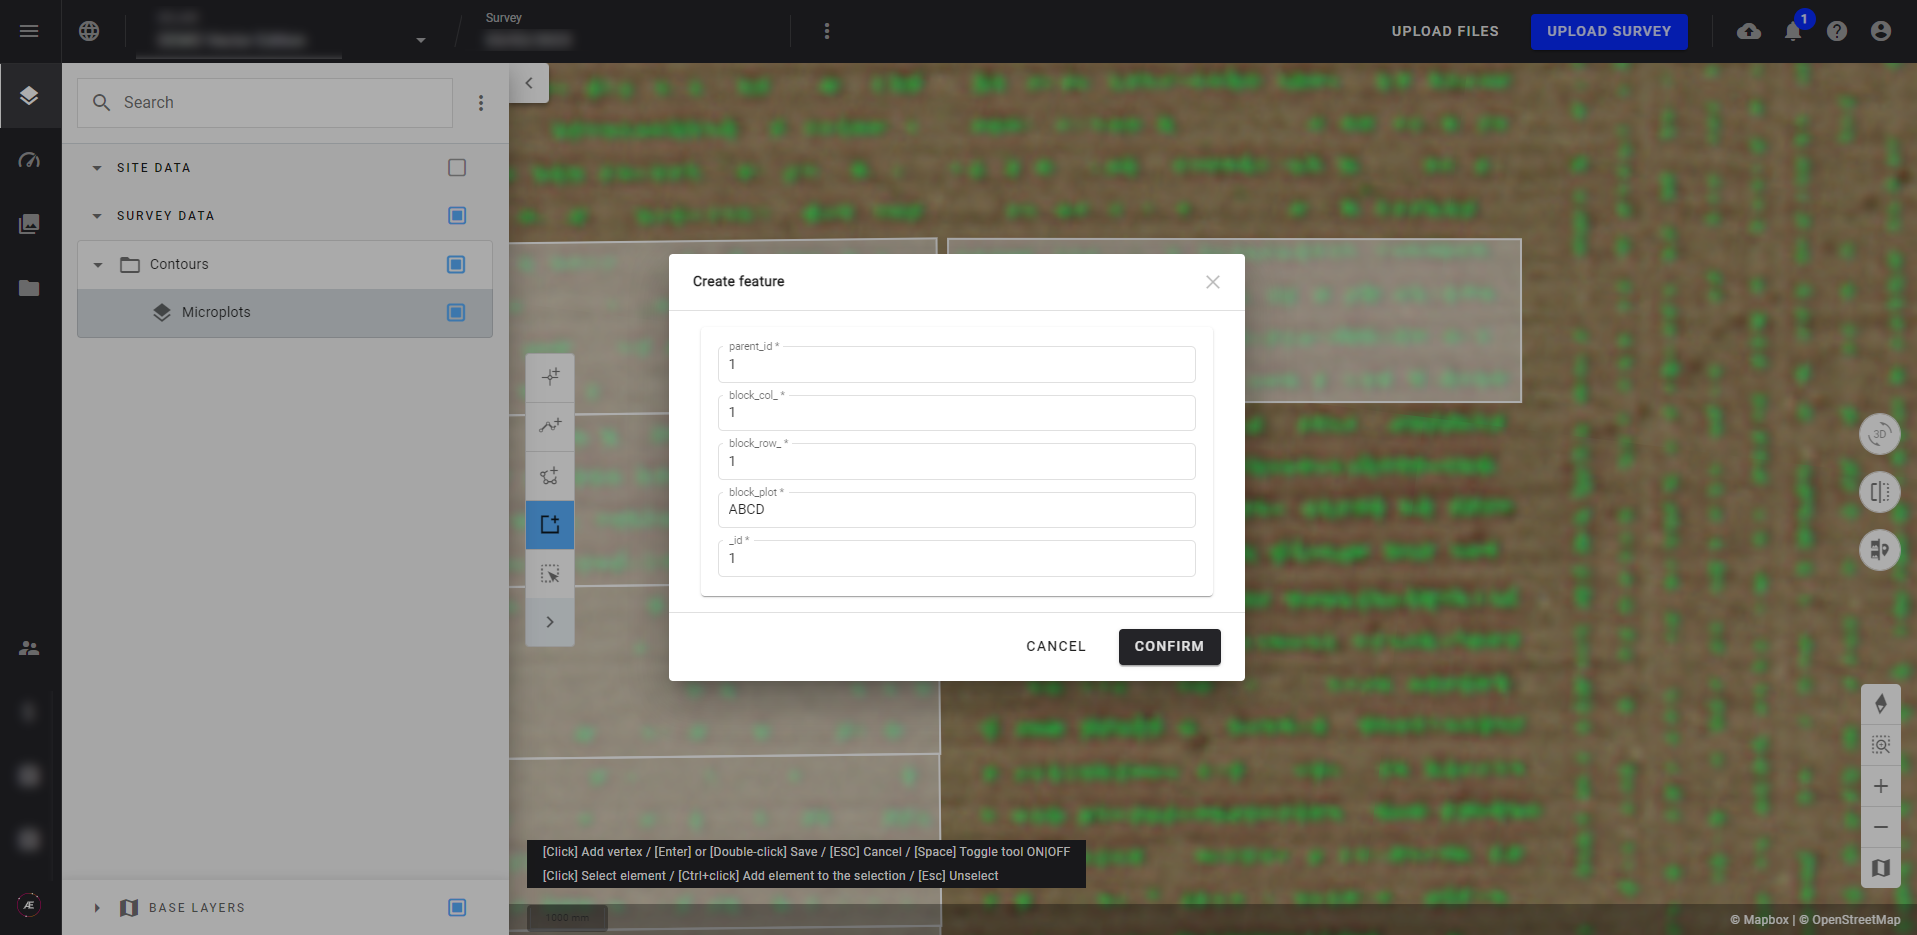
3.7 Add feature
- To add a new feature in a vector, select the type of feature you want to add in the toolbar and then draw the shape on the map.
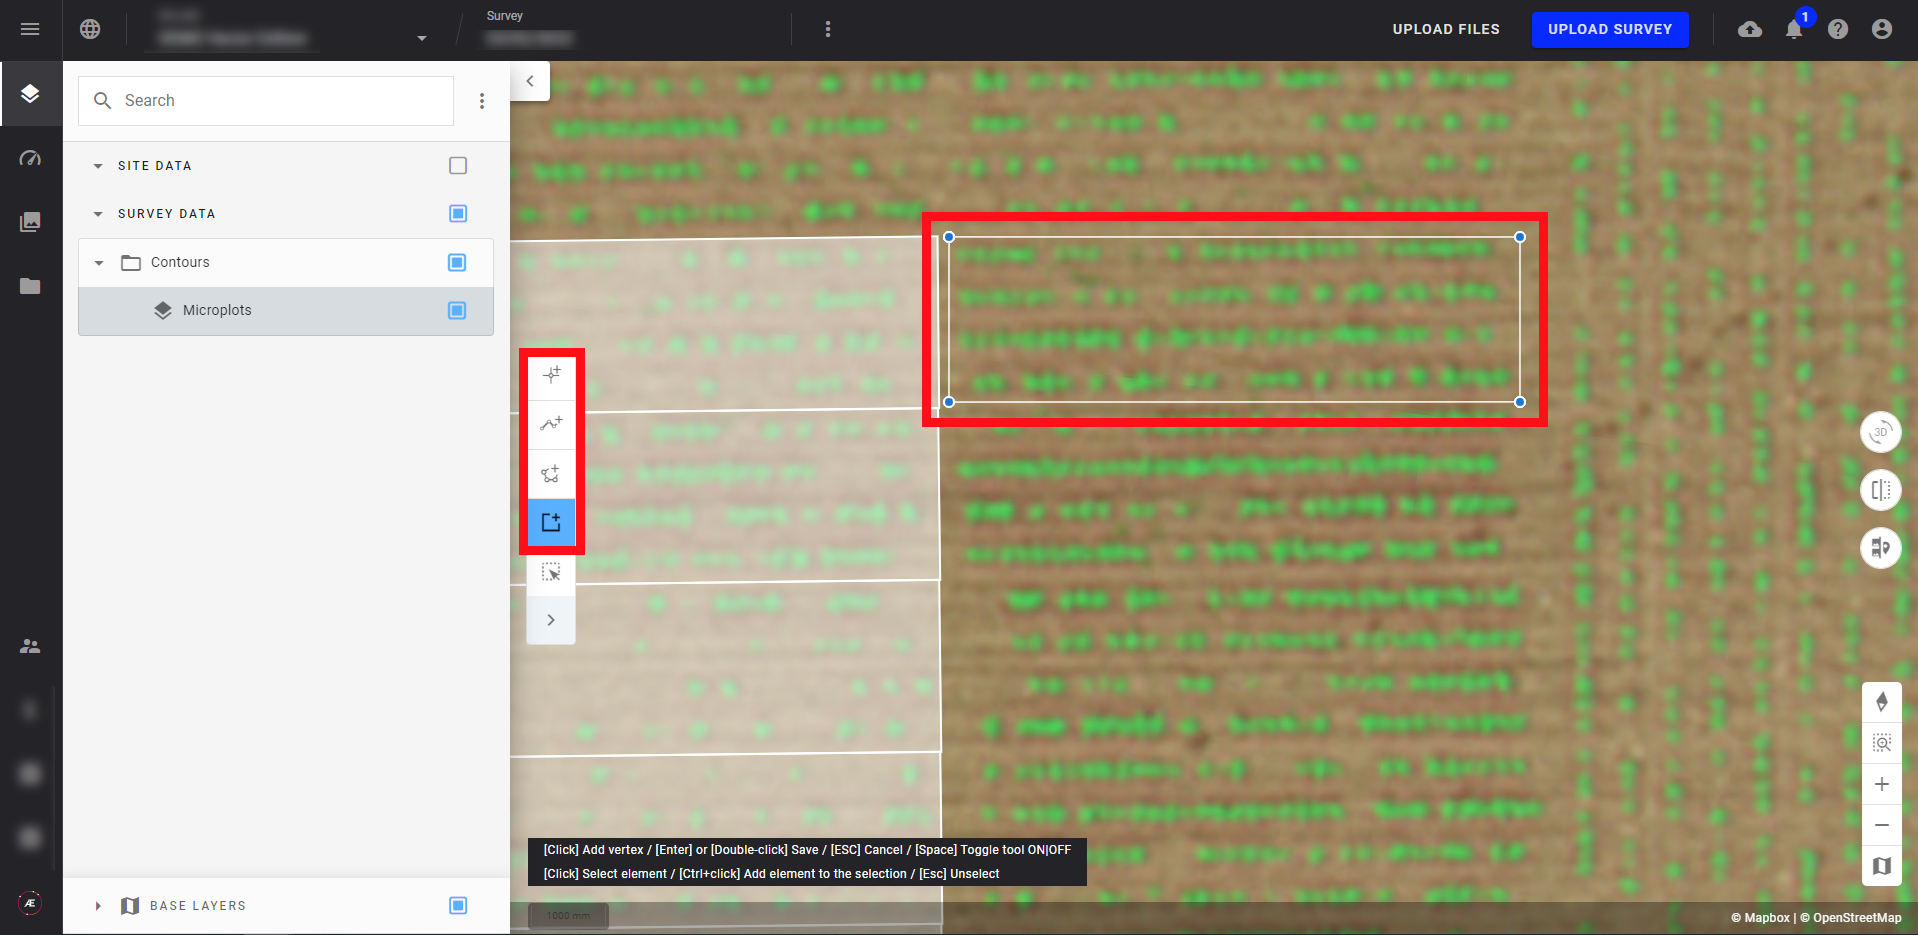
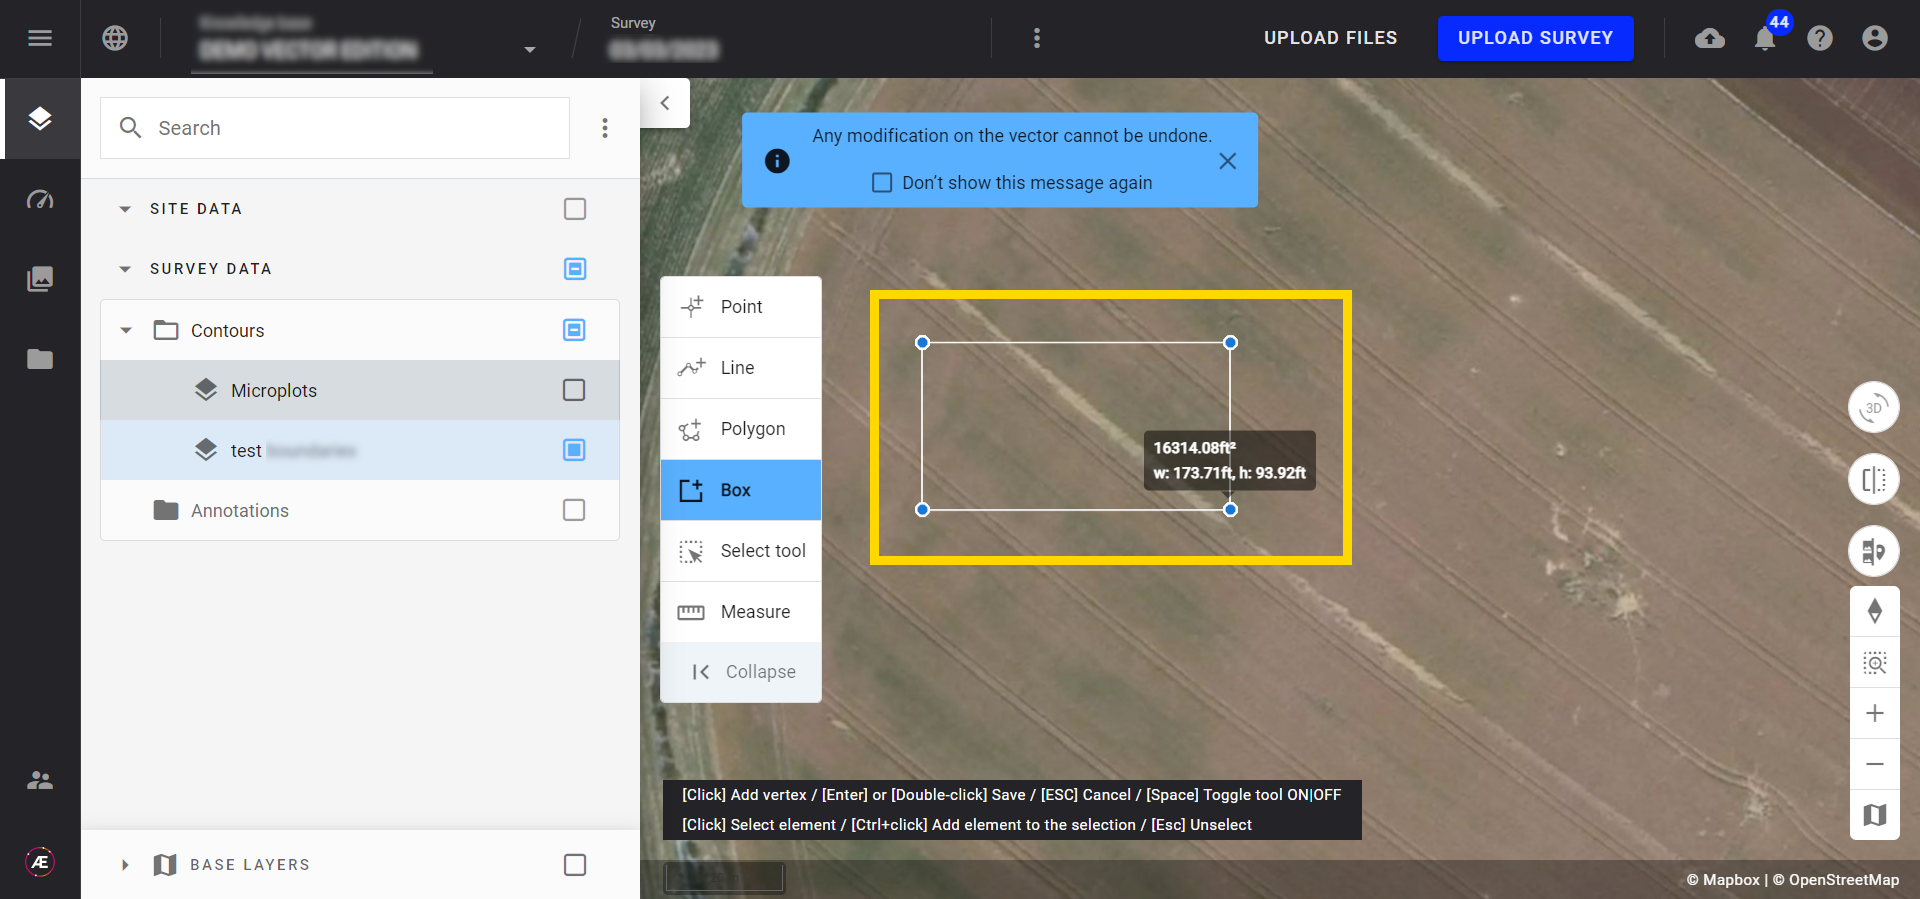

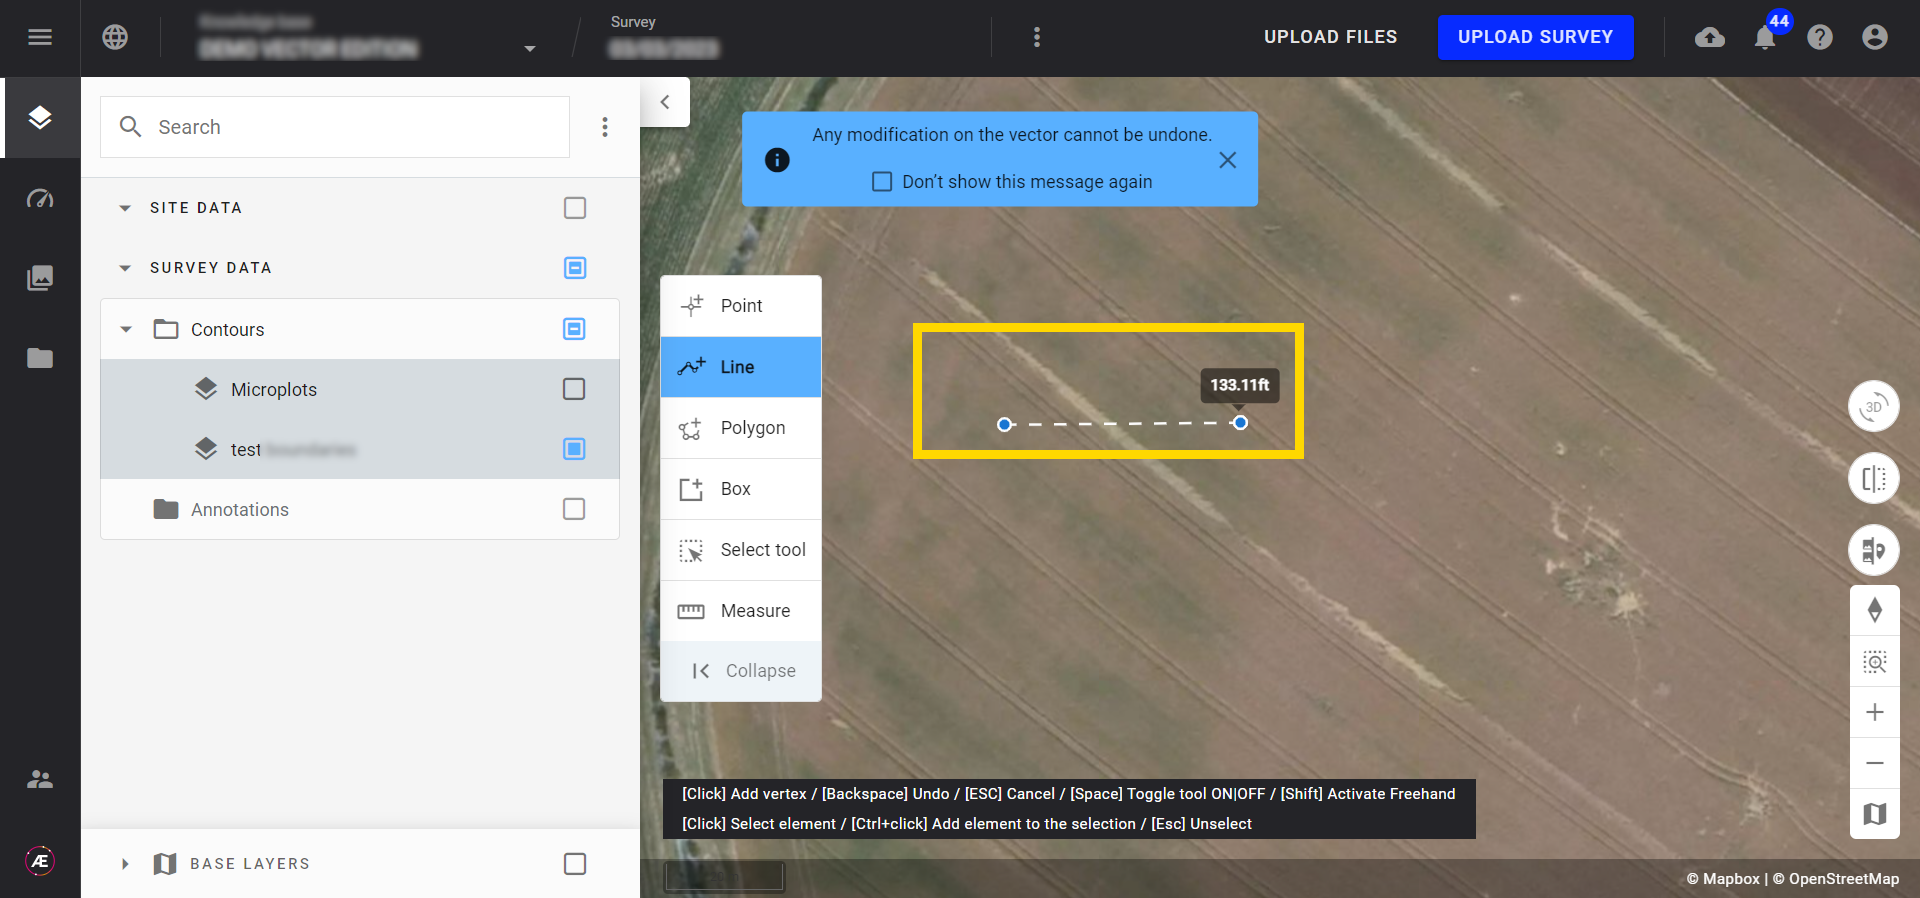
- In the popup, fill in mandatory attributes to complete the creation.
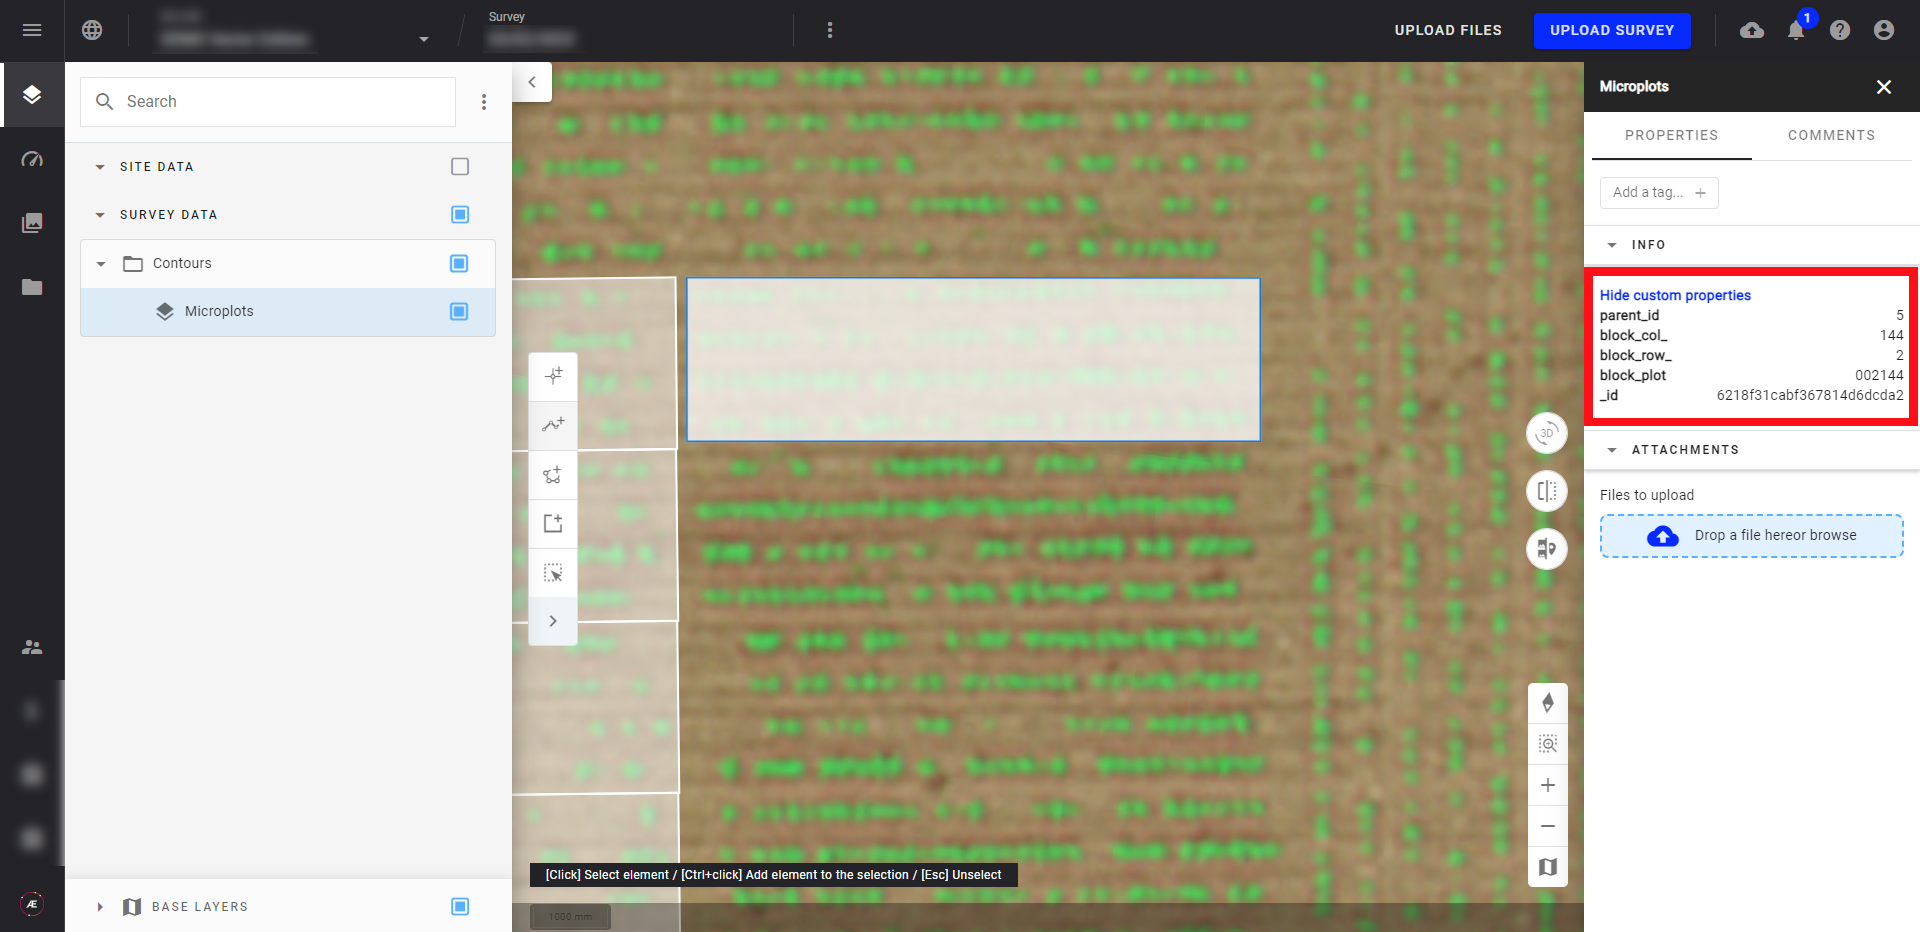
- Once created, the new feature is visible on the map and the attributes are updated in the info panel.
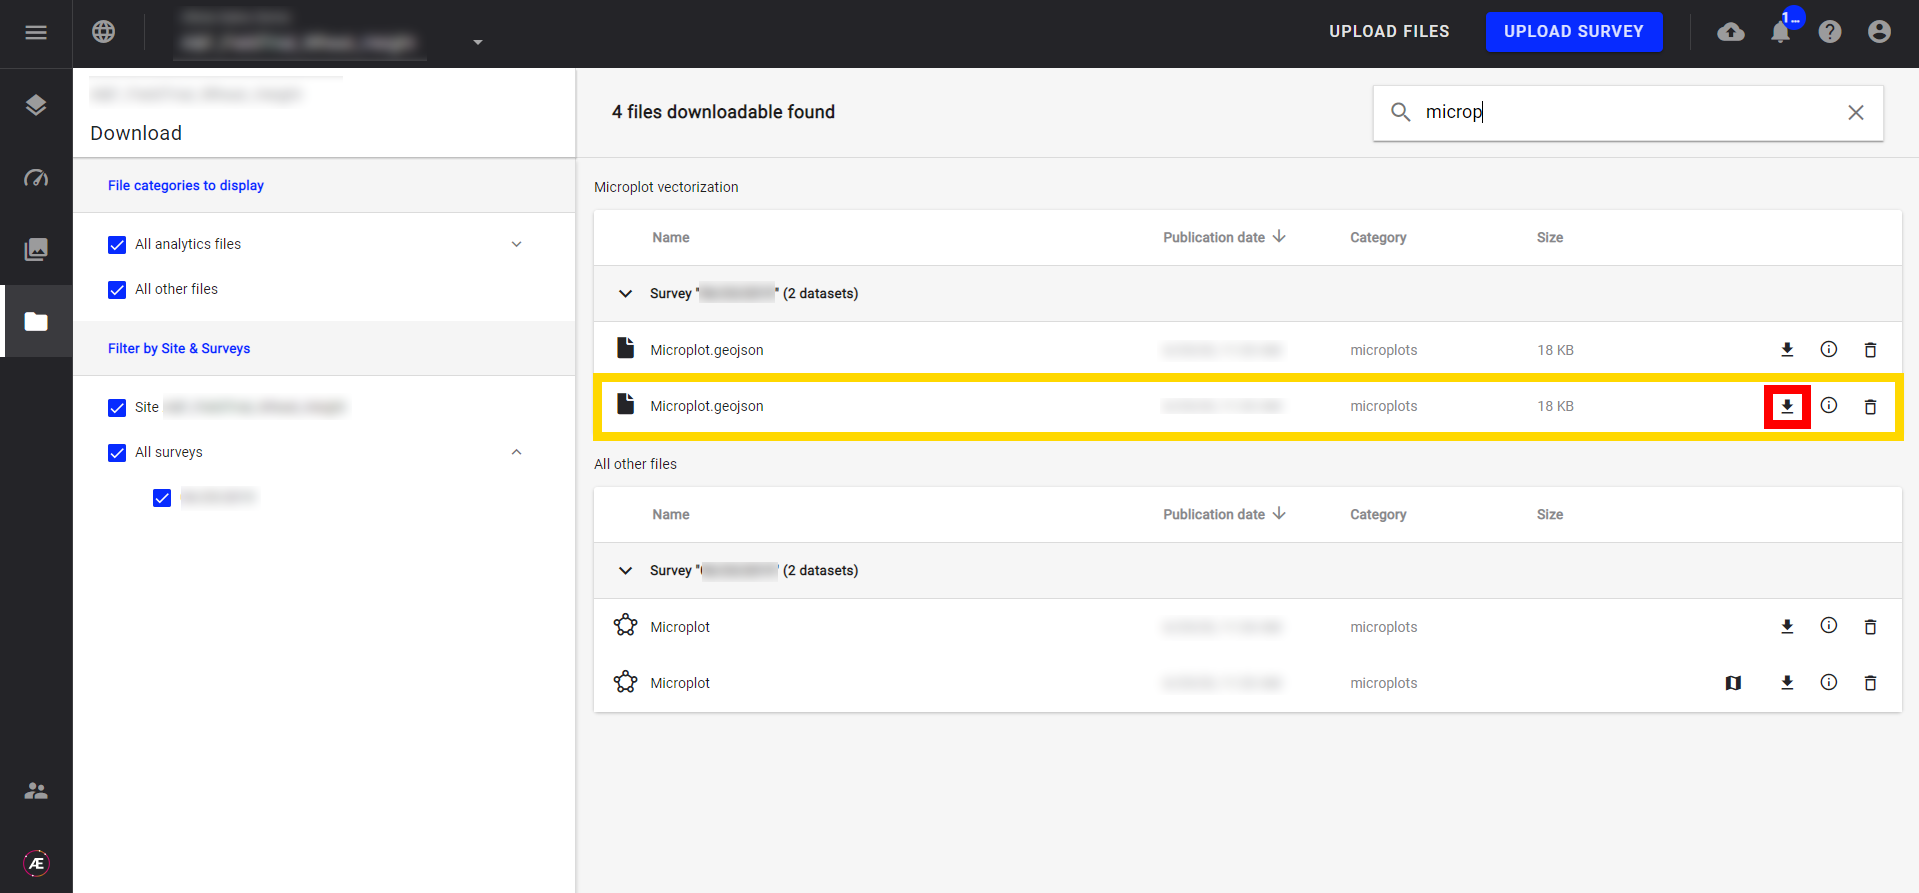
4. Vector file export
The modified vector file can be exported to your computer if necessary.
Download the modified vector file (i.e. including the geometry modifications and including the properties if any):
- From the layers panel, go to SURVEY DATA, and select the vector layer to open the info panel on the right. Click on the 3 dot menu on the top right and Download as GeoJSON or CSV.

- Download the original vector file (i.e. the file that does not contain any modification): click on the folder button on the left bar, search the file with the "file" icon, and click on the arrow to export it.