

Material Management
Inventory & Production Monitoring at a quarry or mine is simplified thanks to the materials' management feature. You can now upload/create a list of Material types and assign them to a stockpile whose volumes were calculated in Aether. The Material Management module enables to :
- Import materials with their density and price
- Create single materials
- Assign materials to stockpiles
- Display total inventory within a site
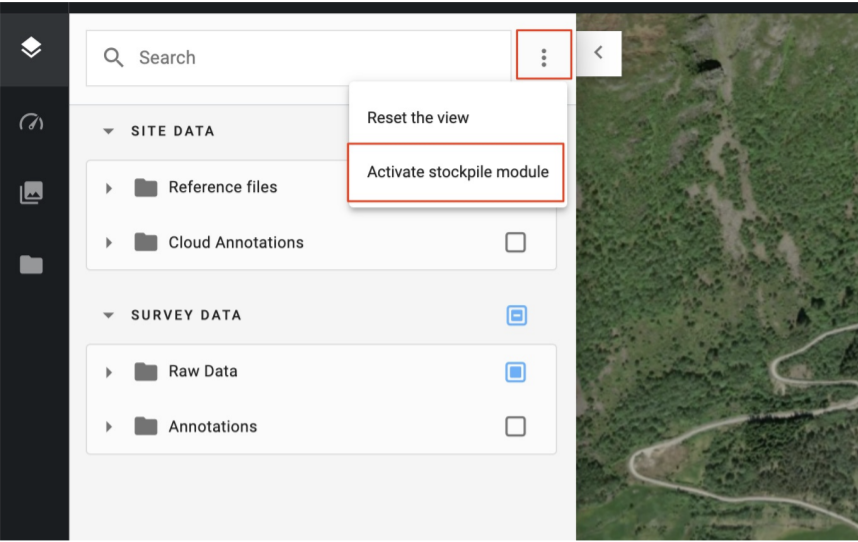
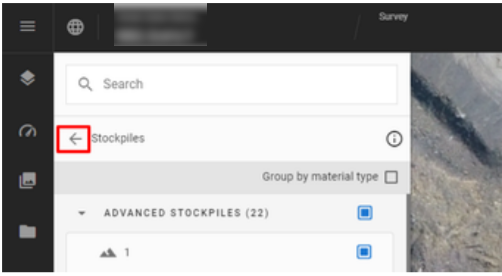
To manage materials, first open a project and select the appropriate Survey. From the layer panel on the right, go to the Stockpiles section and click the small arrow.

You cannot see the Stockpile module?
To activate the stockpile module, click on the 3 dots as seen in the image below, and click on Activate stockpile module.
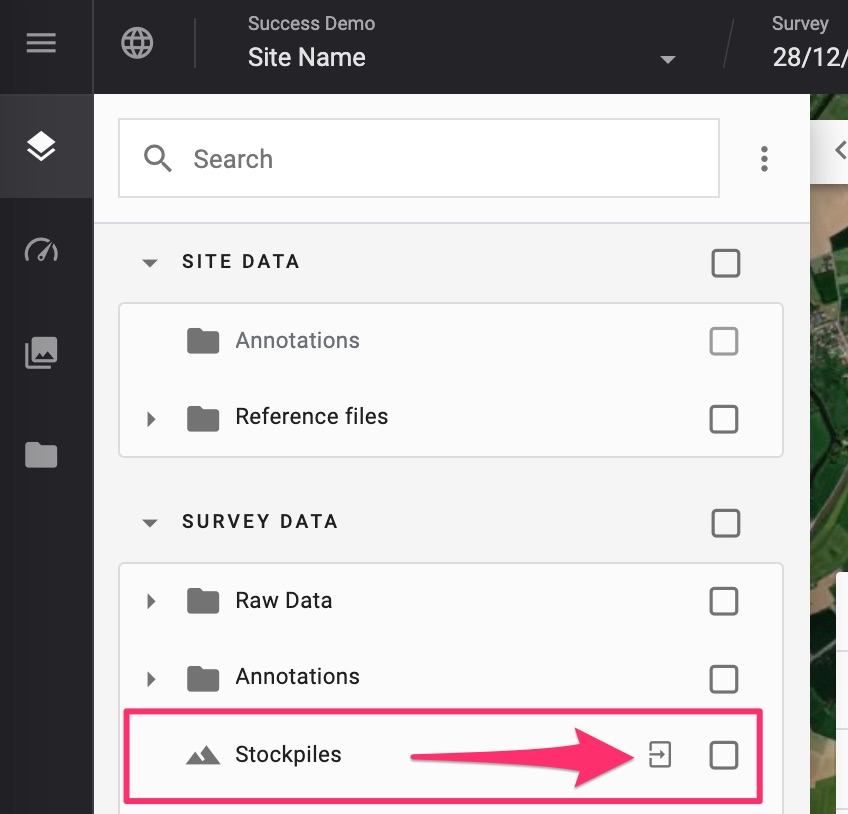
The module will appear in the left panel as seen below, and can be accessed by clicking on the little arrow
If Advanced Stockpiles have been requested, the module will be activated by default upon delivery of the results.
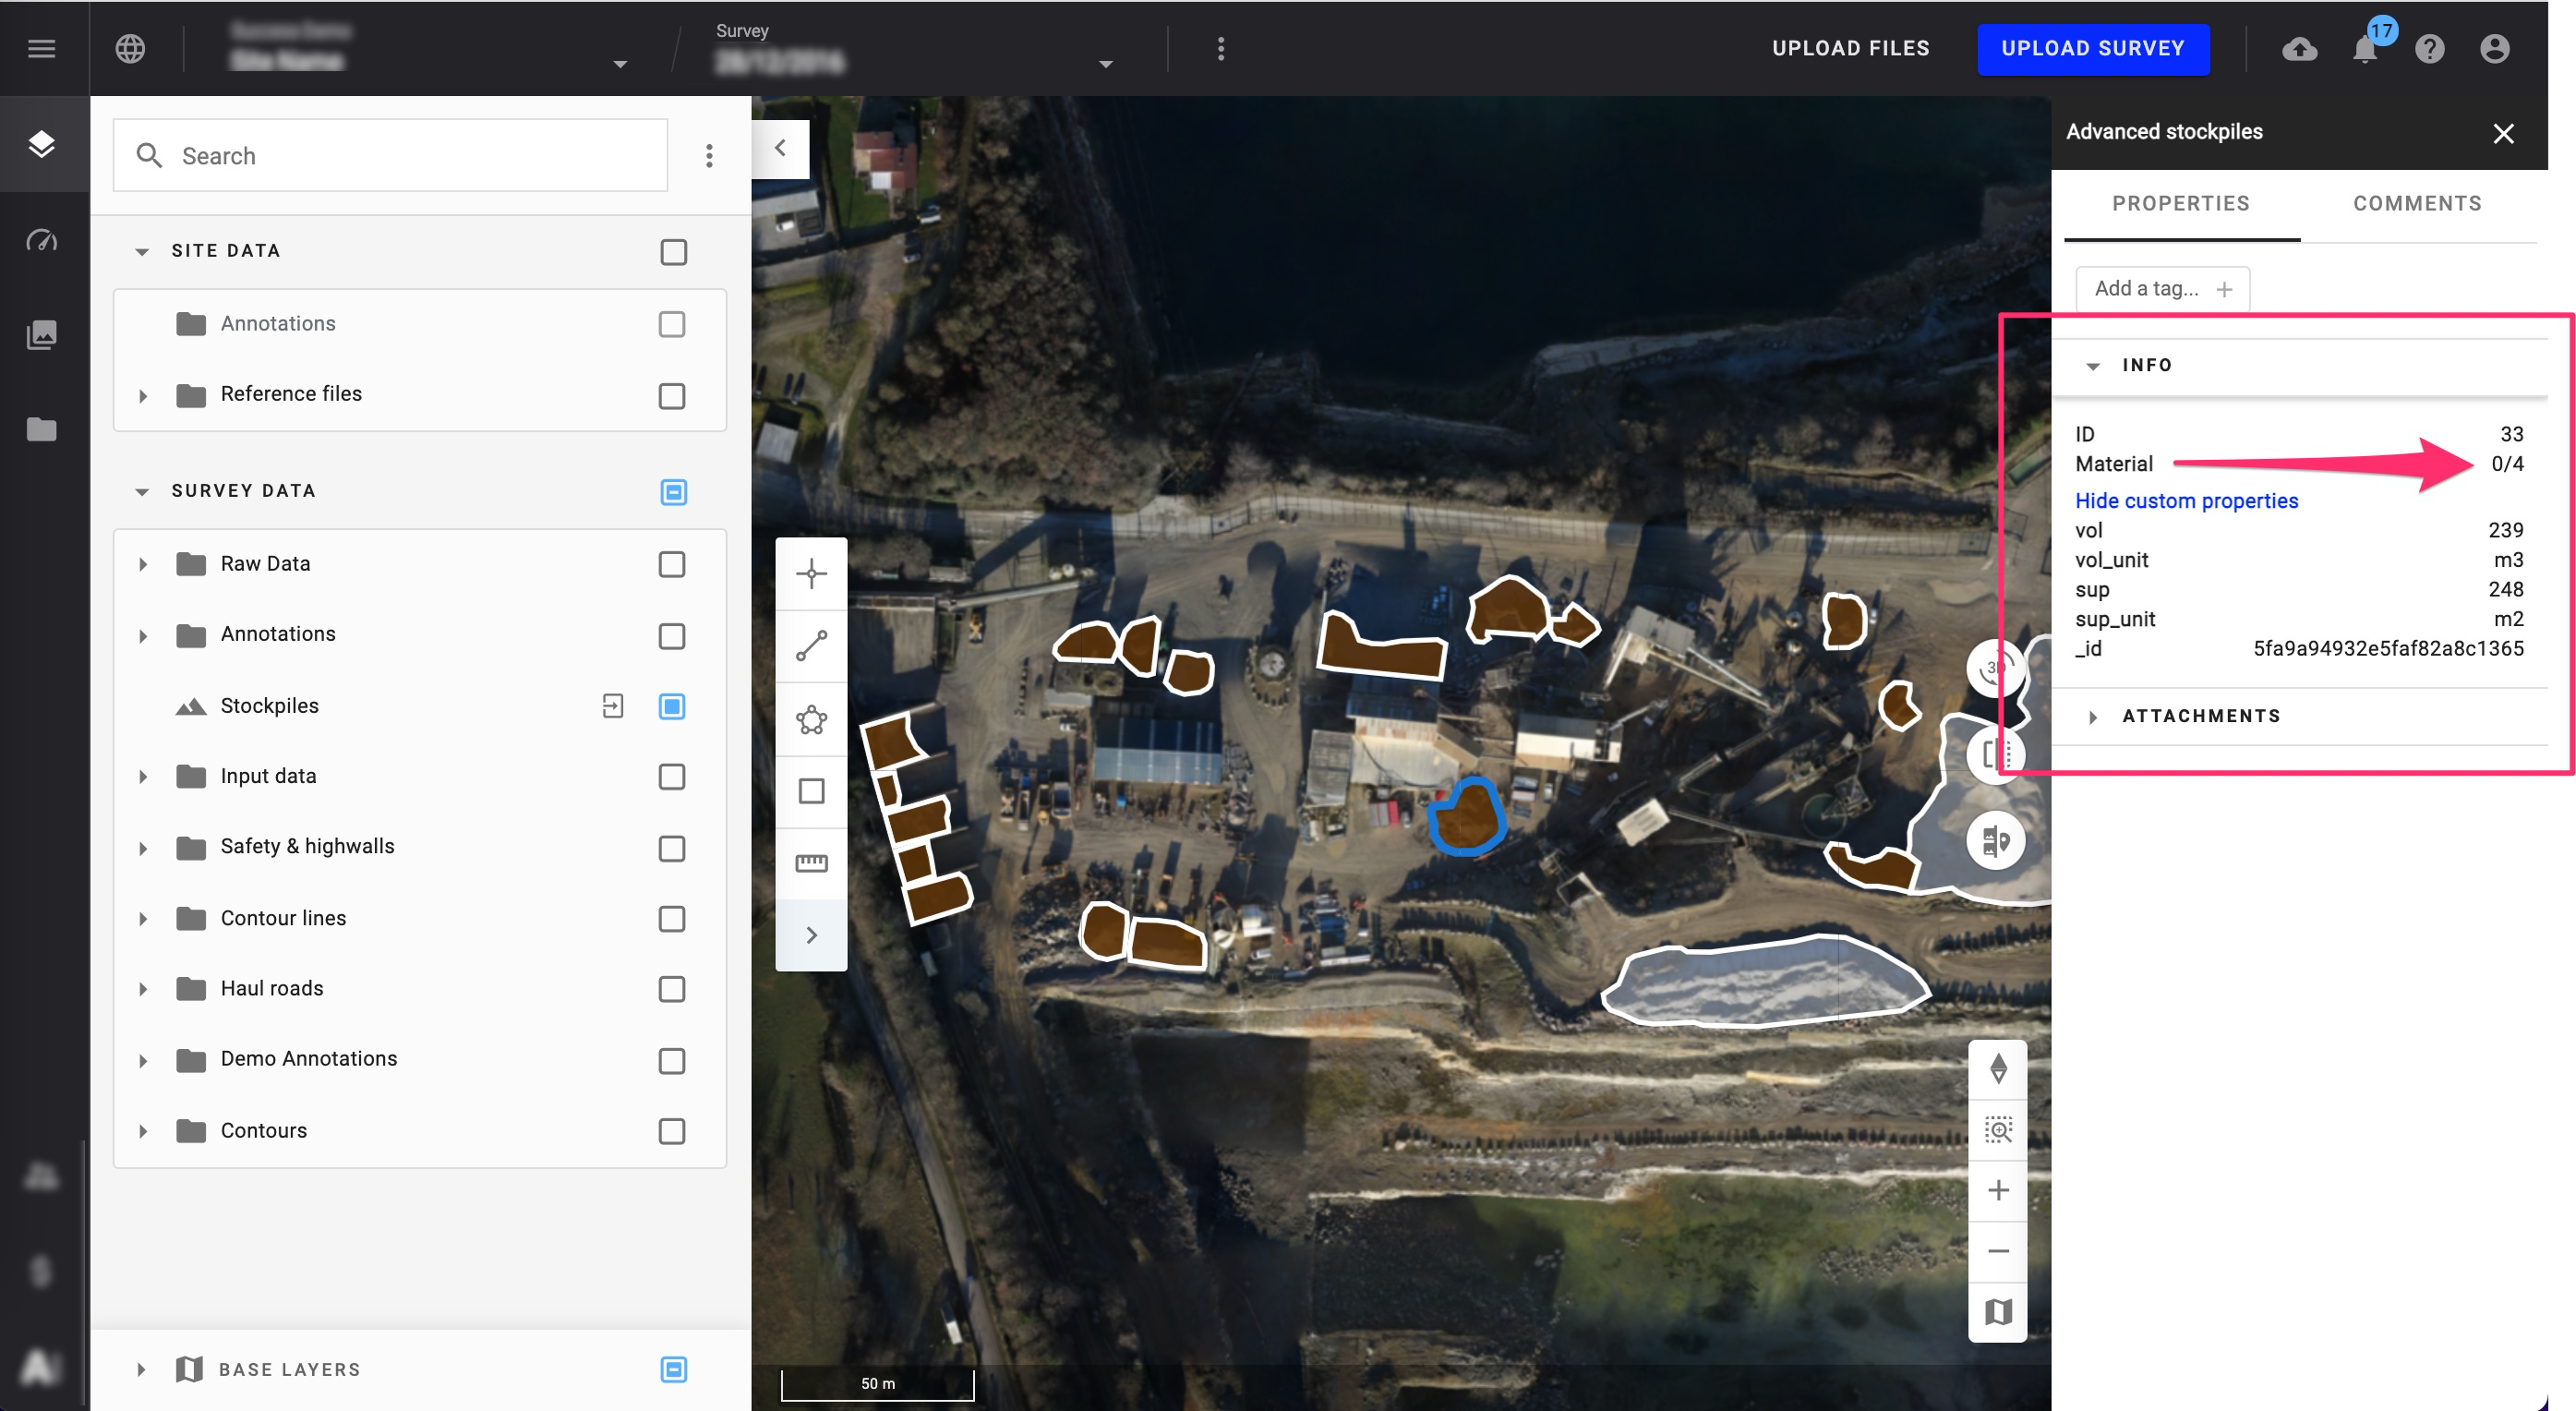
1. Have my stockpiles been assigned Material Types?
Brown piles have materials assigned, while white piles do not. Access the stockpiles layer by checking the box and click on one pile on your map. This will open the information panel on the right and will display the properties of this pile. It will show whether a material is already assigned or not.

2. Creating or Uploading a materials type's list
In order to manage, import or edit material types such as naming and density, etc. you need to import or add that information within Aether. This could be reached in 2 ways.
Note that: only a user in Manager role can create, edit, or upload a materials type's list To get familiar what each role is allowed to do on Aether, check out the following link
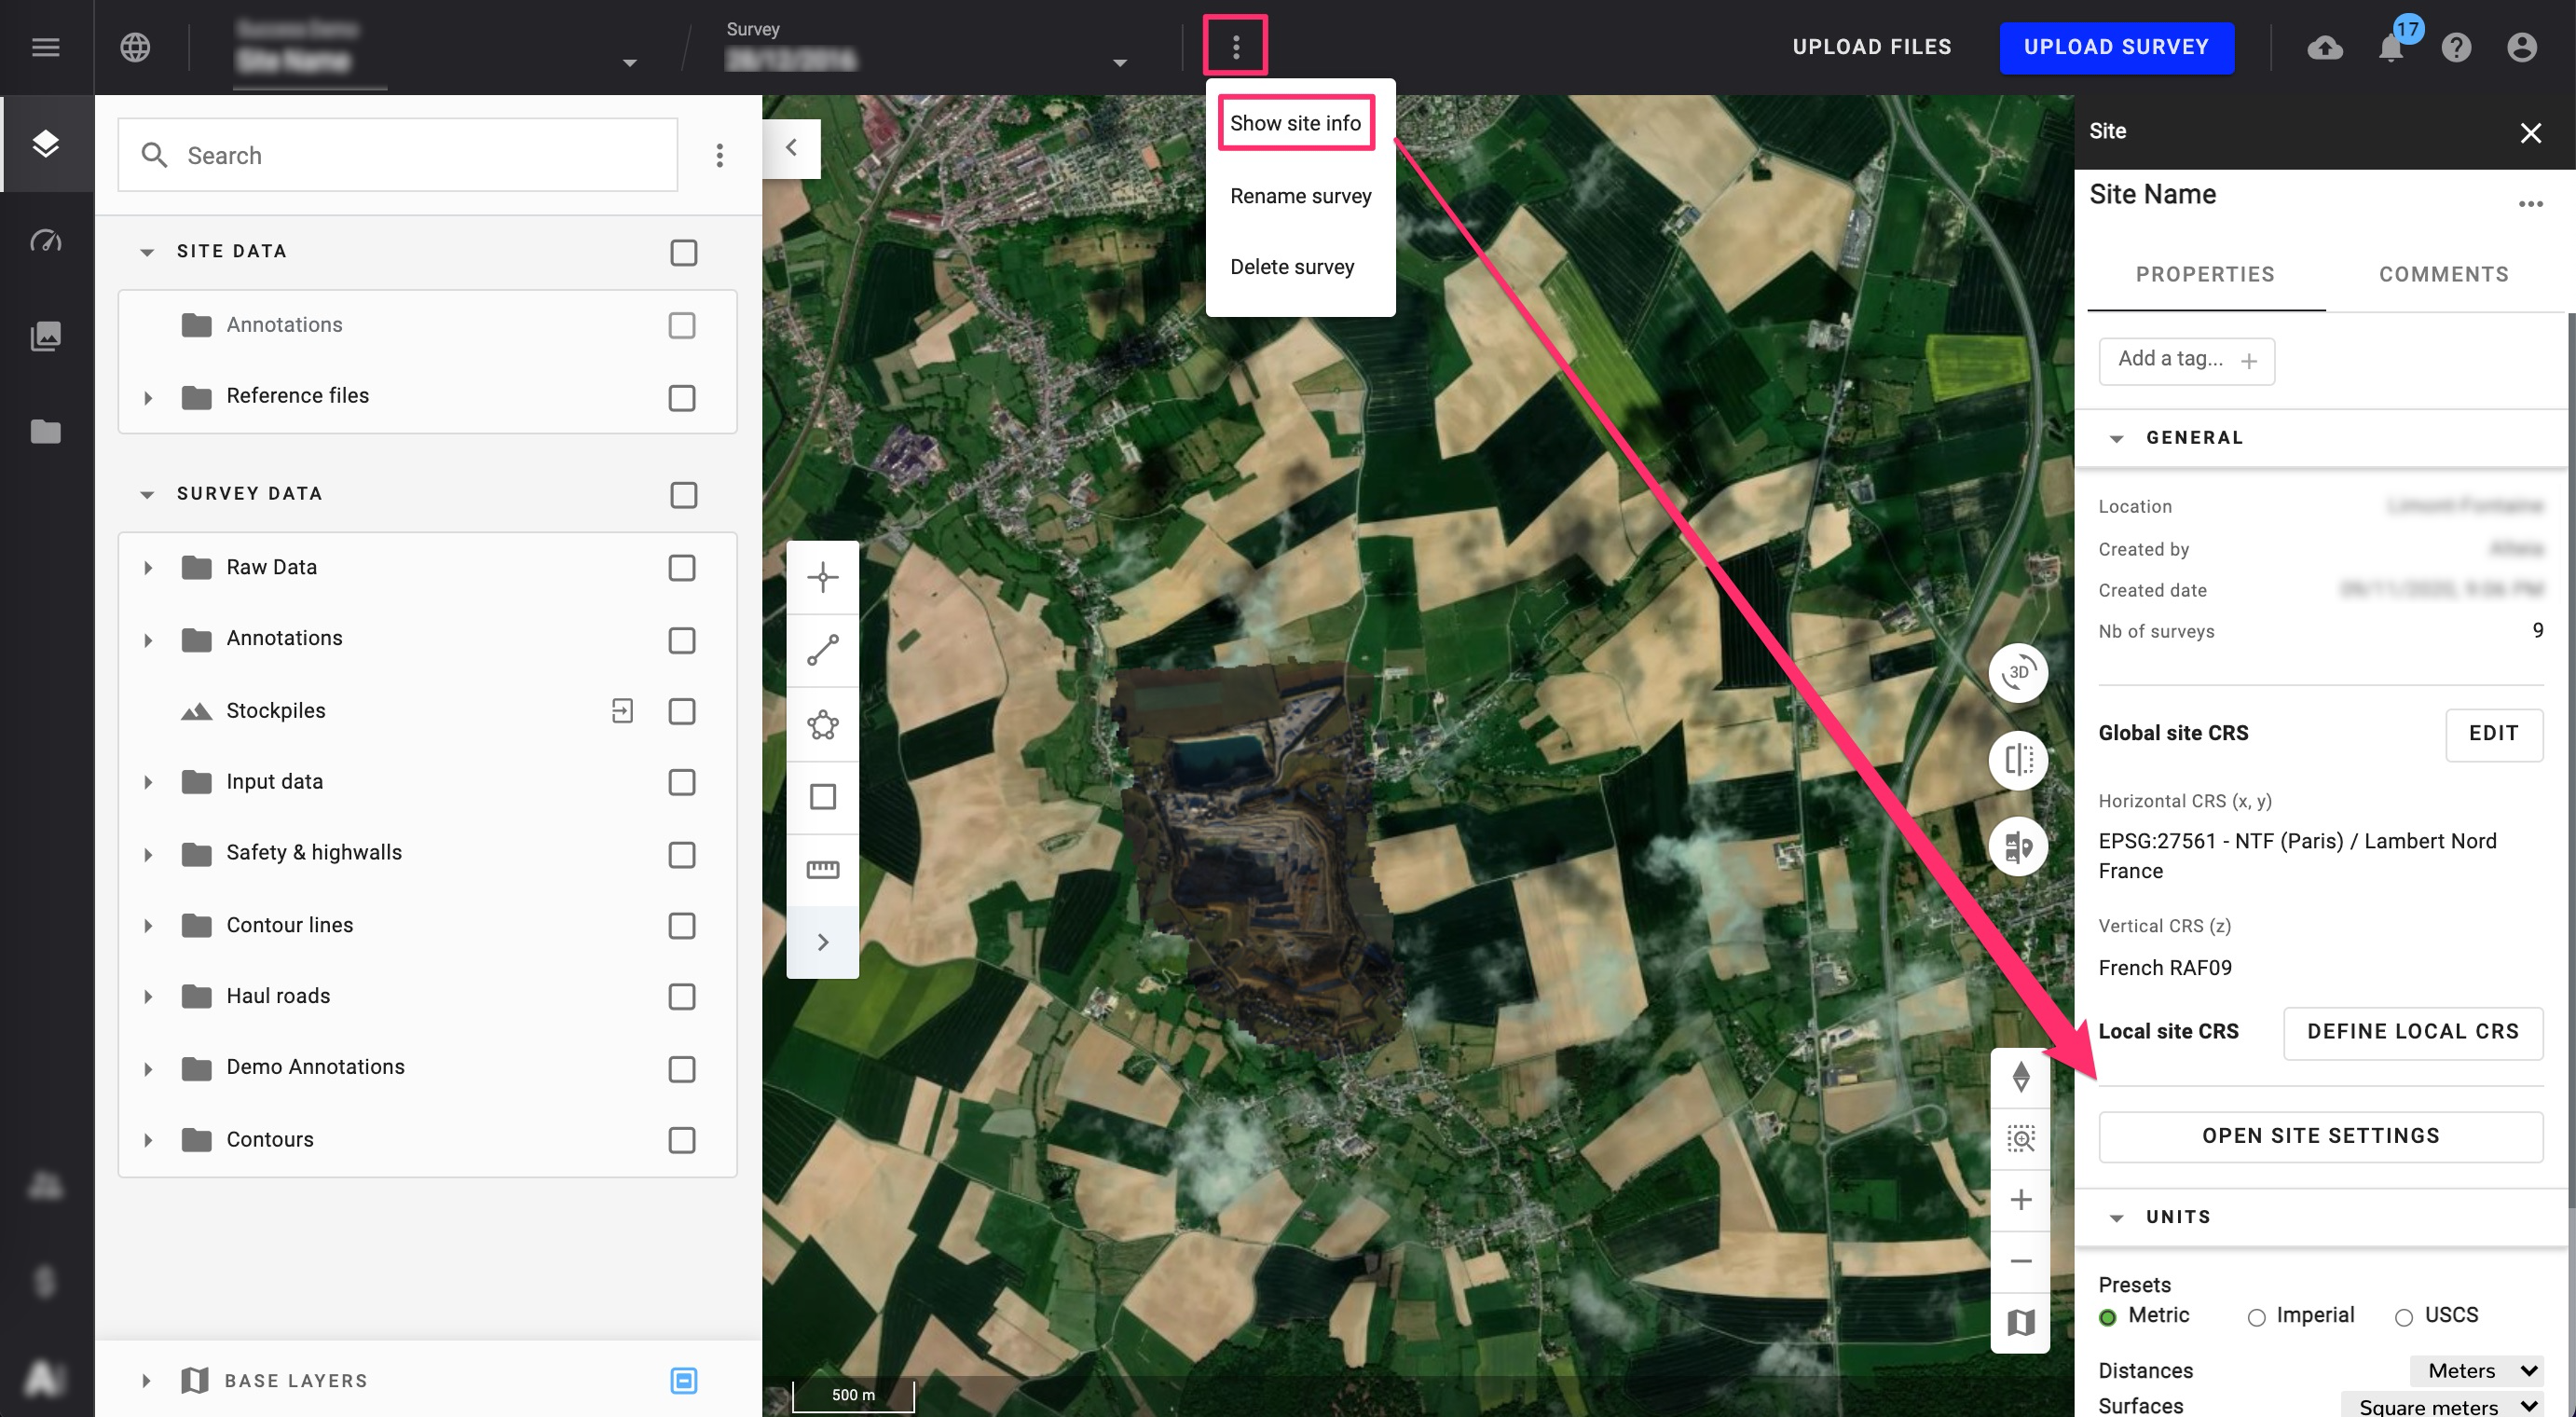
The first way you can access the material management page is through the project information panel.
Within a project, click on the 3 dots next to the survey date > Select "Show project info" > then select Open project Settings.
The second way to find the Material management panel is through the Stockpile Module. Click on the Stockpile layer and from the right panel click on Manage Material Type.
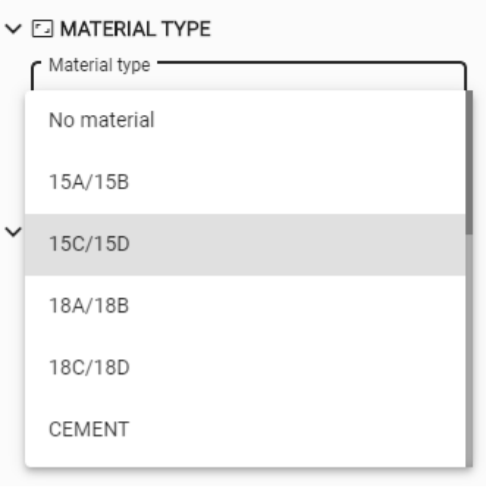
Select Material Types > Make sure to select the correct project you want to add/import to > If you want to import a long list of materials, use the IMPORT CSV option (a template file is available below to ensure the correct format).
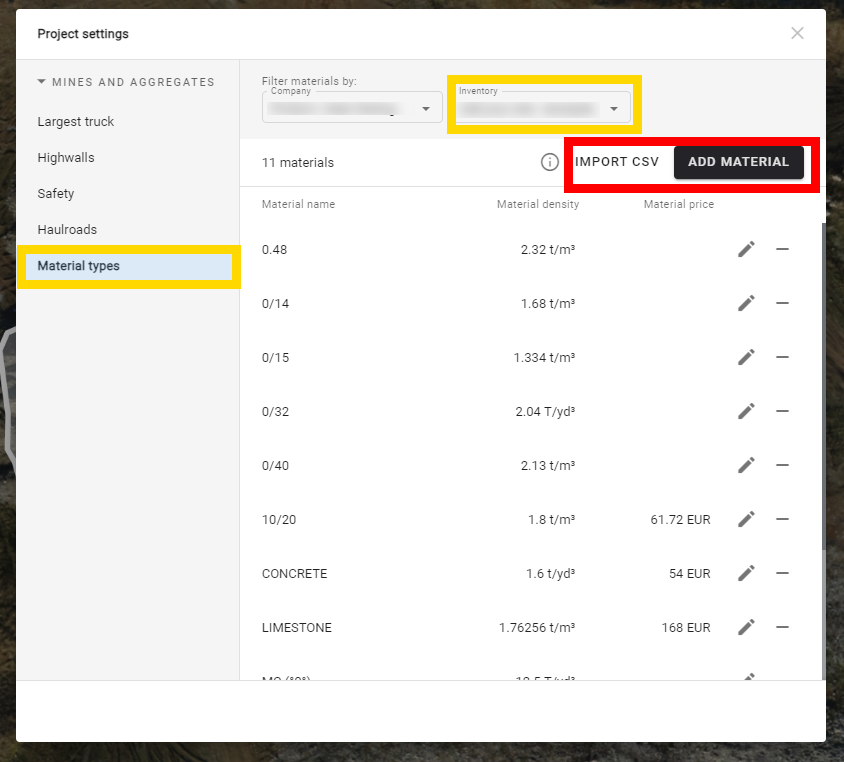
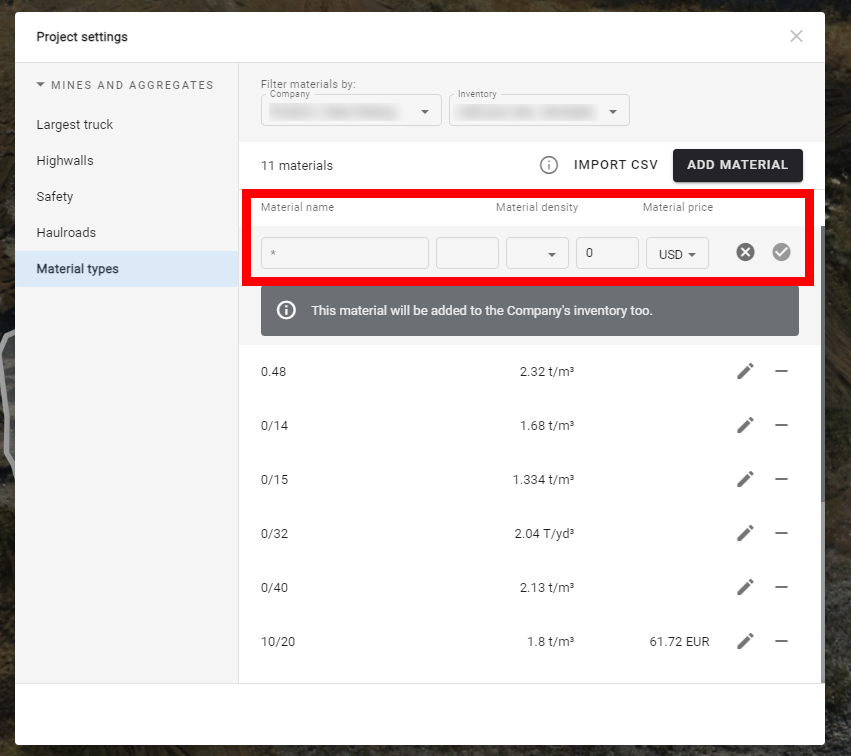
If you want to create or modify one or few materials, select the ADD Material option.
If you want to edit existing materials, click the pencil to adjust a single line, then confirm the correction by clicking the check icon ✓.
3. Assign or Change Material
After importing or adding materials, you need to assign each pile its correct Material. To do so, access the Stockpile module
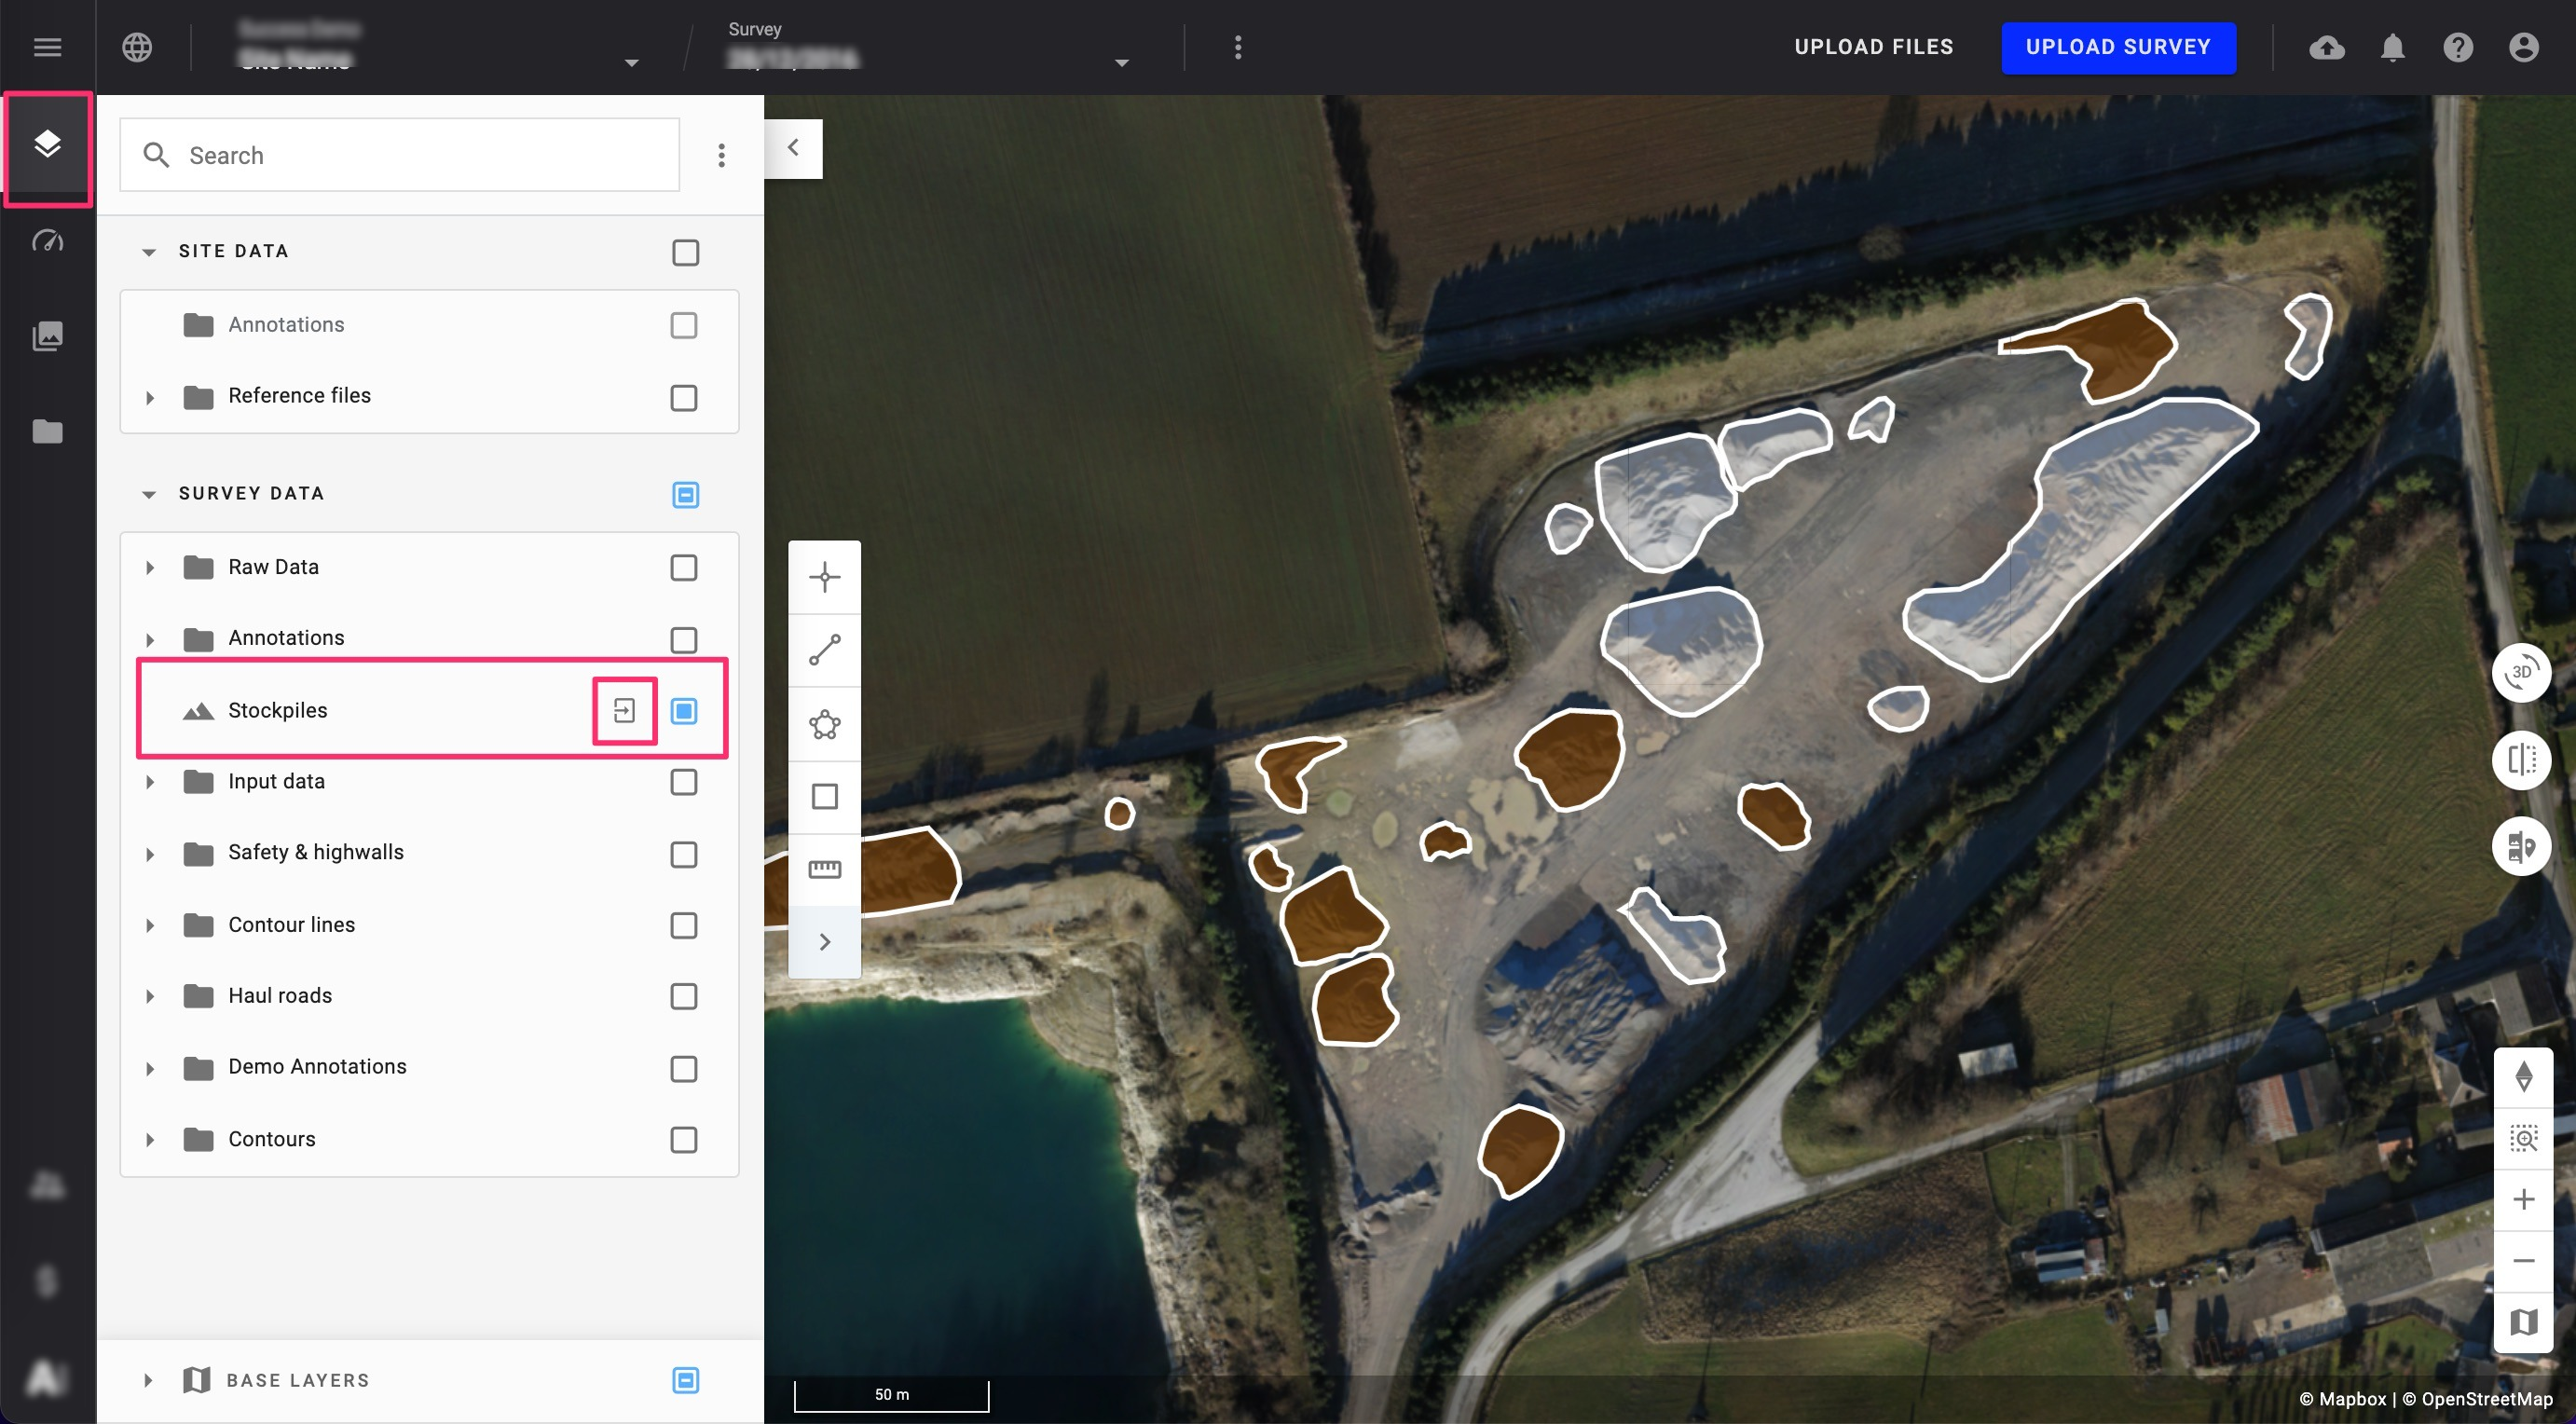
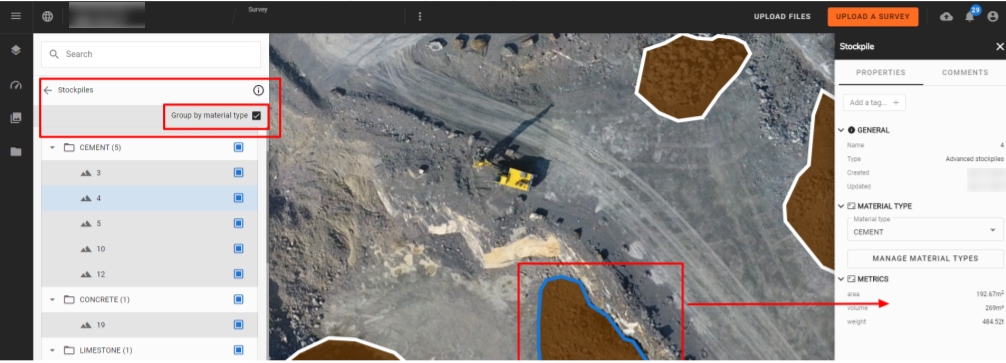
Now click each stockpile to add a material for it or modify an existing one from the drop-down list.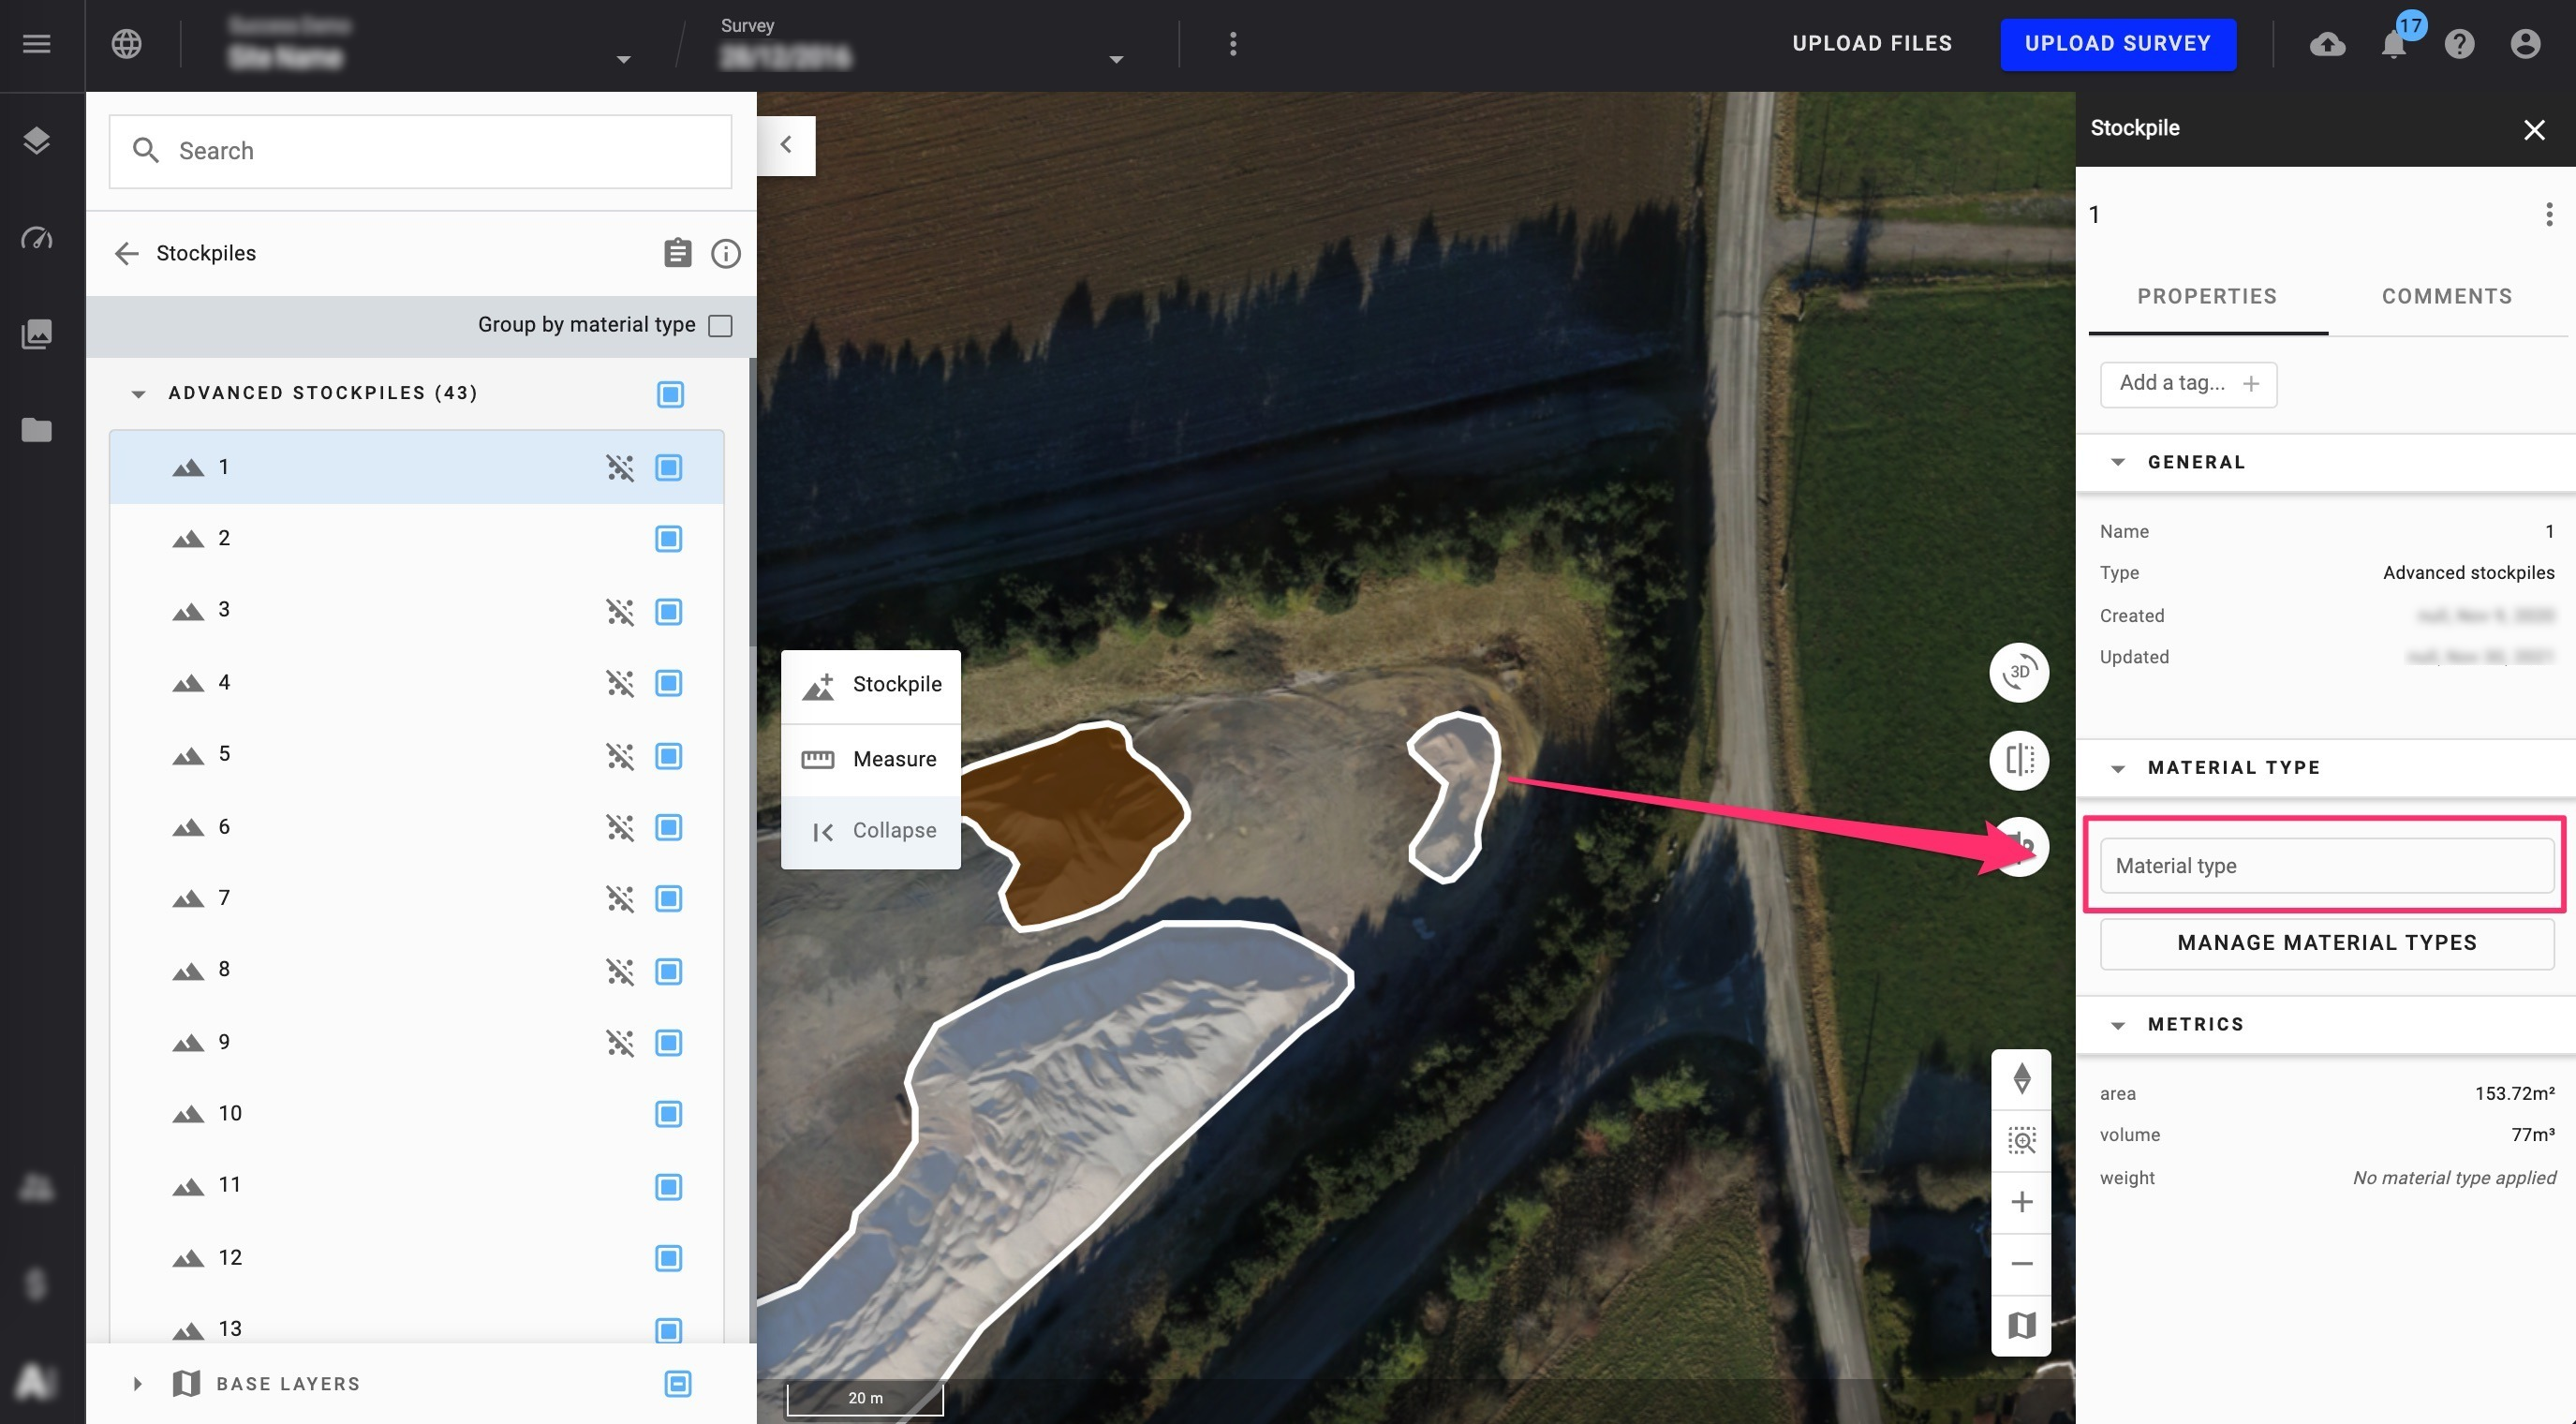
Notice that the white piles become brown, and the barred icon next to the pile number disappears.
4. Grouping by Material
After uploading the material types, and assigning a material for each pile, activate Group by material type. As the name entitles it, each similar piles will be grouped together.
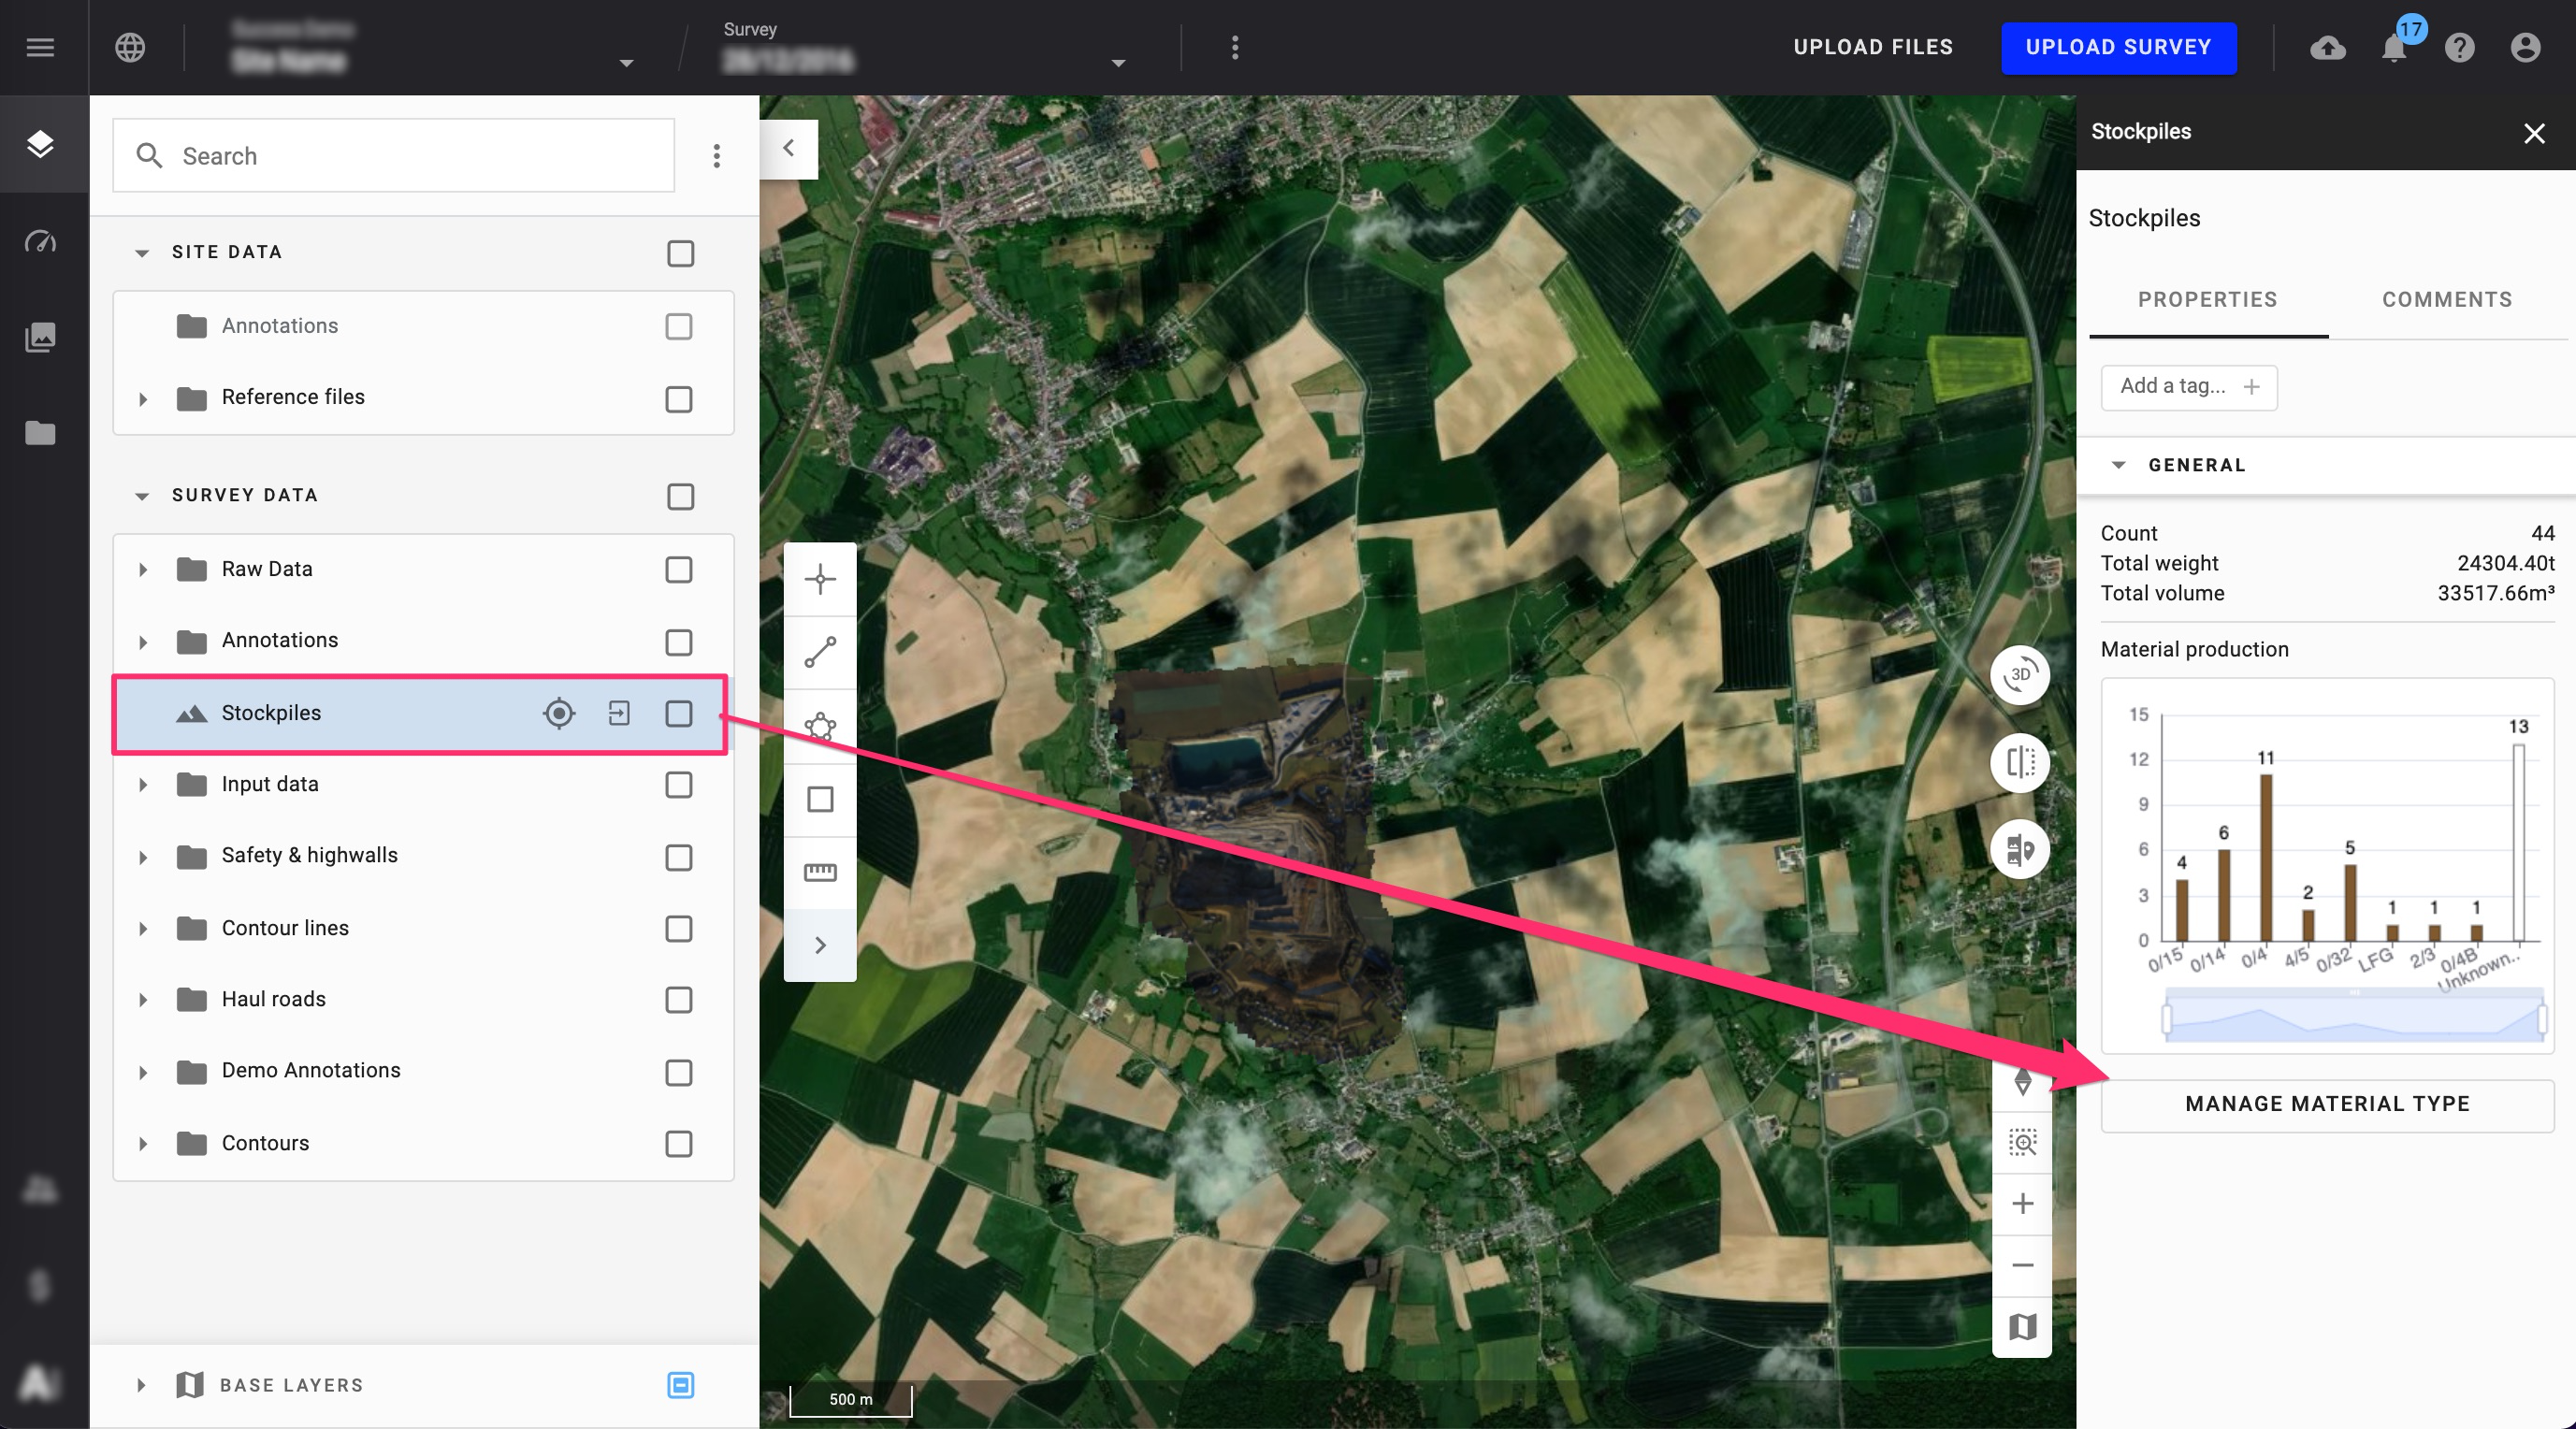
5. Reading total site inventory
First, exit the stockpile module.
Click on the stockpiles layer to open its information panel. Hover the mouse over each product to see it's total from a single view.
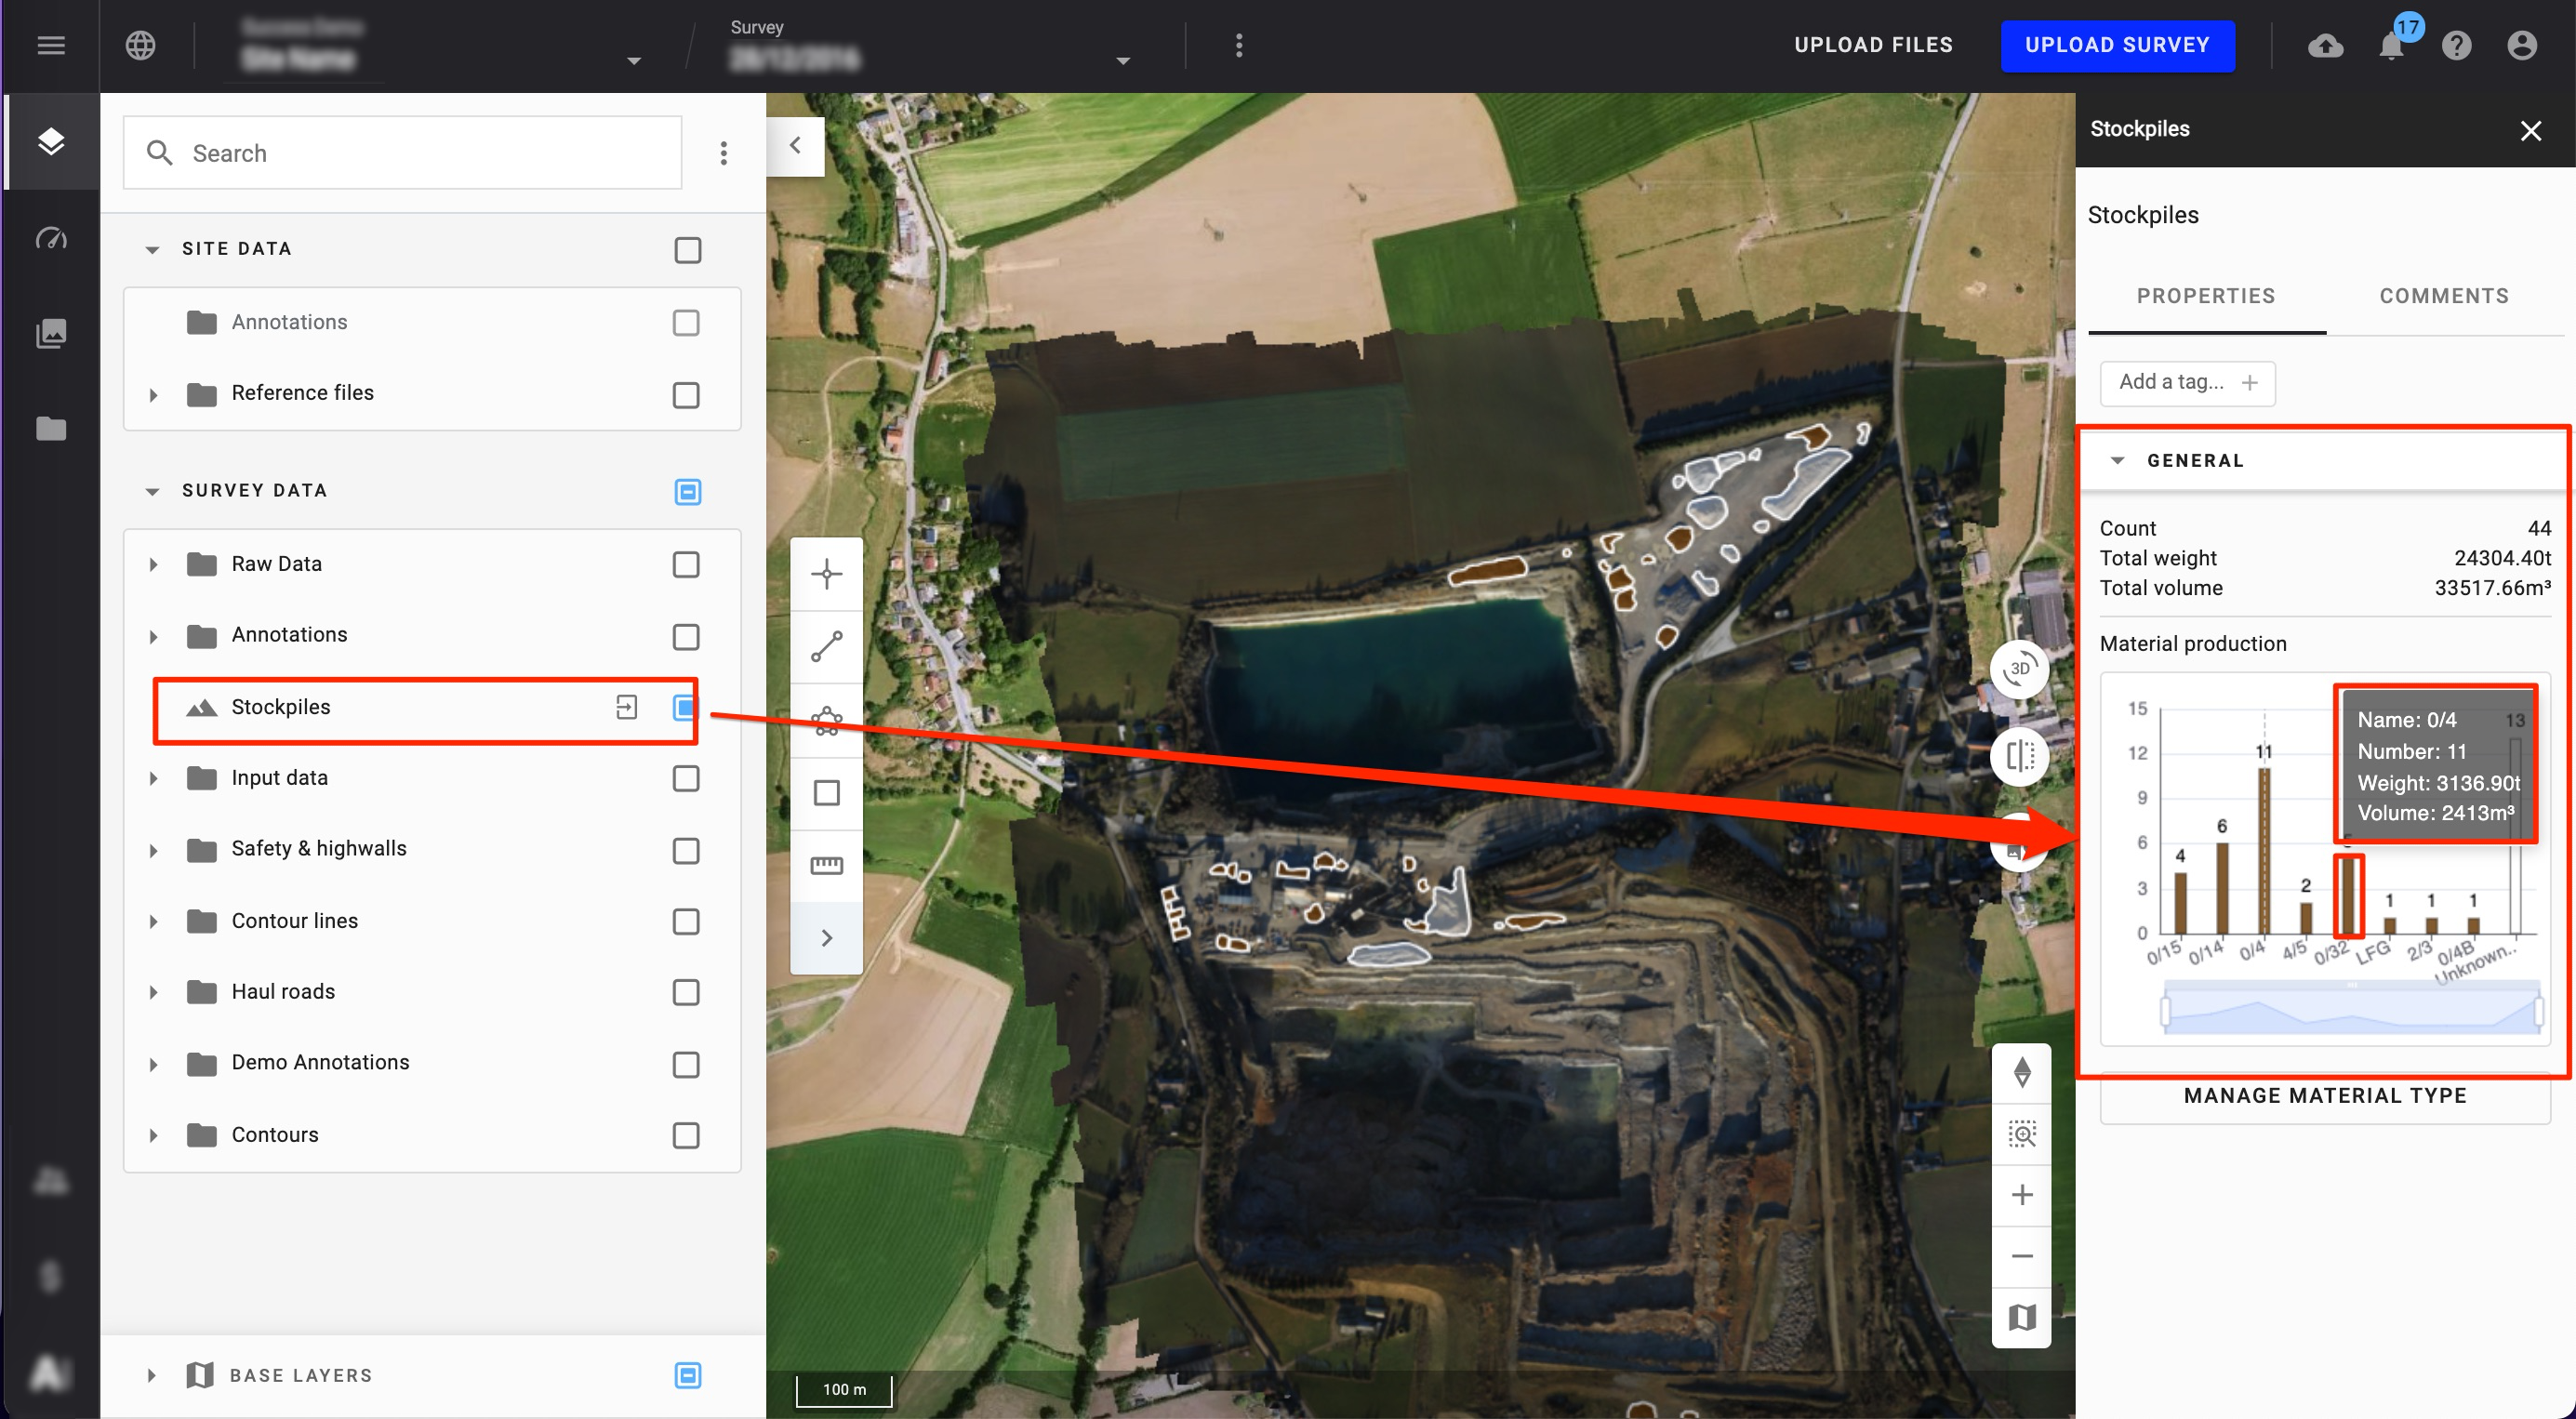
If you have a large amount of material types, use the slider below the bar graph to filter the materials you want to see.

