

Upload CSV as a Vector File
Learn how to quickly and easily convert CSV format files to vector format for use in various digital graphics.
1. Description
With the function import a file, the User can upload a CSV that will create a vector file in Aether.
2. Prerequisites
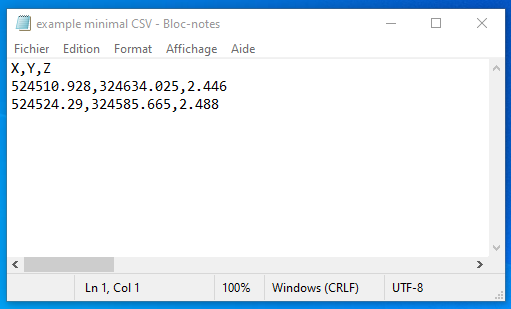
The CSV file must have at least 3 columns for points coordinates (X,Y, Z).
3. Workflow
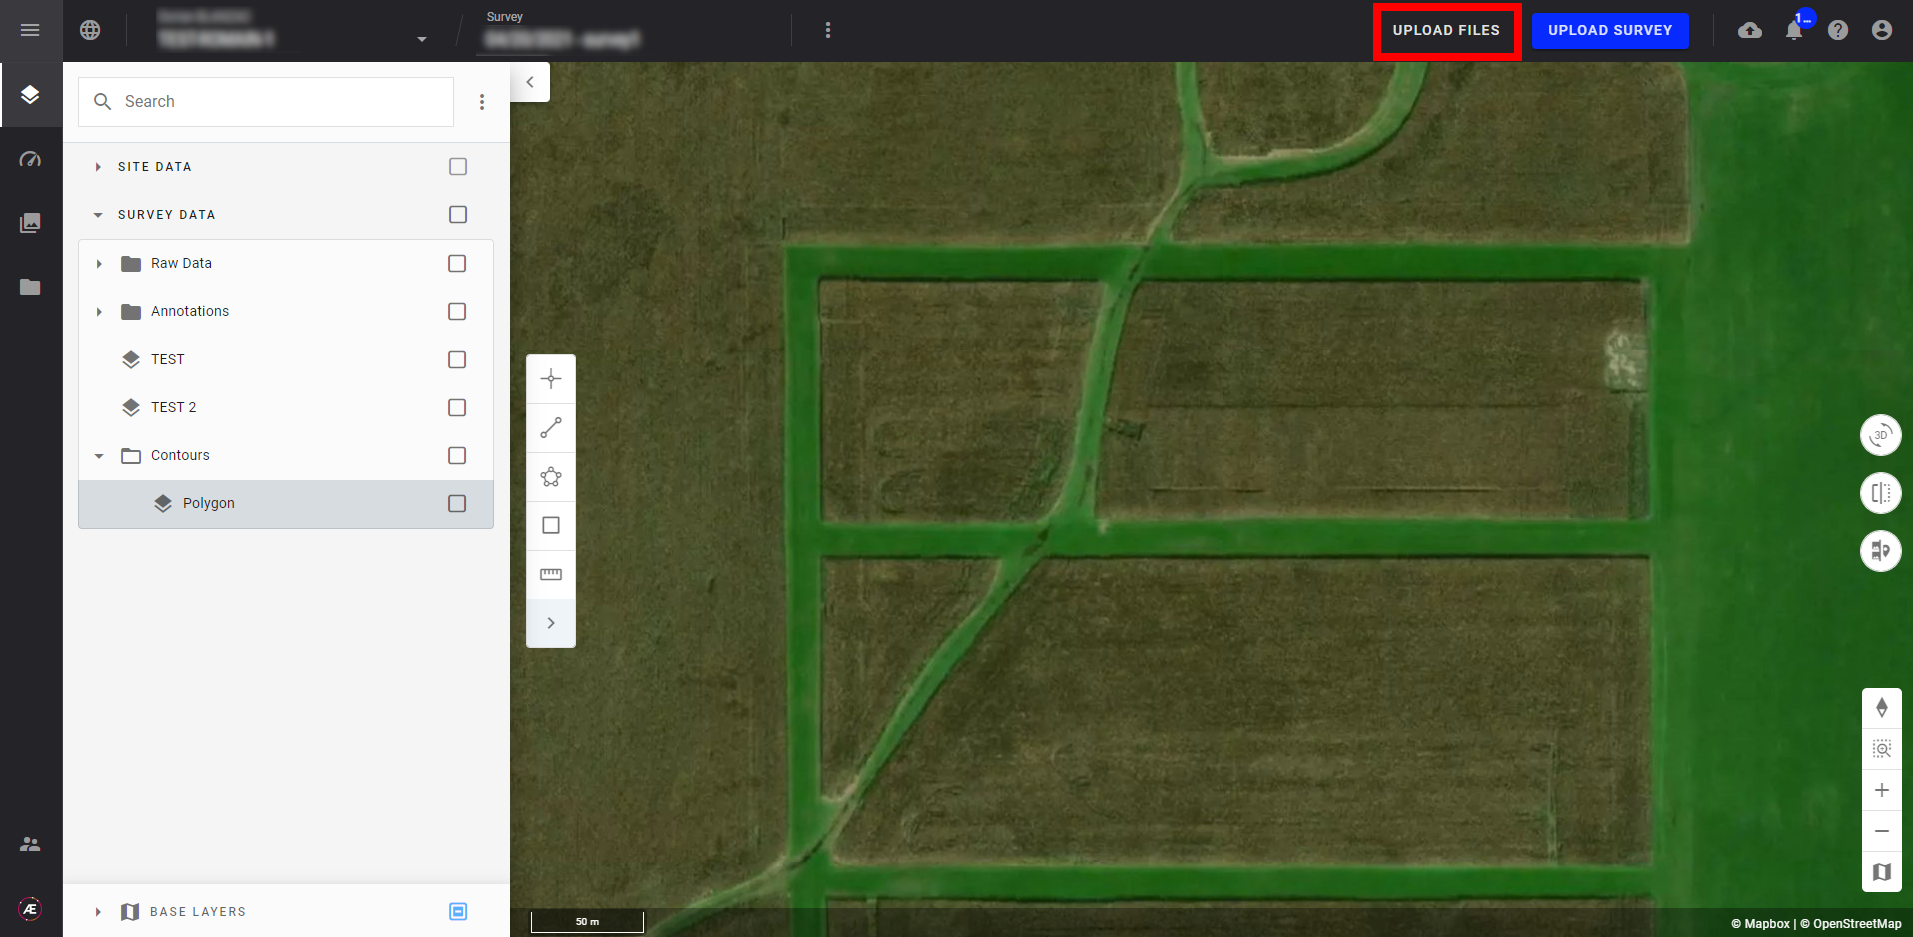
Step 1 - Select a project and click on “UPLOAD FILES”.
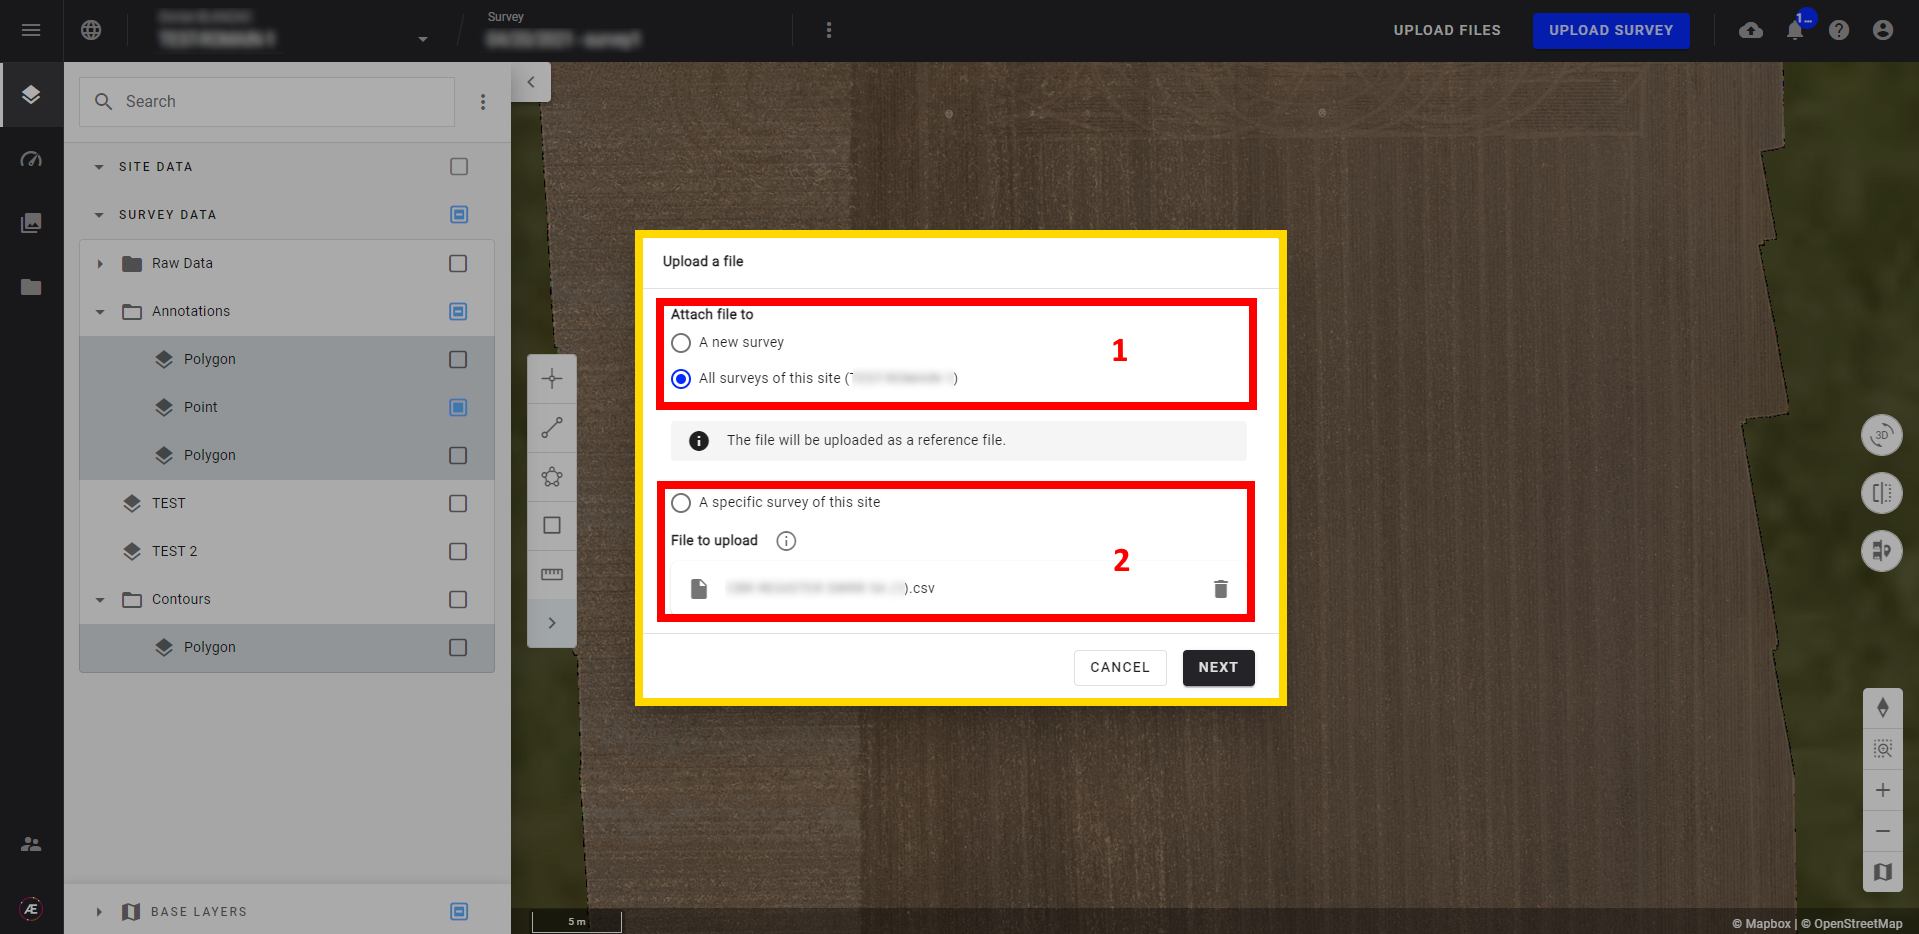
Step 2 - In the pop-up window select the survey (1) to attach the file (or create a new one) and select the CSV file (2) to upload.
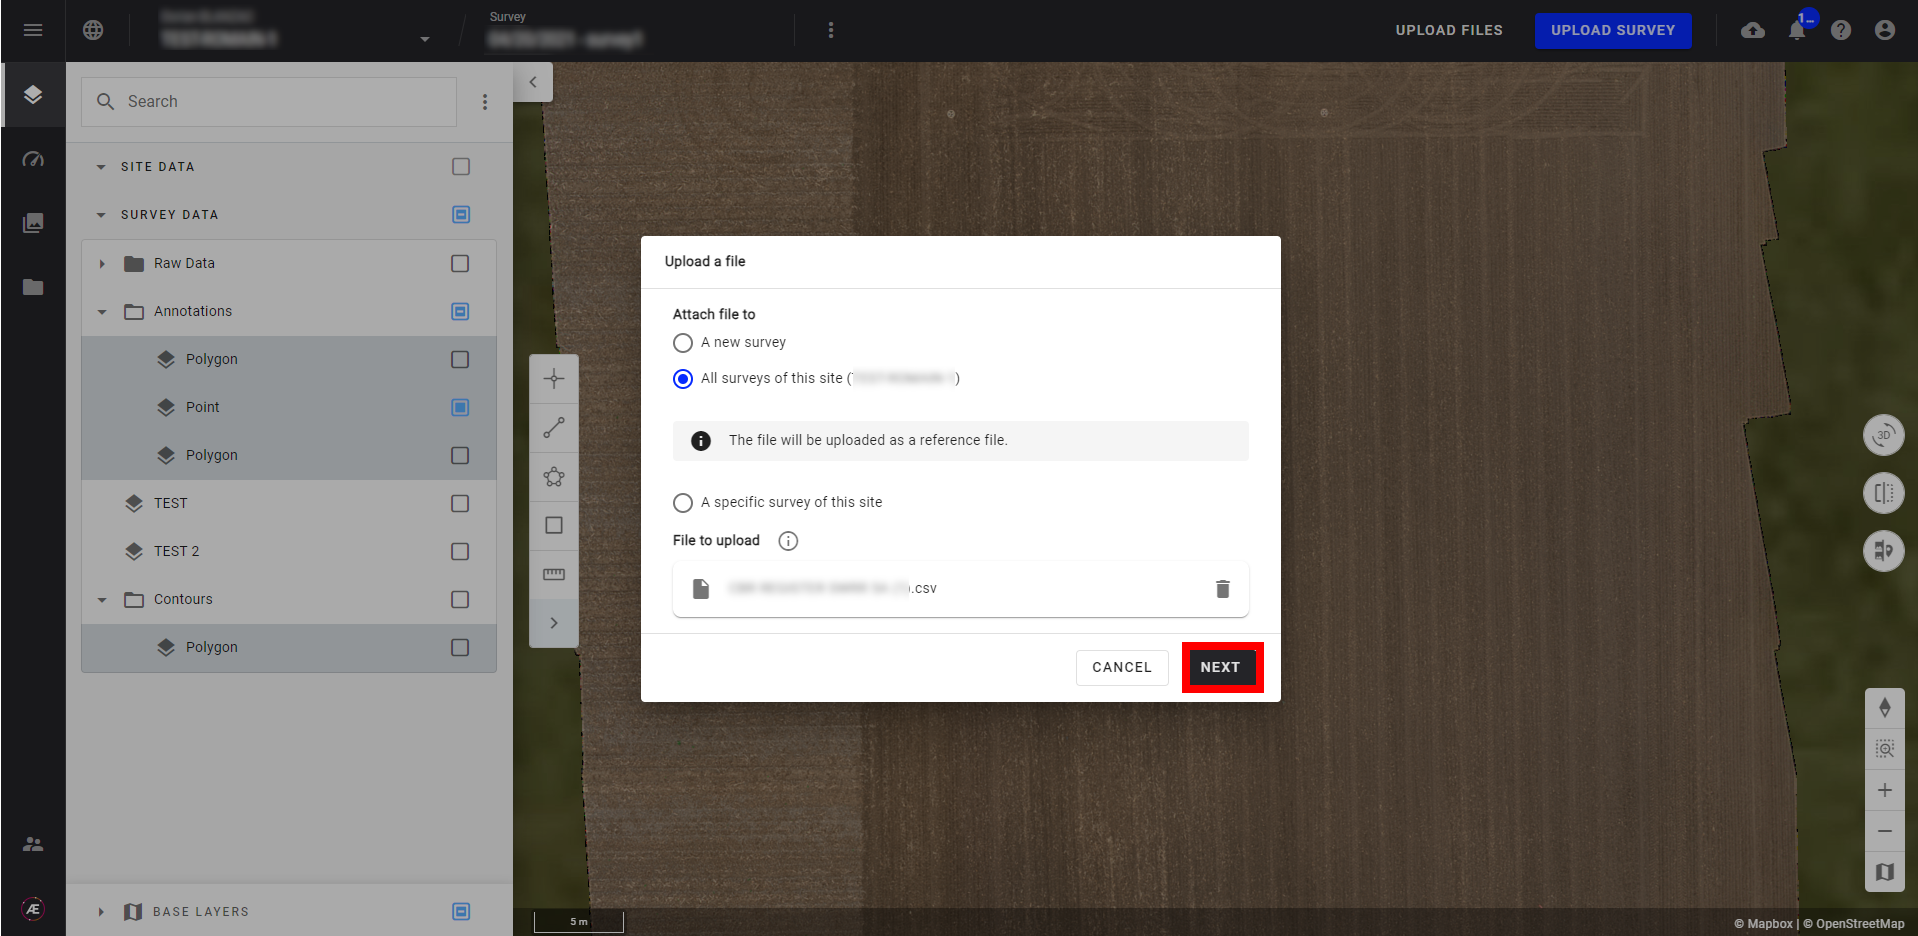
Step 3 - Click on "NEXT".
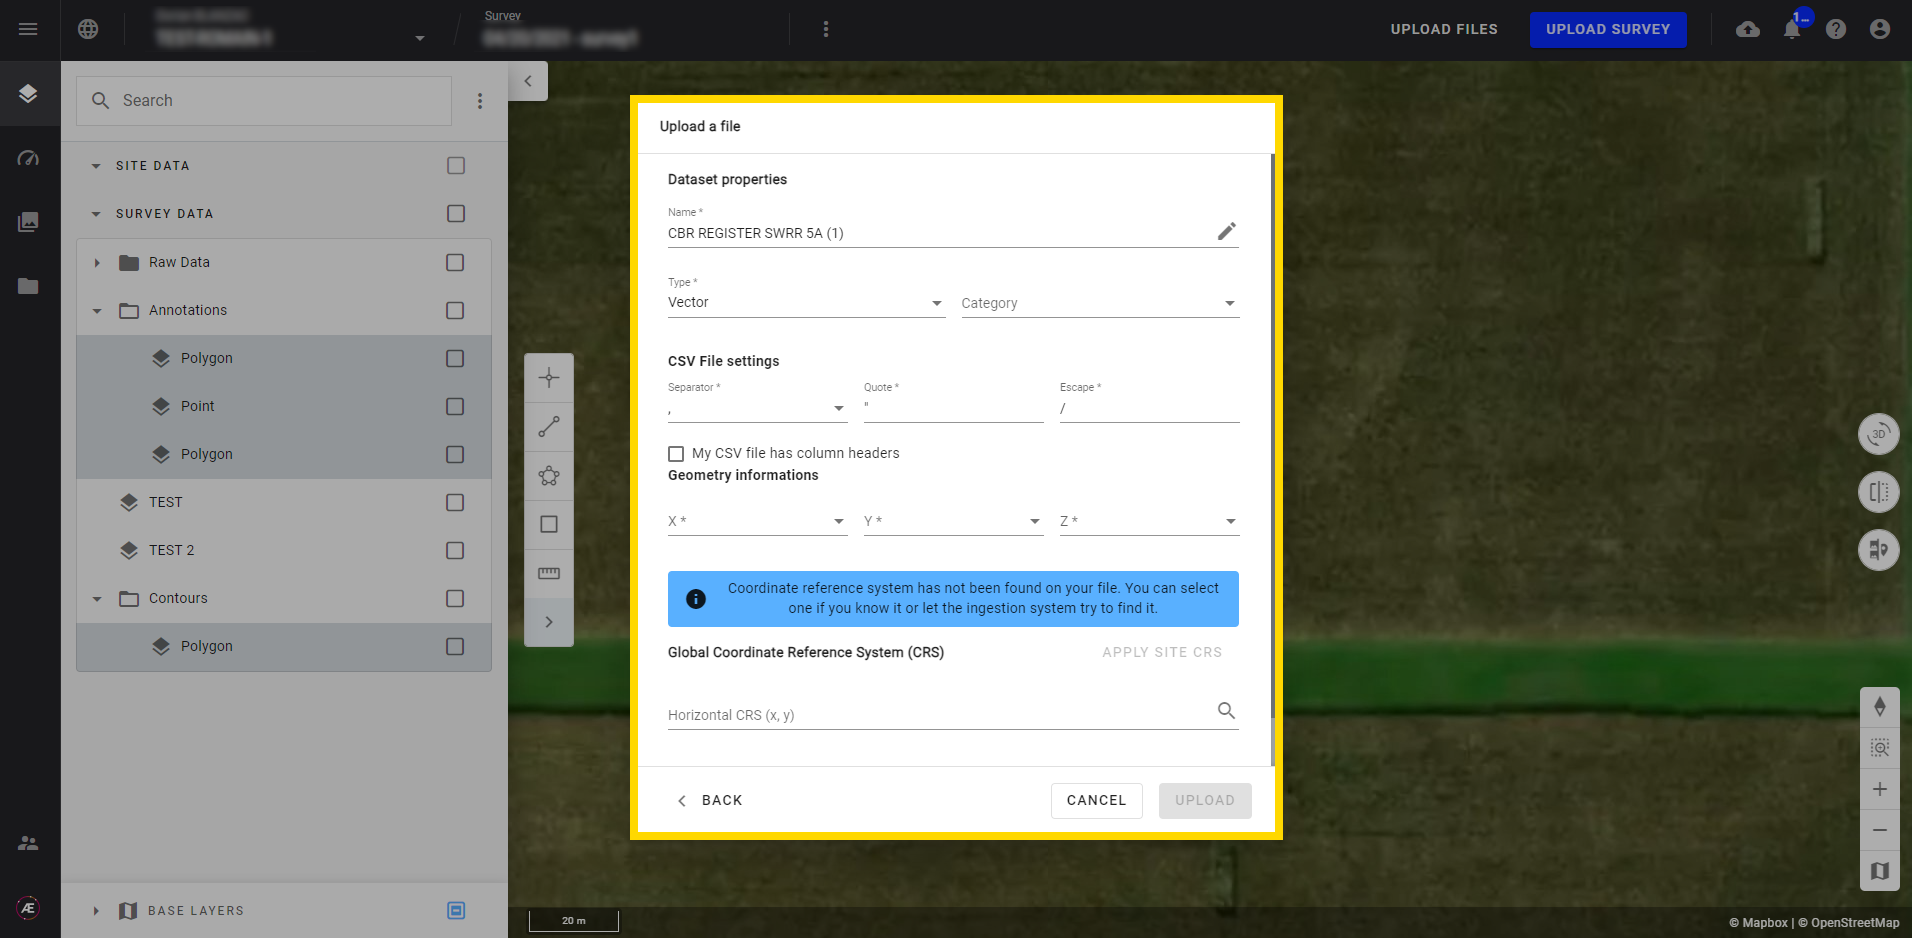
Step 4 - Fill in the form.
-
Dataset properties:
- Name: by default it's the name of the CSV file, if necessary rename it
- Type: Vector (already selected by default)
- Category: see Manual File Upload and refer to the category table. The CSV will appear in this category on the layer menu.
-
CSV File Settings:
- Separator: Define the separator used in the CSV file.
- Quote: Define the quotation marks that appear in CSV files as text qualifiers. This means they function to wrap together text that should be kept as one value, versus what are distinct values that should be separated out.
- Escape: Define the character used to parse the following character differently. That is needed if you have values containing your separator or quote character.
- Note: No need to set separator, quote, and escape if the CSV follows the template.
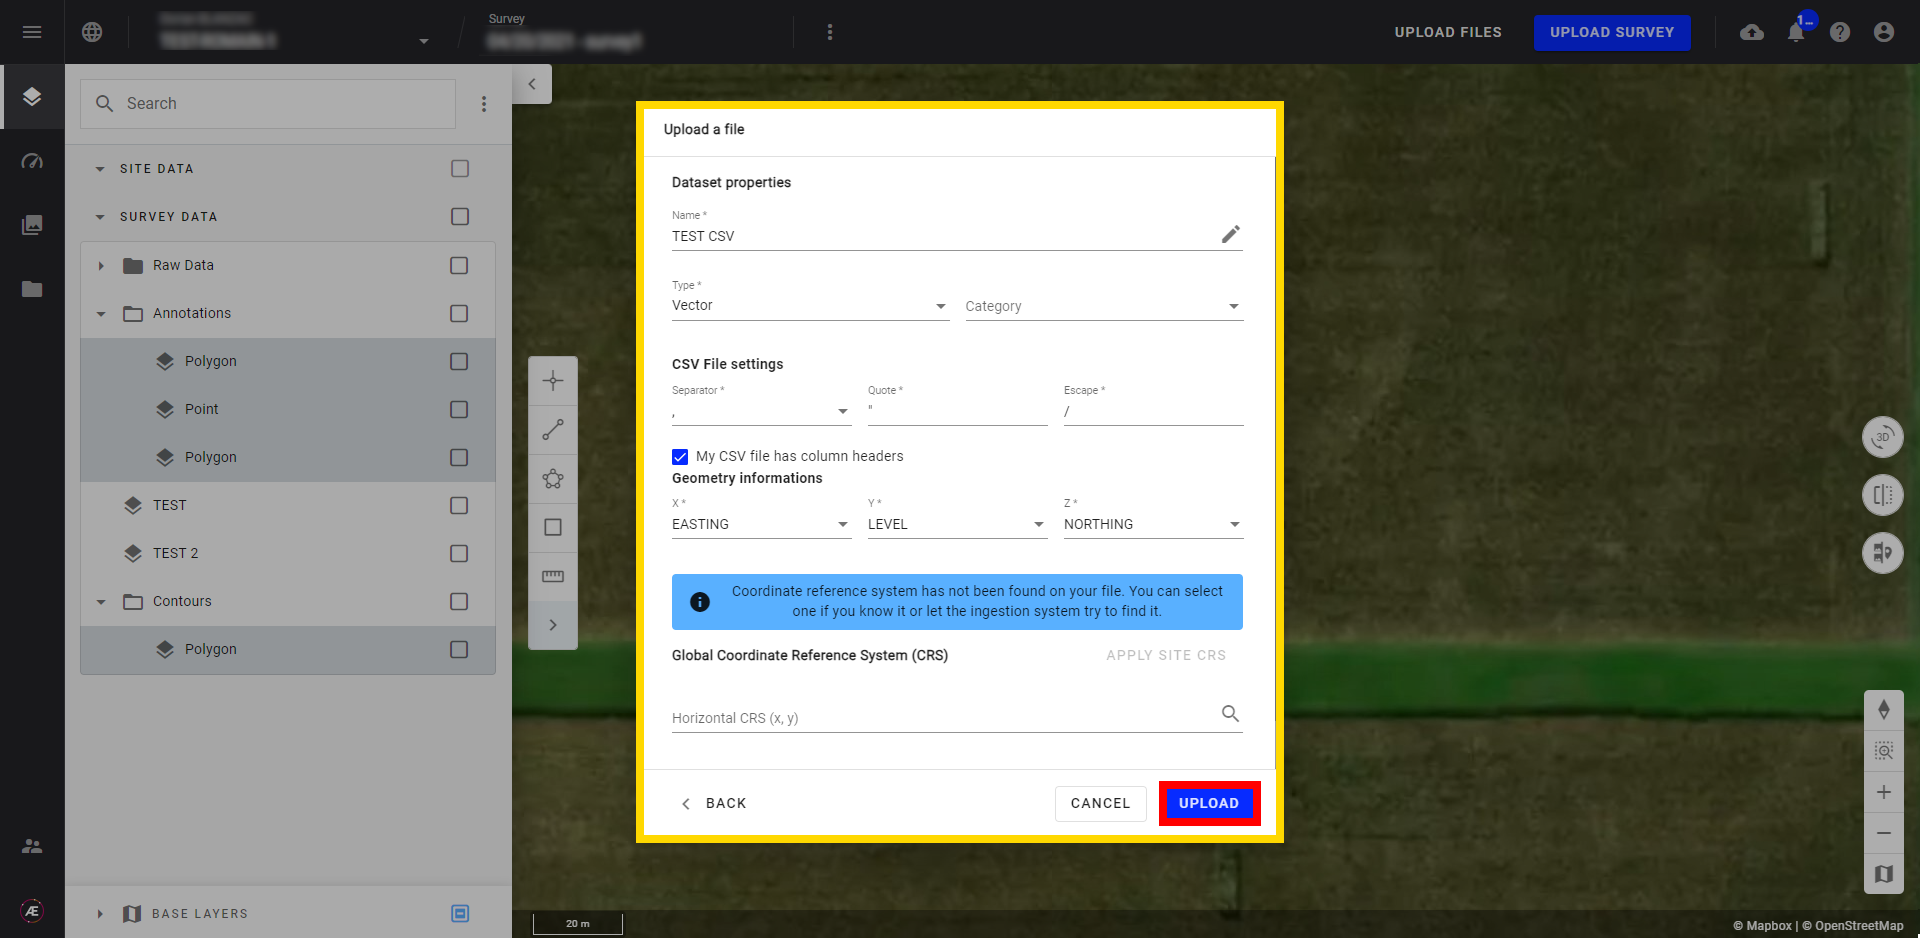
- My CSV file has column headers: If yes tick the box, and headers will be added to the fields (X, Y, and Z).
- X: Defile the menu to select the column with X values
- Y: Defile the menu to select the column with Y values
- Z: Defile the menu to select the column with Z values
-
Global Coordinate Reference System (CRS): see Coordinate Reference Systems (CRS)
- Horizontal CRS (x,y)
- Vertical CRS (z)
Step 5 - Click on "UPLOAD".
Step 6 - Click on "CONFIRM".
4. Results
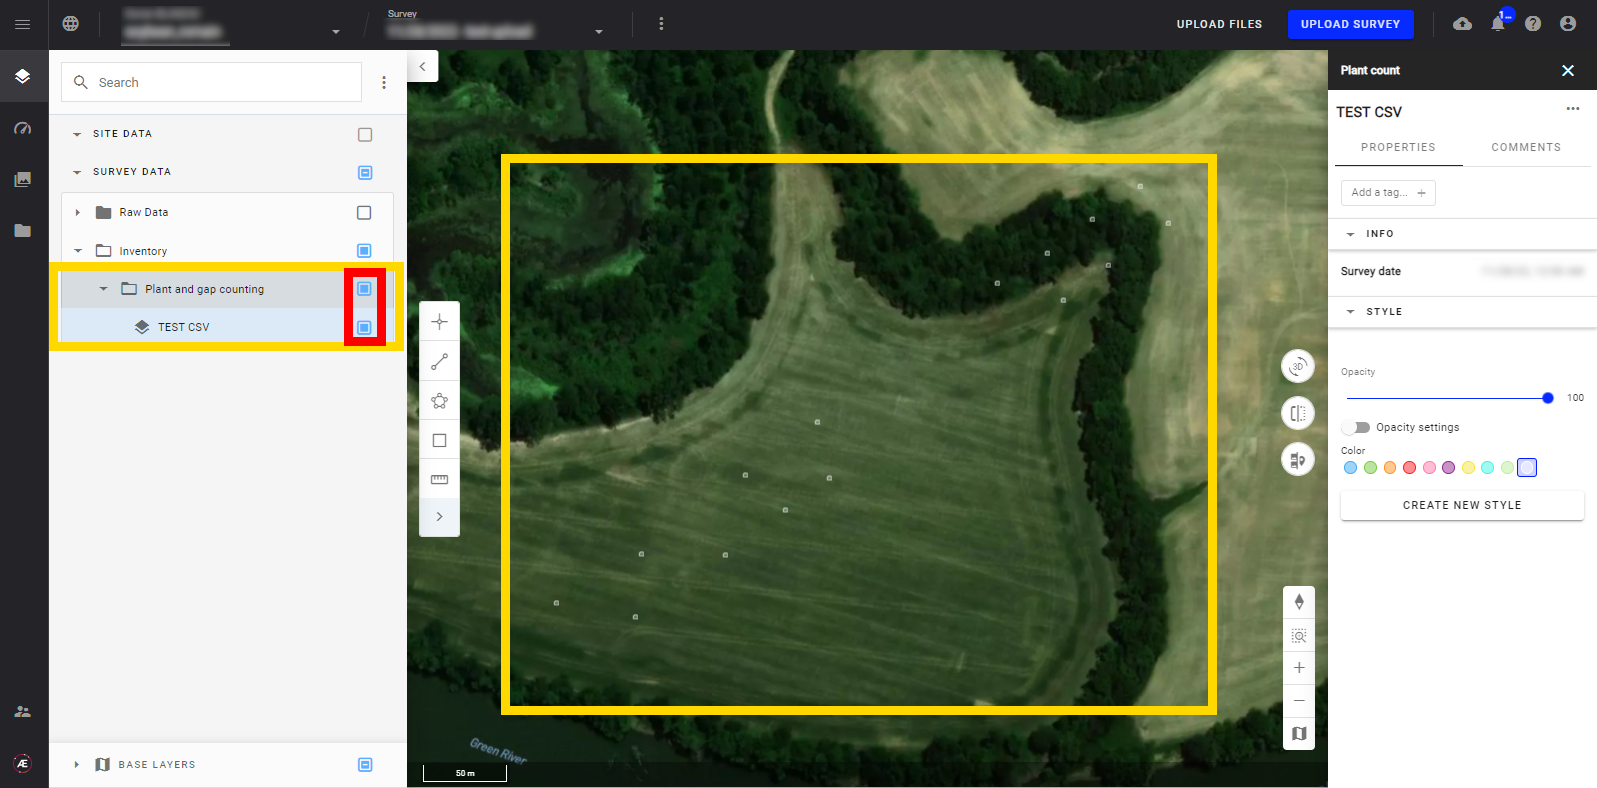
Step 1 - On the layer menu, in the category selected during the upload process tick the box of the CSV to reveal the points on the map.
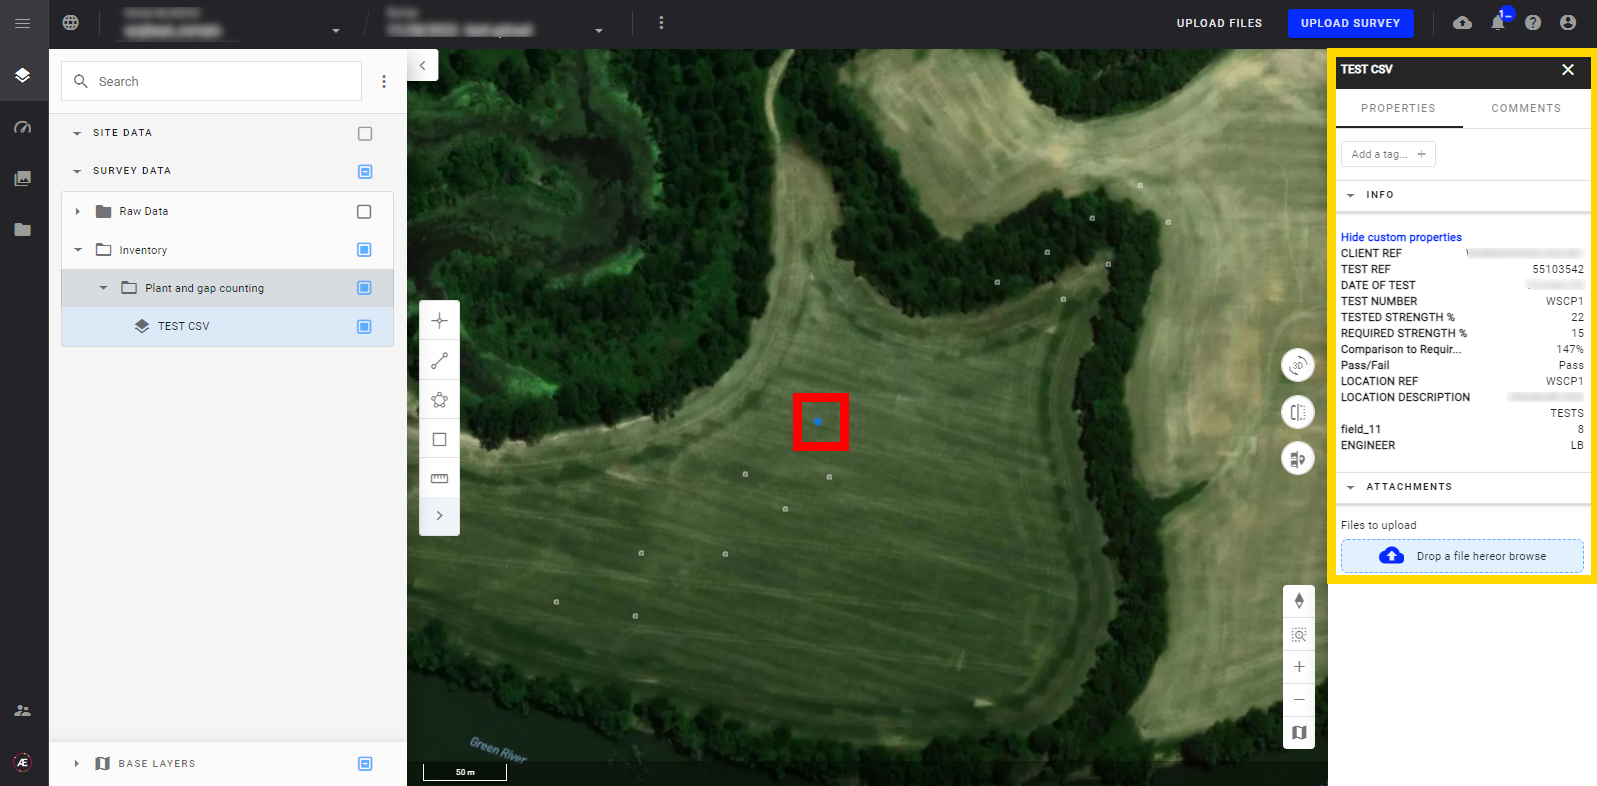
Step 2 - Click on one point of the vector file to see the info panel.
Step 3 - See Vector Layers Styling to customize the CSV, Vector Geometry Edition to edit the layer features geometry, and Modify Attributes and Individual Values of a Vector for attribute management.
