

Vector Attribute Addition
1. Description
There are two ways to add attributes (from a CSV file) to a vector file in bulk:
- The "Vector attribute addition" tool is available in the analytics panel.
- The "Join attributes" tool is available in the map view.
Either tool will allow you to upload custom attributes or any information linked to your vector features (polygons).
2. Inputs
- A vector file you would like to join the attributes to. The vector can be created in Aether (with the Microplot Designer tool for example), or created with external software and uploaded in Aether.
- A CSV file with the attributes to join
3. Vector Attribute Addition tool (from the Analytics Panel)
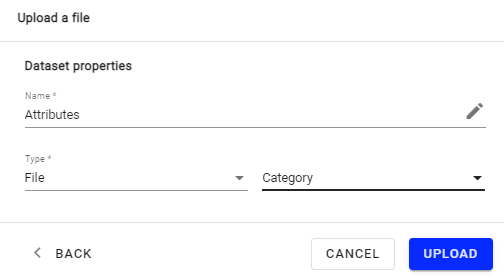
Step 1 - Upload the input files using the “upload files” feature. When uploading the CSV file, please select “File” in Type and “None” in Category. See Manual File Upload.
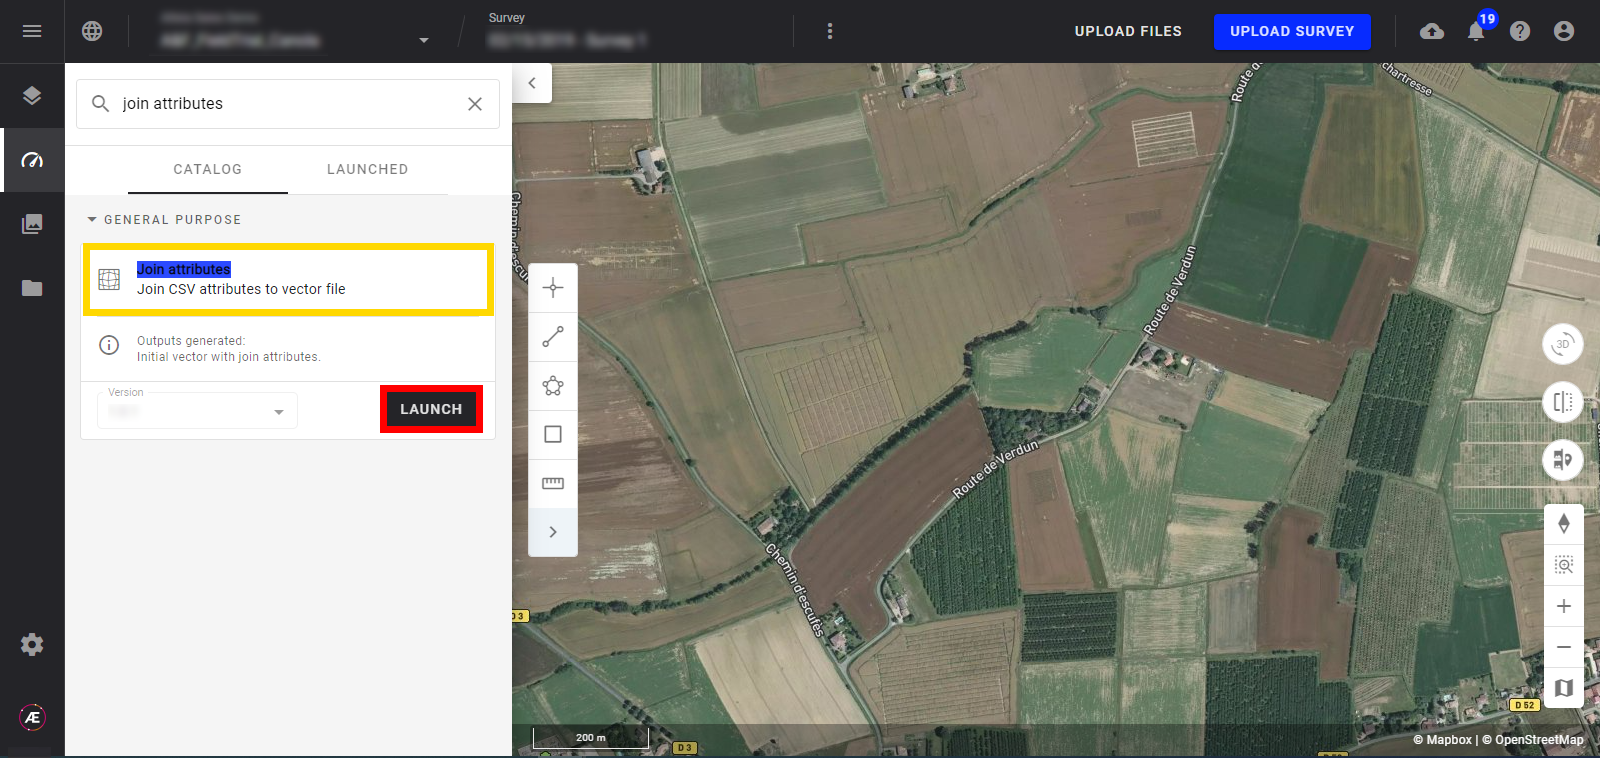
Step 2 - Open the Analytic Catalog, in the “TRANSFORMATION TOOL” section, select the “Vector attribute addition” and click on "LAUNCH".
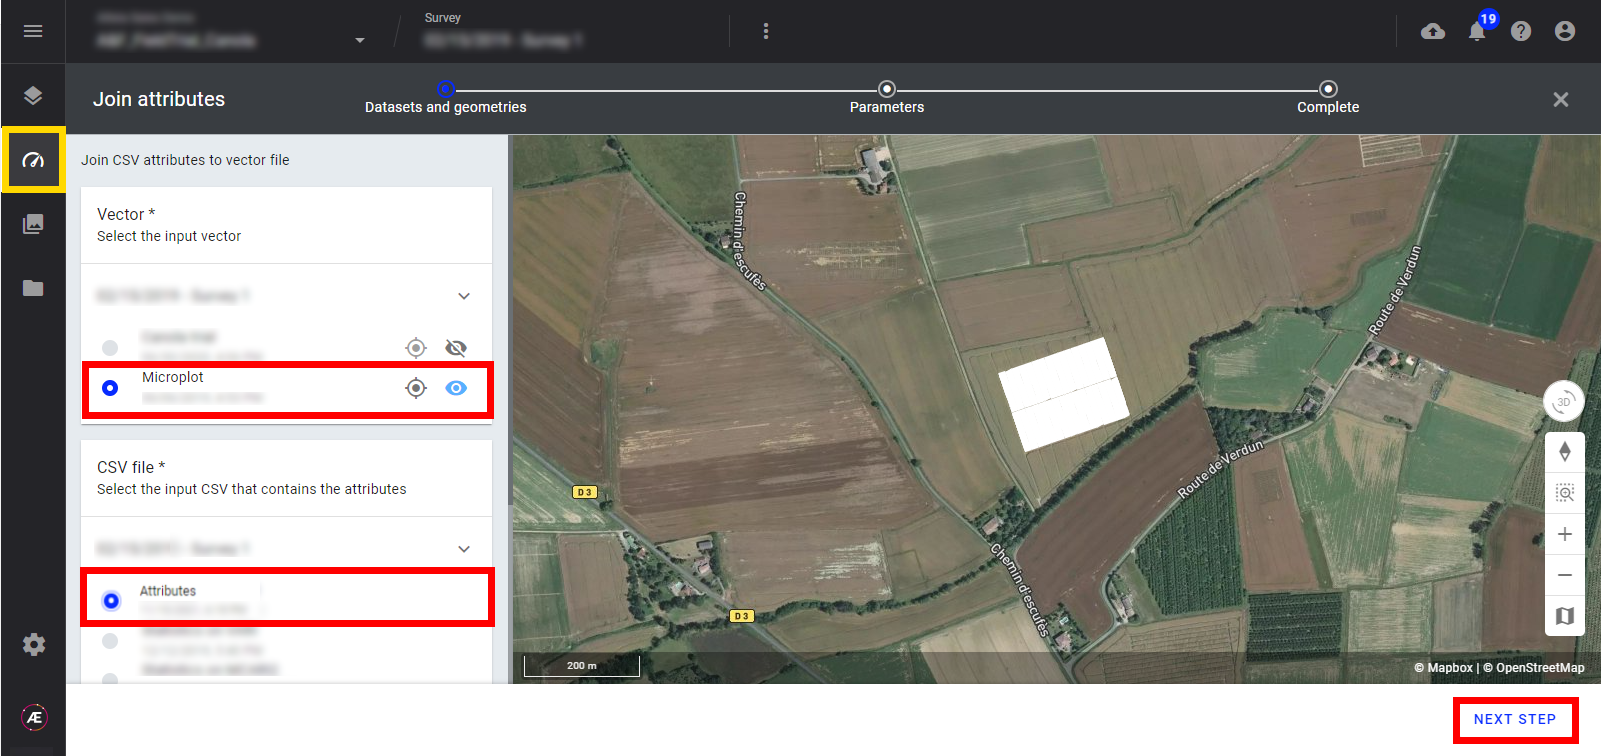
Step 3 - Select the vector file and the CSV file and click on "NEXT STEP".
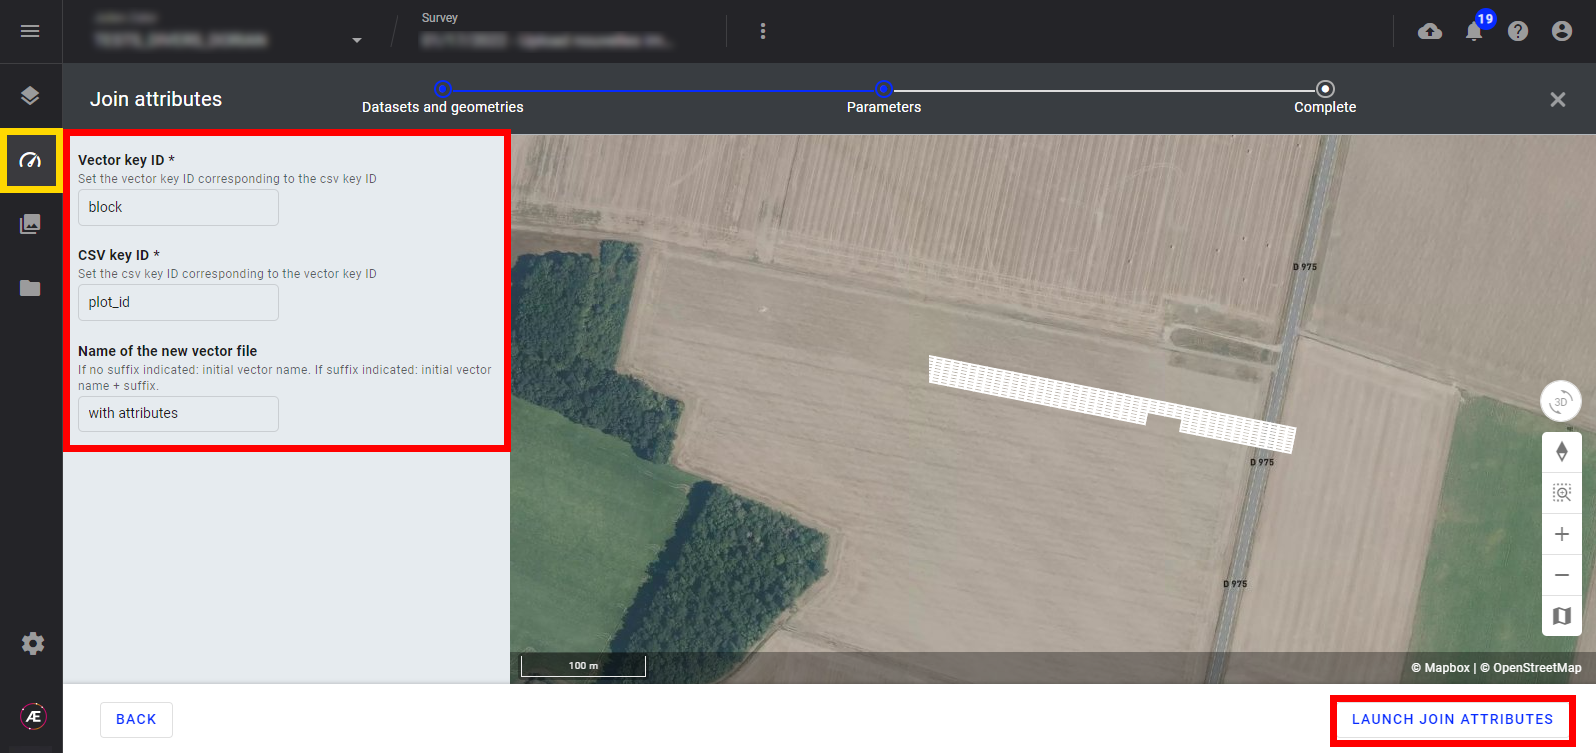
Step 4 - Select the vector key ID and CSV key ID and add a suffix to the new file (optional), then click on "LAUNCH VECTOR ATTRIBUTE ADDITION".
- If the suffix is indicated: the initial vector name + the suffix will be indicated in the new file.
- If no suffix is indicated: the initial vector name will be applied to the new file.
Step 5 - After processing, a new vector file with the attributes will be published in the map view and download section.
Click here to learn more about the vector edition tools.
4. Join attributes tool (from Map View)
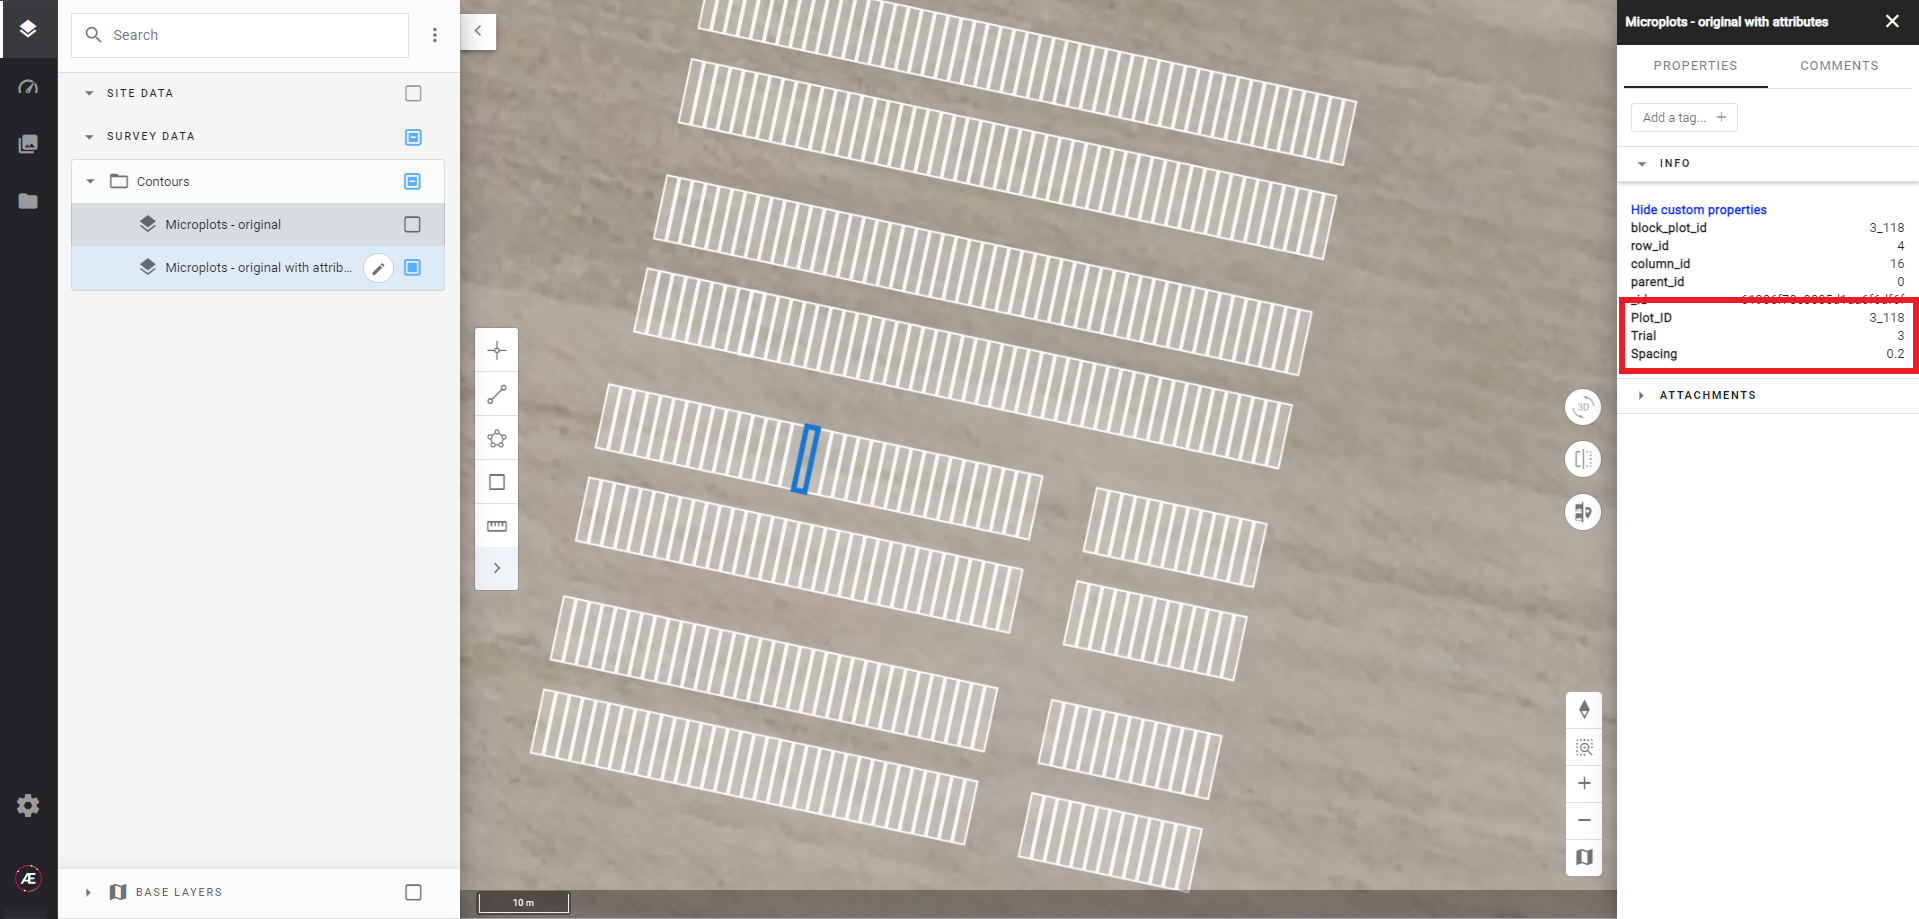
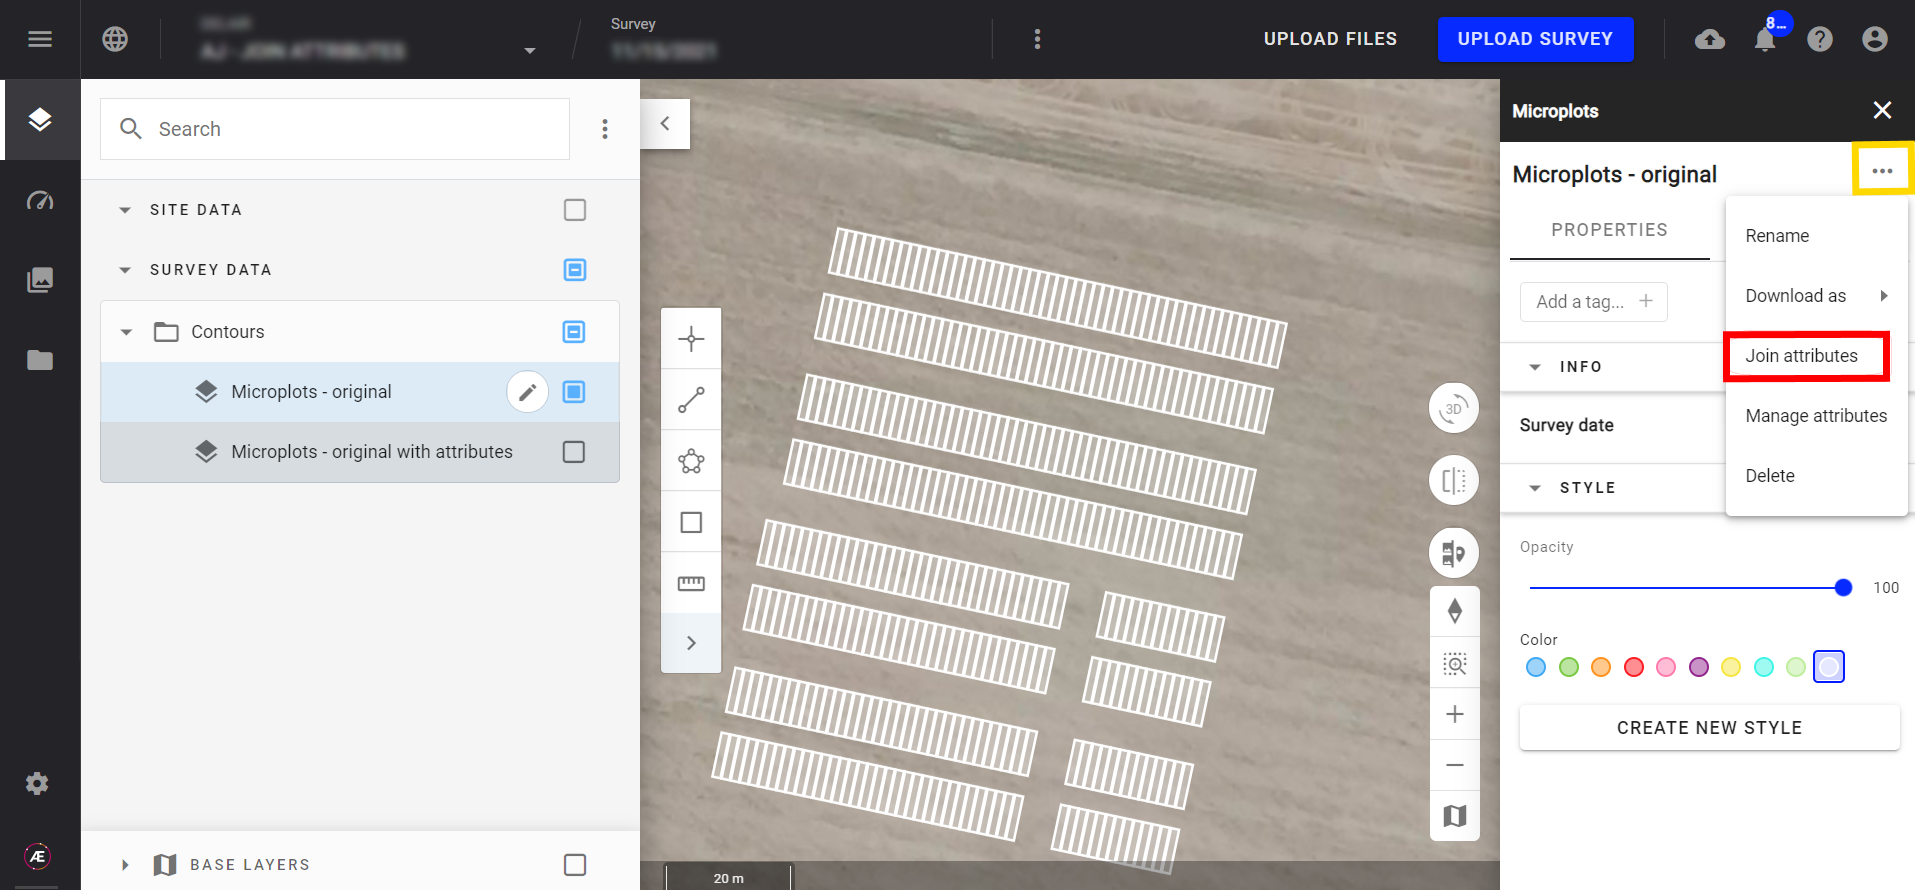
Step 1 - From the layers panel, go to "SURVEY DATA", and "Contours", and select the Vector layer to open the info panel on the right.
Step 2 - Click on the 3 dots menu on the top right and on Join attributes.
Step 3 - Drag and drop or browse your CSV file containing the additional attributes.
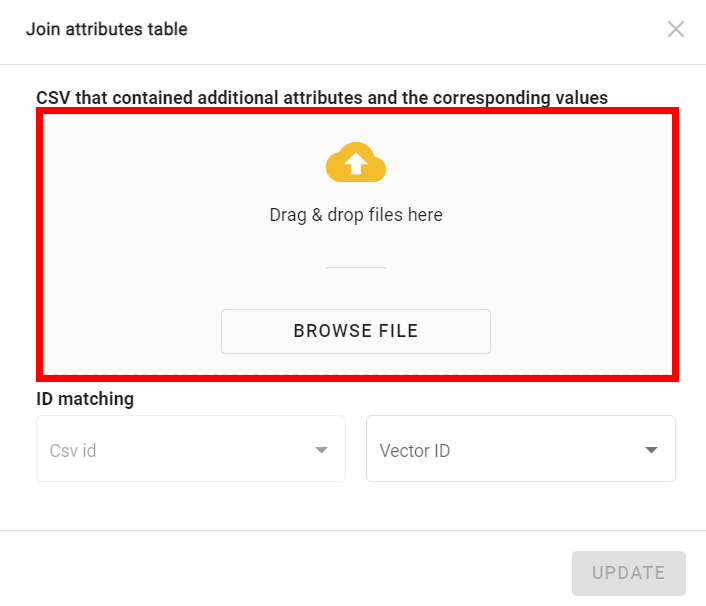
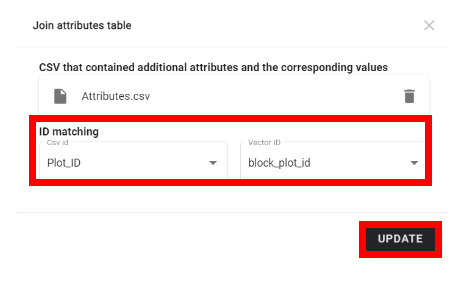
Step 4 - To link the vector file and CSV file, select the column containing CSV IDs and the Vector file IDs, then click on "UPDATE".
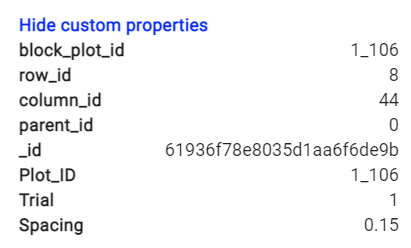
Step 5 - After processing, the attributes and associated information inside the CSV will be added to the Microplot file:
Click here to learn more about the vector edition tool.
