

Create a New Vector Layer
1. Description
Allow users to easily design new vector layers with corresponding features (line, point, polygon) to be used as analytics inputs, for visualization purposes, or to generate annotations for deep learning model training.
2. Prerequisites
Users have access to an open project of a company.
3. Workflow
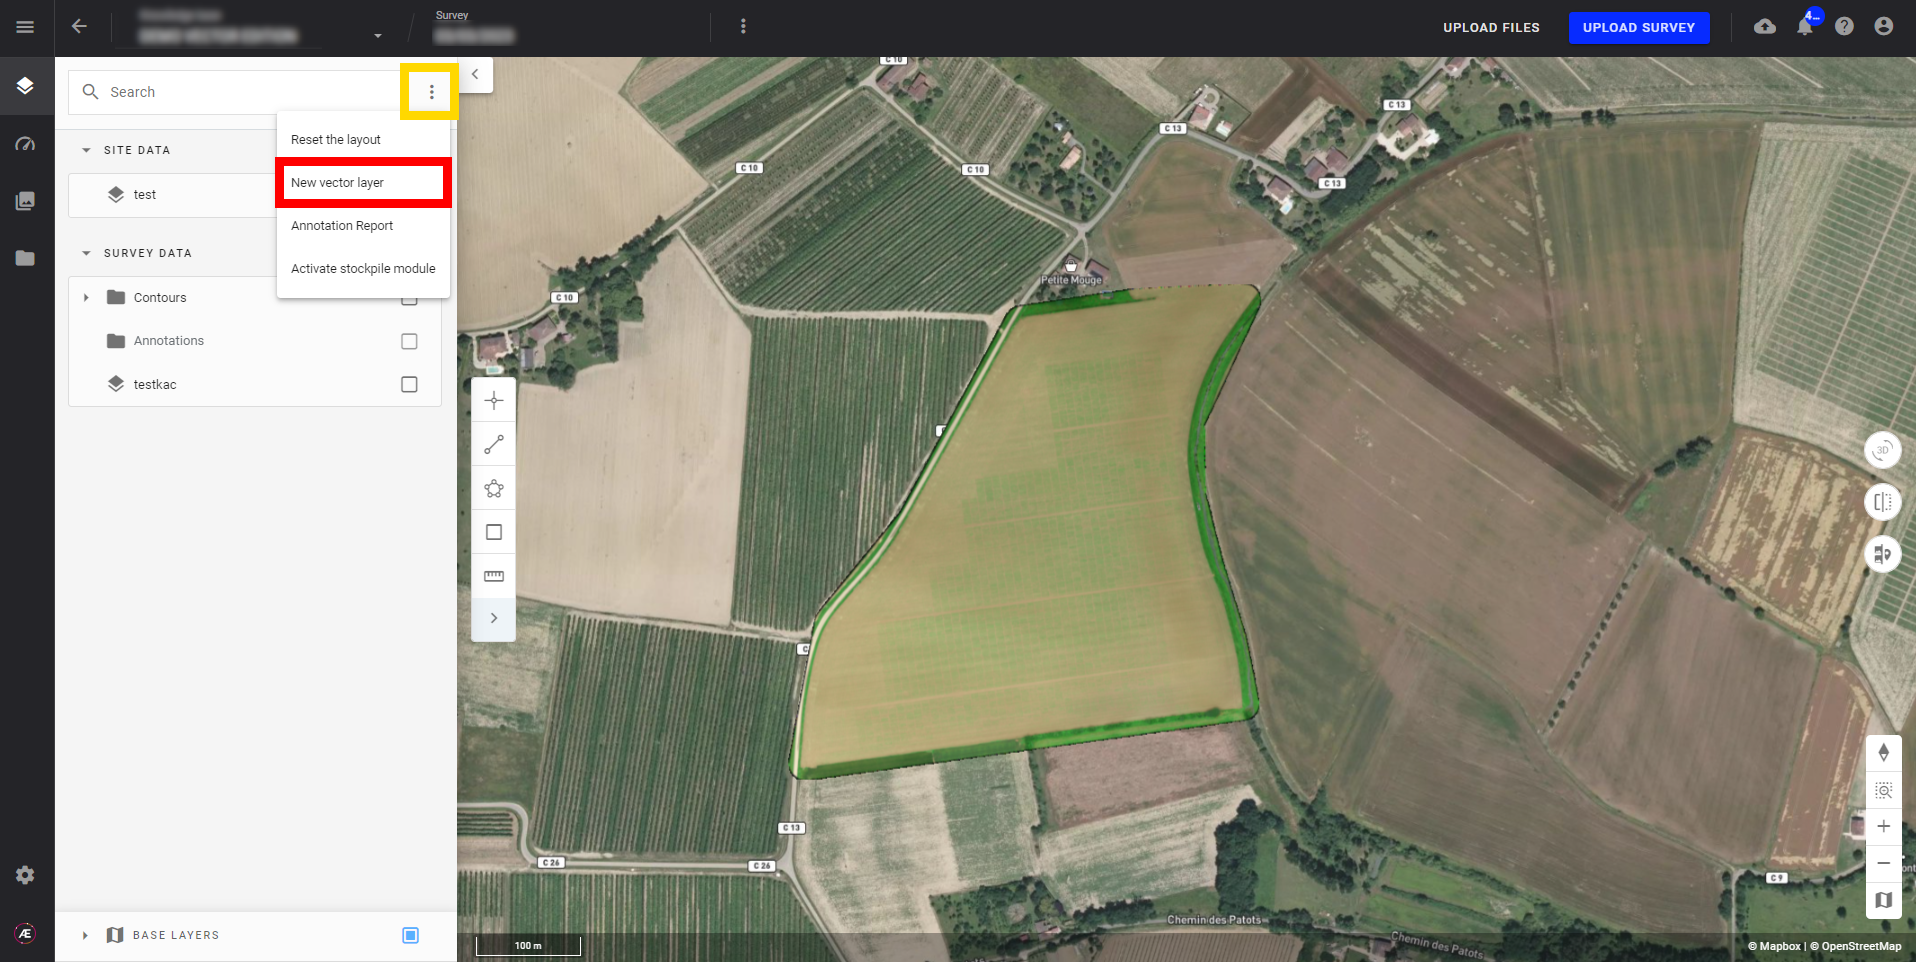
Step 1 - Click on the 3 dots menu of the “layer” left menu and on “New vector layer”.
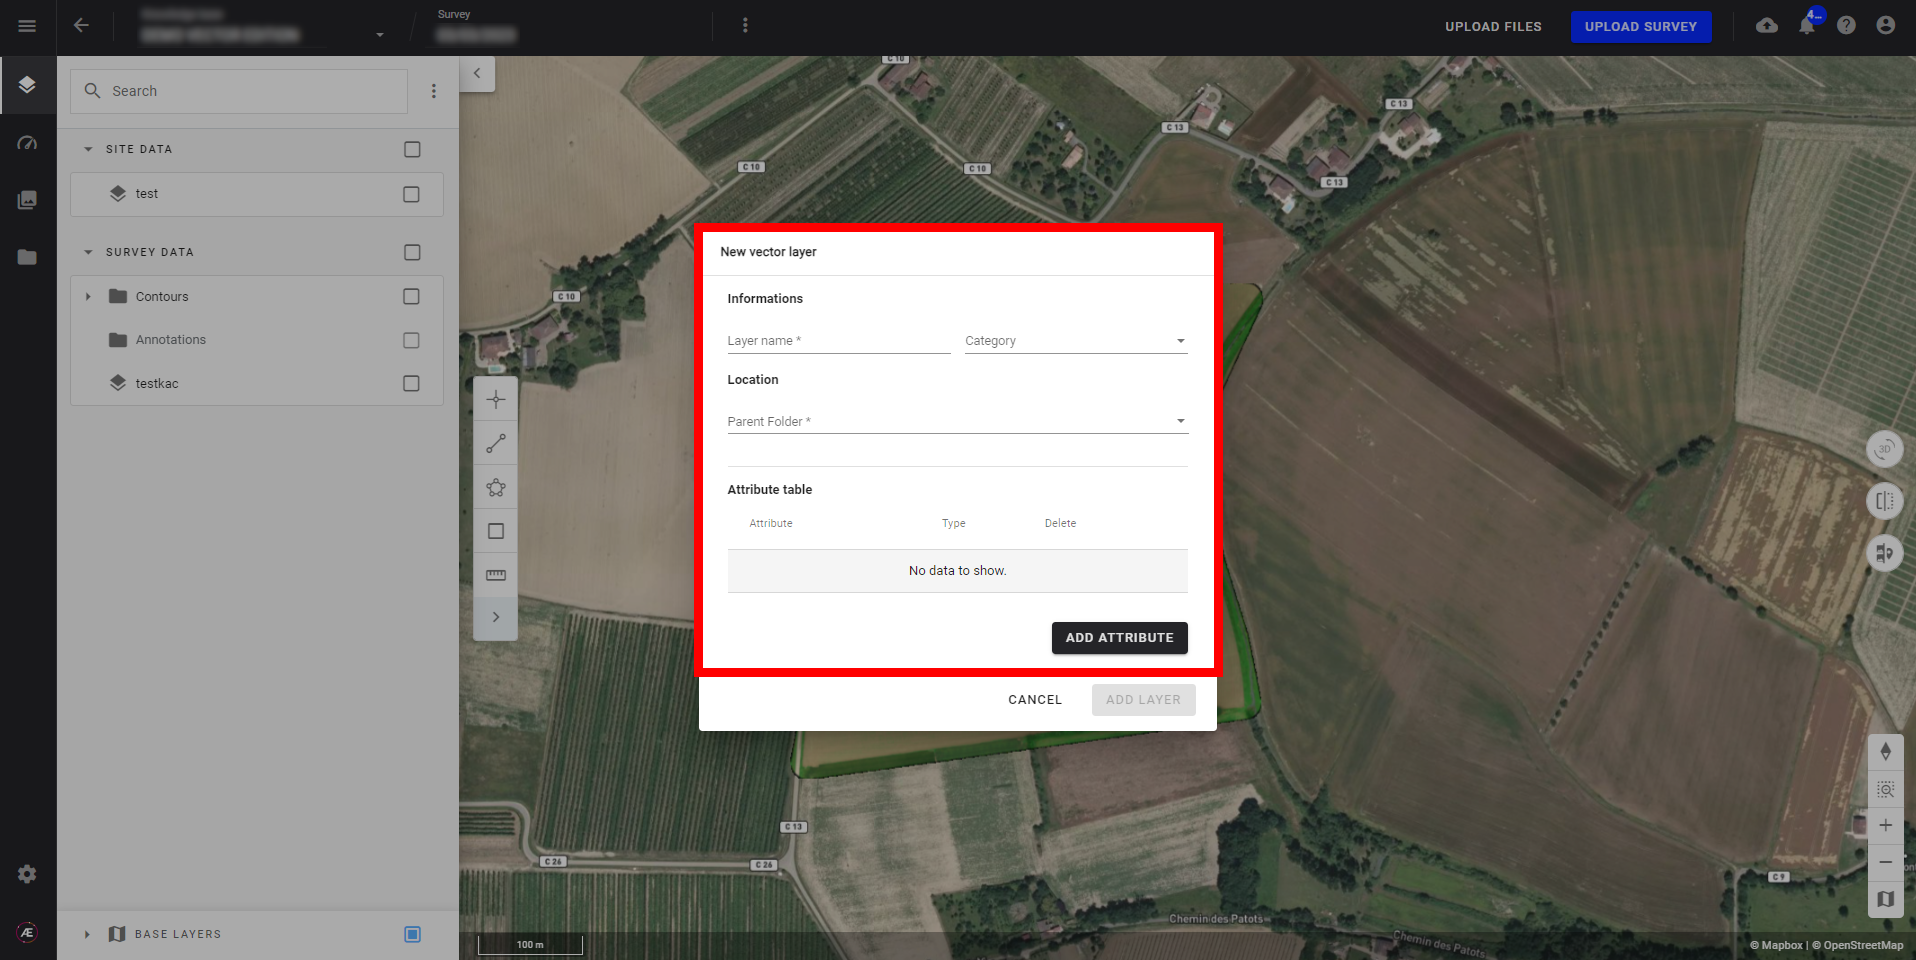
Step 2 - Fill in the fields of the pop-up
- Layer name: name of the layer that will be displayed in the layer panel
- Category: category of the layer. It is important to select the right category if the layer is used as input for analytics
- Parent folder: folder in which the layer will be located in the layer panel
- Attribute table: allow to add attributes to the layer (string, float, and integer)
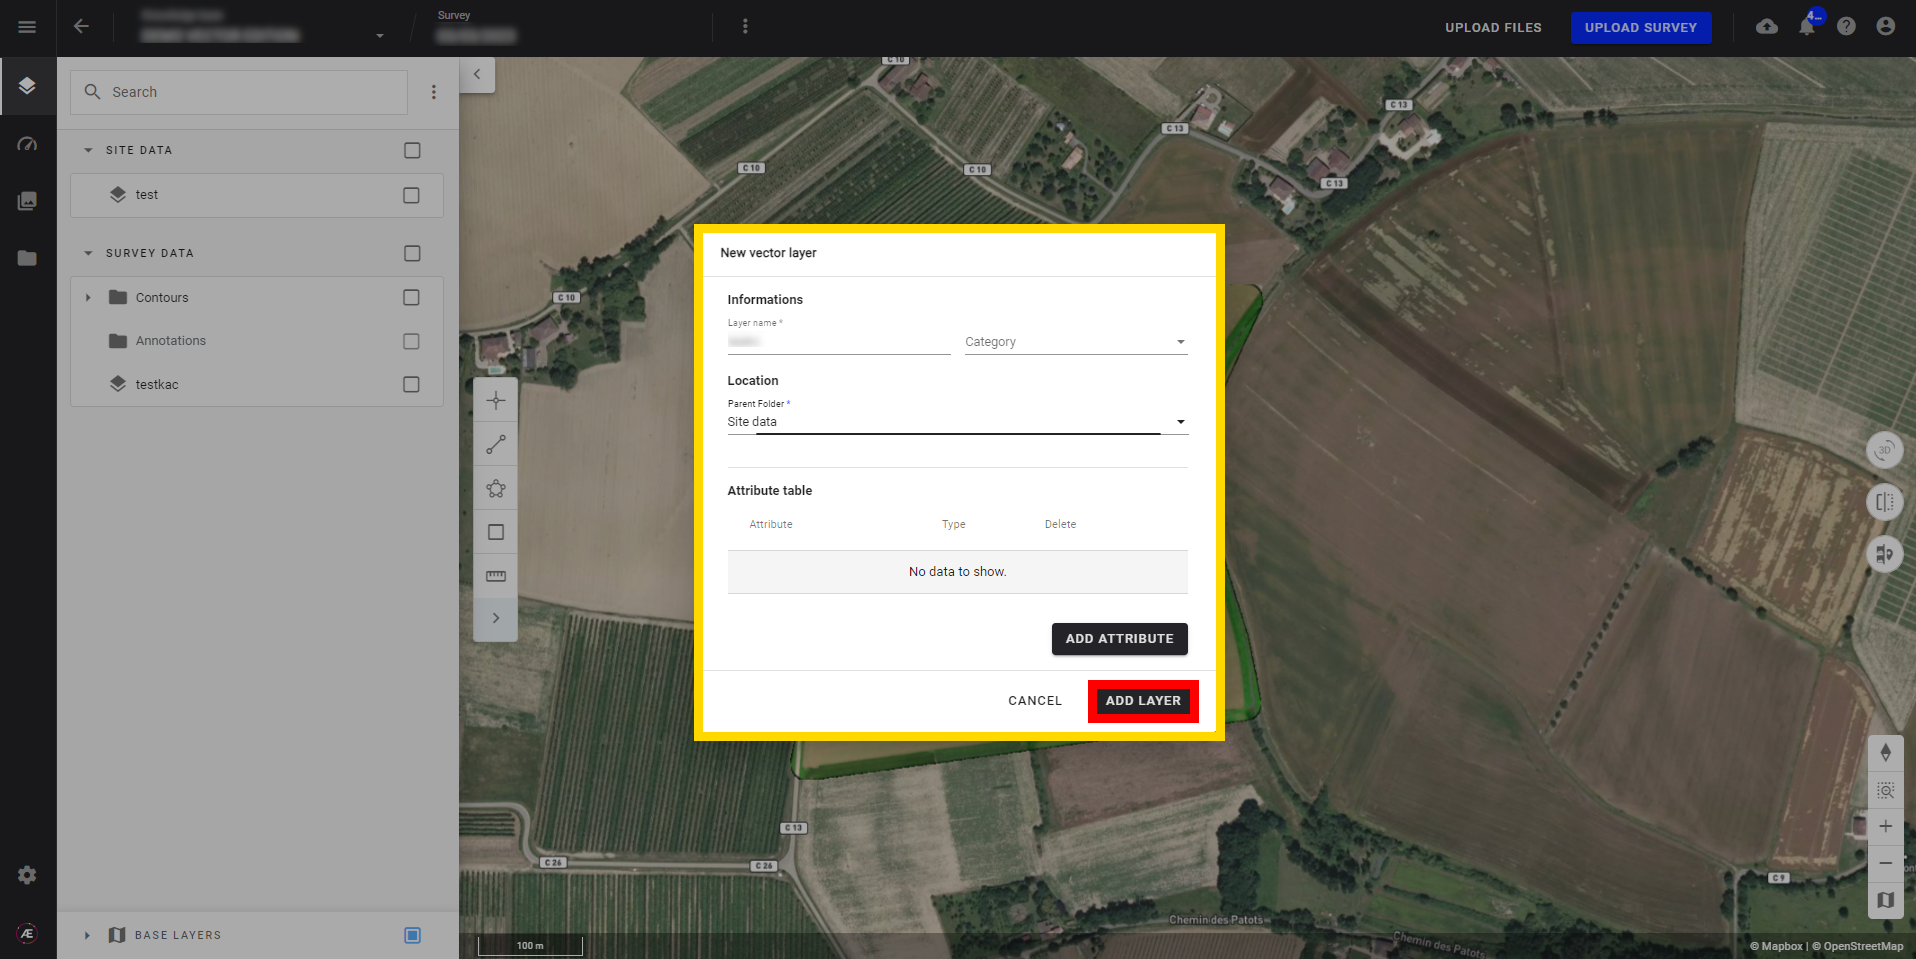
Step 3 - When all information is completed, click "ADD LAYER".
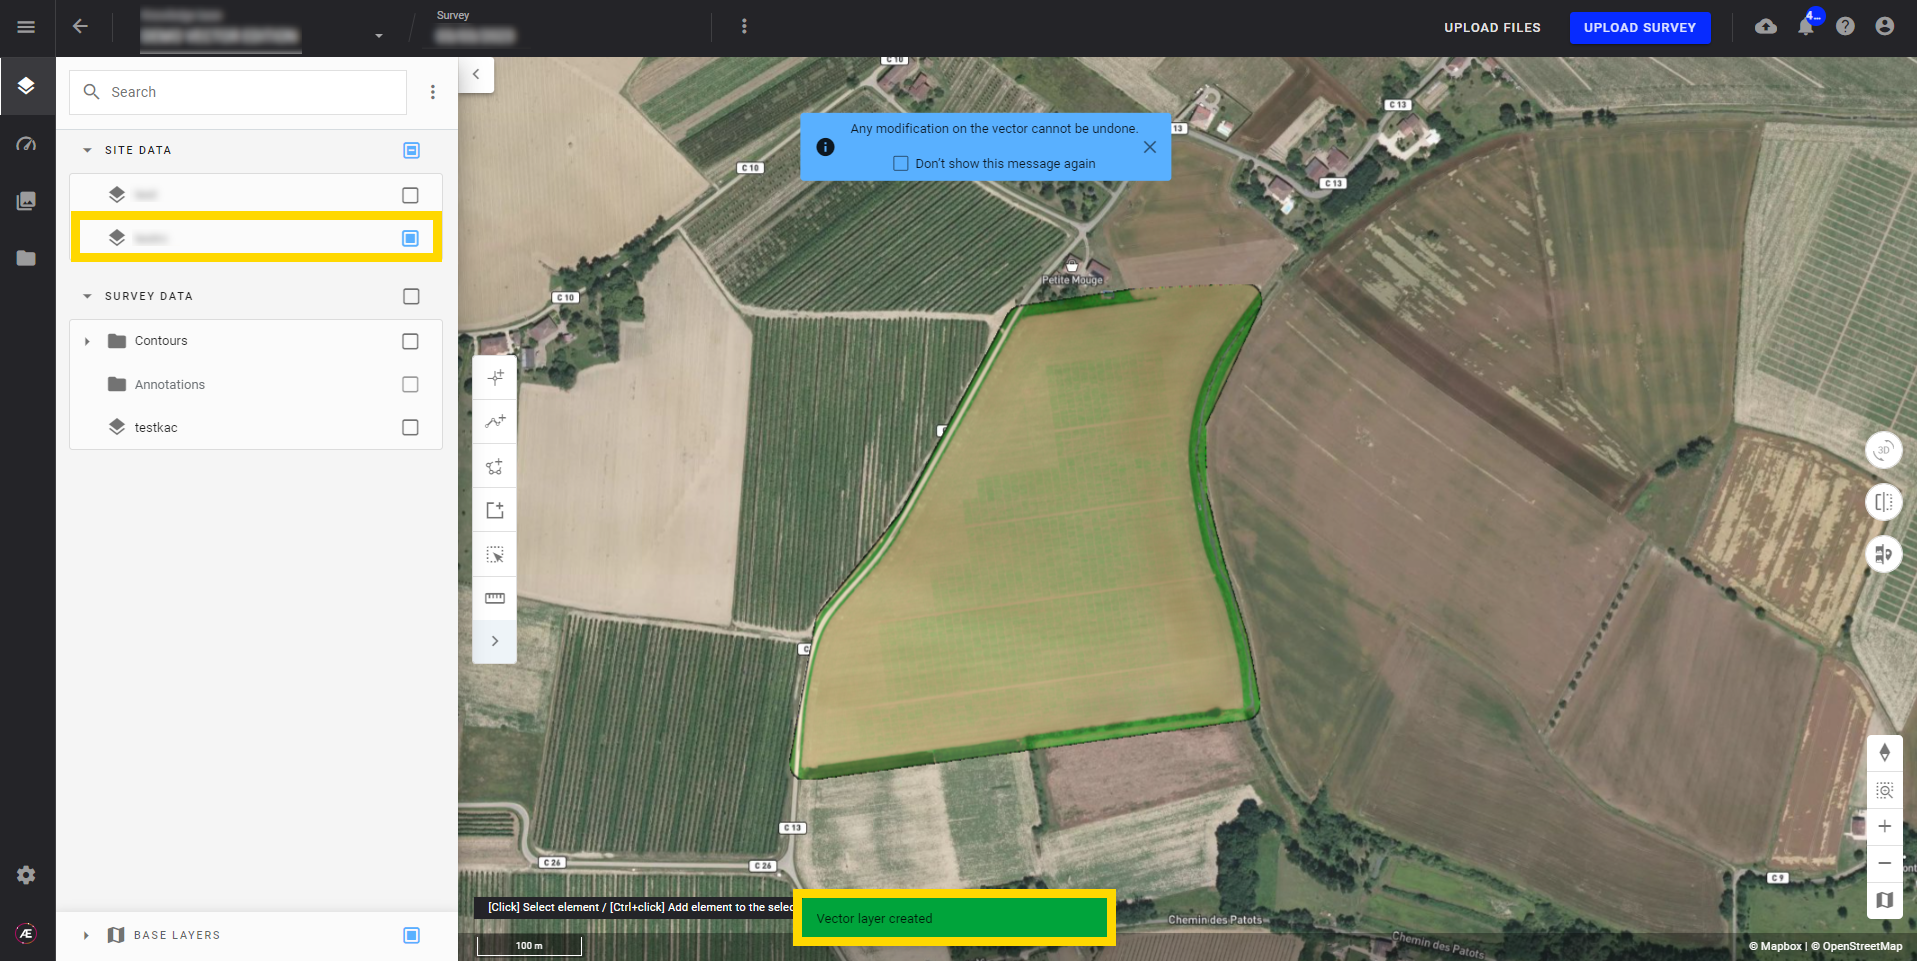
Step 4 - The layer is created and the vector geometry edition is activated.
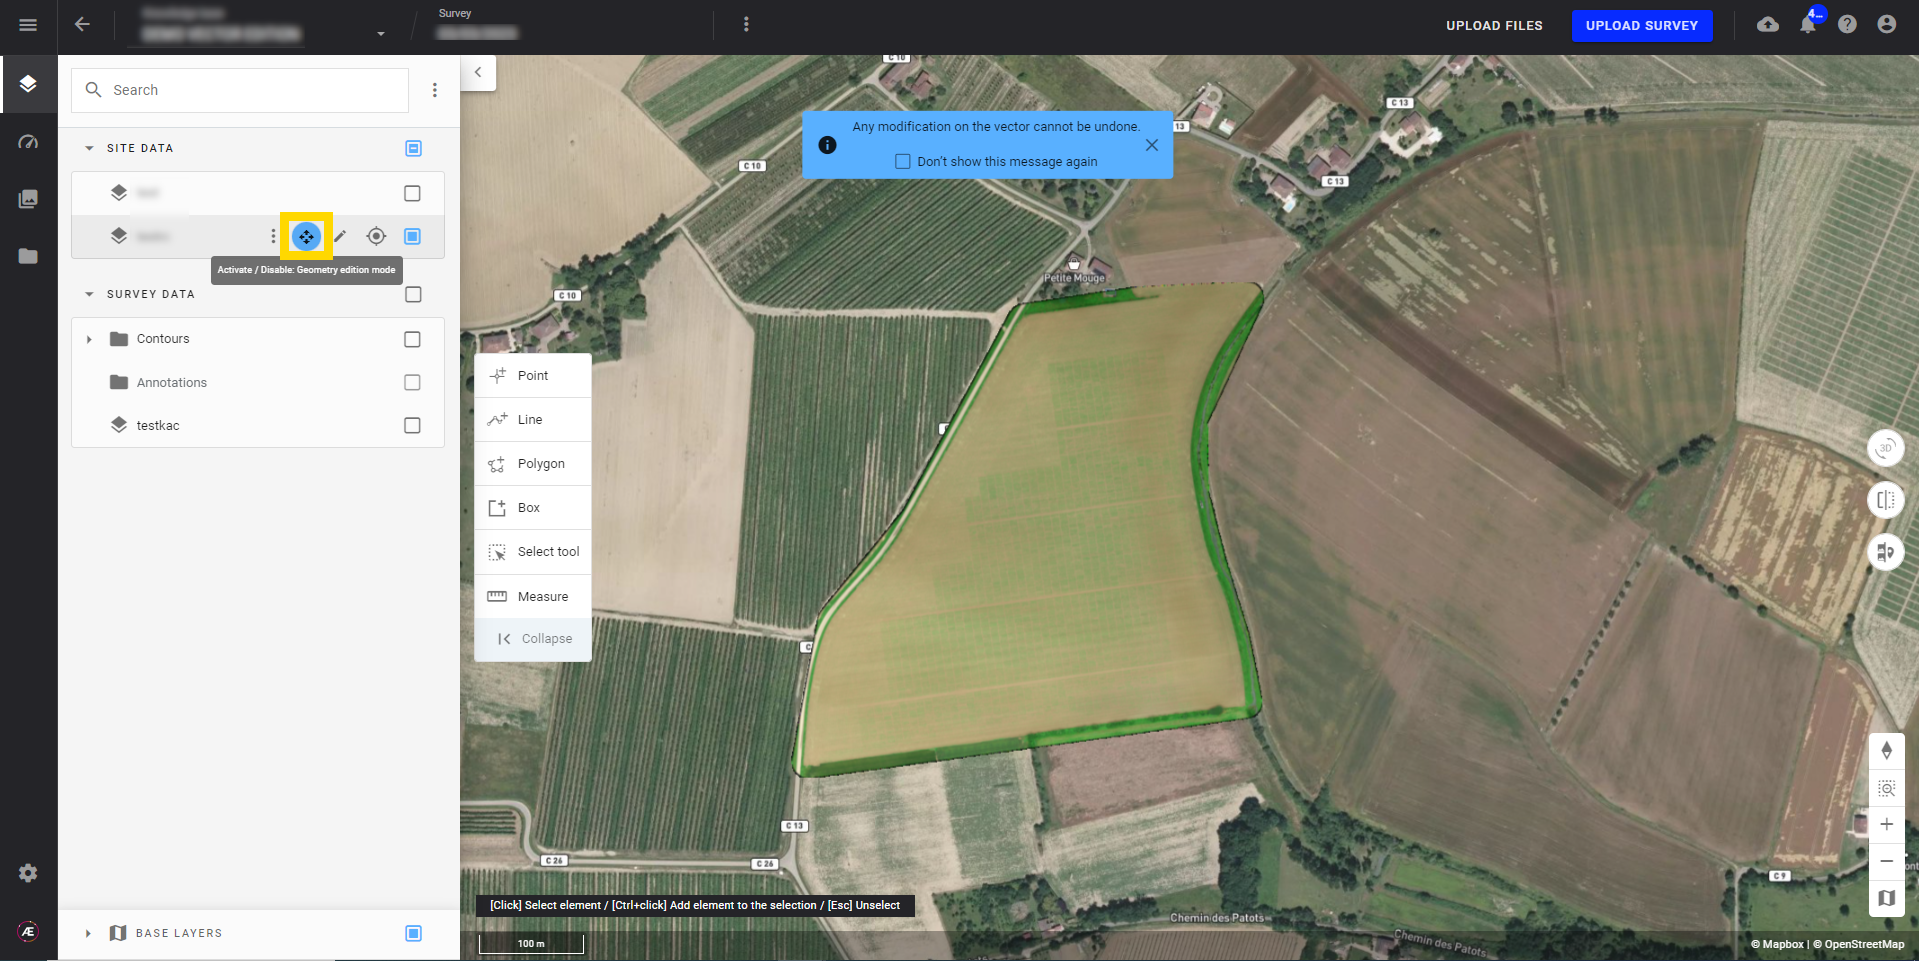
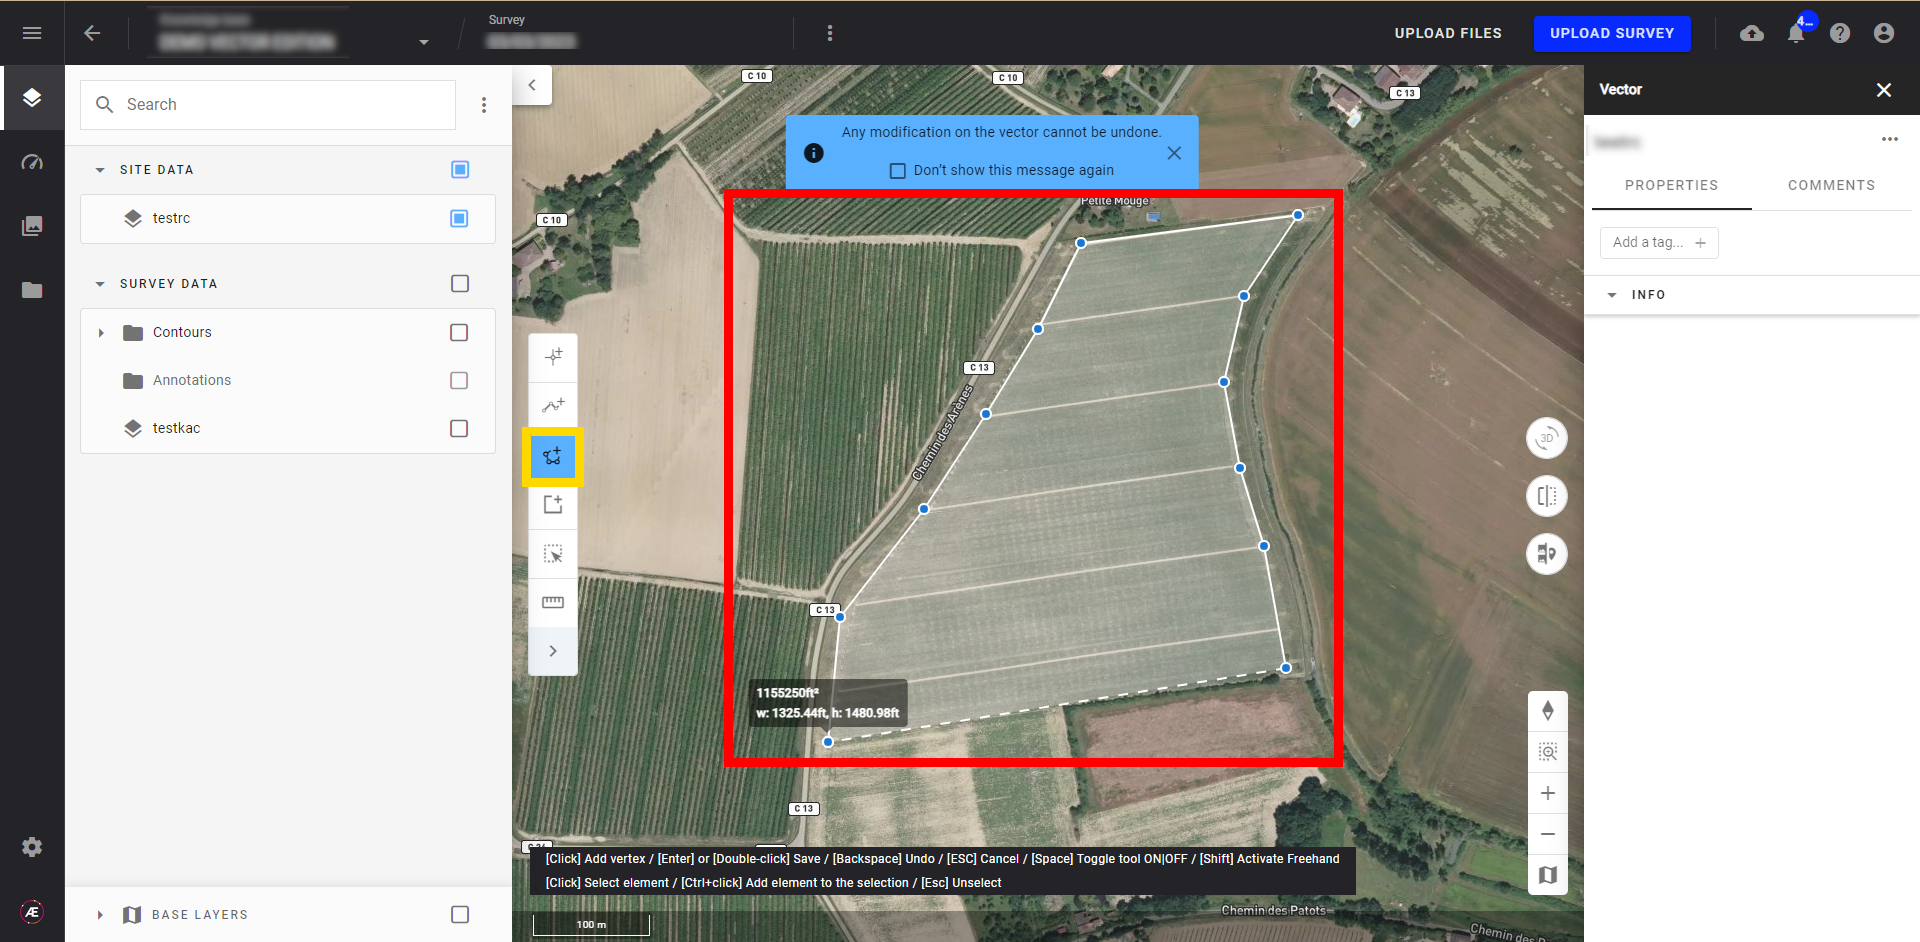
Step 5 - Use the Vector Geometry Edition functions to add features to the vector layer.
Step 6 - Deactivate the vector geometry edition when the vector is complete.
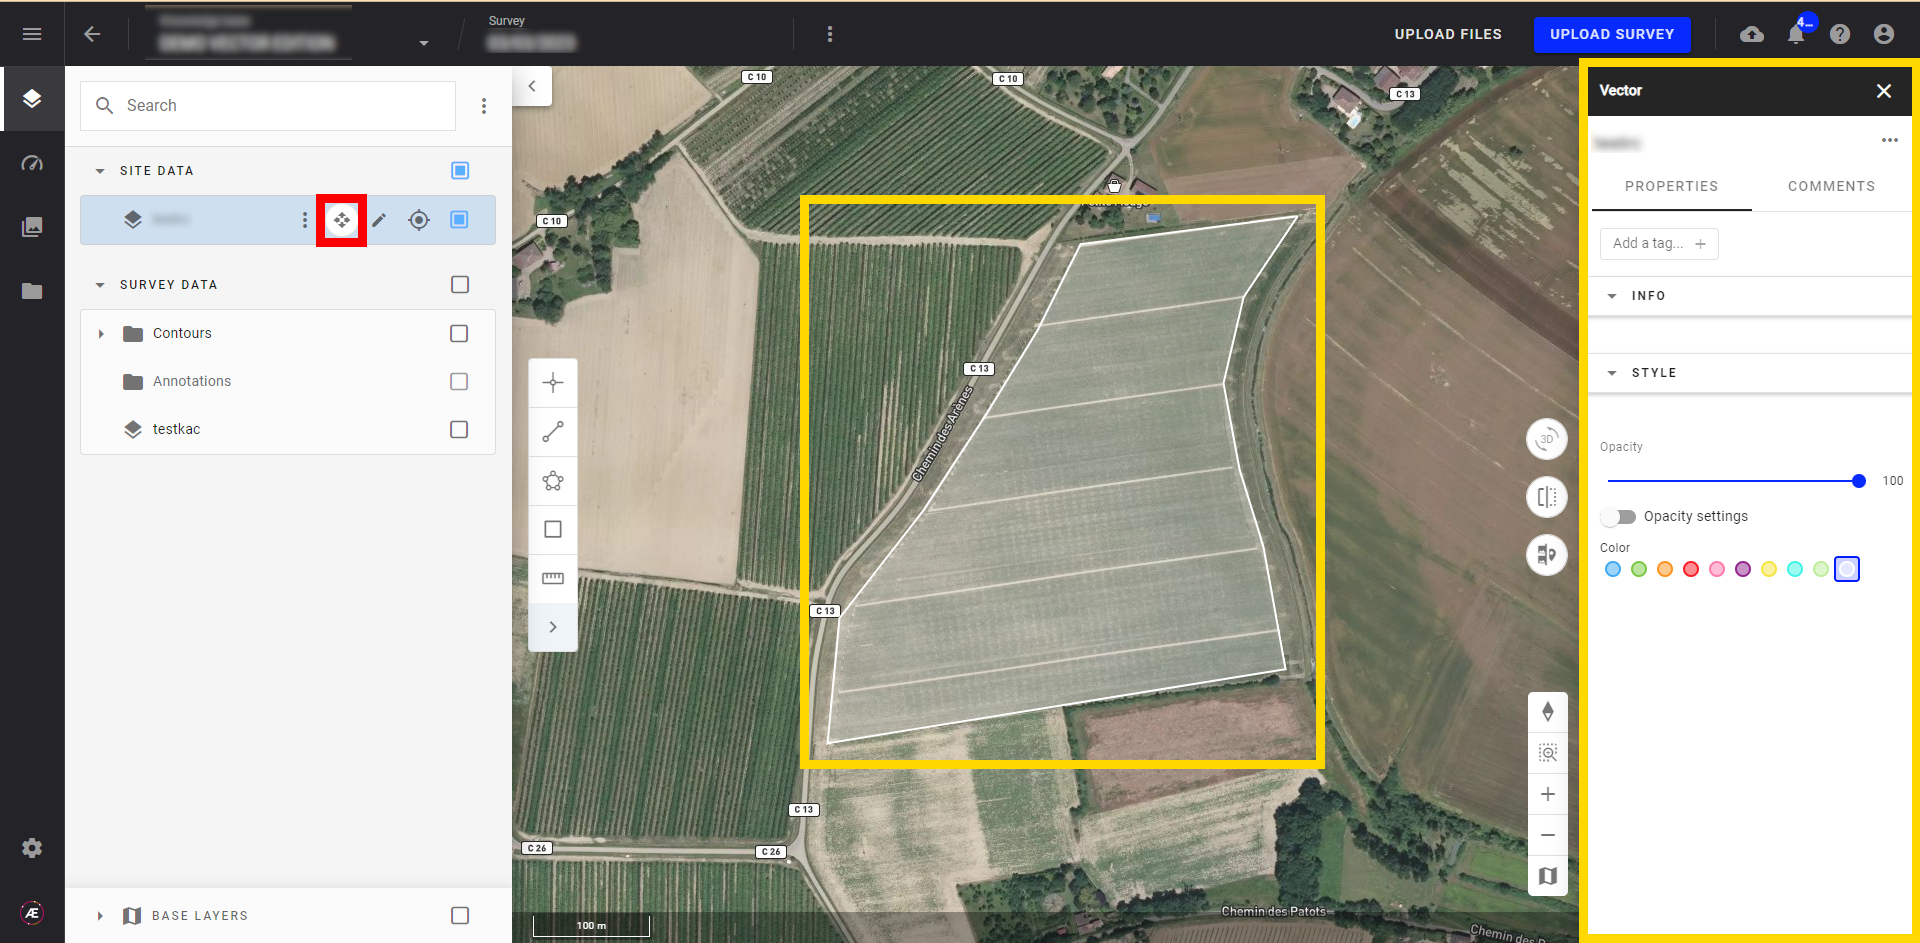
3. Results
The vector layer is created. If necessary use Aether features to:
