

Automated Stockpile Calculation
1. Description
This tools allows detecting and performing accurate volume calculation for stockpile inventory reporting.
It provides the stockpiles detected from the input files. Each stockpile is provided with the following information :
- a name (an identifier as a number)
- a volume, in the volume unit configured in the project settings
- a surface, in the surface unit configured in the project settings
- a geometry (CRS : WGS84)
The results will then be viewable from the Stockpiles module (see below).
2. Automated Stockpile Calculation
2.1 Running "Automated stockpile calculation"
Important
Please note that the launch and completion of this analysis are conditional on the prior completion of a photogrammetry operation for the survey date in question.
Please ensure that you have the following photogrammetry input files:
- Orthomosaic
- Digital Surface Model (DSM)
- Point cloud
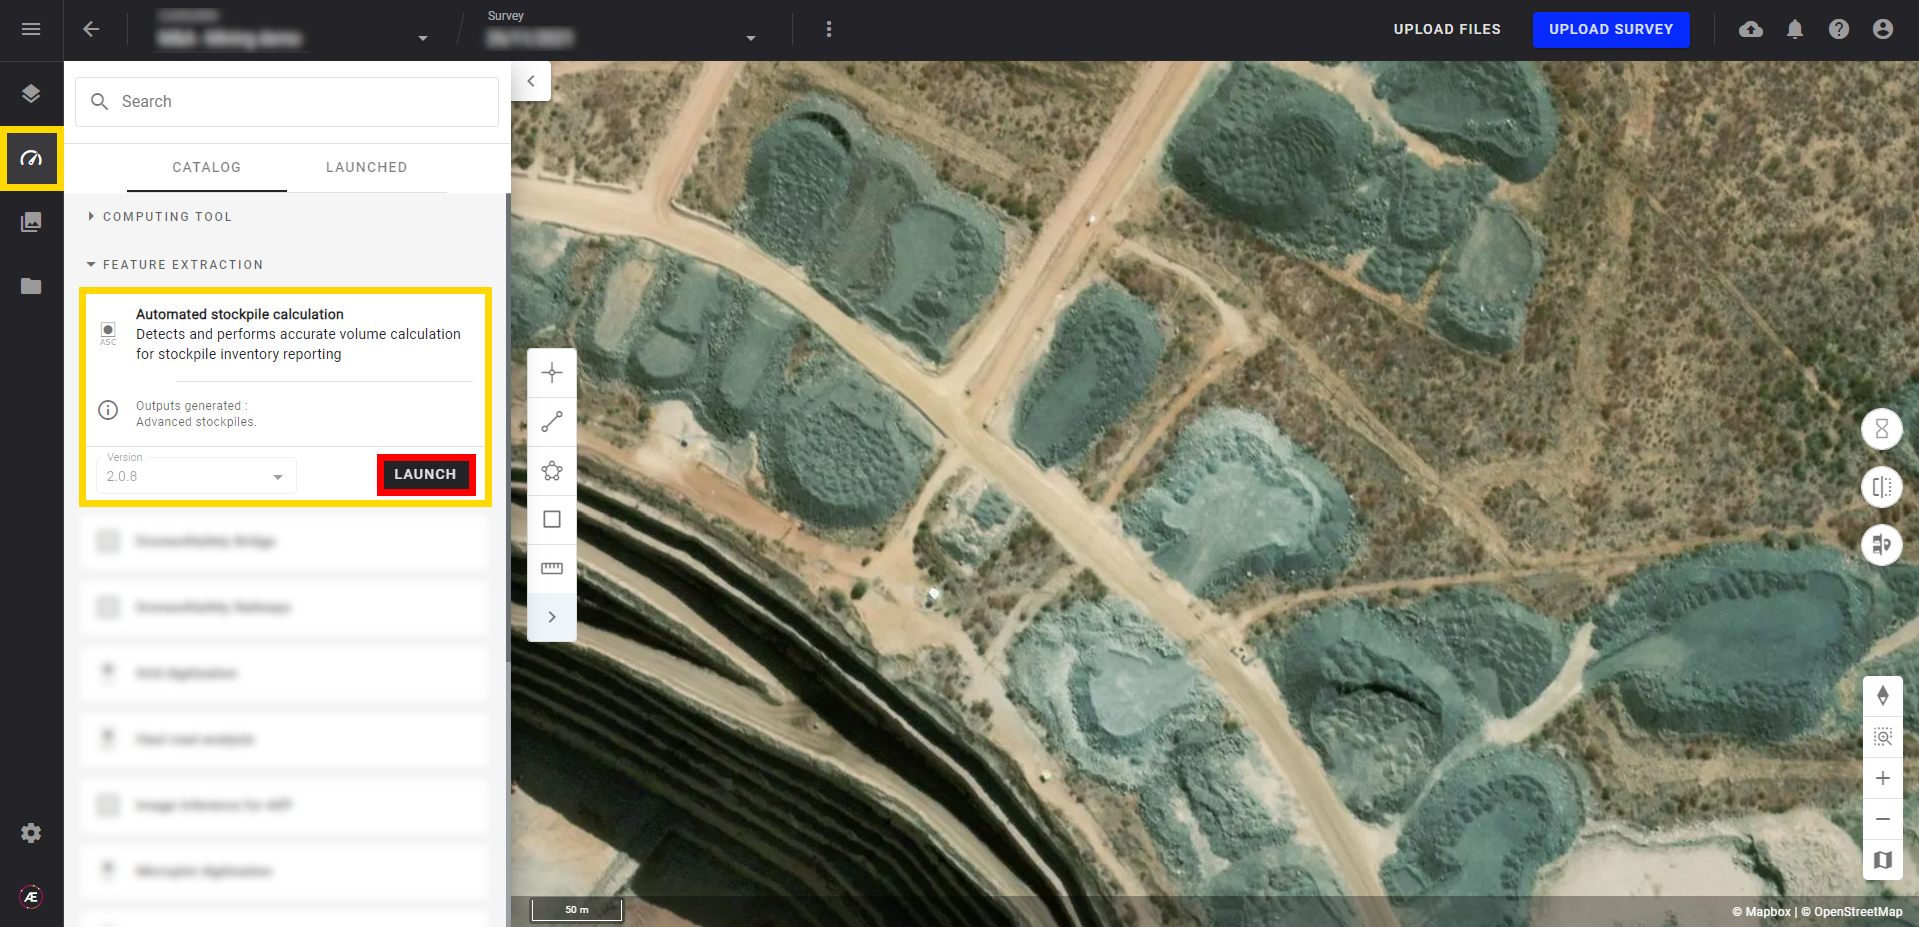
- From the left menu on an opened Project, go to the Analytics tab, search and select "Automated stockpile calculation", and click on "LAUNCH".
- Select the 3 inputs necessary to launch the analytics and click on "LAUNCH AUTOMATED STOCKPILE CALCULATION".
Info
The necessary inputs to complete the analytics are:
- Orthomosaic
- DSM or DTM (if needed)
- Point cloud

After its completion, a notification informs that the results are available.
At that step, it will be necessary to assign a material type to each stockpiles, from the Stockpiles module.
Info
Read this page to know how to handle the Stockpiles module.
