

Export Point Cloud from 3D viewer
Discover the different options available to export Point Cloud from 3D viewer
1. Description
This article presents the different ways to export a Point Cloud from the 3D viewer.
2. Export full PCL
To export the full PCL, once in the 3D Viewer, open the layer panel of the point cloud you want to export, click on the  button and select the “export” menu.
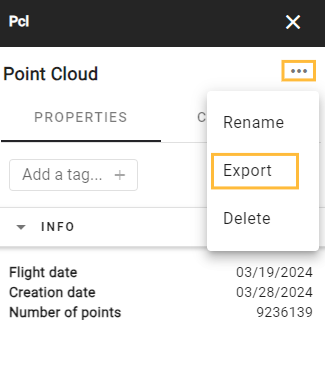
It opens the following pop-up.

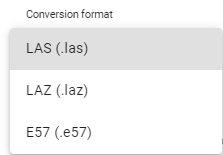
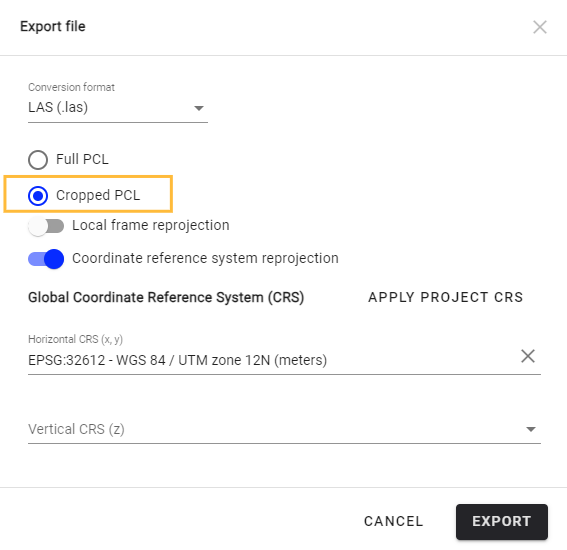
From there, the user can define export options:
- Conversion format : choose the export format among the different proposed formats.
- Coordinates system: choose between 3D local frame or CRS reprojection. The user can define any horizontal and vertical CRS. Data will be exported accordingly.
Once options are defined, click on “EXPORT” button.
The export is available for download a few minutes later in the “Download” view of the project and in the Data Management module.
3. Export cropped PCL
There is a second option that allows you to export only a portion of the PCL. This is especially useful if you don't need the entire PCL in your third-party software, or if your third-party software cannot support large PCLs.
To export a “Cropped PCL”, activate the cropping tool and crop your PCL:

Then, select the PCL you want to export in the layer panel and follow the same steps as in the section 2. In the export parameters, select the option “Cropped PCL”.
The export is available for download a few minutes later in the “Download” view of the project or in the Data Management module.
