

Manual File Upload
1. Description
Files can be uploaded to an existing project or survey and then used as inputs for analytics, 2D or 3D visualization.
Examples of files can be construction as-built, future mine plans, and previously processed data from other sources such as manned aircraft, ground-based sensors, satellite tile, or human surveys.
It is possible to create a new survey for an existing Project when uploading a file.
Info
The workflow to upload a raw image dataset is described here.
2. Procedure
Step 1 - Open the project.
Step 2 - Click on "UPLOAD FILES".

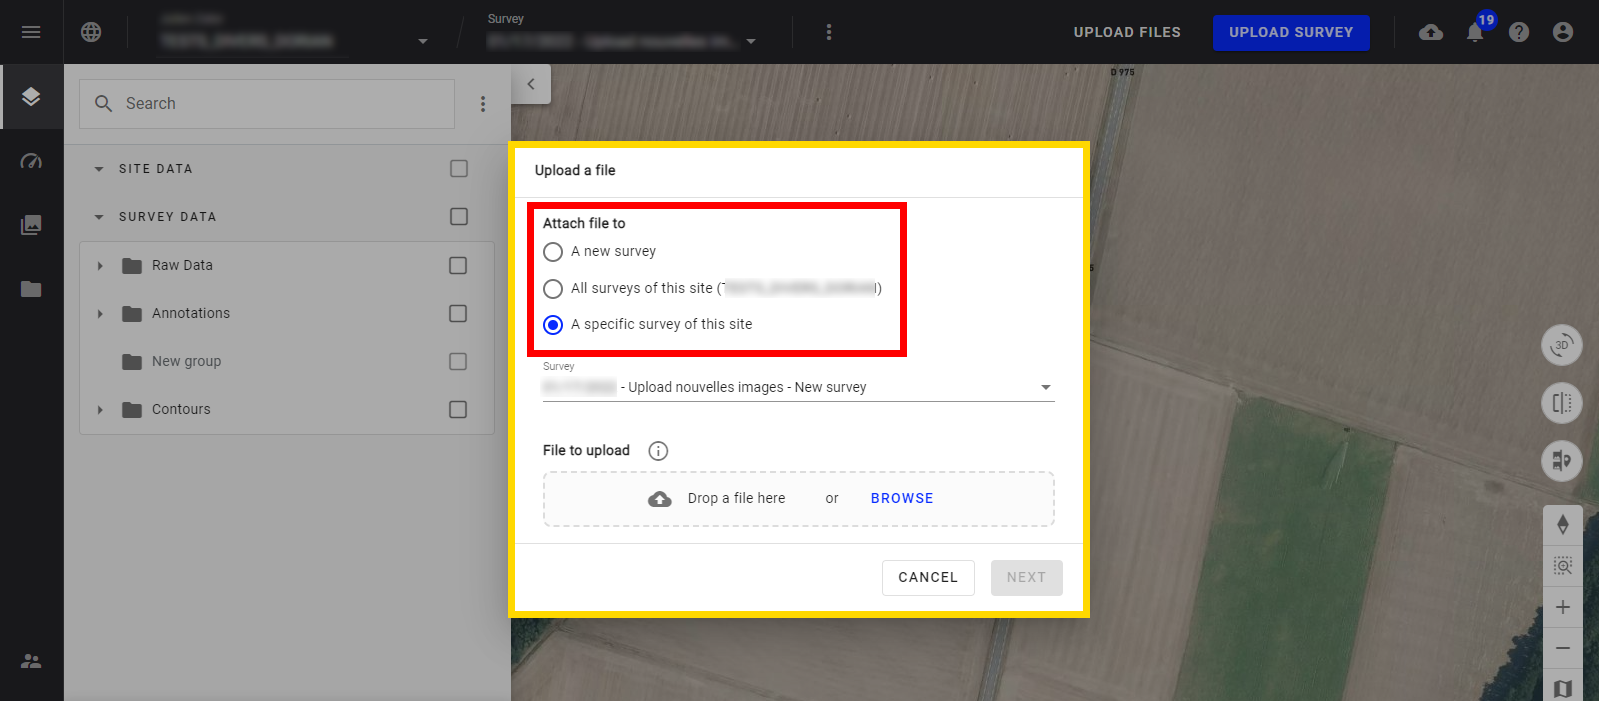
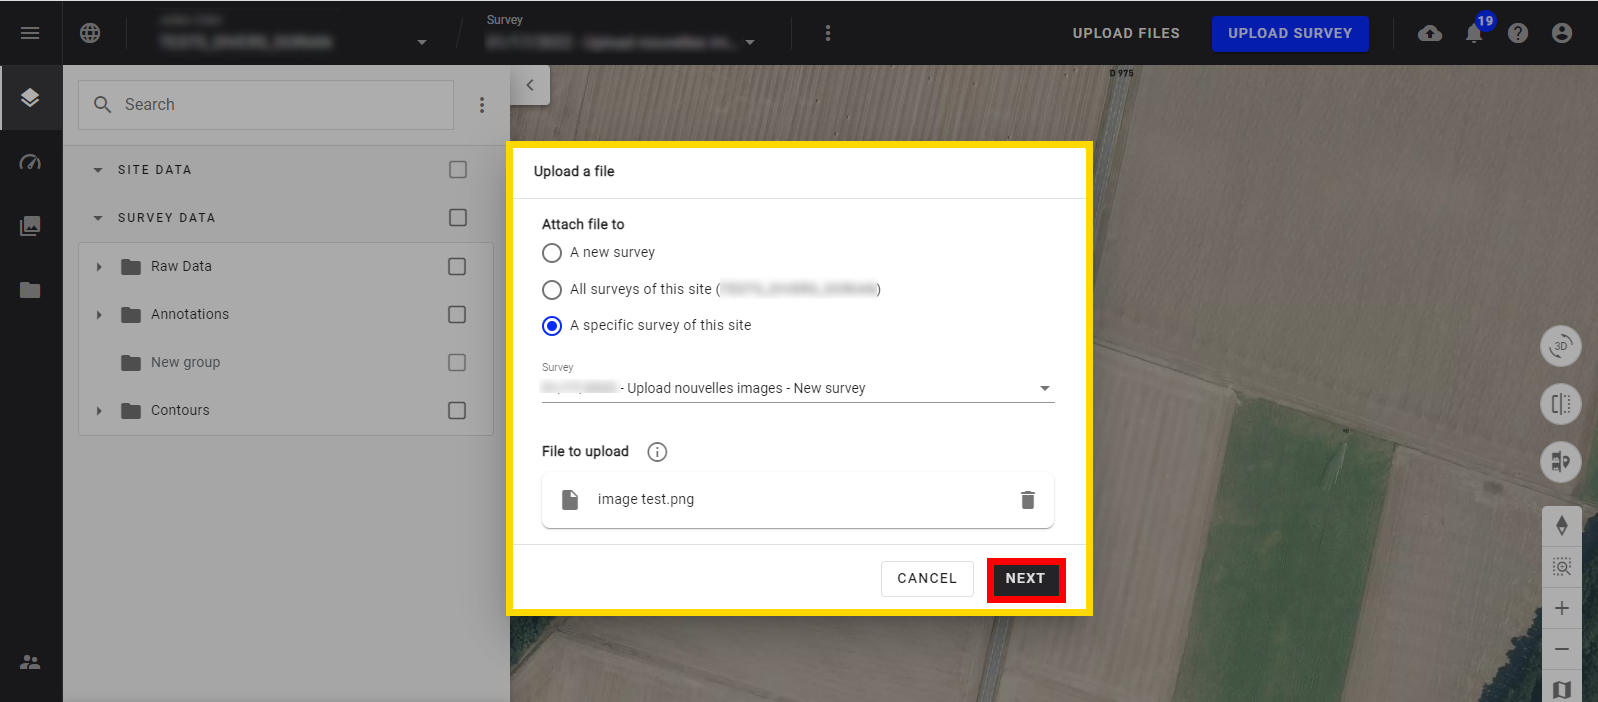
Step 3 - Choose the survey option:
- A new survey (create a survey)
- All surveys (accessible to all surveys = project level)
- A specific survey of the project
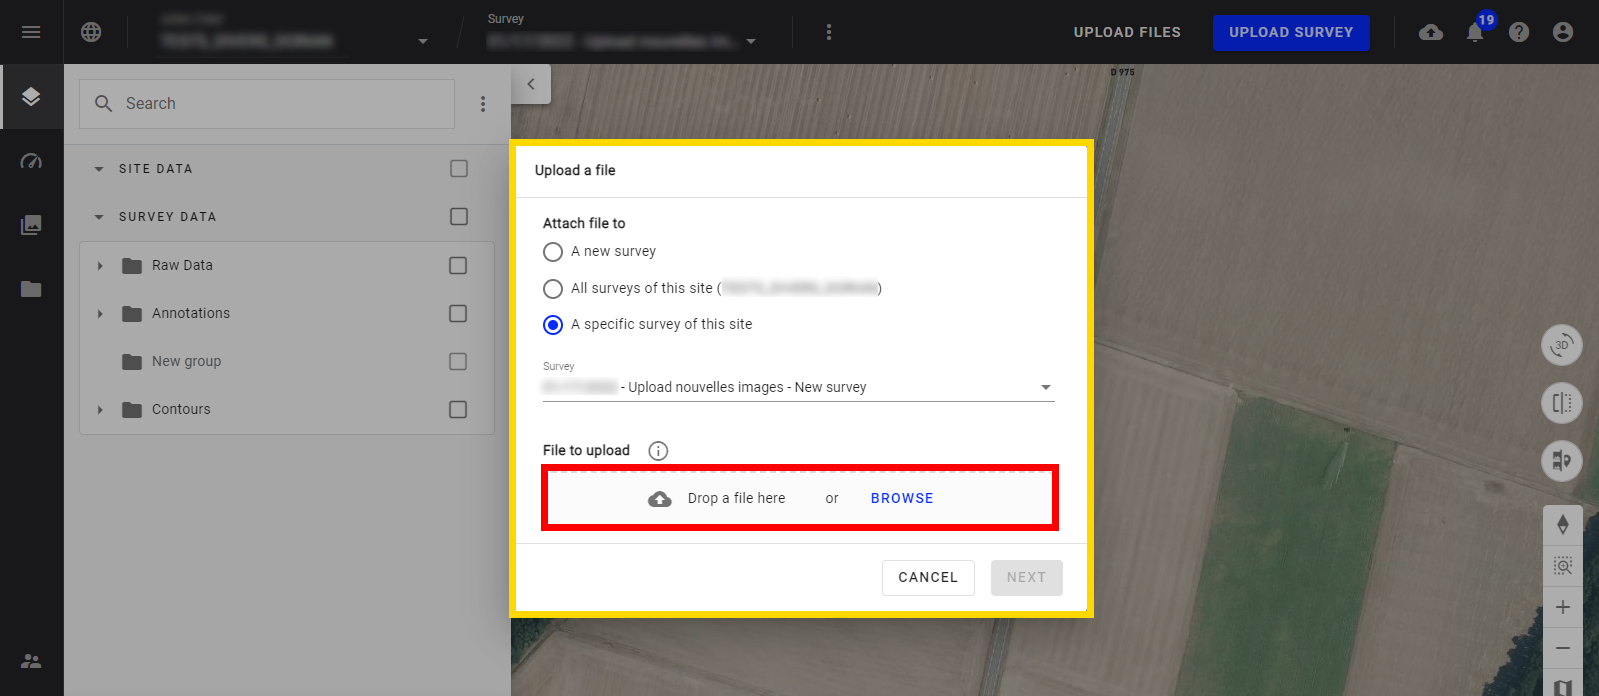
Step 4 - Drag and Drop or browse the file.
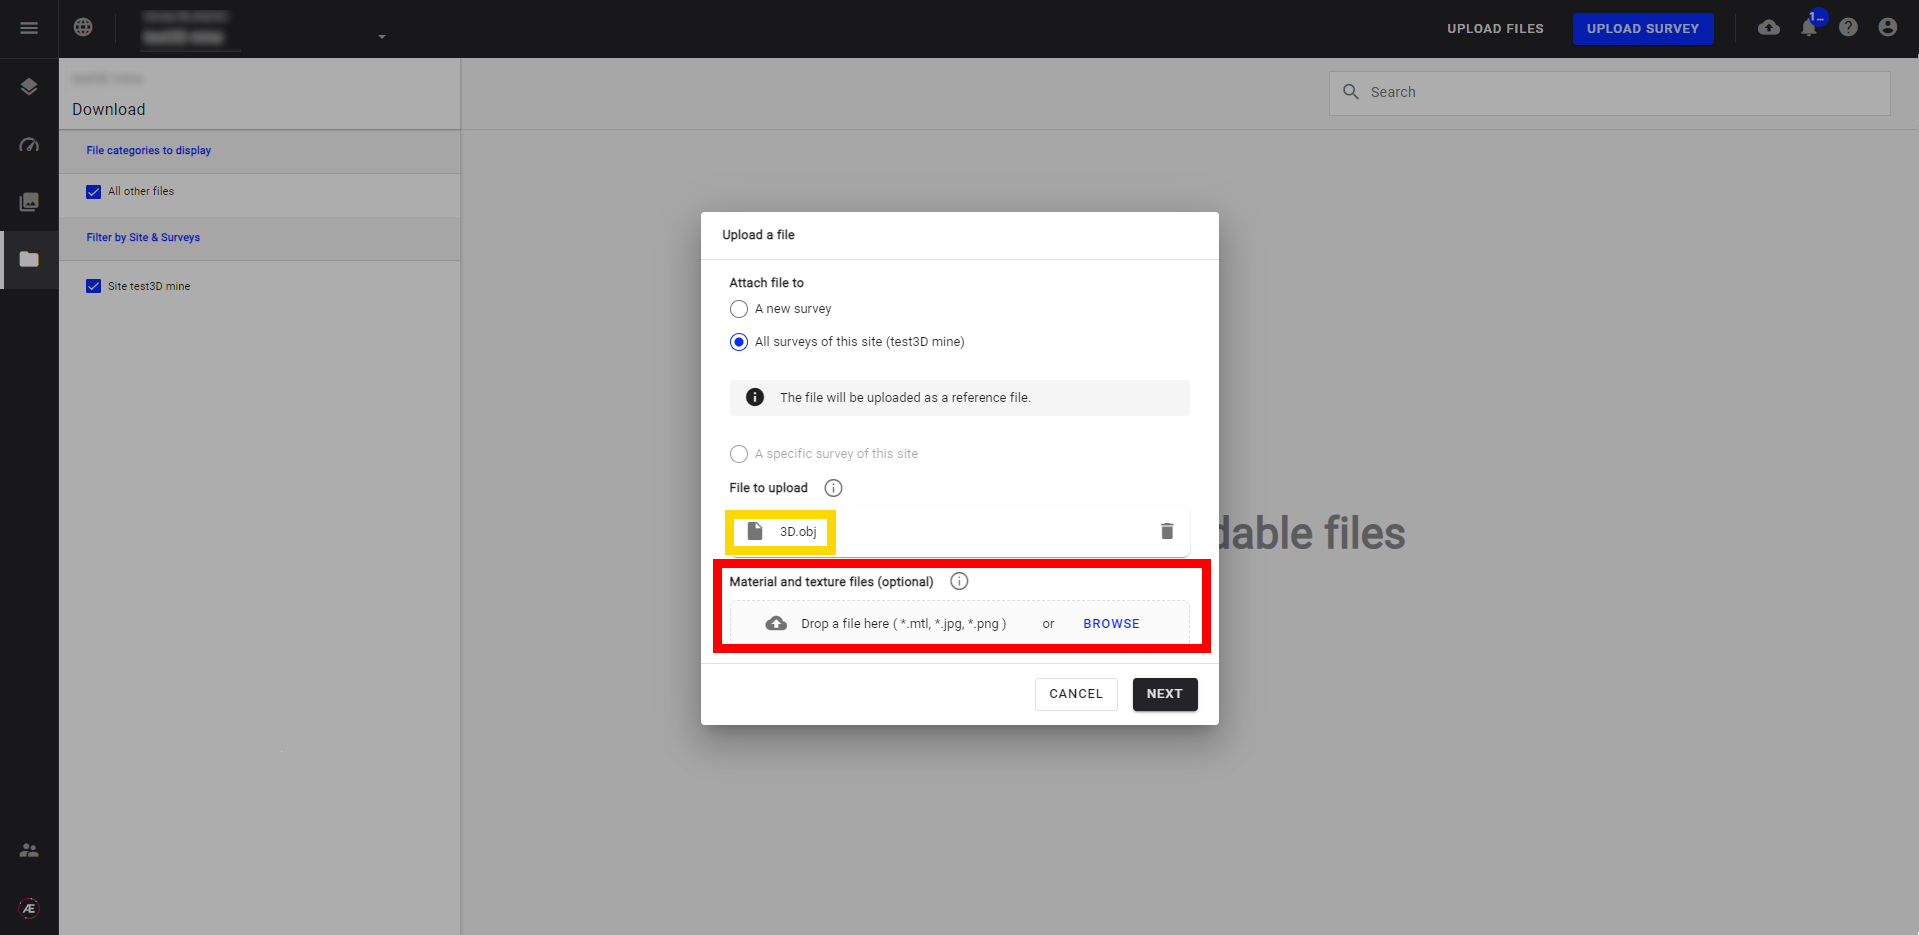
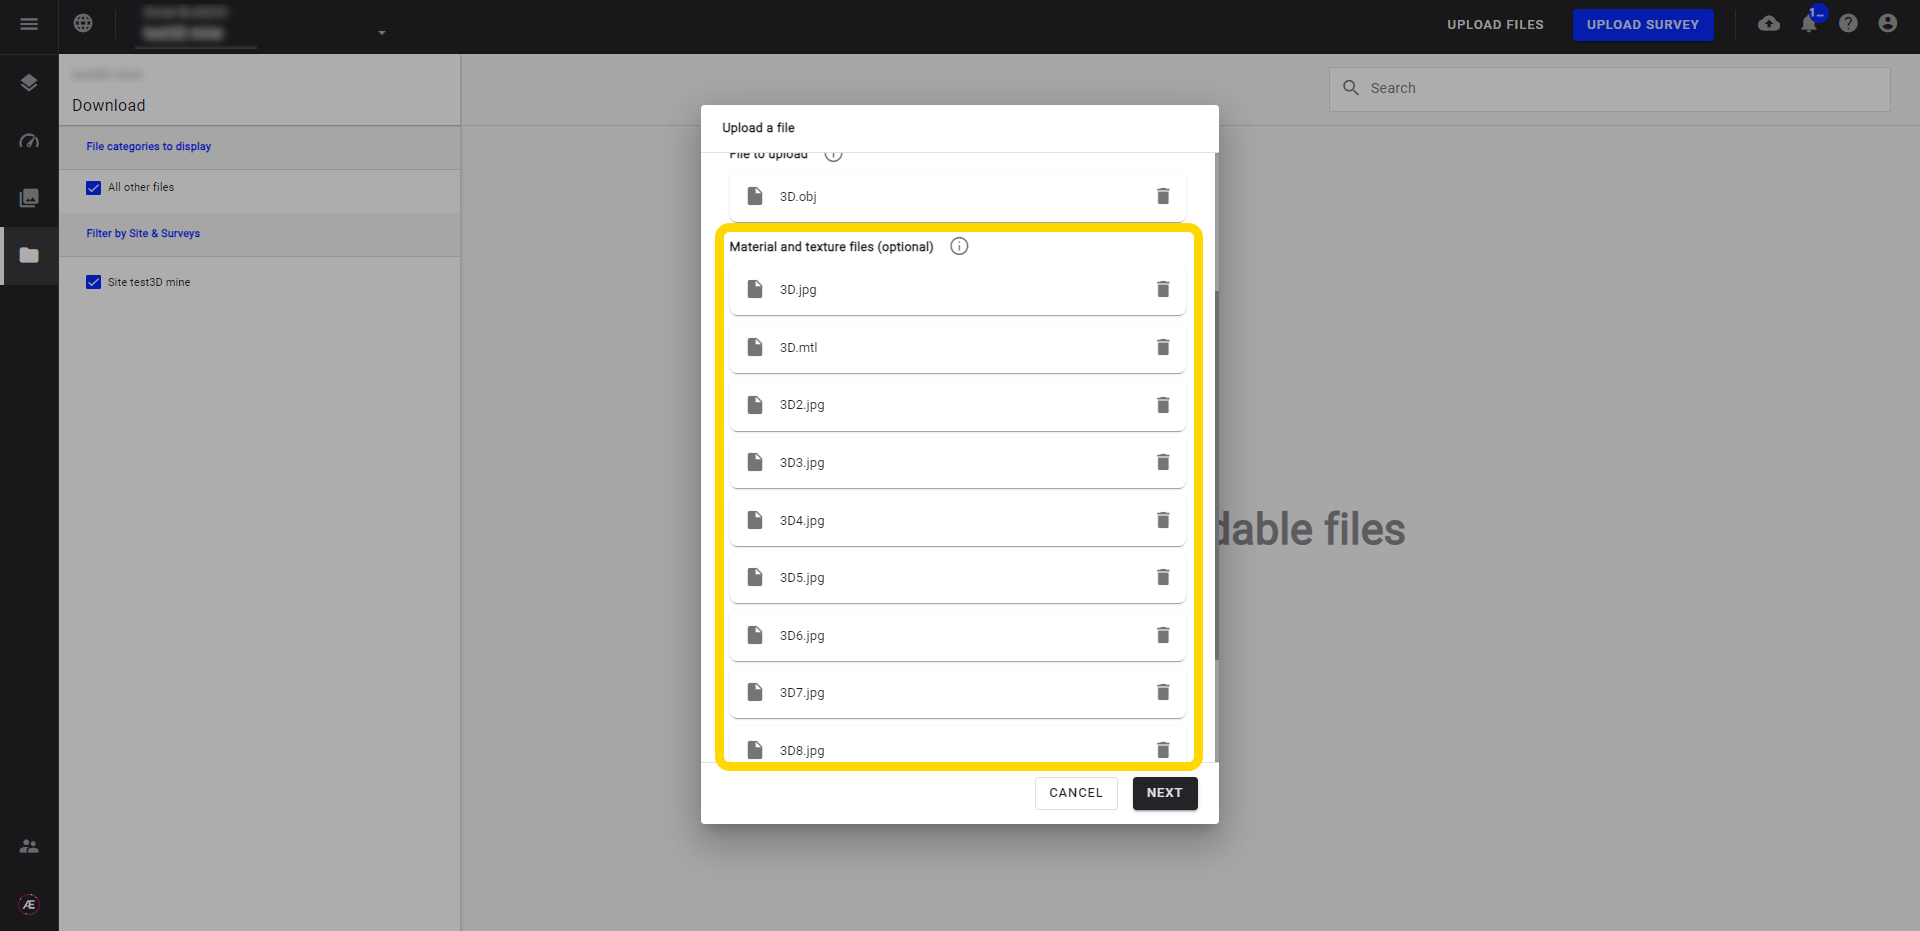
Optional steps for 3D
For 3D model file (OBJ) - Add material and texture files.
Once the 3D model file (obj) is selected, a new box appears to attach mtl and multiple jpg or png texture files.
Step 5 - Click on "NEXT".
Step 6 - Rename the file, if necessary.
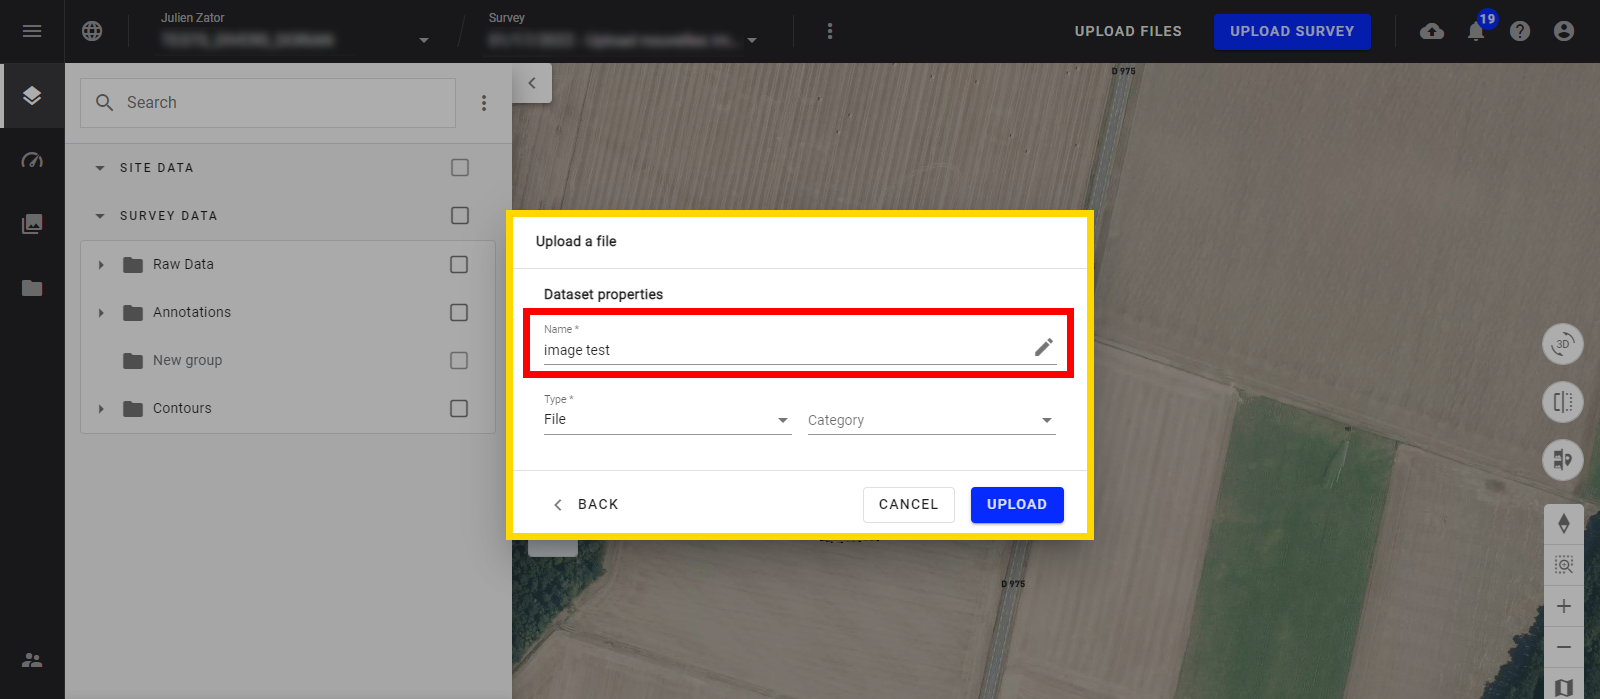
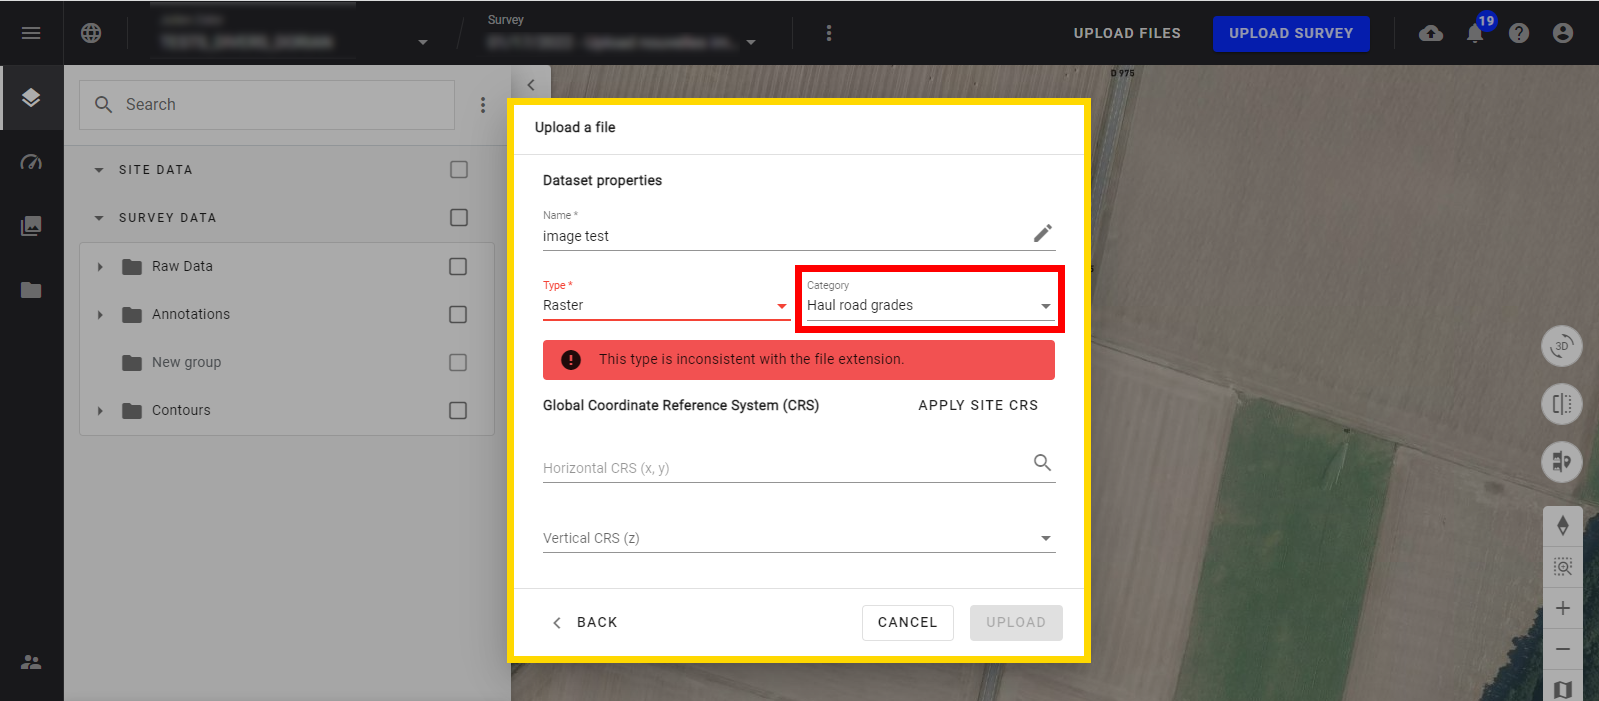
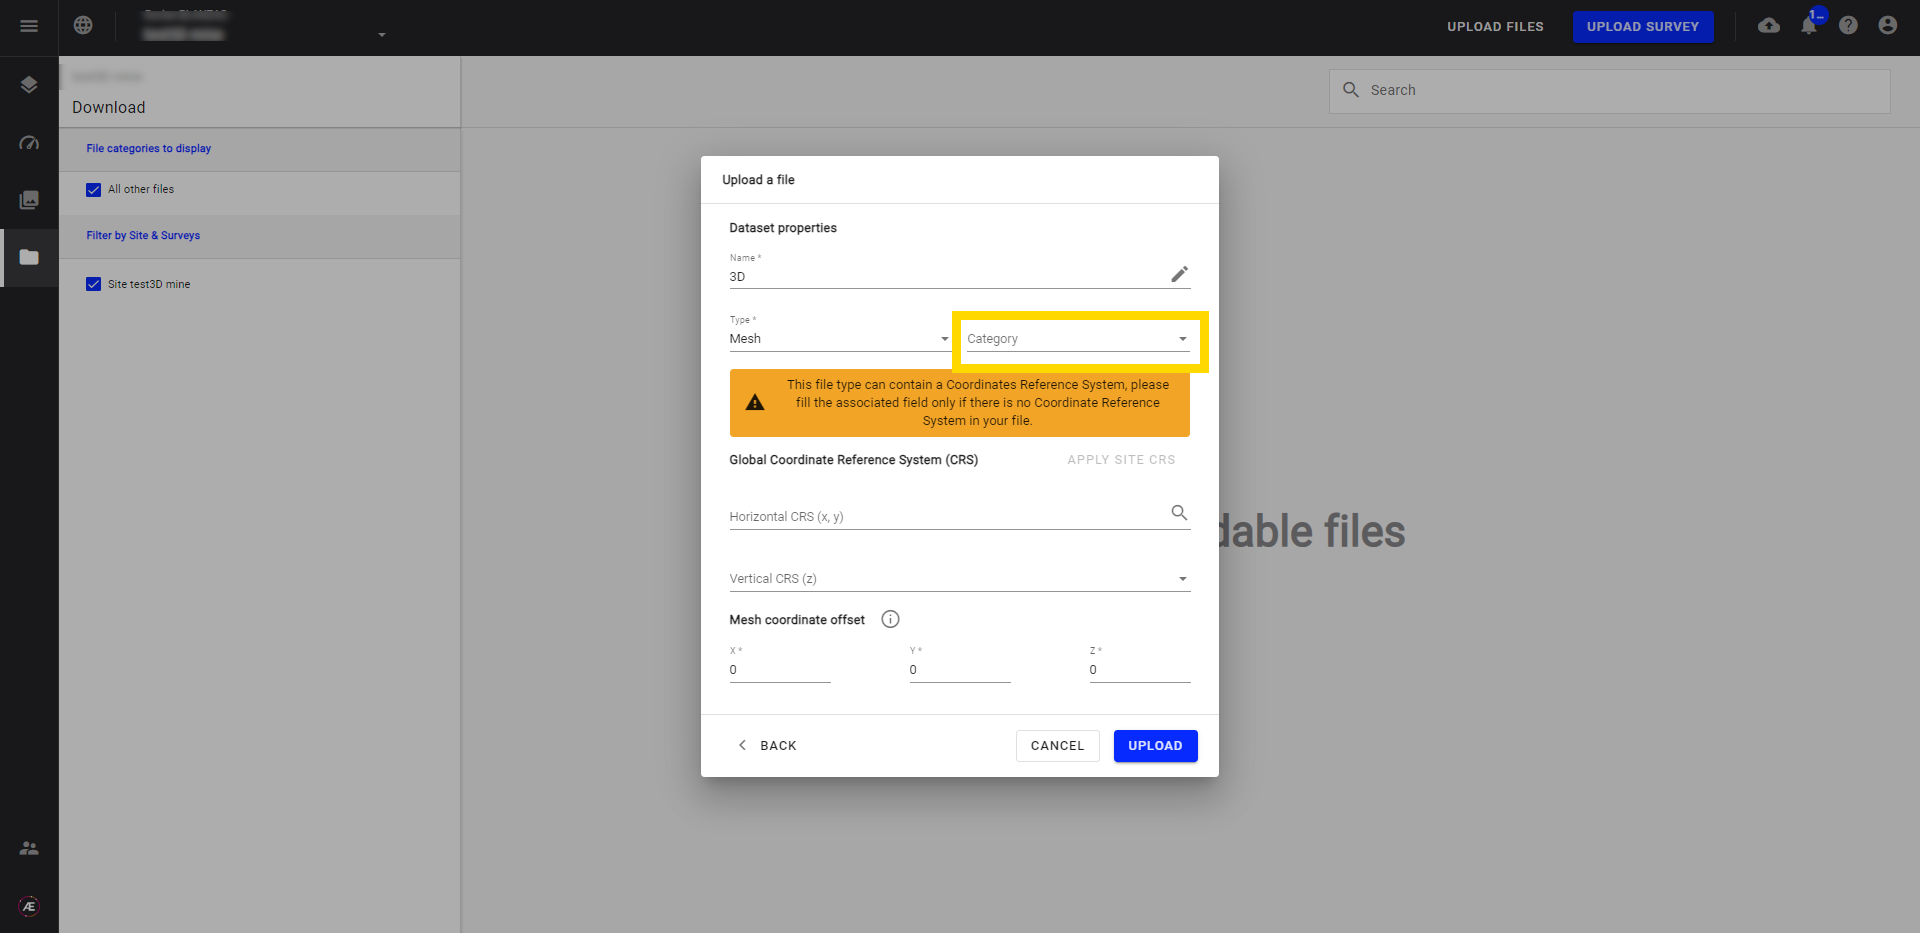
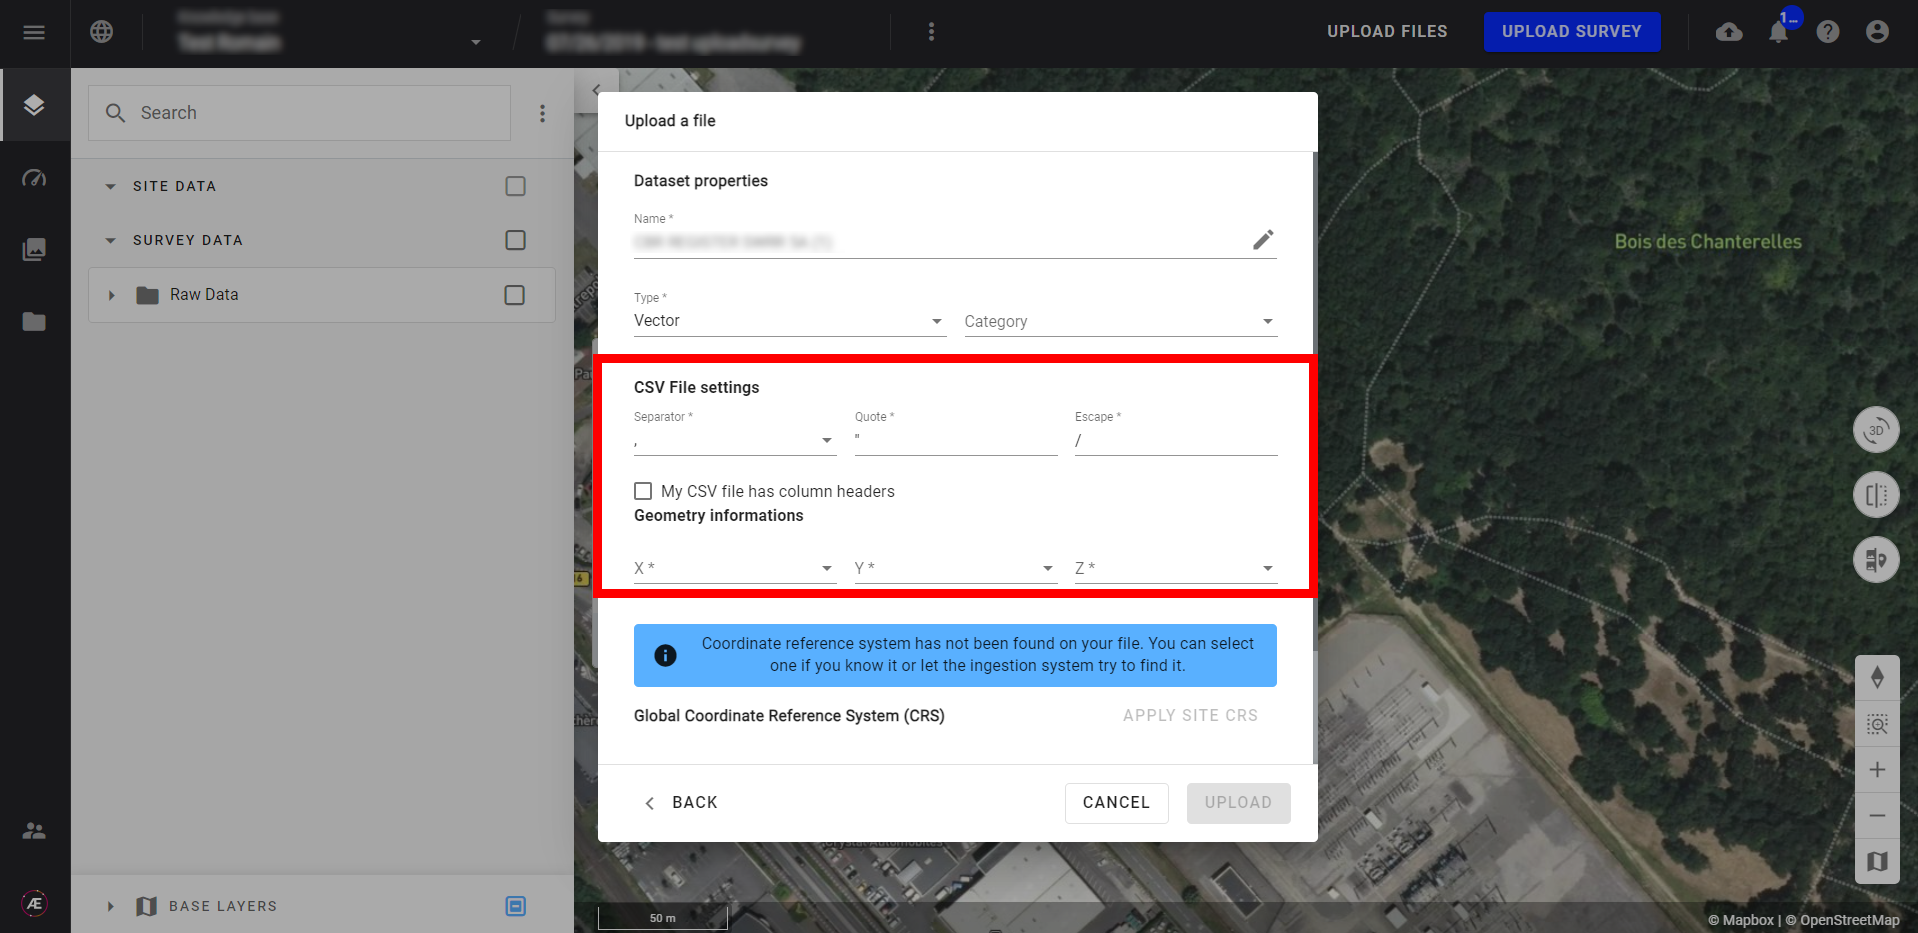
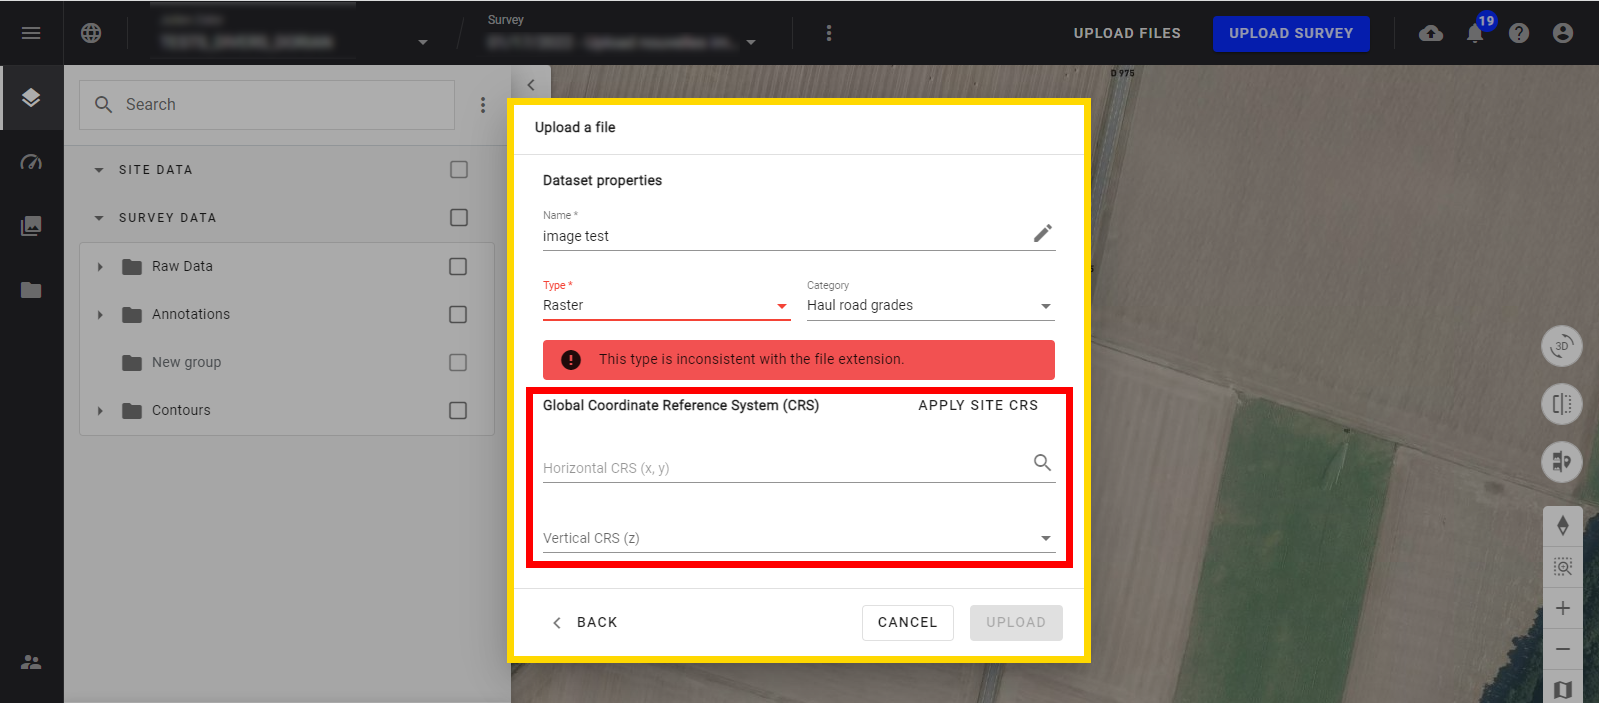
Step 7 - Define the type (See Table 1, Paragraph 4.).
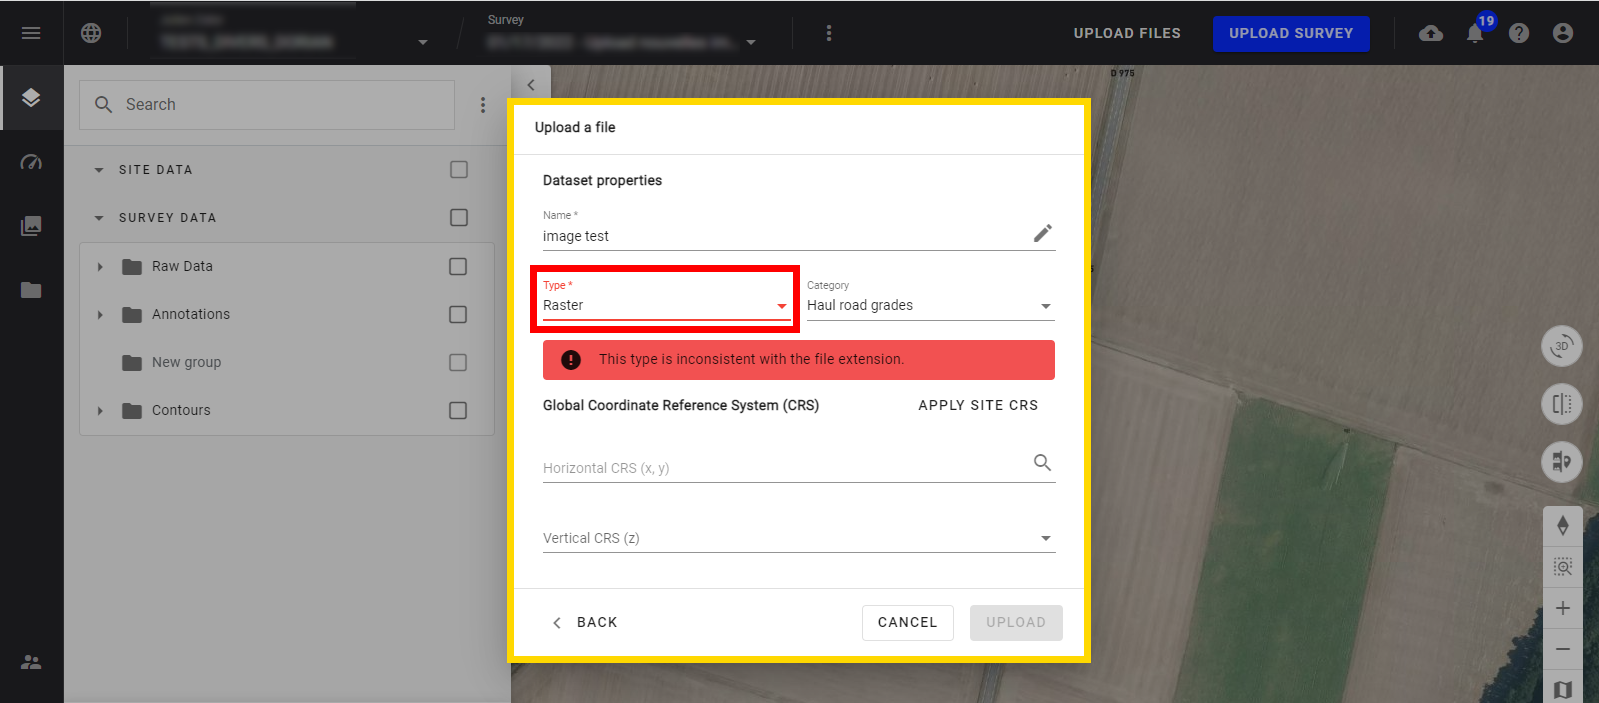
Step 8 - Define the category (see Table 2, Paragraph 5.).
Info
- For 3D files, select the "Mesh" type and keep the "Category" box empty.
- For CSV files to be converted to vector file, select the "Vector" type, select a "Category" (see paragraph 5), adjust the CSV file settings if the input file deviates from Aether's default values, tick if the CSV file has column headers, and localize columns X, Y, and Z. See Upload CSV as a Vector File for more information
Step 9 - Define Coordinate Reference Systems (CRS).
Optional step for 3D files
Step 9a - Define 3D-model offset
If the selected type of the file is “Mesh”, it opens an additional field, enabling to define the offset of the model.

This offset is needed in case the selected mesh was generated in a local coordinate system. It represents the offset between this local coordinate system and the coordinate system of the project. The offset is an output of the photogrammetry tool used to generate the mesh.
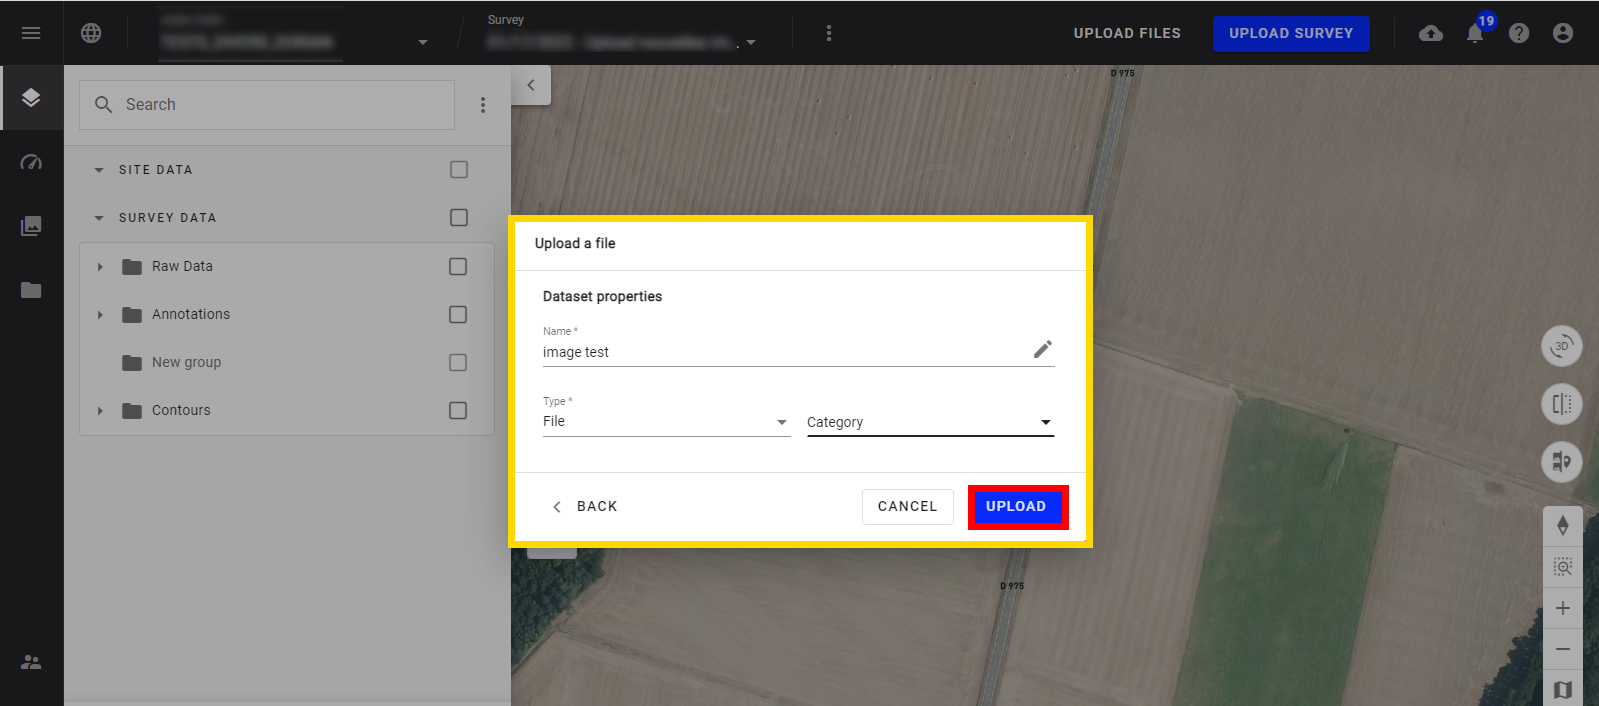
Step 10 - Click on "UPLOAD".
Warning
Do not log out or close the browser tab of Aether before the upload completion will stop the process.
Step 11 -.Click on "CONFIRM" to launch the upload.
Step 12 - Follow the progression of the uploading.
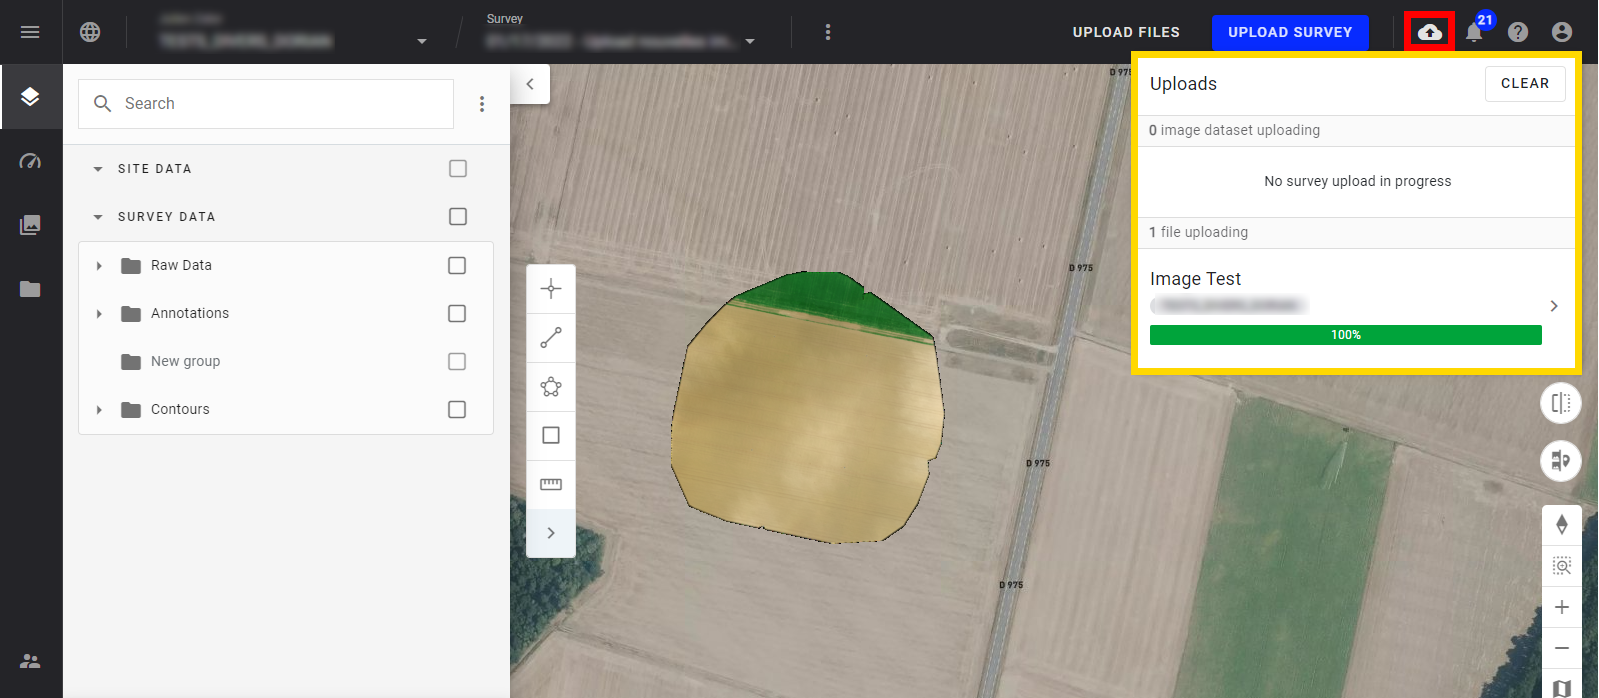
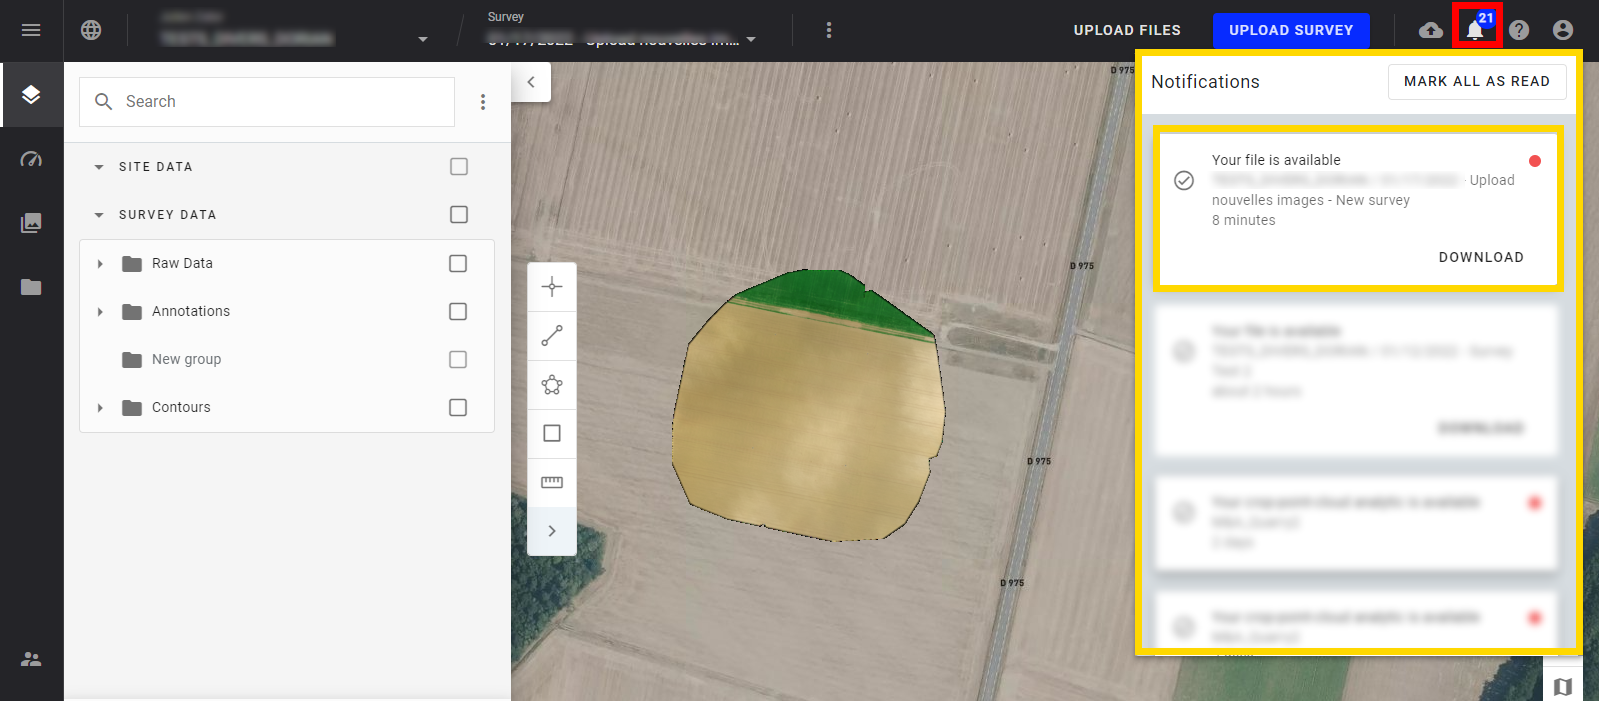
Step 13 - Aether notifies the user that the uploading is done.
3. Results
- Uploaded files are in the Download section of Aether. It is possible to download or delete them and check the information (Type, Author, publication date, CRS, etc...)
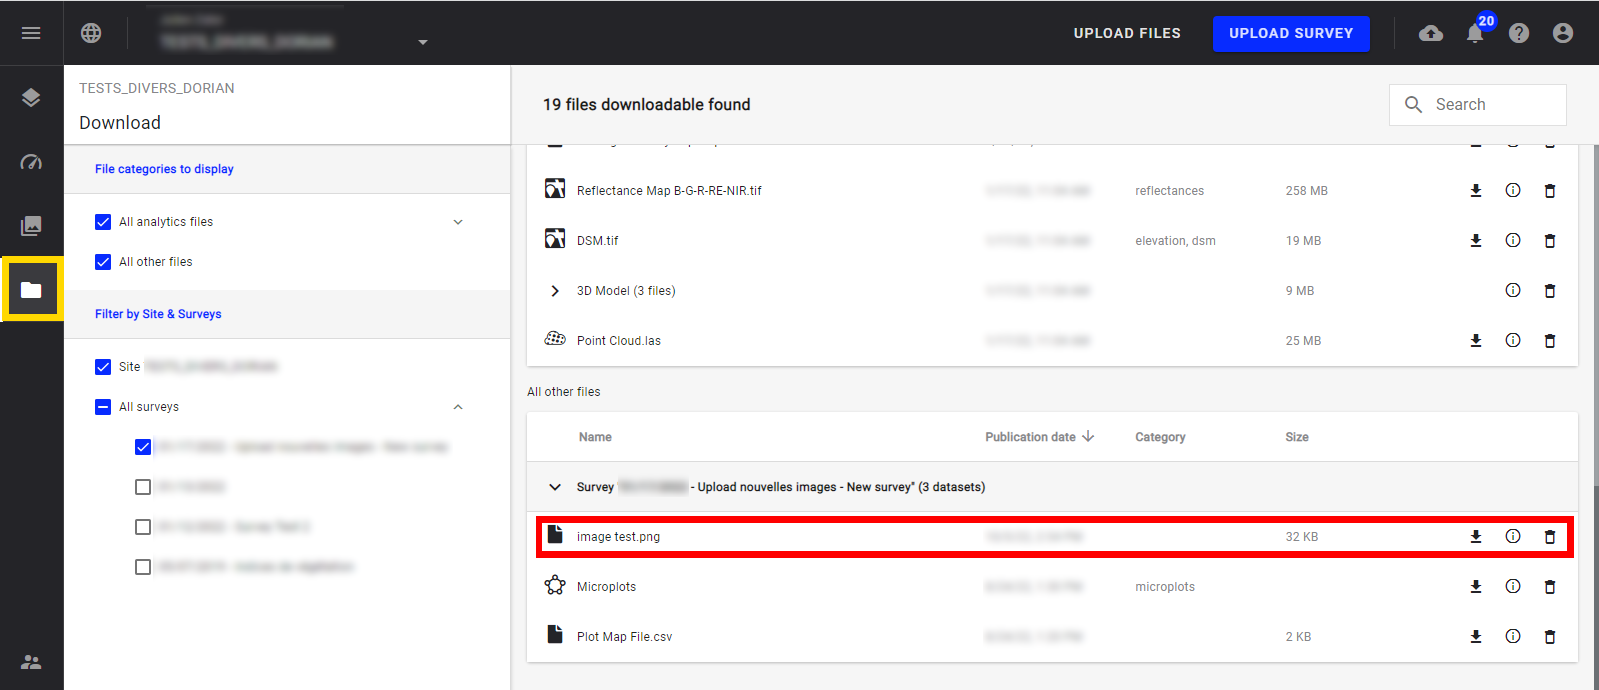
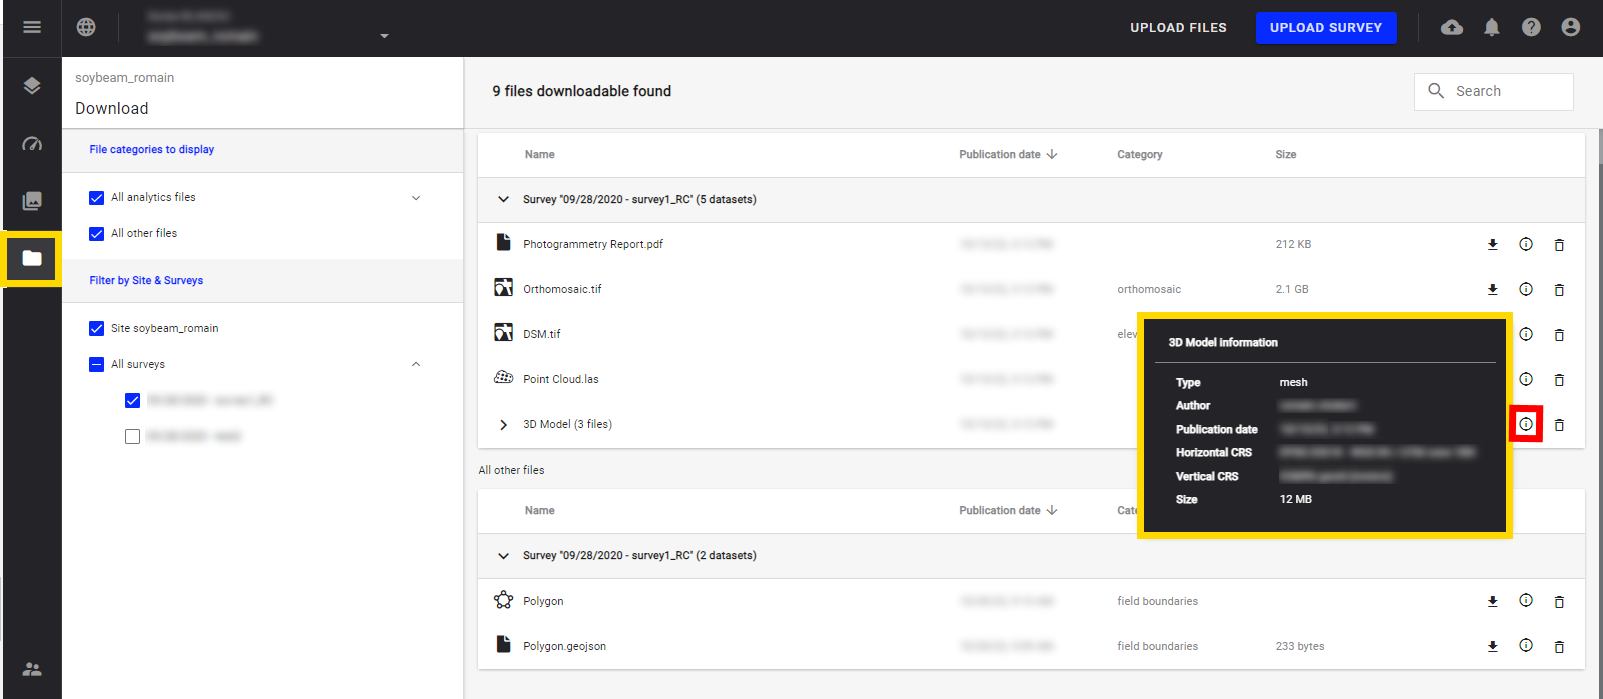
- Depending on the type and categories, files uploaded are added in the corresponding categories.
4. File Types
- The following file types are supported
Table 1: accepted files format
| TYPE | FORMATS |
| Vector | kml, json, geojson, topojson, zip shapefile, dxf (single-layer), csv |
| Raster | tiff, jp2 |
| Point Cloud | las (1.2 & 1.4), laz |
| Mesh | obj (+ mtl + jpg + png), glb |
| Image | tif, jpeg ( + dlc for UX11 users) |
| File | zip, csv, txt, xlsx, mp4… |
- A warning message is displayed in case the file to upload has an extension not recognized for the selected file type.
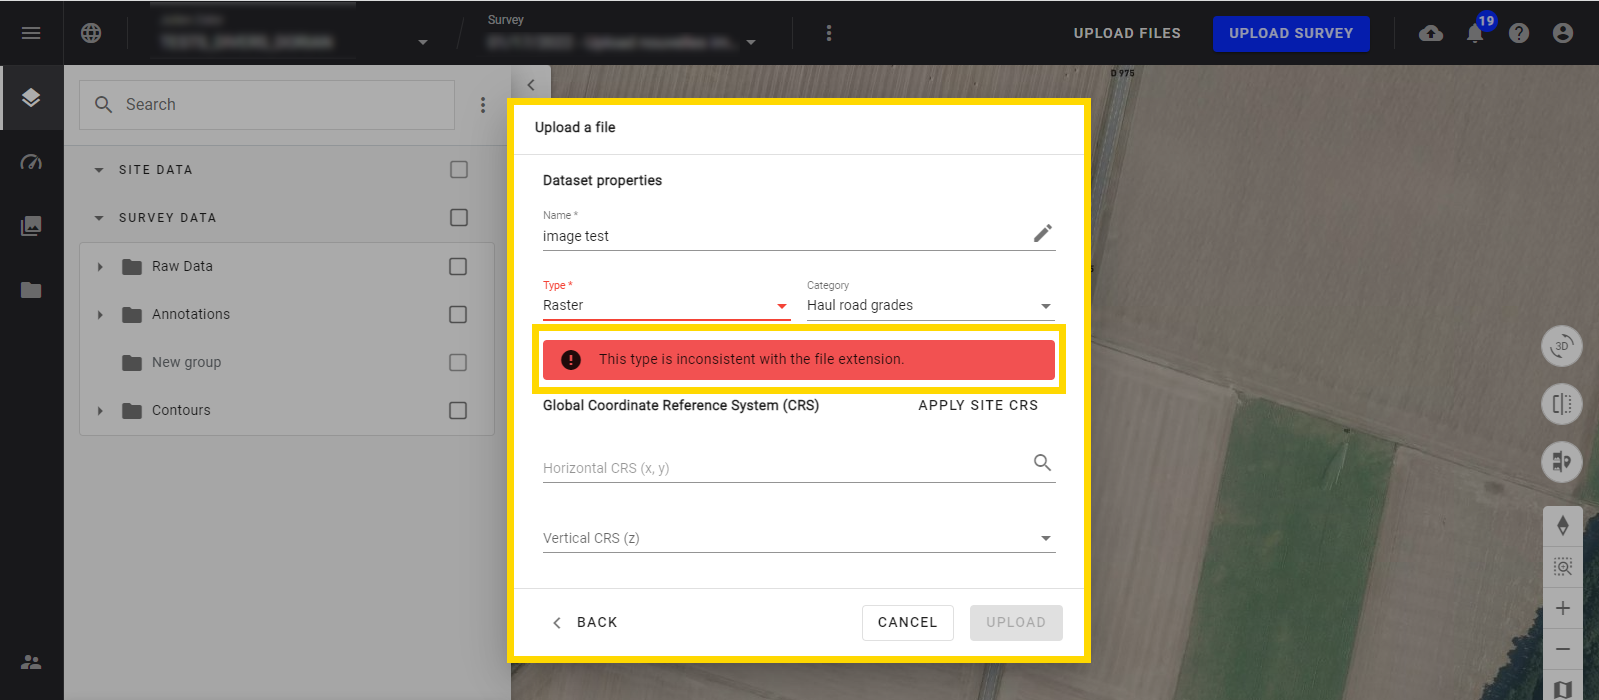
Warning message
5. File Category
A file category can be added to an uploaded file.
Depending on the selected category and after upload:
- The file is placed in a specific folder in the 2D or 3D layer panel in the Data Studio module
- A specific styling associated with the category can be automatically applied
- The file can be used for specific analytics that require a specific category.
The following categories are available to the user, sorted per industry.
Table 2: Files Categories
| CATEGORIES | |||||
| Generic | Agriculture & Forestry | Mines & Aggregates | Power & Utilities | None | |
|
|
|
|
|
|
6. File Folders in Data Studio
In the Data Studio interface, datasets are automatically organized into folders based on their assigned category and data type
- Project scope level

At the project scope level, datasets are organized as follows:
| Section Name | Data studio Folder name | Category name | Dataset type |
| Project data | Converted files | Converted files | mesh, point cloud, raster and vector |
| Reference files | N/A | mesh, point cloud, raster and vector |
By default, only the "Project Data" section is created when a project is initialized
Example : When vector data is added at the project level without a category assignment, it will be placed in the "Reference Files" folder
- Survey scope level

At the survey scope level, datasets are organized as follows:
| Section Name | Data studio Folder name | Category name | Dataset type |
| Survey data | Input data | N/A | vector, raster |
| Changes | elevation, dsm difference | vector | |
| Contour lines | Contour lines | vector | |
| Haul roads | haul road envelopes, haul road grades, haul road crossfalls, haul road widths, haul road crossfall breakpoints | vector | |
| Safety & highwalls | bench width, high walls, sand pit, safety block crests, safety block toes, safety berm toes and crests, highwall toes and crests, safety berm crests, safety berm toes, quarry face crests, quarry face toes, quarry faces, safety blocks, safety berms | vector | |
| Stockpiles | stockpiles, advanced stockpiles, self service stockpiles, automatic stockpiles | vector | |
| Contours | microplots, field boundaries, plants rows | vector | |
| Inventory | plants, plants count, plants gaps, flowering, flowering percent, fcover, fcover percent, emergence, emergence ratio, stay green, stay green percent, tree tops density, tree crowns, tree | vector | |
| flowering, flowering mask, fcover, fcover mask, emergence, emergence mask, stay green, stay green mask, elevation, vegetation heights | raster | ||
| Trees | tree, tree tops density, tree crowns | vector | |
| Plant and gap counting | plants,plants count, plants gaps | vector | |
| Plant height | elevation, vegetation heights | raster | |
| Flowering characterization | flowering, flowering percent | vector | |
| lowering, flowering mask | raster | ||
| Stay green | stay green, stay green percent | vector | |
| stay green, stay green mask | raster | ||
| Fraction of vegetation cover | fcover, fcover percent | vector | |
| fcover, fcover mask | raster | ||
| Emergence characterization | emergence, emergence ratio | vector | |
| emergence, emergence mask | raster | ||
| Statistics | statistics, tree density indicators, tree | vector | |
| Precision Ag | weed, weed zones, weed area | vector | |
| Vegetation Encroachment | powerline, vegetation encroachment risks | point cloud | |
| vegetation encroachment, vegetation encroachment risks, vegetation work order, vegetation risk map |
vector | ||
| Converted files | Converted files | vector, raster | |
| change map | vector | ||
| Base layers | Scouting maps | vegetation index, bndvi, bpri, brilliance, bsr, bvi, ccci, gndvi, gsr, gvi, mcari2, msavi, msavi2, ndre, ndvi, pri, revi, rri1, rsr, rvi, savi, vari | raster |
| Converted files | Converted files | mesh, point cloud |
Example : When vector data is added at the survey level with a category “statistics”, it will be placed in the "Statistics" folder
7. Tiled 3D Model upload
You can import a Tiled 3D model embedded in a zip file with the format described below.
Tiled 3D Model format
Only one Tiled 3D Model by archive in .obj format.
A zip can contain multiple .obj with their material and textures files, see the following structure as an example.
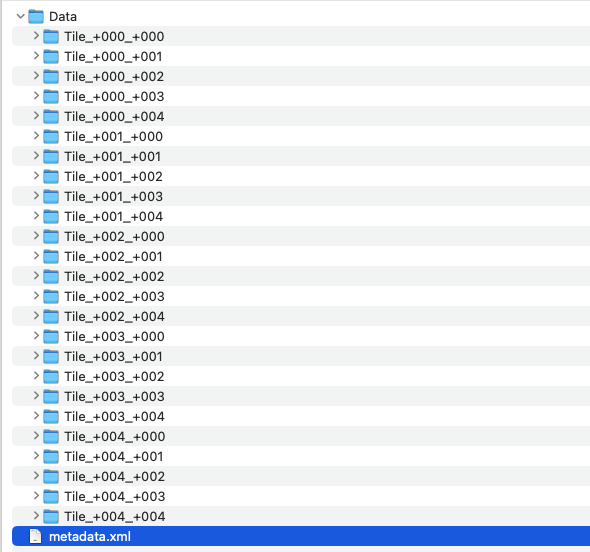
A metadata file is also supported. If available, it's used to define automatically the coordinates system and offset. The format is described below:
<?xml version="1.0" encoding="utf-8"?>
<ModelMetadata version="1">
	<!--Spatial Reference System-->
	<SRS>EPSG:32631</SRS>
	<!--Origin in Spatial Reference System-->
	<SRSOrigin>388342,4804265,0</SRSOrigin>
</ModelMetadata>
