Topographic Plan
1. Description
This analysis generates a detailed topographic plan of a site on a reduced scale, including the exact dimensions of the land and the location of all physical features.
2. Prerequisites
| Orthomosaic | Photogrammetry outputs |
| DSM or DTM | Photogrammetry outputs |
| Folder containing layers | Folder containing all the vector layers that the user wishes to include on the topographic map |
| Haul Roads (optional) | Haul Roads Analytics outputs |
3. Workflow
3.1 “Folder containing layer” creation
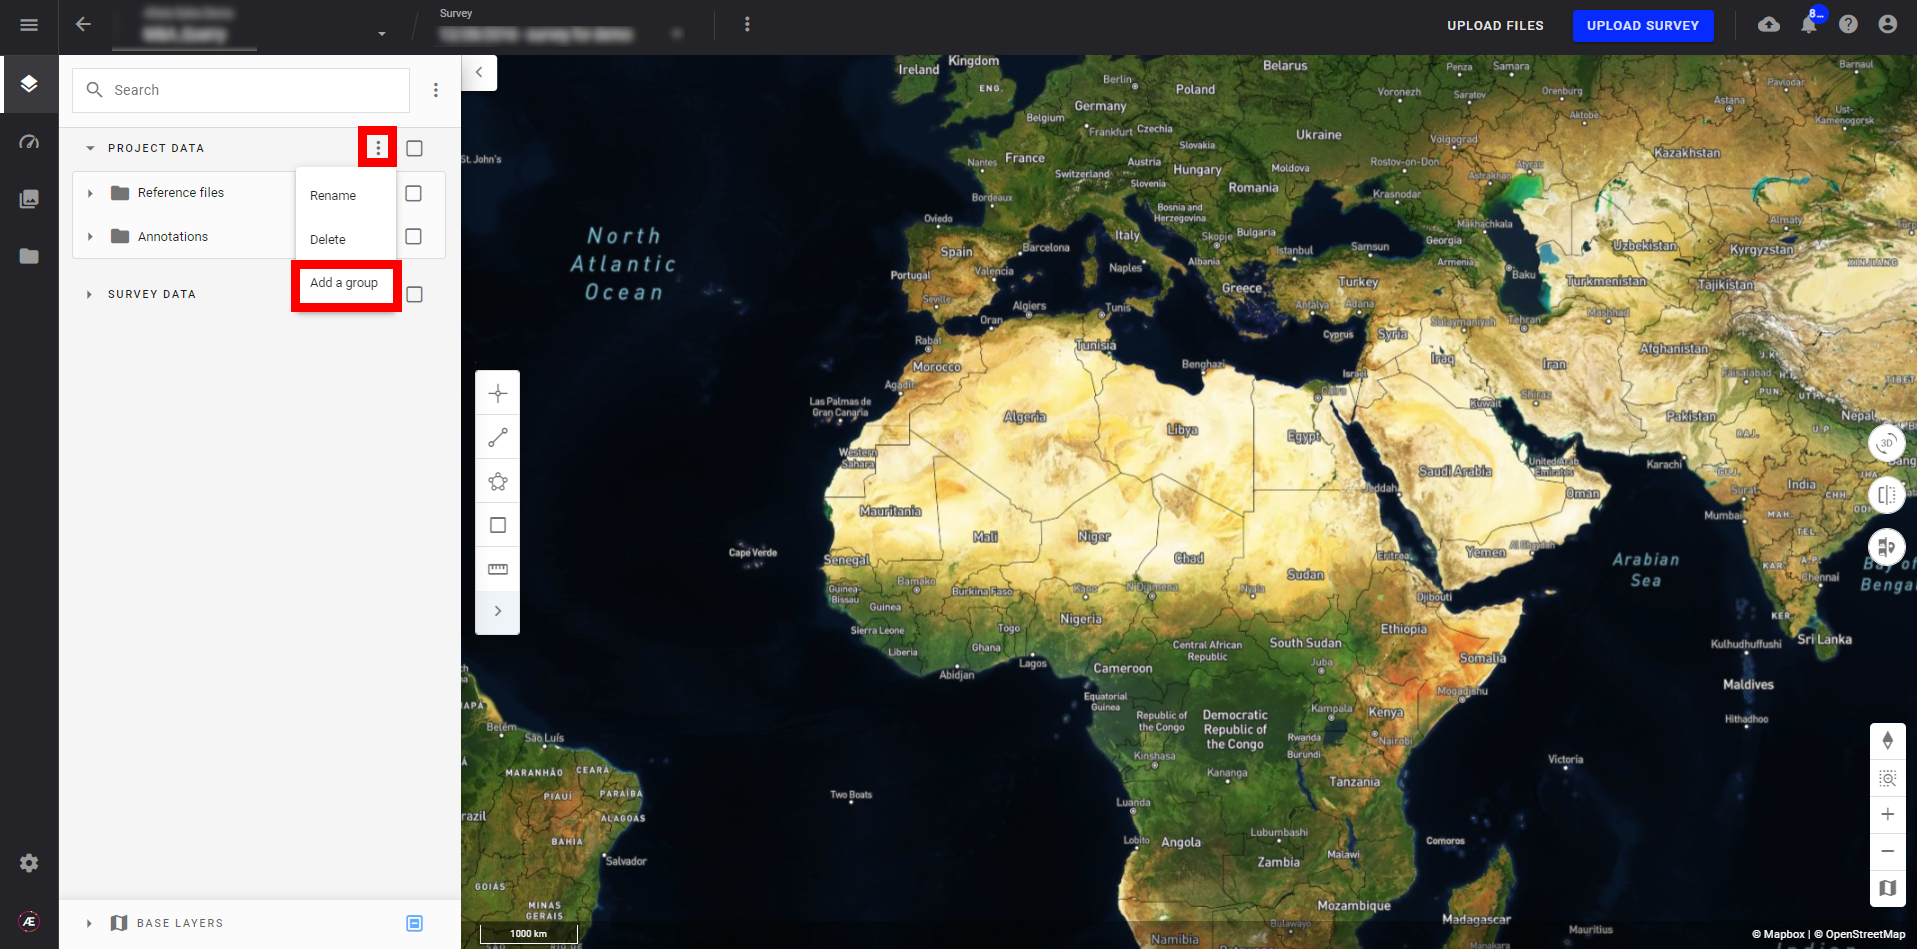
Step 1 - Click on the 3 dots menu of “PROJECT DATA” and on “Add a group”.
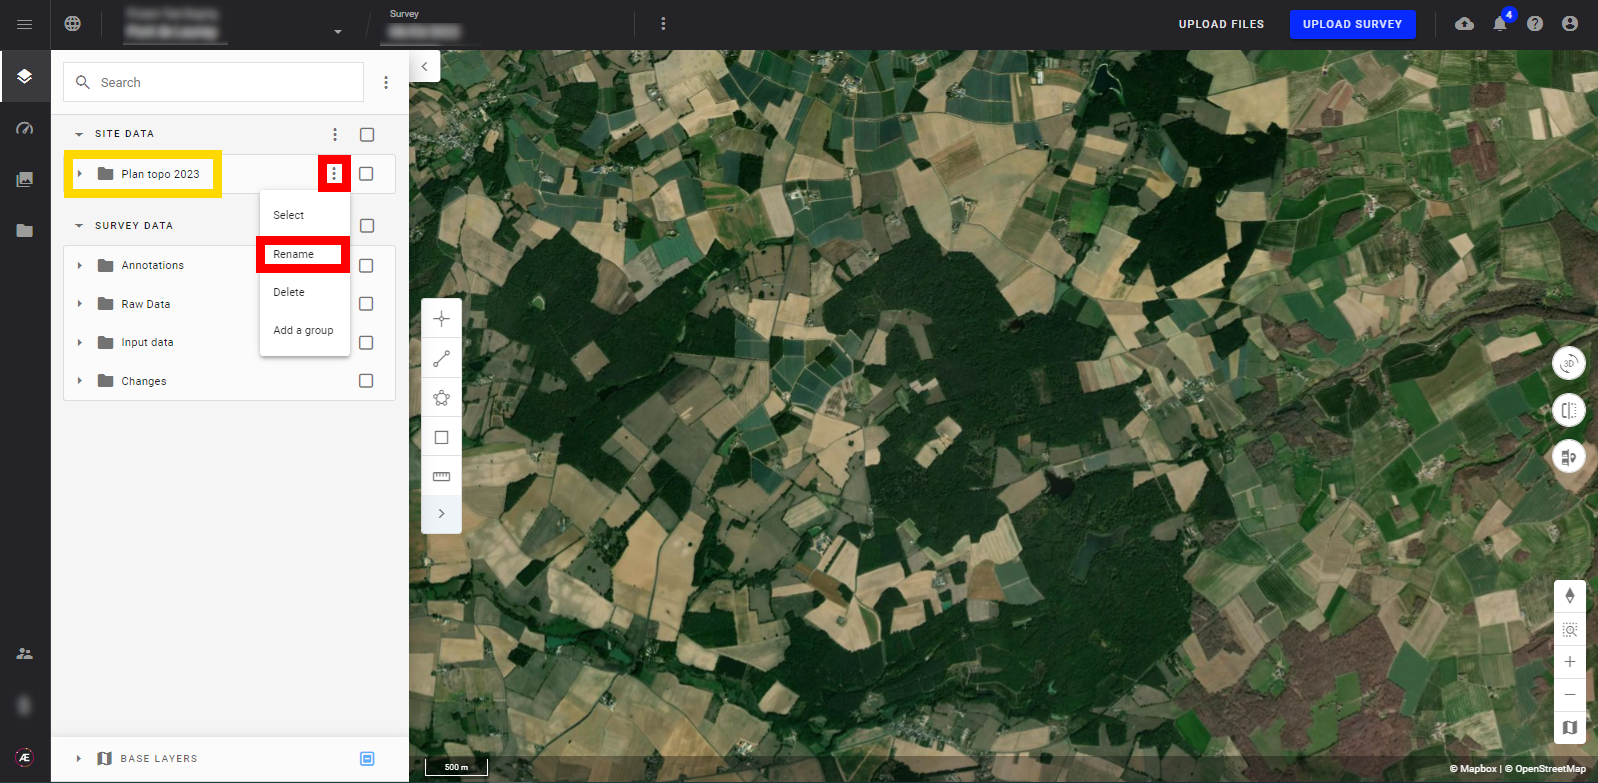
Step 2 - Click on the 3 dots menu of the “New group” created and on “Rename”. Name this folder, here for the example it will be “Plan topo 2023”.
Step 3 - Fill in the folder “Plan topo 2023” with vector layers wishes for the analytics “Topographic Plan”:
- by moving with the mouse layers already existing in the PROJECT DATA.
- by creating annotations
- by creating vector layers
- by uploading files

3.2 Topographic Plan Analytics
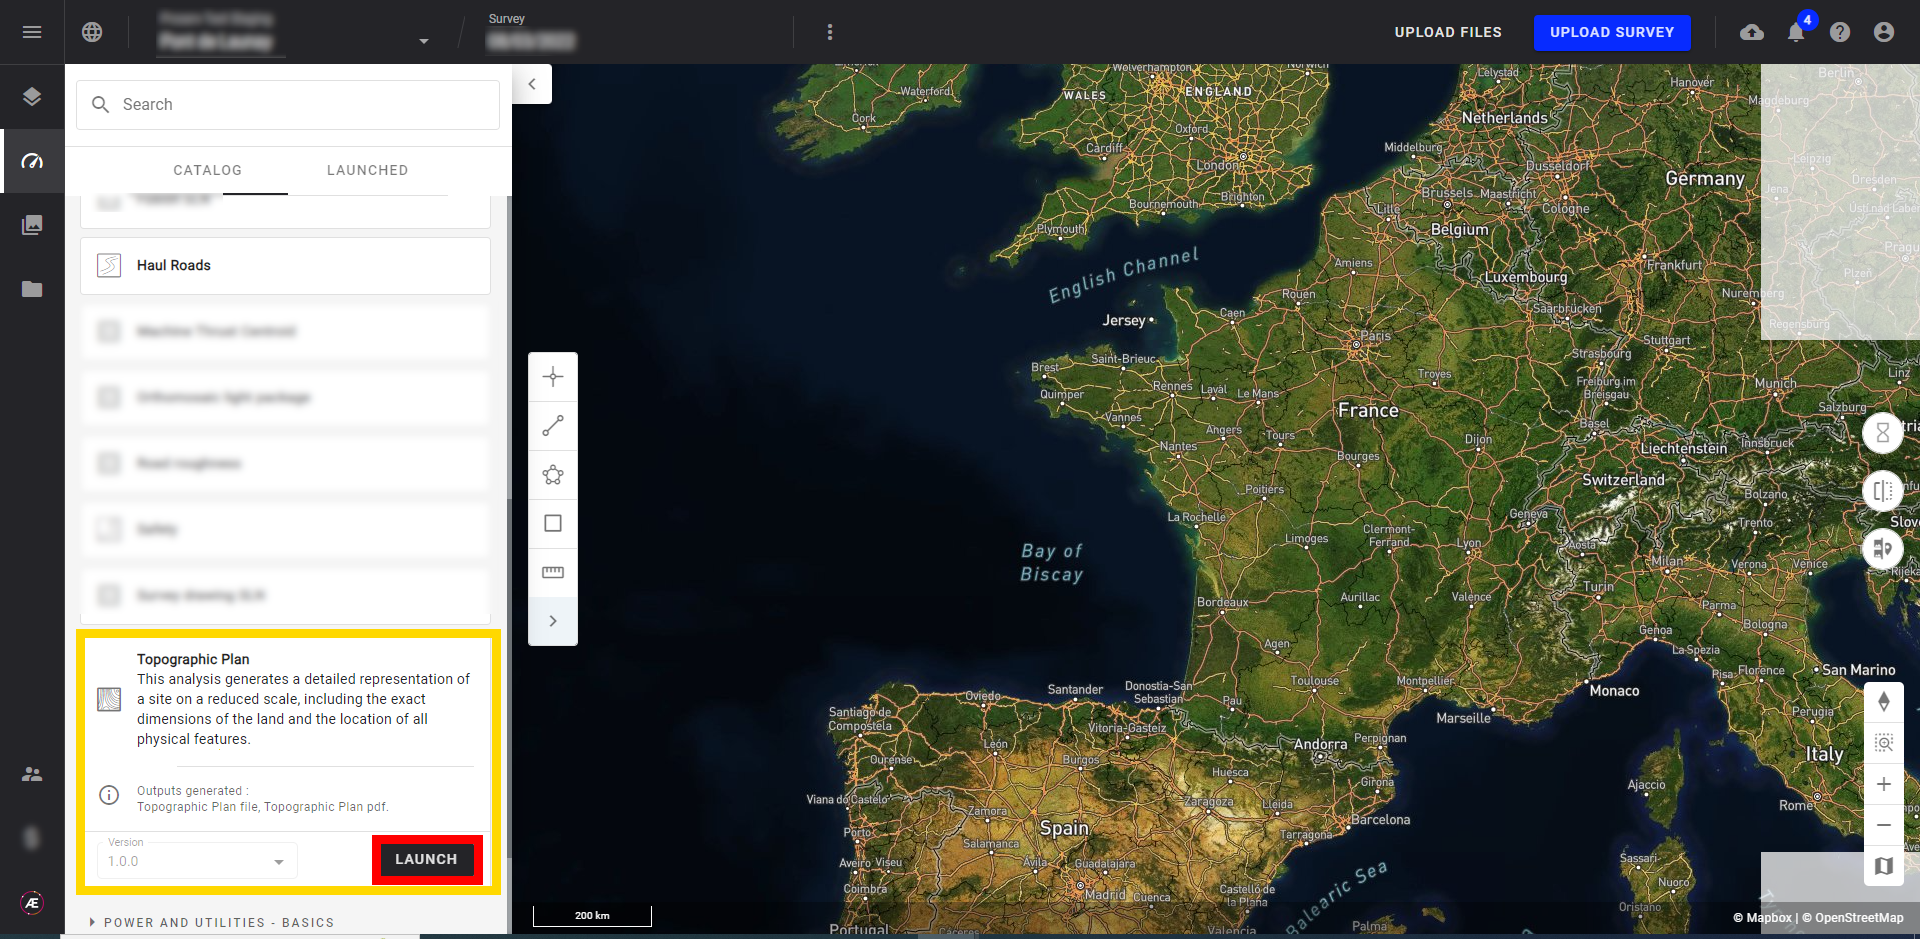
Step 1 - In an opened project, open the Analytics section and find in the category “COMPUTING TOOLS” the “Topographic Plan” analytics. Or search it with the “Search” bar.

Step 2 - Click on "LAUNCH".
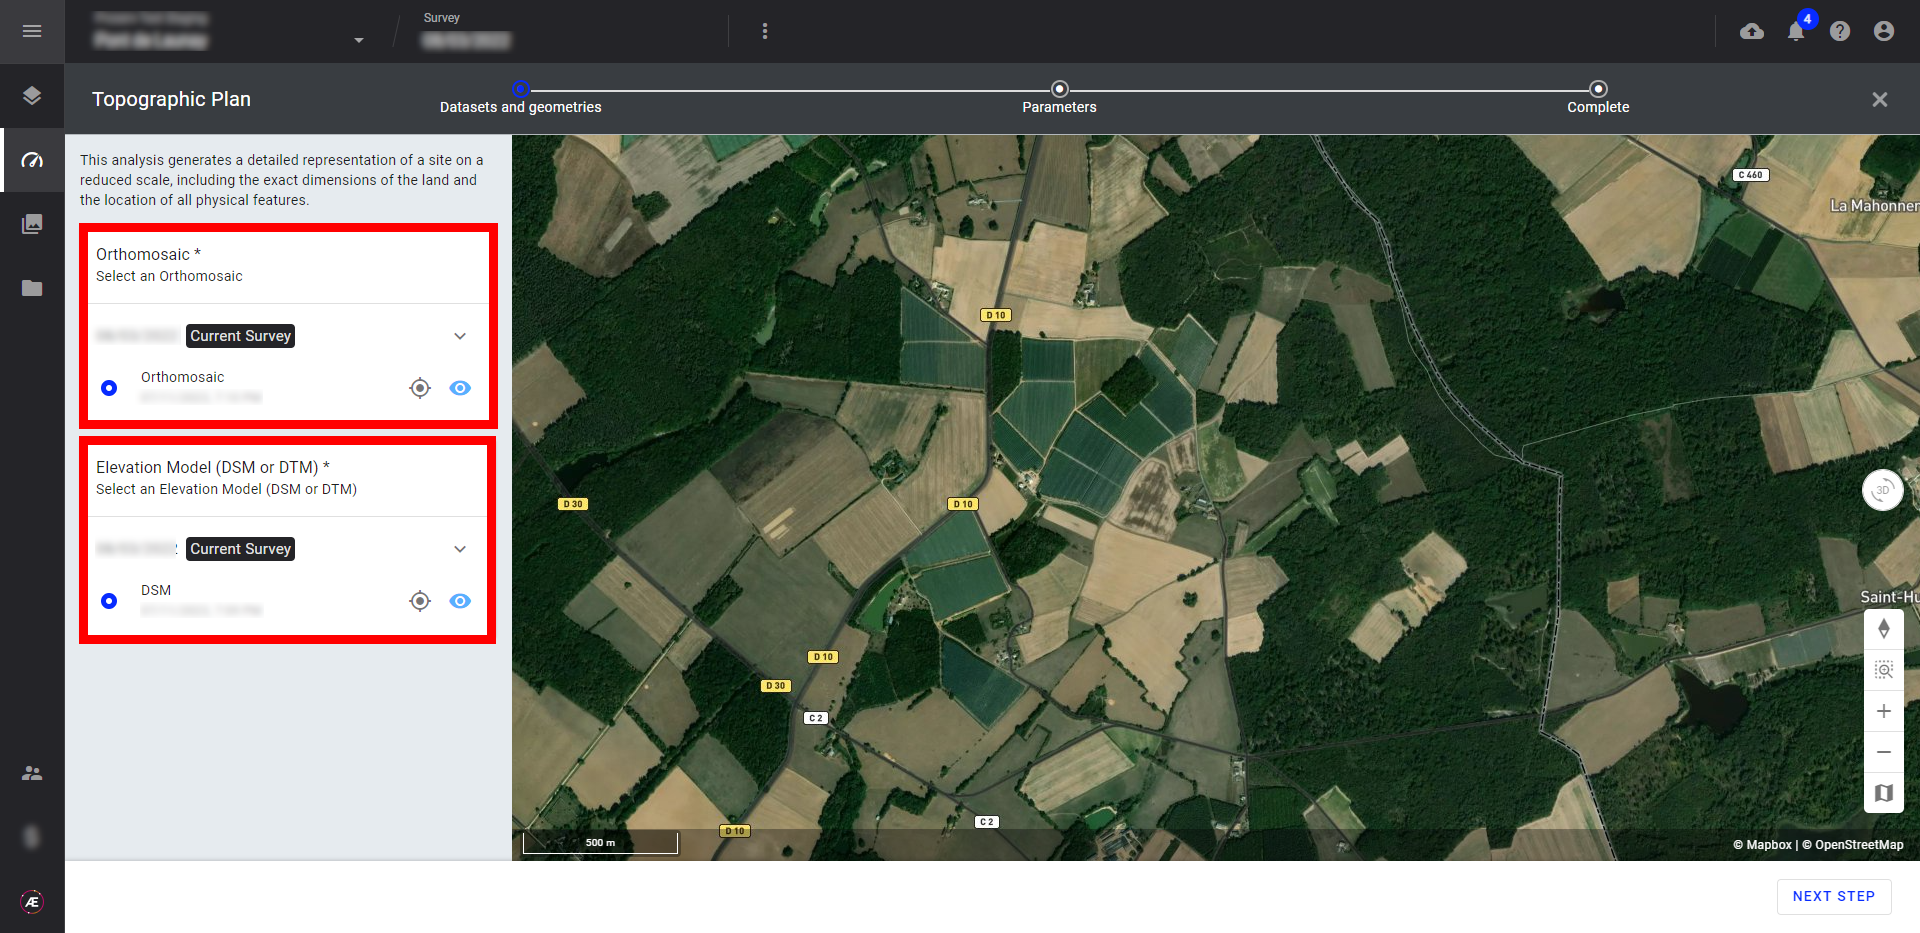
Step 3 - Select the Survey (orthomosaic) and the DSM or DTM.
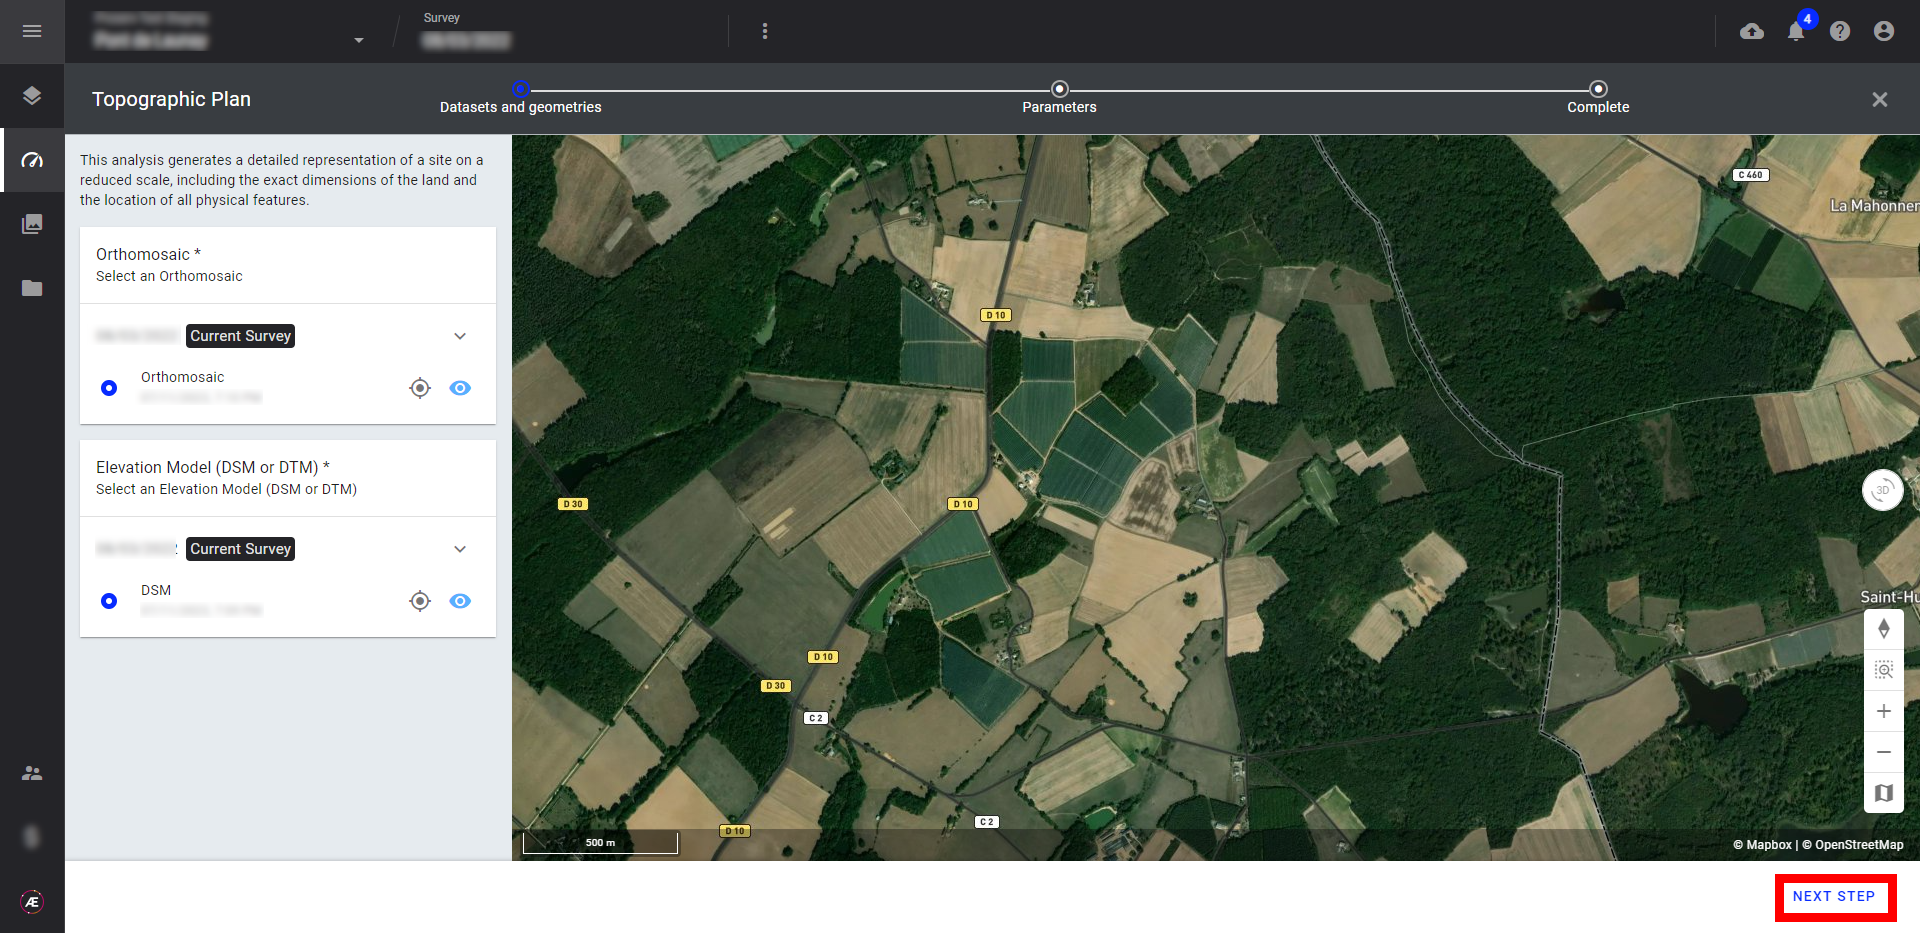
Step 4 - Click on “NEXT STEP”.
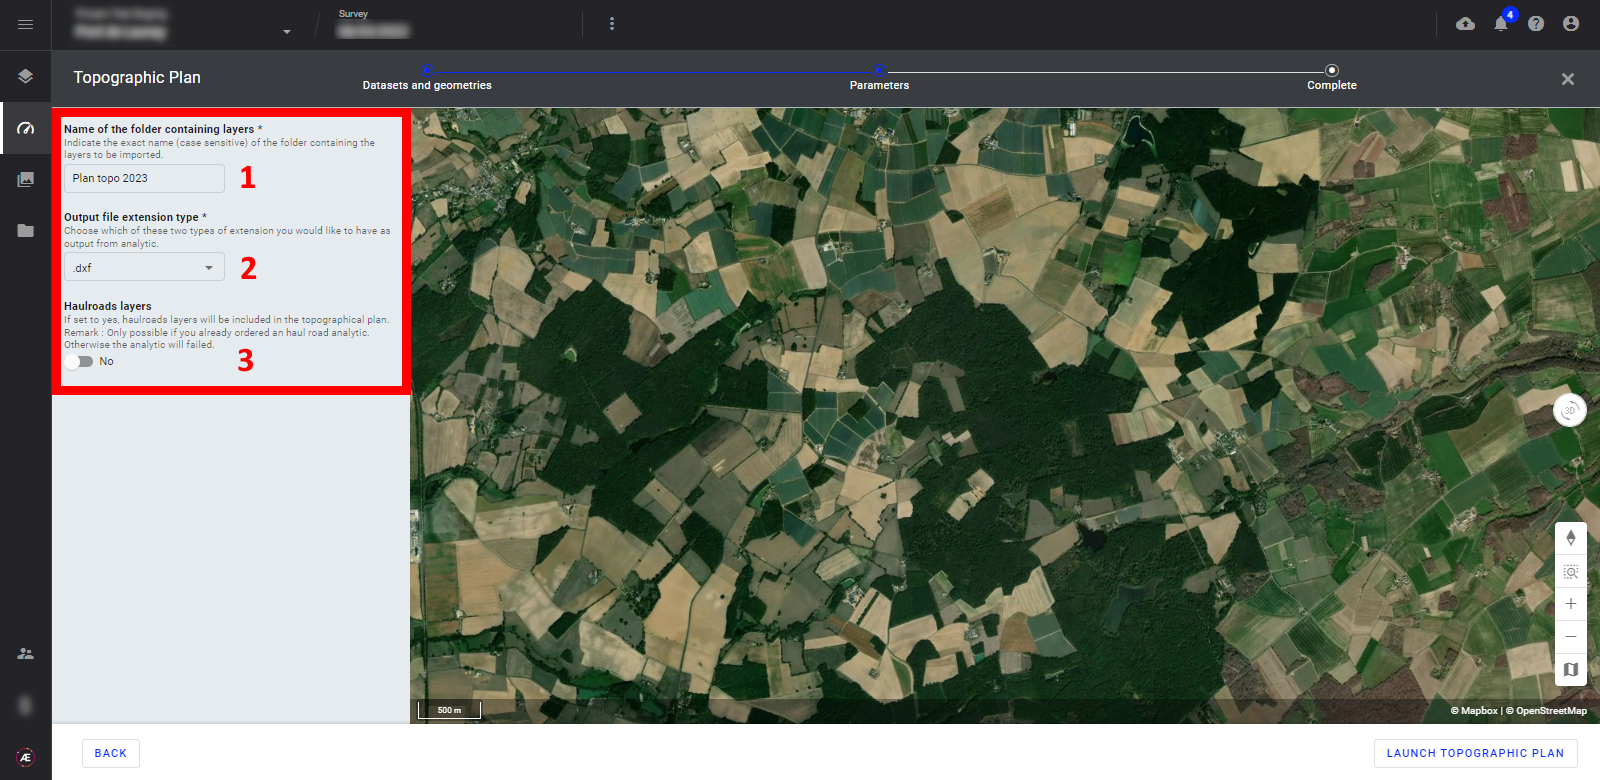
Step 5 - Add the name of the folder containing layers (1), and choose the output file extension (DXF or DWG format) (2). If the haul roads analytics has been done it's possible to add the haulroads layers to the topographic plan (3).
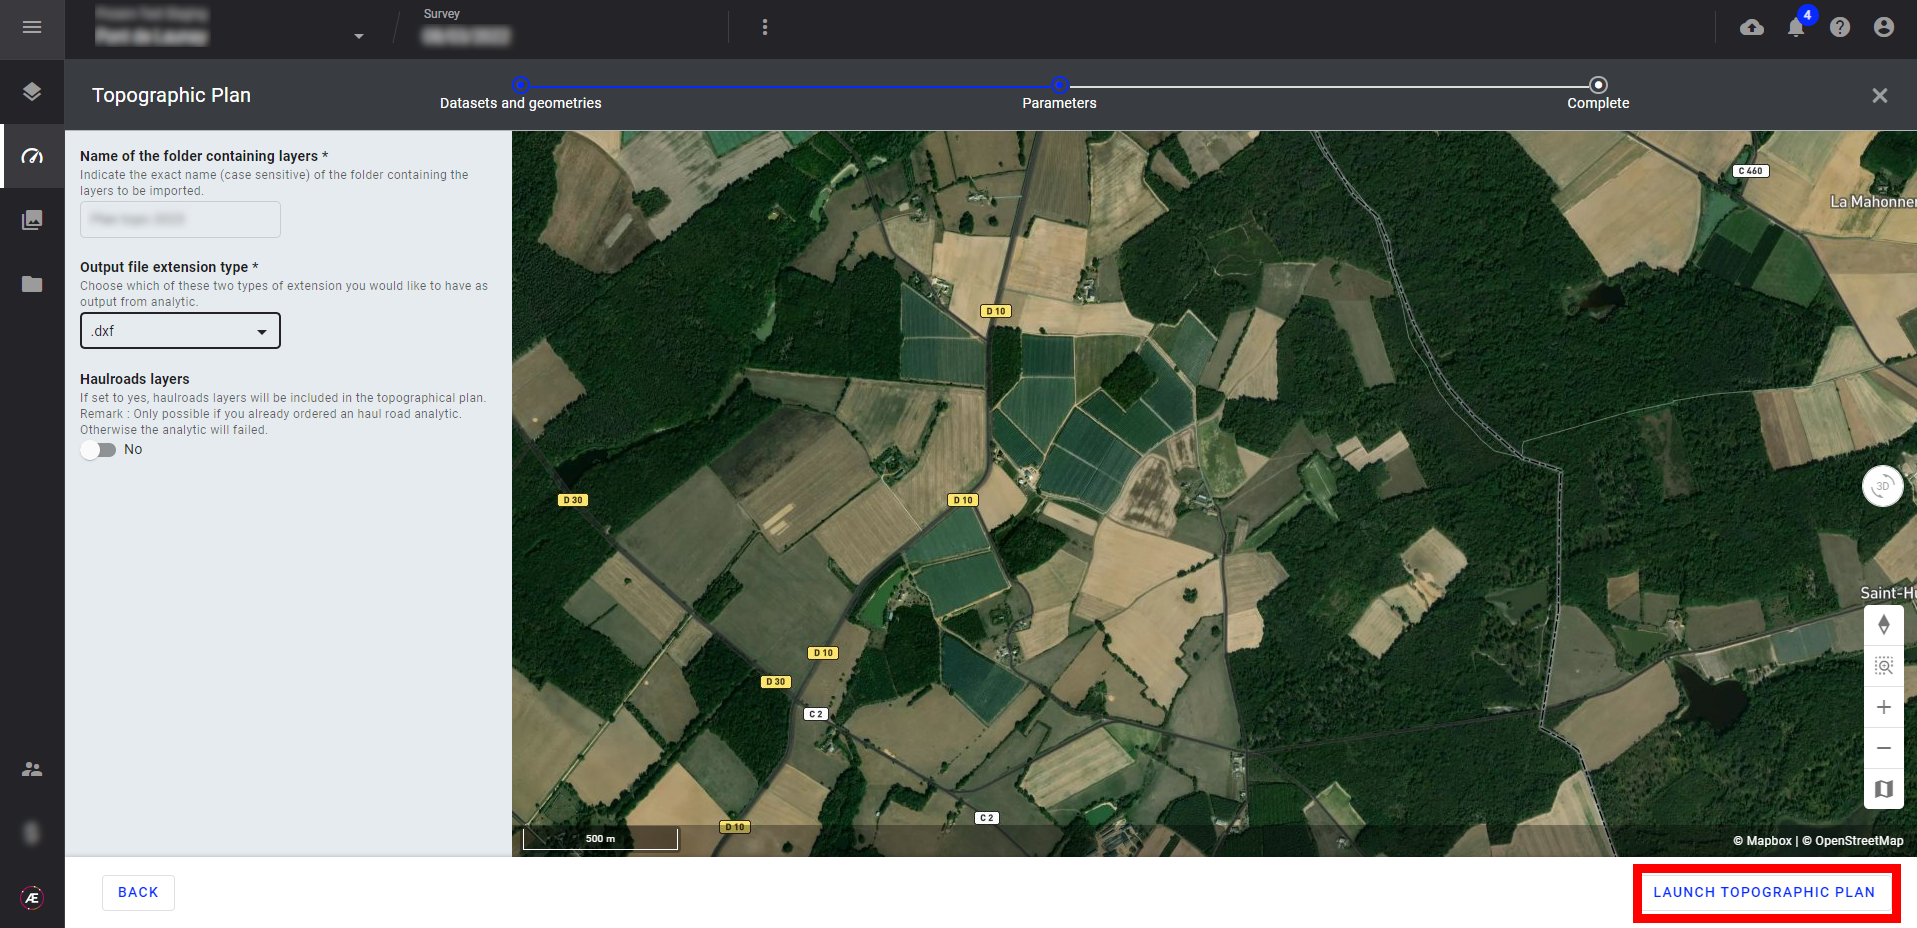
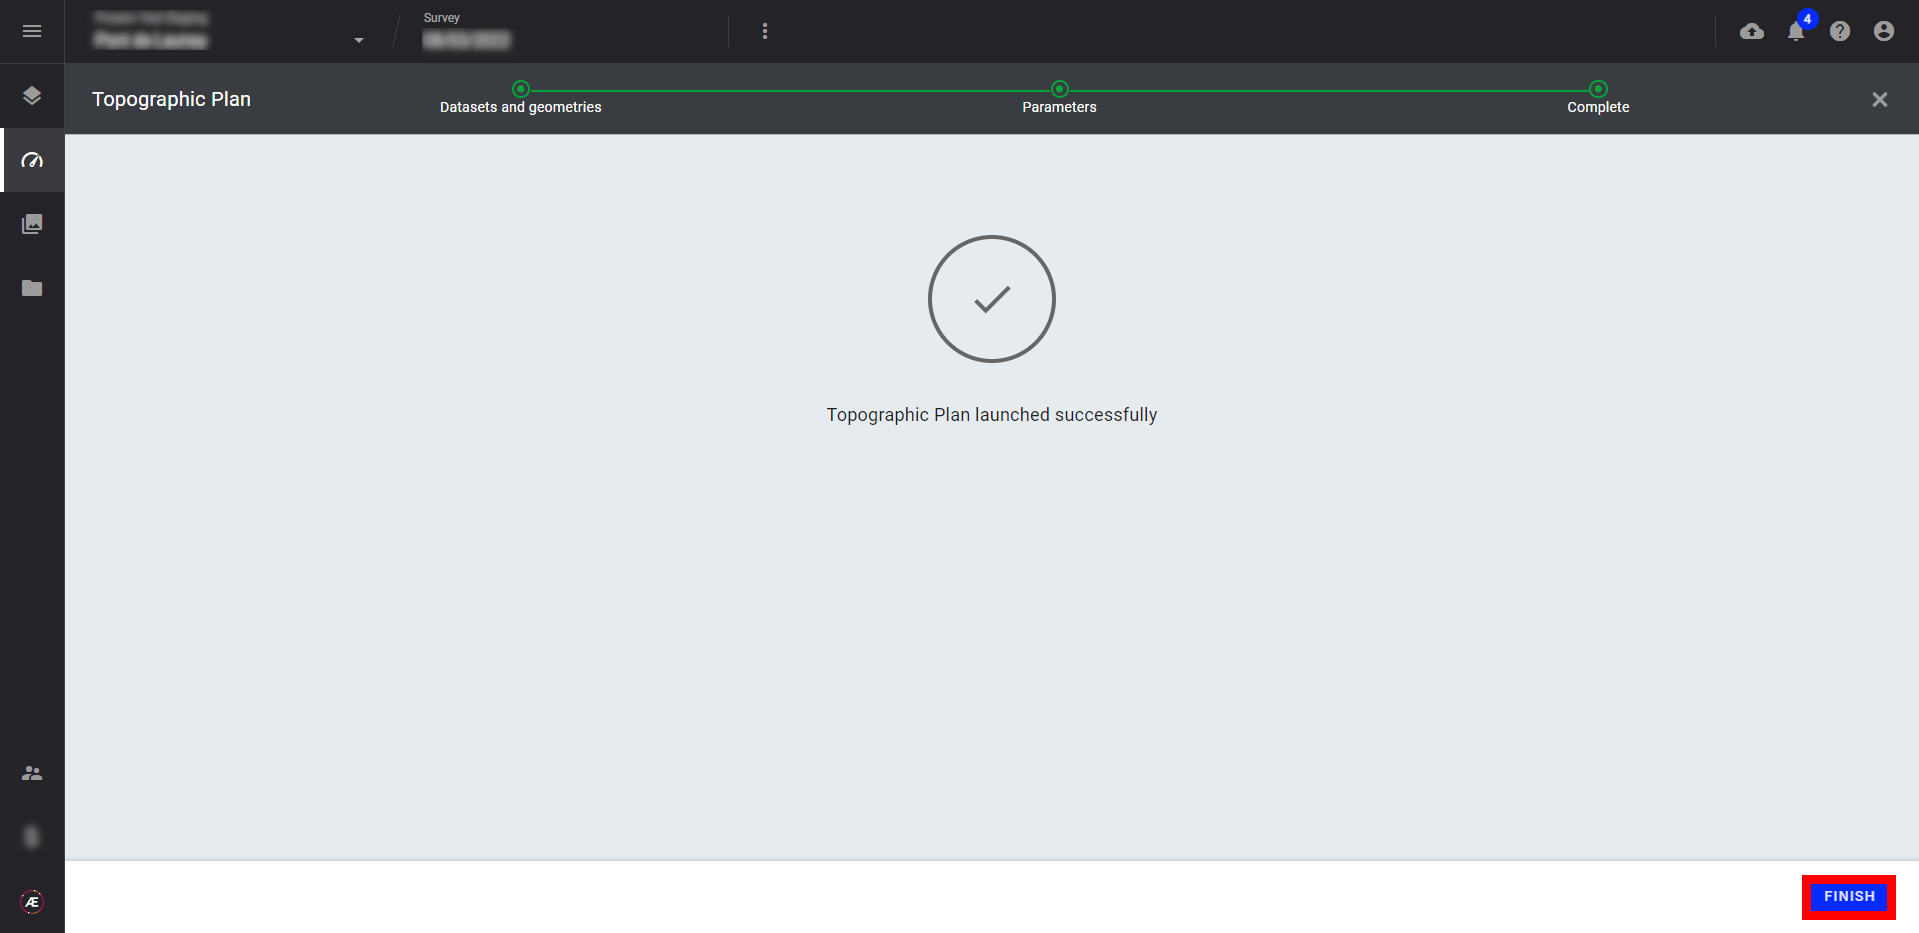
Step 6 - Click on "LAUNCH TOPOGRAPHIC PLAN".
Step 7 - Click on "FINISH".
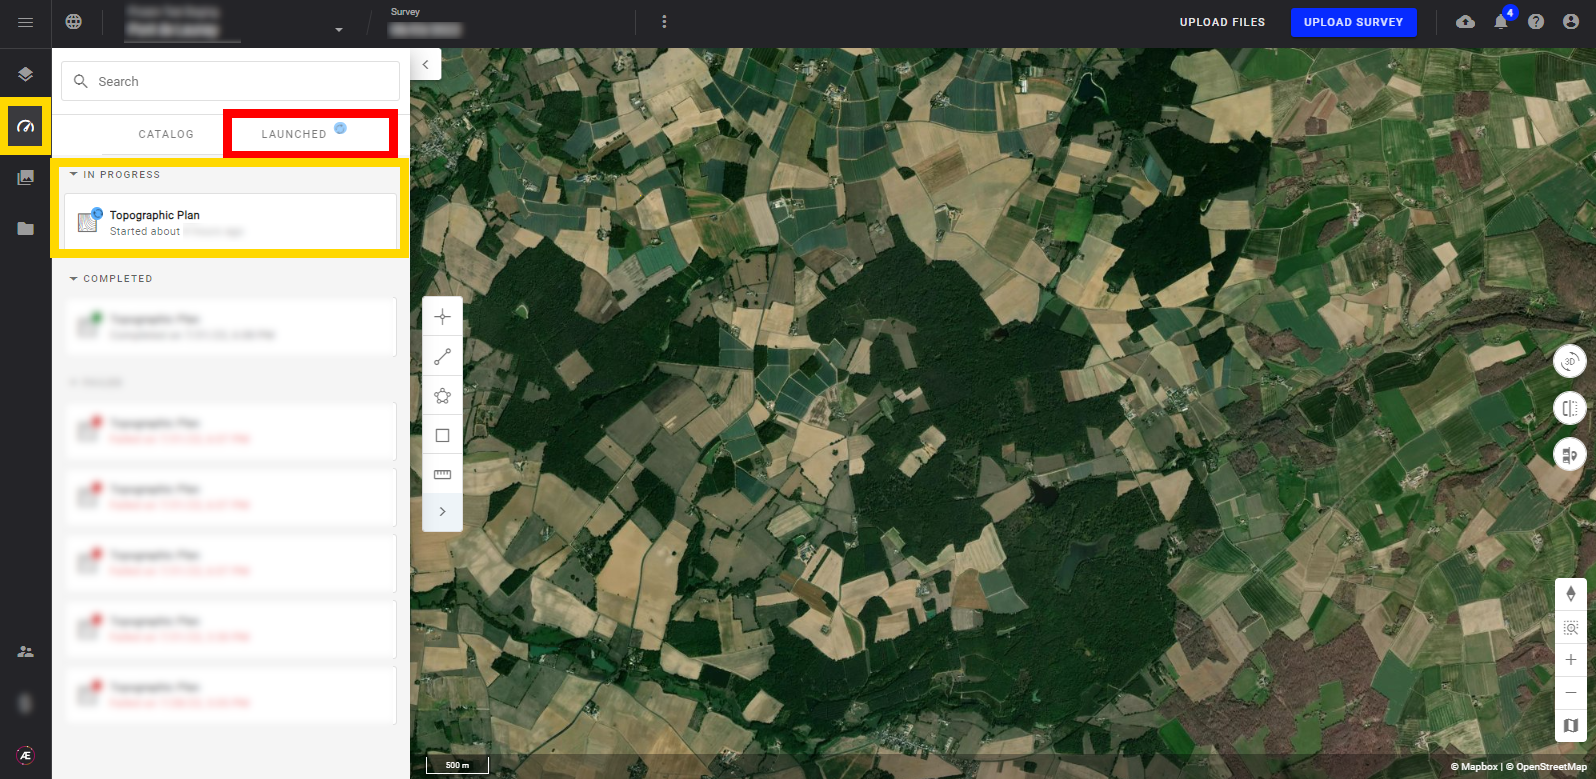
Step 8 - In the Analytics section at the "LAUNCHED" tab, the analytics is running. Aether will notify the user about the end of the process if its notifications are enabled (see: User Profile Edition).
4. Results
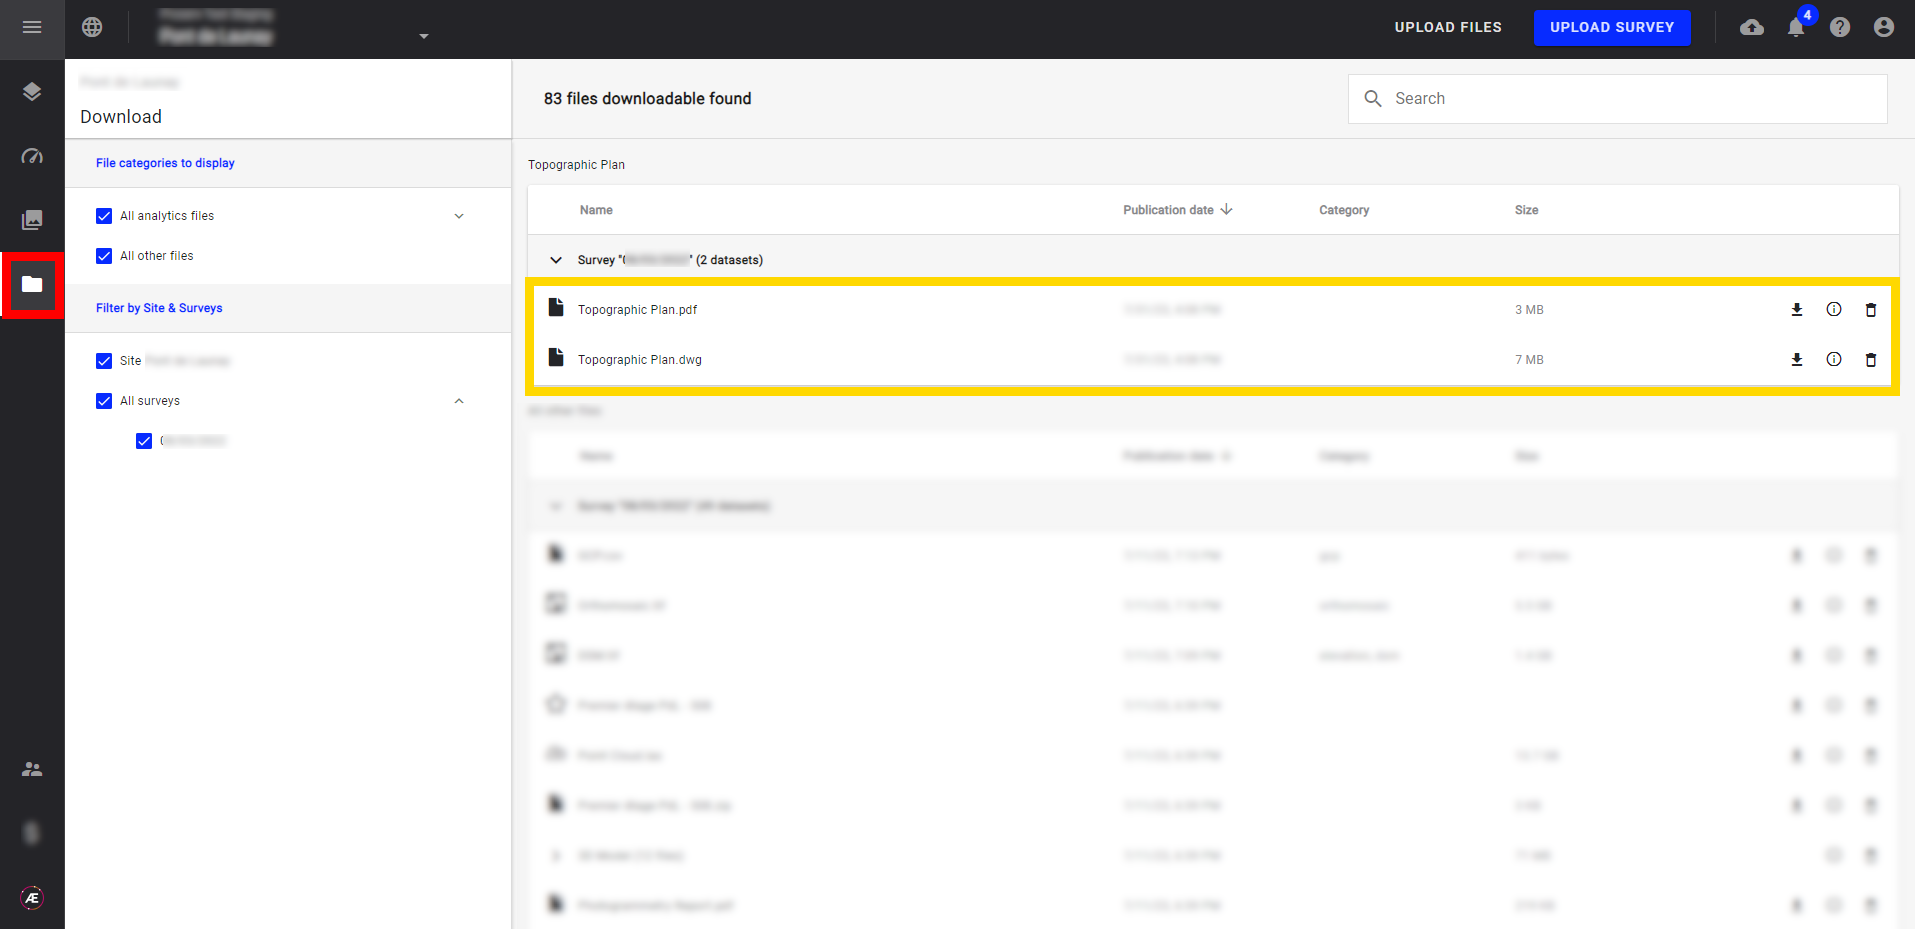
Find in the Download section the outputs:
- Topographic plan in the extension selected (DXF or DWG)
- Topographic plan in PDF